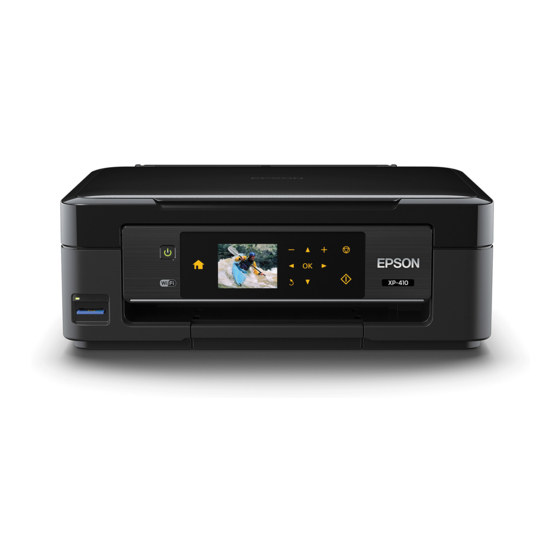
Epson XP-410 Series User Manual
Hide thumbs Also See for XP-410 Series:
Table of Contents

Advertisement

User's Guide
NPD4863-00 EN

Advertisement

Table of Contents
loading

Summary of Contents for Epson XP-410 Series

  • Page 1 User’s Guide NPD4863-00 EN...
  • Page 2: Copyright And Trademarks

    The information contained herein is designed only for use with this Epson product. Epson is not responsible for any use of this information as applied to other products.
  • Page 3 Memory Stick Duo are trademarks of Sony Corporation. General Notice: Other product names used herein are for identification purposes only and may be trademarks of their respective owners. Epson disclaims any and all rights in those marks. Copyright © 2013 Seiko Epson Corporation. All rights reserved.
  • Page 4: Table Of Contents

    Setup for Mac OS X..... . 47 XP-410 Series......17 XP-310 Series.
  • Page 5 Using the control panel (XP-310 Series/ XP-410 Series)......95 Scanning Multiple Documents to a PDF File .
  • Page 6 Paper is improperly loaded....129 Contacting Epson Support....147 Paper is not ejected fully or is wrinkled.
  • Page 7: Introduction

    User’s Guide Introduction Introduction Where to Find Information The latest version of the following manuals are available on the Epson support website. http://www.epson.eu/Support (Europe) http://support.epson.net/ (other than Europe) ❏ Start Here (paper): Provides you with information on setting up the product and installing the software.
  • Page 8: Using Epson Connect Service

    ❏ Mac OS X refers to Mac OS X 10.5.8, 10.6.x, 10.7.x, 10.8.x. Using Epson Connect Service Using Epson Connect and other companies’ services, you can easily print directly from your smartphone, tablet PC or laptop, anytime and practically anywhere even across the globe! The services available vary by product. (&...
  • Page 9: Important Instructions

    User’s Guide Important Instructions Important Instructions Safety Instructions Read and follow these instructions to ensure safe use of this product. Make sure you keep this guide for future reference. Also, be sure to follow all warnings and instructions marked on the product. ❏...
  • Page 10 User’s Guide Important Instructions ❏ Use only the type of power source indicated on the product’s label. ❏ Avoid using outlets on the same circuit as photocopiers or air control systems that regularly switch on and off. ❏ Avoid electrical outlets controlled by wall switches or automatic timers. ❏...
  • Page 11: Using The Product With A Wireless Connection

    Epson Status Monitor, your LCD, or lights on the control panel will advise you when this part needs replacing.
  • Page 12: Handling Ink Cartridges

    ❏ The exterior cover of the LCD screen could break if it receives a heavy impact. Contact your dealer if the panel surface chips or cracks, and do not touch or attempt to remove the broken pieces. ❏ For XP-410 Series The touchpad is a capacitive touch panel, which responds only when touched directly with a finger. The panel may not respond when touched with wet hands, gloved hands, or touched through a protective sheet or sticker.
  • Page 13: Getting To Know Your Product

    User’s Guide Getting to Know Your Product Getting to Know Your Product Available Features Check what is available for your product. Features XP-410 Series XP-310 Series XP-210 Series ✓ ✓ ✓ Print from a PC ✓ ✓ from a memory card ✓...
  • Page 14: Product Parts

    User’s Guide Getting to Know Your Product Product Parts Paper support Output tray Stopper Feeder guard Edge guide Sheet feeder...
  • Page 15 User’s Guide Getting to Know Your Product Document cover Scanner glass Control panel Release lever (rear of the control panel) Memory card slot Memory card light...
  • Page 16 User’s Guide Getting to Know Your Product Scanner Unit Ink cartridge holder Print head (under the ink cartridge holder) Scanner unit support USB connector for connecting to a computer AC inlet...
  • Page 17: Guide To The Control Panel

    Guide to the Control Panel Note: Although the control panel design and menu and option names and other items in the LCD display may slightly differ from the actual product, the method of operation is the same. XP-410 Series XP-310 Series Buttons/Lights/Icons Function Turns the product on and off.
  • Page 18 An icon displayed only on the 2.5-inch LCD screen. Indicates the status as follows. Green: Epson Connect services are online. Orange: Epson Connect services are suspended. Gray: Epson Connect services are unavailable. “Using Epson Connect Service” on page 8 & Network status icon: XP-410 Series...
  • Page 19: Xp-210 Series

    User’s Guide Getting to Know Your Product Icons Status Processing a Wi-Fi connection XP-210 Series Buttons/Lights Function The green light (left) stays on while the product is connected to a Wi-Fi network. If only the orange light (right) is flashing, a network error has occurred. & “Error Indications on the Control Panel (XP-210 Series)”...
  • Page 20: Paper And Media Handling

    You can achieve good results with most types of plain paper. However, coated papers provide superior prints because they absorb less ink. Epson provides special papers that are formulated for the ink used in Epson ink jet products, and recommends these papers to ensure high-quality results.
  • Page 21 11mm up to 6mm up to 11mm up to 6mm Legal User Defined Envelope Epson Bright White Ink Jet Paper Epson Photo Quality Ink Jet Paper ✓ Epson Matte Paper - Heavyweight ✓ Epson Photo Paper ✓ 10 × 15 cm (4 × 6 in.) ✓...
  • Page 22: Paper Type Settings On The Lcd Screen

    13 × 18 cm (5 × 7 in.) *1 Paper with a weight of 64 g/m2 (17 lb) to 90 g/m2 (24 lb). *2 The loading capacity for manual 2-sided printing is 30 sheets for XP-310 Series/XP-410 Series and 15 sheets for XP-210 Series. Note: The availability of special media varies by location.
  • Page 23: Loading Paper And Envelopes

    Paper and Media Handling For this paper Printer driver paper type Plain paper* plain papers Epson Bright White Ink Jet Paper* Epson Ultra Glossy Photo Paper* Epson Ultra Glossy Epson Premium Glossy Photo Paper* Epson Premium Glossy Epson Premium Semigloss Photo Paper*...
  • Page 24 User’s Guide Paper and Media Handling Slide out the paper support and the output tray and then raise the stopper. Note: The XP-210 Series does not have a stopper Slide the edge guide to the left. Fan and align the edges of the paper sheets. Then load them with the printable side up, against the right side of the sheet feeder.
  • Page 25 User’s Guide Paper and Media Handling Note: ❏ The printable side is often whiter or brighter than the other side. ❏ Always load paper into the sheet feeder short edge first, even when you are printing landscape -oriented pictures. ❏ You can use paper with binding holes. Load only one sheet of paper at a time. Make sure you adjust the size of your file to avoid printing over the binding holes.
  • Page 26: Inserting A Memory Card

    For plain paper, do not load paper above the H arrow mark inside the edge guide. For Epson special media, make sure the number of sheets is less than the limit specified for the media. “Selecting Paper” on page 20 &...
  • Page 27 User’s Guide Paper and Media Handling Important Make sure you attach an adapter before inserting the card into the slot, otherwise the card may get stuck. ❏ miniSD, microSD, miniSDHC, microSDHC, microSDXC ❏ Memory Stick Micro Insert one card at a time. Check the light stays on.
  • Page 28: Placing Originals

    Open the document cover and place your original face-down on the scanner glass. Slide the original to the corner. Note: See the following sections if any problems occur with the scanning area or the scanning direction when using EPSON Scan. “The edges of your original are not scanned” on page 137 &...
  • Page 29: Copying

    User’s Guide Copying Copying Copying Documents Basic copying for XP-310 Series/XP-410 Series Follow the steps below to copy documents. Note for XP-410 Series: To copy photos, select More Functions from the Home menu, and select Copy/Restore Photos, then follow the on-screen instructions.You can copy one photo or multiple photos of different sizes at the same time, as long as they are larger than 30 x...
  • Page 30: Copy Mode Menu List

    User’s Guide Copying Press x r or r x to start copying. Note: ❏ Press x r or r x for 3 seconds to copy in draft mode. For users in Belgium, draft mode is not available. ❏ Press x r or r x and y at the same time to make 20 copies. Copy Mode Menu List Refer to the section below for the Copy mode menu list.
  • Page 31: Printing

    ❏ To select another group, select Print Photos on the Home menu. Then press d and select Select Group. Display the print setting menus. For XP-410 Series, press d and select Print Settings. For XP-310 Series, press OK and then press d.
  • Page 32: Print Photos Mode Menu List

    Function Copy/Restore Photos You can make faithful copies of your originals. (XP-410 Series only) If your original photo is faded, you can restore color to bring it back to life. You can copy one photo or multiple photos of different sizes at the same time, as long as they are larger than 30 ×...
  • Page 33: More Functions / Personal Stationery Mode Menu List

    Note for Windows users: ❏ Your printer driver automatically finds and installs the latest version of the printer driver from Epson’s Web site. Click the Software Update button in your printer driver’s Maintenance window, and then follow the on-screen instructions.
  • Page 34 User’s Guide Printing Note: Screen shots of the printer driver windows in this User’s Guide are from Windows 7. From Windows applications Click Print or Print Setup on the File menu. In the window that appears, click Printer, Setup, Options, Preferences, or Properties. (Depending on your application, you may need to click one or a combination of these buttons.) From the desktop ❏...
  • Page 35: Basic Printing

    Print Click Print on the File menu of your application. Epson Printer Utility 4 For Mac OS X 10.8 or 10.7, click System Preferences on the Apple menu and then click Print & Scan. Select your product from the Printers list box, click Options & Supplies, Utility, and then click Open Printer Utility.
  • Page 36 User’s Guide Printing Access the printer settings. “Accessing the printer driver for Windows” on page 33 & Click the Main tab. Select the appropriate Type setting. “Paper type settings from the printer driver” on page 22 & Note: Print quality is automatically adjusted for the selected paper type setting. Select Borderless if you want to print borderless photos.
  • Page 37 User’s Guide Printing Click OK to close the printer settings window. Note: To make changes to advanced settings, refer to the relevant section. Print your file. Basic product settings for Mac OS X Note: Screen shots of the printer driver windows in this manual are from Mac OS X 10.7. Open the file you want to print.
  • Page 38 User’s Guide Printing Select the product you are using as the Printer setting. Note: Depending on your application, you may not be able to select some of the items in this dialog box. If so, click Page Setup on the File menu of your application, and then make suitable settings. Select the appropriate Paper Size setting.
  • Page 39: Canceling Printing

    When you start printing, the progress meter appears on your computer screen. Click the Cancel button to cancel printing. Using EPSON Status Monitor 3 Access the EPSON Status Monitor 3. “For Windows” on page 116 & Click the Print Queue button. The Windows Spooler appears.
  • Page 40 User’s Guide Printing For Mac OS X Follow the steps below to cancel a print job. Note: If you have sent a print job from a Mac OS X 10.6 or 10.5 through the network, you may not be able to cancel printing from the computer.
  • Page 41: Other Options

    Printing photos the easy way Epson Easy Photo Print lets you lay out and print digital images on various types of paper. The step-by-step instructions in the window let you preview the printed images and get the effects you want without having to make any difficult settings.
  • Page 42: 2-Sided Printing (For Windows Only)

    ❏ The surface of the paper may be smeared during 2-sided printing. ❏ This feature is available only when EPSON Status Monitor 3 is enabled. To enable the status monitor, access the printer driver and click the Maintenance tab followed by the Extended Settings button. In the Extended Settings window, check the Enable EPSON Status Monitor 3 check box.
  • Page 43: Fit To Page Printing

    User’s Guide Printing Check the other settings and print. Note: ❏ The actual binding margin may be different from the specified settings depending on your application. Experiment with a few sheets to examine actual results before printing the entire job. ❏...
  • Page 44: Pages Per Sheet Printing

    User’s Guide Printing Pages per sheet printing Lets you use the printer driver to print two or four pages on a single sheet of paper. Note: This feature may not be available at some settings. Product settings for Windows Access the printer settings. “Accessing the printer driver for Windows”...
  • Page 45: Sharing The Product For Printing

    User’s Guide Printing Sharing the Product for Printing Setup for Windows These instructions tell you how to set up your product so other users on the network can share it. First you will set up the product as a shared printer on the computer directly connected to it. Then you will add the product to each network computer that will access it.
  • Page 46 User’s Guide Printing Select Share this printer, then type a Share name. Note: Do not use spaces or hyphens in the share name. If you want to automatically download printer drivers for computers that are running different versions of Windows, click Additional Drivers and select the environment and the operating systems of the other computers.
  • Page 47: Setup For Mac Os X

    User’s Guide Printing Windows Vista: Click the start button, select Control Panel, and then select Printer from the Hardware and Sound category. Windows XP: Click Start and select Control Panel, and then select Printers and Faxes, from the Printers and Other Hardware category.
  • Page 48: Scanning

    & Start Epson Scan. ❏ Windows 8: Select the EPSON Scan icon on the desktop, or select EPSON Scan from the Start screen. ❏ Windows 7, Vista and XP: Double-click the Epson Scan icon on the desktop. ❏ Mac OS X: Select Applications >...
  • Page 49 User’s Guide Scanning Select Text/Line Art as the Document Type setting. Click Preview. Click Scan.
  • Page 50: Image Adjustment Features

    Scanning Click OK. Your scanned image is saved. Image Adjustment Features Epson Scan offers a variety of settings for improving color, sharpness, contrast, and other aspects affecting image quality. See the Help for more details on Epson Scan. Histogram Provides a graphical interface for adjusting highlight, shadow, and gamma levels...
  • Page 51 User’s Guide Scanning Tone Correction Provides a graphical interface for adjusting tone levels individually. Image Adjustment Adjusts brightness and contrast and the balance of red, green, and blue colors in the overall image. Color Palette Provides a graphical interface for adjusting mid-tone levels, such as skin tones, without affecting the highlight and shadow areas of the image.
  • Page 52: Basic Scanning From The Control Panel

    User’s Guide Scanning Backlight Correction Removes shadows from photos that have too much background light. Dust Removal Removes dust marks from your originals automatically. Text Enhancement Enhances text recognition when scanning text documents. Auto Area Segmentation Makes Black&White images clearer and text recognition more accurate by separating the text from the graphics.
  • Page 53: For Xp-310 Series/Xp-410 Series

    ❏ You can change the computer name displayed on the control panel using Epson Event Manager. ❏ For XP-410 Series: If you want to use the Scan to Cloud service, see the Epson Connect guide, which is available on the Epson Connect portal site.
  • Page 54: Basic Scanning From Your Computer

    100% size. Note: ❏ This mode is not available when the Automatic Document Feeder is installed. ❏ See the Help for more details on Epson Scan. Place your original(s). Start Epson Scan.
  • Page 55: Scanning In Home Mode

    Scanning Note: If the Show this dialog box before next scan check box is cleared, Epson Scan starts scanning immediately without displaying this screen. To return to this screen, click Cancel in the Scanning dialog box during scanning. Click Scan. Epson Scan starts scanning in Full Auto Mode.
  • Page 56 Scanning Place your original(s). “Placing Originals” on page 28 & Start Epson Scan. “Starting Epson Scan Driver” on page 68 & Select Home Mode from the Mode list. Select the Document Type setting. Select the Image Type setting. Click Preview.
  • Page 57: Scanning In Office Mode

    In the File Save Settings window, select the Type setting and then click OK. Note: If the Show this dialog box before next scan check box is cleared, Epson Scan starts scanning immediately without displaying the File Save Settings window.
  • Page 58 User’s Guide Scanning Select Office Mode from the Mode list. Select the Image Type setting. Select the Document Source setting. Select the size of your original as the Size setting. Select an appropriate resolution for your original(s) as the Resolution setting. Click Scan.
  • Page 59: Scanning In Professional Mode

    In the File Save Settings window, select the Type setting and then click OK. Note: If the Show this dialog box before next scan check box is cleared, Epson Scan starts scanning immediately without displaying the File Save Settings window.
  • Page 60 User’s Guide Scanning Select Professional Mode from the Mode list. Select the type of original(s) you are scanning as the Document Type setting. Select the Document Source setting. If you select Reflective as the Document Type setting, select Photo or Document as the Auto Exposure Type setting.
  • Page 61: Previewing And Adjusting The Scan Area

    In the File Save Settings window, select the Type setting and then click OK. Note: If the Show this dialog box before next scan check box is cleared, Epson Scan starts scanning immediately without displaying the File Save Settings window.
  • Page 62 ❏ Some of the settings that you change after previewing an image are reset if you change the preview mode. ❏ Depending on your document type and the Epson Scan mode you are using, you may not be able to change the preview type.
  • Page 63: Various Types Of Scanning

    Various Types of Scanning Scanning a Magazine First of all, place your magazine and start Epson Scan. “Starting a Scan” on page 48 & Select Home Mode from the Mode list.
  • Page 64 Select Magazine as the Document Type setting. Click Preview. Adjust the exposure, brightness, and other image quality settings. See the Help for more details on Epson Scan. Click Scan. Select PDF as the Type setting, and then click OK. Your scanned image is saved.
  • Page 65: Scanning Multiple Documents To A Pdf File

    User’s Guide Scanning Scanning Multiple Documents to a PDF File First of all, place your document and start Epson Scan. “Starting a Scan” on page 48 & Select Professional Mode from the Mode list. Select the Document Source setting. Click Preview.
  • Page 66 Select PDF as the Type setting, and then click OK. Note: If the Show Add Page dialog after scanning check box is cleared, Epson Scan automatically saves your document without displaying the Add Page Confirmation window. Epson Scan starts scanning your document.
  • Page 67: Scanning A Photo

    Save File Select this button when you are finished. The pages are saved in one PDF file. Scanning a Photo First of all, place your photo on the scanner glass and start Epson Scan. “Starting a Scan” on page 48 &...
  • Page 68: Software Information

    Select Photograph as the Document Type setting. Click Preview. Adjust the exposure, brightness, and other image quality settings. See the Help for more details on Epson Scan. Click Scan. Select JPEG as the Type setting, and then click OK. Your scanned image is saved.
  • Page 69: Starting Other Scanning Software

    Or, select Epson Scan from the Start screen. ❏ Windows 7, Vista and XP: Double-click the EPSON Scan icon on the desktop. Or, select the start button icon or Start > All Programs or Programs > EPSON > EPSON Scan > EPSON Scan. ❏ Mac OS X: Select Applications >...
  • Page 70: Menu List Of Control Panel

    Mode on the control panel. Each mode’s main screen appears as you select the mode. Note: This function is available with XP-310 Series/XP-410 Series. Copy Mode XP-410 Series Press d to see the menu.
  • Page 71: Print Photo Mode

    User’s Guide Menu List of Control Panel Print Photo Mode XP-410 Series Press d to see the menu. Menu Setting item and description Select Photos Select by Date Cancel Photo Selection Display Options Select how to display photos on the LCD screen. Thumbnail shows a thumbnail view of your photos and allows you to select photos to print quickly.
  • Page 72: Scan Mode

    200dpi, 300dpi, 600dpi Contrast -4 to +4 Scan to Cloud For instructions on use, see the Epson Connect guide. The guide is available on the Epson Connect portal site. “Using Epson Connect Service” on page 8 & Scan to PC (JPEG) “Basic Scanning from the Control Panel”...
  • Page 73: More Functions Mode

    User’s Guide Menu List of Control Panel More Functions Mode XP-410 Series Menu Setting item and description Copy/Restore Photos Color Restoration Select On to automatically restore color of a faded photo. Display Options Select how to display photos on the LCD screen.
  • Page 74: Wi-Fi Setup Mode

    You can print monthly or weekly calendars. For monthly calendars, you can specify the year and month. Wi-Fi Setup Mode XP-410 Series Menu Setting item and description Wi-Fi Setup Wizard For details on the setting items, see the online Network Guide.
  • Page 75: Setup Mode

    You can check whether your printer is registered or connected to Epson Connect service. Services For instructions on use, see the Epson Connect guide. The guide is available on the Epson Connect portal site. “Using Epson Connect Service” on page 8 &...
  • Page 76 You can check whether your printer is registered or connected to Google Cloud Print service. Services For instructions on use, see the Epson Connect guide. The guide is available on the Epson Connect portal site. “Using Epson Connect Service” on page 8 &...
  • Page 77: Replacing Ink Cartridges

    User’s Guide Replacing Ink Cartridges Replacing Ink Cartridges Ink Cartridge Safety Instructions, Precautions, and Specifications Safety instructions Observe the following when handling the ink cartridges: ❏ Keep ink cartridges out of the reach of children. ❏ Be careful when you handle used ink cartridges, as there may be some ink around the ink supply port. If ink gets on your skin, wash the area thoroughly with soap and water.
  • Page 78: Precautions On Ink Cartridge Replacement

    Read all of the instructions in this section before replacing the ink cartridges. ❏ Epson recommends the use of genuine Epson ink cartridges. Epson cannot guarantee the quality or reliability of non-genuine ink. The use of non-genuine ink may cause damage that is not covered by Epson’s warranties, and under certain circumstances, may cause erratic product behavior.
  • Page 79: Ink Cartridge Specifications

    ❏ Store ink cartridges with their labels facing upward. Do not store cartridges upside down. Ink Cartridge Specifications ❏ Epson recommends using the ink cartridge before the date printed on the package. ❏ The ink cartridges packaged with your product are partly used during initial setup. In order to produce high quality printouts, the print head in your product will be fully charged with ink.
  • Page 80: Checking The Ink Cartridge Status

    Note: ❏ If EPSON Status Monitor 3 does not appear, access the printer driver and click the Maintenance tab and then the Extended Settings button. In the Extended Settings window, check the Enable EPSON Status Monitor 3 check box.
  • Page 81: For Mac Os X

    Click the EPSON Status Monitor icon. The EPSON Status Monitor appears. Note: ❏ The graphic displays the ink cartridge status when EPSON Status Monitor was first opened. To update the ink cartridge status, click Update. ❏ The order in which ink cartridges are listed varies depending on the product.
  • Page 82: Temporarily Printing With Black Ink When Color Ink Cartridges Are Expended

    User’s Guide Replacing Ink Cartridges Select Ink Levels. Note: The ink levels displayed are an approximate indication. Temporarily Printing with Black Ink When Color Ink Cartridges are Expended When color ink is expended and black ink still remains, you can continue printing for a short time using only black ink. However, you should replace the expended ink cartridge(s) as soon as possible.
  • Page 83 User’s Guide Replacing Ink Cartridges When EPSON Status Monitor 3 tells you to cancel your print job, click Cancel or Cancel Print to cancel your print job. Note: If the error stating that a color ink cartridge is expended originates with another computer on the network, you may need to cancel the print job at the product.
  • Page 84: For Mac Os X

    User’s Guide Replacing Ink Cartridges Print your file. EPSON Status Monitor 3 is displayed on your computer screen again. Click Print in Black to print with black ink. For Mac OS X Follow the steps below to continue printing temporarily with black ink.
  • Page 85: Conserving Black Ink When The Cartridge Is Low (For Windows Only)

    User’s Guide Replacing Ink Cartridges Load plain paper or envelope. Access the Print dialog box. “Accessing the printer driver for Mac OS X” on page 34 & Click the Show Details button (for Mac OS X 10.8 or 10.7) or the d button (for Mac OS X 10.6 or 10.5) to extend this dialog box.
  • Page 86: Replacing An Ink Cartridge

    ❏ Click Disable this feature to continue using the remaining black ink. Replacing an Ink Cartridge Using the control panel (XP-310 Series/XP-410 Series) When prompted to replace an ink cartridge, open the scanner unit and press OK. The ink cartridge holder moves to the ink cartridge replacement position.
  • Page 87 User’s Guide Replacing Ink Cartridges Note: Removed ink cartridges may have ink around the ink supply port, so be careful not to get any ink on the surrounding area when removing the cartridges. Gently shake the new cartridge four or five times and then unpack. Important: ❏...
  • Page 88 User’s Guide Replacing Ink Cartridges Important: ❏ You must remove the yellow tape from the cartridge before installing it; otherwise, print quality may decline or you may not be able to print. ❏ If you have installed an ink cartridge without removing the yellow tape, take the cartridge out of the product, remove the yellow tape, and then reinstall it.
  • Page 89: Using The Control Panel (Xp-210 Series)

    User’s Guide Replacing Ink Cartridges Using the control panel (XP-210 Series) Open the scanner unit. If the B light is on, press the y button. If the B light is flashing or off, press the y button for six seconds until the ink cartridge holder moves. The ink cartridge holder moves to the ink cartridge check position.
  • Page 90 User’s Guide Replacing Ink Cartridges Press the y button again. If more than one ink cartridge is expended, the ink cartridge holder moves to the mark. This occurs each time you press the y button until all expended ink cartridges have been indicated. Once all of the expended ink cartridges have been indicated, the ink cartridge holder moves to the ink cartridge replacement position when you press the y button.
  • Page 91 User’s Guide Replacing Ink Cartridges Important: ❏ Be careful not to break the hooks on the side of the ink cartridge when you remove it from the package. ❏ Do not touch the green IC chip or the small window on the side of the cartridge. Doing so may prevent normal operation and printing.
  • Page 92: For Windows

    User’s Guide Replacing Ink Cartridges Insert the cartridge and press it until it clicks. Make sure the top surface of the ink cartridges align. Close the scanner unit and press y. Ink charging starts. This process takes about two minutes to complete. Note: ❏...
  • Page 93: For Mac Os X

    “For Mac OS X” on page 117. & If you need to replace an ink cartridge before it is low or expended, access the Epson Printer Utility 4. Then click the Ink Cartridge Replacement icon. “Accessing the printer driver for Mac OS X” on page...
  • Page 94: Maintaining Your Product And Software

    Make sure that no warnings or errors are indicated in the control panel. Make sure that A4-size paper is loaded in the sheet feeder. Access the Epson Printer Utility 4. “Accessing the printer driver for Mac OS X” on page 34 &...
  • Page 95: Using The Control Panel (Xp-310 Series/Xp-410 Series)

    User’s Guide Maintaining Your Product and Software Using the control panel (XP-310 Series/XP-410 Series) Follow the steps below to check the print head nozzles using the product control panel. Make sure that no warnings or errors are indicated in the control panel.
  • Page 96: Cleaning The Print Head

    Then run the nozzle check again and repeat the head cleaning if necessary. If print quality has still not improved, contact Epson support. ❏ To maintain print quality, we recommend printing a few pages on a regular basis.
  • Page 97: Using The Head Cleaning Utility For Windows

    Click the Head Cleaning icon. Follow the on-screen instructions. Using the control panel (XP-310 Series/XP-410 Series) Follow the steps below to clean the print head using the product control panel. Make sure that no warnings or errors are indicated in the control panel.
  • Page 98: Using The Control Panel (Xp-210 Series)

    User’s Guide Maintaining Your Product and Software Using the control panel (XP-210 Series) Follow the steps below to clean the print head using the product buttons. Make sure that no warnings or errors are indicated in the control panel. Hold down the y button for three seconds. The product starts cleaning the print head and the P light begins flashing.
  • Page 99: Using The Control Panel (Xp-310 Series/Xp-410 Series)

    Click the Print Head Alignment icon. Follow the on-screen instructions to align the print head. Using the control panel (XP-310 Series/XP-410 Series) Follow the steps below to align the print head using the product control panel. Make sure that no warnings or errors are indicated in the control panel.
  • Page 100: For Windows

    Select Off, 30 minutes, 1 hour, 2 hours, 4 hours, 8 hours, or 12 hours as the Power Off Timer setting. Select 3 minutes, 5 minutes, 10 minutes, or 15 minutes as the Sleep Timer setting. Click the Apply button. Using the control panel (XP-310 Series/XP-410 Series) Enter Setup mode from the Home menu. Select Printer Setup.
  • Page 101: Making Network Service Settings

    XP-212/XP-213 do not support this function. You can make network service settings such as Epson Connect, AirPrint, or Google Cloud Print using a Web browser on your computer, smartphone, tablet PC, or laptop that is connected to the same network as the product.
  • Page 102: Cleaning The Product

    User’s Guide Maintaining Your Product and Software When the product is found successfully, the product’s web page is displayed as shown below. Select the menu you want. The web page also allows you to check the product’s status and update the product’s firmware. Cleaning the Product Cleaning the exterior of the product To keep your product operating at its best, clean it thoroughly several times a year by using the following instructions.
  • Page 103: Cleaning The Interior Of The Product

    User’s Guide Maintaining Your Product and Software ❏ Be careful not to scratch or damage the surface of the scanner glass, and do not use a hard or abrasive brush to clean it. A damaged glass surface can decrease the scan quality. Cleaning the interior of the product To keep your print results at their best, clean the roller inside by using the following procedure.
  • Page 104 User’s Guide Maintaining Your Product and Software Important: ❏ When storing or transporting the product, avoid tilting it, placing it vertically, or turning it upside down; otherwise ink may leak. ❏ Leave the ink cartridges installed. Removing the cartridges can dry out the print head and may prevent the product from printing.
  • Page 105 User’s Guide Maintaining Your Product and Software Secure the ink cartridge holder to the case with tape as shown, then close the scanner unit. Note: Do not place tape on the white flat cable inside the product. Unplug the power cord from the outlet, then disconnect the USB cable from the product. Close the paper support and the output tray.
  • Page 106: Checking And Installing Your Software

    Check the list of currently installed programs. For Mac OS X Double-click Macintosh HD. Double-click the Epson Software folder in the Applications folder and check the contents. Note: ❏ The Applications folder contains software provided by third parties. ❏ To check that the printer driver is installed, click System Preferences on the Apple menu and then click Print & Scan (for Mac OS X 10.8 or 10.7) or Print &...
  • Page 107: Uninstalling Your Software

    User’s Guide Maintaining Your Product and Software If you are using Mac OS X, or if your computer does not have a CD/DVD drive, go to the following Epson website to download and install the software. http://support.epson.net/setupnavi/ Uninstalling Your Software You may need to uninstall and then reinstall your software to solve certain problems or if you upgrade your operating system.
  • Page 108: For Mac Os X

    Access the site at: http://www.epson.com Next, select the support section of your local Epson Web site. ❏ To uninstall applications, you must log on to a Computer Administrator account. You cannot uninstall programs if you log on as a limited account user.
  • Page 109: Transferring Data Using An External Storage Device

    User’s Guide Transferring Data Using an External Storage Device Transferring Data Using an External Storage Device Note: The availability of this feature varies by product. You can use the product’s memory card slot to copy files to a computer connected to the product. You can also use it to copy files on your computer to the storage device.
  • Page 110: Saving Files To A Storage Device

    User’s Guide Transferring Data Using an External Storage Device Double-click the removable disk icon, then select the folder in which your files are saved. Note: If you have set a volume label, it is displayed as the drive name. If you have not set the volume label, “removable disk” is displayed as the drive name on Windows XP.
  • Page 111: Error Indicators

    Printer error. Turn power off and on again. Turn the product off and then back on. Make sure that no paper is still in the product. If the error message still appears, contact Epson support. Communication error. Connect computer.
  • Page 112: Error Indications On The Control Panel (Xp

    Press x to resume printing. The message will be displayed until life. the ink pad is replaced. Contact Epson support to replace ink pads before the end of their service life. When the ink pads are saturated, the printer stops and Epson support is required to continue printing.
  • Page 113 & Maintenance The product’s ink pads are nearing or at the end of Contact Epson support to replace ink pads. their service life. If the product’s ink pads are nearing the end of their service life, printing can be resumed by pressing one Flashing of the start x buttons.
  • Page 114 Recovery mode The firmware update has failed, and the product You will need to re-attempt the firmware update. is in recovery mode. Ready a USB cable and visit your local Epson website for further instructions. = on, = flashing slowly,...
  • Page 115: Troubleshooting For Printing/Copying

    User’s Guide Troubleshooting for Printing/Copying Troubleshooting for Printing/Copying Diagnosing the Problem Troubleshooting product problems is best handled in two steps: first diagnose the problem, then apply likely solutions until the problem is fixed. The information that you need to diagnose and solve most common problems is provided by online problem solving, the control panel, or the status monitor.
  • Page 116: Checking Product Status

    When you access EPSON Status Monitor 3, the following window appears: Note: If EPSON Status Monitor 3 does not appear, access the printer driver and click the Maintenance tab and then the Extended Settings button. In the Extended Settings window, check the Enable EPSON Status Monitor 3 check box.
  • Page 117 ❏ Current Status: If the ink is low or expended, the How to button appears in the EPSON Status Monitor 3 window. Clicking How to displays ink cartridge replacement instructions and moves the ink cartridge holder to the ink cartridge replacement position.
  • Page 118 Click the EPSON Status Monitor icon. The EPSON Status Monitor appears. You can also use this utility to check the ink cartridge status before printing. EPSON Status Monitor displays the ink cartridge status at the time it was opened. To update the ink cartridge status, click Update.
  • Page 119: Paper Jams

    User’s Guide Troubleshooting for Printing/Copying When ink is low or expended, a How to button appears. Click How to, and EPSON Status Monitor will lead you step by step through the ink cartridge replacement procedure. Paper Jams Caution: Never touch the buttons on the control panel while your hand is inside the product.
  • Page 120 User’s Guide Troubleshooting for Printing/Copying Open the scanner unit. Note: Some products may come with a scanner unit support.
  • Page 121 User’s Guide Troubleshooting for Printing/Copying Remove all of the paper inside, including any torn pieces. Close the scanner unit. If the jammed paper remains near the output tray, carefully remove the paper.
  • Page 122: Preventing Paper Jams

    ❏ For plain paper, do not load paper above the line just under the H arrow mark inside the edge guide. For Epson special media, make sure the number of sheets is less than the limit specified for the media.
  • Page 123: Print Quality Help

    User’s Guide Troubleshooting for Printing/Copying Access the printer settings. “Accessing the printer driver for Windows” on page 33 & Select the Print Preview check box in the Main or Advanced window of your printer driver. Make the settings that you want to use to print. Click OK to close the printer settings window, and then print your file.
  • Page 124: Horizontal Banding

    “Aligning the Print Head” on page 98 & ❏ If a moire (cross-hatch) pattern appears on your copy, change the Reduce/Enlarge setting (XP-410 Series only) in the LCD menu or shift the position of your original. ❏ If there is problem with copy quality, clean the surface of the scanner glass.
  • Page 125: Incorrect Or Missing Colors

    Epson recommends replacing the ink cartridges. “Replacing an Ink Cartridge” on page 86 & ❏ Try to use genuine Epson ink cartridges and paper recommended by Epson. Blurry or smeared print ❏ Try to use genuine Epson ink cartridges and paper recommended by Epson.
  • Page 126: Miscellaneous Printout Problems

    Fast Economy is selected in Print Quality in Print Settings (for Mac OS X), select another setting. Size or position of copied image is incorrect ❏ Make sure the paper size, layout, or reduce/enlarge setting (XP-410 Series only) selected in the control panel matches the paper used.
  • Page 127: Inverted Image

    User’s Guide Troubleshooting for Printing/Copying Inverted image ❏ For Windows, clear the Mirror Image check box from the Page Layout window of your printer driver, or turn off the Mirror Image setting in your application. For Mac OS X, clear the Mirror Image check box in Print Settings in the Print dialog box of your printer driver, or turn off the Mirror Image setting in your application.
  • Page 128: Paper Does Not Feed Correctly

    ❏ For plain paper, do not load paper above the line just under the H arrow mark inside the edge guide. For Epson special media, make sure the number of sheets is less than the limit specified for the media.
  • Page 129: Paper Is Improperly Loaded

    User’s Guide Troubleshooting for Printing/Copying ❏ If too many copies of a file are being printed, check the Copies setting in your printer driver as follows, and also check in your application. For Windows, check the Copies setting on the Page Layout window. Mac OS X, check the Copies setting in the Print dialog.
  • Page 130: An Ink Error Is Indicated After You Replace The Cartridge

    User’s Guide Troubleshooting for Printing/Copying ❏ Users of Windows can clear any stalled print jobs from the Windows Spooler. “Canceling Printing” on page 39 & ❏ Uninstall the printer driver, then reinstall it. “Uninstalling Your Software” on page 107 & An ink error is indicated after you replace the cartridge Open the scanner unit.
  • Page 131: Increasing The Print Speed (For Windows Only)

    User’s Guide Troubleshooting for Printing/Copying Close the scanner unit slowly and press the button described below. For products with LCD screen: Press OK. For products without LCD screen: Press y. Increasing the Print Speed (For Windows Only) Note: The screen shots in this section may vary depending on the model. Print speed may be increased by selecting certain settings in the Extended Settings window when the printing speed is slow.
  • Page 132: Other Problem

    User’s Guide Troubleshooting for Printing/Copying The following dialog box appears. Select the following check boxes and print speed may be increased. ❏ High Speed Copies ❏ Always spool RAW datatype ❏ Page Rendering Mode ❏ Print as Bitmap For more details on each item, see the online help. Other Problem Printing plain papers quietly When plain paper is selected for the paper type or Normal is selected as for quality in the printer driver, the product...
  • Page 133: Troubleshooting For Scanning

    ❏ Make sure you select the correct product if a scanner list appears when starting to scan. Windows: When you start Epson Scan using the EPSON Scan icon, and the Select Scanner list is displayed, make sure you select the model of your product.
  • Page 134: Using The Button

    & ❏ Mac OS X: Make sure you are logged on as the user who installed the scanning software. Other users must first start Epson Scanner Monitor in the Applications folder and then press a button to scan. How to unblock Epson Event Manager Click Start or the start button, and then point to Control Panel.
  • Page 135: Using Scanning Software Other Than Epson Scan Driver

    Programs and Services list. Click OK. Using scanning software other than Epson Scan driver ❏ If you are using any TWAIN-compliant programs, such as Adobe Photoshop Elements, make sure that the correct product is selected as the Scanner or Source setting.
  • Page 136: Problems With Scanned Images

    User’s Guide Troubleshooting for Scanning Problems With Scanned Images Scan quality is unsatisfactory Scan quality can be improved by changing the current settings or adjusting the scanned image. “Image Adjustment Features” on page 50 & An image on the back of your original appears in your scanned image If your original is printed on thin paper, images on the back may be visible to the product and appear in your scanned image.
  • Page 137: The Scanning Area Or Direction Is Unsatisfactory

    User’s Guide Troubleshooting for Scanning ❏ Select the Descreening check box. ❏ Change a resolution setting and scan again. Uneven color, smears, dots, or straight lines appear in your image You may need to clean the interior of the product. “Cleaning the Product”...
  • Page 138: Problems Remain After Trying All Solutions

    Click Configuration, select the Preview tab, and then clear the Auto Photo Orientation check box. Then, place your documents correctly. Problems Remain After Trying All Solutions If you have tried all the solutions and have not solved the problem, initialize the Epson Scan settings. Click Configuration, select the Other tab, and then click Reset All.
  • Page 139: Product Information

    User’s Guide Product Information Product Information Ink Cartridges You can use the following ink cartridges with this product: Ink Cartridge Part numbers Black 200/200XL Cyan 200/200XL Magenta 200/200XL Yellow 200/200XL Note: Not all cartridges are available in all regions. Black, Cyan, Magenta, Yellow Color For best results, use up ink cartridge within six months of opening the package.
  • Page 140: Technical Specifications

    ❏ Since the quality of any particular brand or type of paper may be changed by the manufacturer at any time, Epson cannot attest to the quality of any non-Epson brand or type of paper. Always test samples of paper stock before purchasing large quantities or printing large jobs.
  • Page 141: Printable Area

    User’s Guide Product Information Thickness 0.08 to 0.11 mm (0.003 to 0.004 in.) (for plain paper) Weight 64 g/m2 (17 lb) to 90 g/m2 (24 lb) (for plain paper) Envelopes: Envelope #10 4 1/8 × 9 1/2 in. Size Envelope DL 110 × 220 mm Envelope C6 114 ×...
  • Page 142: Scanner Specifications

    User’s Guide Product Information Minimum margin Media type Single sheets Envelopes 3.0 mm (0.12 in.) 3.0 mm (0.12 in.) 3.0 mm (0.12 in.) 5.0 mm (0.20 in.) 3.0 mm (0.12 in.) 20.0 mm (0.78 in.) Note: Depending on the type of paper, print quality may decline in the top and bottom areas of the print, or the area may be smeared.
  • Page 143: Memory Card

    Photo data specifications File format JPEG with the Exif Version 2.3 standard 80 × 80 pixels to 9200 × 9200 pixels Image size XP-410 Series: up to 9990 Number of files XP-310 Series: up to 2000 Mechanical XP-210 Series XP-310 Series...
  • Page 144: Electrical

    User’s Guide Product Information Dimensions Storage Width: 390 mm (15.4 inches) Depth: 300 mm (11.8 inches) Height: 145 mm (5.7 inches) Printing Printing Width: 390 mm (15.4 inches) Width: 390 mm (15.4 inches) Depth: 504 mm (19.8 inches) Depth: 528 mm (20.8 inches) Height: 279 mm (11.0 inches) Height: 279 mm (11.0 inches) Weight...
  • Page 145: Environmental

    User’s Guide Product Information XP-410 Series 100-240 V Model Input voltage range 90 to 264 V Rated frequency range 50 to 60 Hz Input frequency range 49.5 to 60.5 Hz Rated current 0.5 to 0.3 A Approx. 13 W (ISO/IEC24712)
  • Page 146: Interface

    User’s Guide Product Information This product conforms to Part 15 of the FCC Rules and RSS-210 of the IC Rules. Epson cannot accept responsibility for any failure to satisfy the protection requirements resulting from a non-recommended modification of the product.
  • Page 147: Where To Get Help

    Depending on the product, the dial list data for fax and/or network settings may be stored in the product’s memory. Due to breakdown or repair of a product, data and/or settings may be lost. Epson shall not be responsible for the loss of any data, for backing up or recovering data and/or settings even during a warranty period.
  • Page 148: Help For Users In Europe

    User’s Guide Where To Get Help Help for Users in Europe Check your Pan-European Warranty Document for information on how to contact Epson support. Help for Users in Taiwan Contacts for information, support, and services are: World Wide Web (http://www.epson.com.tw) Information on product specifications, drivers for download, and products enquiry are available.
  • Page 149: Help For Users In Australia

    Epson Helpdesk Epson Helpdesk is provided as a final backup to make sure our clients have access to advice. Operators on the Helpdesk can aid you in installing, configuring and operating your Epson product. Our Pre-sales Helpdesk staff can provide literature on new Epson products and advise where the nearest dealer or service agent is located.
  • Page 150: Help For Users In Hong Kong

    To obtain technical support as well as other after-sales services, users are welcome to contact Epson Hong Kong Limited. Internet Home Page Epson Hong Kong has established a local home page in both Chinese and English on the Internet to provide users with the following information: ❏ Product information ❏...
  • Page 151: Index

    2-sided printing................42 2-up....................73 Easy Photo Print................41 Enlarging pages................43 4-up....................73 Envelopes loading..................23 printable area................141 Epson Easy Photo Print.................41 8-up....................73 paper.....................20 Epson Connect................8, 72 Epson Event Manager..............69 Error messages................111 Errors Aligning print head................98 copy....................126 print....................115 scan.....................133 Banding..................124 Beep....................75 Blank pages..................127 File Sharing Setup................76 Blurry prints..................125...
  • Page 152 Mac OS X..................94 banding..................124 product buttons................95 blank pages................127 Windows..................94 blurry prints................125 contacting Epson..............147 diagnosing..................115 incorrect characters..............126 incorrect colors.................125 Office Mode..................57 margins..................126 mirror image................127 paper feeding................128 paper jams..................119 print....................115 Pages per sheet printing..............44 print speed.................127 Paper product does not print.............129 Epson special paper..............20...
  • Page 153 User’s Guide Index scan.....................133 smeared prints..............125, 127 solving..................147 Technical support.................147 Product Trademarks..................2 checking status................116 Transporting product..............103 cleaning..................102 parts....................14 transporting................103 Product settings accessing for Mac OS X..............34 Upper 1/2..................73 accessing for Windows..............33 Power Off Timer.................99 connector...................146 Sleep Timer..................99 Professional Mode................59 Web service................8, 72 , 75 Wi-Fi Settings..................75 Reducing page size................43 Wi-Fi Setup..................75...

This manual is also suitable for:

Xp-310 seriesXp-210 seriesXp-410 seris

Table of Contents