Table of Contents
Advertisement
Quick Links
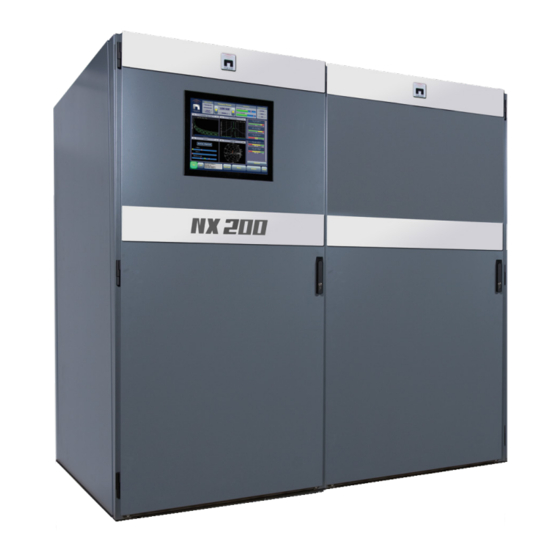
NX200
Main-Standby
Transmitter
Systems
All India Radio (AIR)
Common Sites
Installation and Operation Manual
Issue 0.3 .............................28 October 2014
Nautel Limited
10089 Peggy's Cove Road,
Hackett's Cove, NS, Canada B3Z 3J4
T.+1.902.823.3900 F.+1.902.823.3183
info@nautel.com
U.S. customers please contact:
Nautel Inc.
201 Target Industrial Circle, Bangor ME 04401
T.+1.207.947.8200 F.+1.207.947.3693
info@nautel.com
e-mail: support@nautel.com
www.nautel.com
Copyright 2014 NAUTEL. All rights reserved.
Advertisement
Table of Contents

Related Manuals for Nautel NX200


Summary of Contents for Nautel NX200
- Page 1 Nautel Limited 10089 Peggy's Cove Road, Hackett's Cove, NS, Canada B3Z 3J4 T.+1.902.823.3900 F.+1.902.823.3183 info@nautel.com U.S. customers please contact: Nautel Inc. 201 Target Industrial Circle, Bangor ME 04401 T.+1.207.947.8200 F.+1.207.947.3693 info@nautel.com e-mail: support@nautel.com www.nautel.com Copyright 2014 NAUTEL. All rights reserved.
- Page 3 Nautel for repair. The repairs will be made without charge to the Customer. Where warranty replacements or repair are provided under items 2 or 3, Nautel will pay that part of the shipping costs incurred in returning the part/assembly to the Customer.
- Page 4 When the warranty has expired, a charge of 80% of the list price for all exchanged modules is made. If the faulty module is returned to Nautel within 30 days, a credit is issued reducing this charge by one half to 40% of the list price.
- Page 5 NOTE A NOTE denotes important information pertaining to an operating procedure, condition, statement, etc., which is essential to highlight. A NOTE may precede or follow the text to which it applies. NX200 Main-Standby Transmitter System Installation and Operation Manual Oct.28.14...
- Page 6 DO NOT cut, crush or grind devices because the resulting dust may be HAZARDOUS IF INHALED. Unserviceable devices should be disposed of as harmful waste. NX200 Main-Standby Transmitter System Installation and Operation Manual Oct.28.14...
-
Page 7: Table Of Contents
Modulating Audio 2-21 2.2.9 Safety Interlocks 2-21 2.2.9.1 External Electrical System Interlock 2-22 2.2.9.2 Mechanical Safety Interlock (Key Sequence System) 2-22 2.2.10 Remote Control Circuits 2-22 2.2.11 Remote Status Indications 2-22 NX200 Main-Standby Transmitter System Installation and Operation Manual Oct.28.14... - Page 8 2.3.12 Ventilation (Air Handling) System - Installation Tasks 2-71 2.3.13 Miscellaneous Installation Tasks 2-79 KEY SEQUENCE SYSTEM 2-80 COMMISSIONING AND OPERATION 2-83 2.5.1 Precautions to Observe 2-83 2.5.2 Preliminary Settings 2-83 2.5.3 Initial Operation 2-84 NX200 Main-Standby Transmitter System Installation and Operation Manual Oct.28.14...
- Page 9 List of Figures Page Site Layout - NX200 Main-Standby Transmitter System (Example) Partial Top View of NX200 System (201-1321-01;Common, showing Soda Load Kit (228-8305-02) Not Used Assembly/Dimensional Information - 4-Port Switch for NX200 systems 2-11 Assembly/Dimensional Information - IMU for all Transmitter systems...
- Page 10 List of Appendices System Installation Drawings Soda Load and Dry Cooler Antenna Tuning Unit Ac Power 4 Port Switch / IMU Transmission Line Ventilation DRM Components (includes electrical schematic of DRM cabinet) NX200 Main-Standby Transmitter System Installation and Operation Manual Oct.28.14...
- Page 11 Reason 10 January 2014 Customized for NX200 AIR - common systems 22 July 2014 Added Appendix H – DRM Components 28 October 2014 Corrected warranty terms; removed Figure 2-34 (not used) NX200 Main-Standby Transmitter System Installation and Operation Manual Oct.28.14...
-
Page 13: General Information
The Nautel website (www.nautel.com) provides useful resources to keep you up to date on your equipment. NOTE From the Nautel website’s main page, choose the product line that suits your equipment. If you select ‘Radio Broadcast Communications’ or ‘Navigation and Communication’, the next page contains a Nautel User’s Group (NUG) link. -
Page 14: Mechanical Description
See Figure 1-1. Appendix A contains complete system layout drawings for the transmitter site. Each transmitter system consists of a Nautel NX200 Transmitter (Transmitter A - Unit 1), the existing on-site transmitter (Transmitter B - Unit 2) a control/monitor DRM cabinet (A1), an impedance matching unit (A2), a 4-port switch (A3), an antenna tuning unit (ATU) (A4), a test load (A5), a dry cooler and a control/monitor assembly. -
Page 15: Glossary Of Terms
Refer to any of the NX manuals for the Glossary of Terms relevant to each transmitter. 1.7 FACTORY SUPPORT Nautel provides after sale factory support. Technical assistance is available on a 24 hours, seven days a week basis. A factory service facility for repair of modules/assemblies is also available. - Page 17 Dimensions = mm (inches) Site Layout – NX200 Main-Standby Transmitter System Issue 0.3 Not to Scale Figure 1-1 Page 1-5...
-
Page 18: Introduction
INSTALLATION AND OPERATION MANUAL Section 2 PRE-INSTALLATION AND INSTALLATION 2.1 INTRODUCTION This section contains pre-installation and installation information for the NX200 main-standby transmitter system. NOTE Failure to comply with recommendations and instructions in this section may void the manufacturer’s warranty. Please review the Nautel warranty terms and conditions at the beginning of this technical manual. - Page 19 Forklift, 2000 kg Mechanical assistance for moving heavy system crates; positioning heavy (4500 lb) capable components such as NX200 transmitter, transformers, ATU, soda load, dry cooler. Skyjack, 250 kg Mechanical assistance for lifting elevated items into place such as cable tray, (550 lb) capable transmission line, ventilation ducts, 4-port switch, IMU, etc.
-
Page 20: Test Load And Dry Cooler - Pre-Installation Requirements
(e) Obtain a supply of potable water (approximately 100 US gallon and piping) for the dry cooler. NOTE: Nautel provides glycol (part # UE149) to serve as part of this mixture. When preparing amounts, plan for 70% potable water and 30% glycol. - Page 22 400 kW, 120-ohm, 400 V, 3-ph, 50 Hz 228-8320 Dry Cooler Wiring Kit, NX200/NX300 907 kg (2000 lbs) UP138 Dry Cooler for UP134 Partial Top View of NX200 System (201-1321-02; Common), showing Soda Load Kit 228-8305-01 Issue 0.3 Not to Scale Figure 2-1 Page 2-5 (2-6 Blank)
-
Page 23: Antenna Tuning Unit - Pre-Installation Requirements
(a) Obtain and install new ground rods and radials, as required. See sheet 6 (Earthing) of the transmitter system's layout drawings in Appendix A for suggested locations of ground rods. NX200 Main-Standby Transmitter System Installation and Operation Manual Page 2-7 (2-8 Blank) Section 2 Preparation for Use and Installation... -
Page 25: 4-Port Switch, Controller And Imu- Pre-Installation Requirements
2.2.4 4-Port Switch, Controller and IMU- Pre-installation Requirements Nautel provides the 4-port switch, control/monitor assembly, IMU, and all interconnect wiring and transmission line for each system. Prepare each site for installation of these items as follows: Appendix References: Appendix A ... - Page 27 (BOXLINE) TO TEST LOAD TRANSMISSION LINE (BOXLINE) FROM IMU TRANSMISSION LINE (BOXLINE) FROM EXISTING TRANSMITTER TRANSMISSION LINE (BOXLINE) TO ANTENNA VIA BUSHING BOX Assembly/Dimensional Information - 4-Port Switch for NX200 systems Issue 0.3 Not to Scale Figure 2-3 Page 2-11...
- Page 28 Assembly/Dimensional Information - IMU for All Transmitter Systems Issue 0.3 Not to Scale Figure 2-4 Page 2-12...
-
Page 29: Rf Coaxial Transmission Line - Pre-Installation Requirements
Prepare a suitable hole in the wall to support the RF output bushing box, provided by Nautel. See the System Layout Drawings in Appendix A and Figure 2-5 for details. Build support structures for the transmission line sections, which should be ready for use during installation. - Page 31 4.5 kg (10 lbs) 4.5 kg (10 lbs) Flange 10 kg (22 lbs)/m Elbow section 4 ft. section Elbow section JV04 NX200 (Common) Main-Standby System Transmission Line Layout (Nautel Part # 228-8307-01) Issue 0.3 Not to Scale Figure 2-5 Page 2-15 (2-16 Blank)
-
Page 32: Ventilation System - Pre-Installation Requirements
Consider the following for the air handling system, noting that the air handling system has been pre-planned and part of the air handling system is being provided by Nautel: NX200 Main-Standby Transmitter System Installation and Operation Manual Page 2-17 Section 2 Preparation for Use and Installation Issue 0.3... - Page 33 NX200 Transmitter, and so long as a minimum of 3,000 cubic feet per minute (CFM) (1,500 per cabinet) at 0.5 pounds per square inch (PSI) is supplied to the intake duct.
- Page 34 NX200 Ventilation System Kit (Nautel Part # 228-8311-02): Part # Description UE184 Ventilation Kit, AIR, NX200 COMMON 4000 CFM EXHAUST FAN 30 FT 20” SPRIAL DUCTWORK LENGTHS OF 12” DIA SPRIAL 35X14 TO 12” RD HOODS 18”X18” DUCTWORK FOR HOOD TIE IN...
- Page 35 Thermostat open when cool. OUTSIDE AIR DRAWN IN THROUGH FILTER Thermostat closed when hot. Truth Table for Damper Motors Thermostat Motors OPEN NOT POWERED CLOSED OPEN CLOSED CLOSED POWERED OPEN CLOSED OPEN Air Handling Process for NX Main-Standby Transmitter Systems Issue 0.3 Not to Scale Figure 2-7...
-
Page 36: Lightning Protection
2.2.8 Modulating Audio Modulating audio must be applied from an external source to each transmitter, via the program input equipment (PIE) cabinet, provided by Nautel. Refer to the NX200 Transmitter Pre- installation Manual for audio input specifications. 2.2.9 Safety Interlocks There are two types of safety interlocks - electrical and mechanical. -
Page 37: External Electrical System Interlock
See paragraph 2.6 for detailed information. 2.2.10 Remote Control Circuits Refer to the NX200 Transmitter's Installation Manual for information on remote control circuits. 2.2.11 Remote Status Indications Refer to the NX200 Transmitter's Installation Manual for information on remote status indications. -
Page 38: Installation Tasks
All shipments should be inspected for transit damage prior to acceptance. Packing/shipping lists should be perused to determine contents of each crate. Table 2-3 lists all the kits provided by Nautel for the NX200 Transmitter systems, and the corresponding installation paragraph for each kit. -
Page 39: Unpacking Instructions
(e) Remove any unwanted foreign objects from the interior of the cabinet/assemblies, paying particular attention for floating conductive materials such as wire strands, metal slivers/filing, and loose hardware. NX200 Main-Standby Transmitter System Instruction Manual Page 2-24 Issue 0.3 Section 2 Preparation for Use and Installation... -
Page 40: Cabinet Pre-Positioning
In the following text, reference is made to transmitter A and transmitter B. Transmitter A is the NX200 transmitter and transmitter B is the existing on-site transmitter. (b) Position transmitter A, noting the NX200 is partially disassembled for shipping. Refer to the NX200 Transmitter Installation Manual for instructions to re-assemble the NX200 Transmitter. - Page 41 This page intentionally left blank NX200 Main-Standby Transmitter System Instruction Manual Page 2-26 Issue 0.3 Section 2 Preparation for Use and Installation...
-
Page 42: Test Load And Dry Cooler - Installation Tasks
(c) Using necessary mechanical assistance (forklift, etc.), position the soda load in its final location (see the appropriate Figure 1a through 1d). Nautel recommends a forklift, with 8-ft long fork extensions, that is rated for 5000 lbs (2267 kg). - Page 43 (see Figure 2-9). This should be performed by a licensed plumber. Refer to the Plumbing Installation Tasks (section 2.4) of the Soda Load manual in Appendix B. NX200 Main-Standby Transmitter System Instruction Manual Page 2-28 Issue 0.3...
- Page 44 (k) Install interlock wiring between the soda load and the 4-port switch's control box (mounted near the 4-port switch). See Figure 2-10 and the Soda Load Manual (see Appendix B) for more information. NX200 Main-Standby Transmitter System Installation and Operation Manual Page 2-29 Section 2 Preparation for Use and Installation...
- Page 45 (m) Set up the load for operation and verify the impedance using the NX200 Transmitter's AUI (see the NX200 Transmitter's Operations and Maintenance Manual for further details). Set up the NX200 Transmitter to operate at 10% of its maximum capability (i.e., 20 kW for NX200).
- Page 46 4. Any plumbing exposed to the sun should be painted white. Plumbing Kit 228-8360-03 Contents: Part # Description 2-1/2 Inch Plumbing Kit (228-8360-03) for Soda Load and Dry Cooler for NX200 systems (Common) Issue 0.3 Not to Scale Figure 2-9 Page 2-31...
- Page 47 VIEW E - DRY COOLER ELECTRICAL ENCLOSURE LAYOUT VIEW A - SODA LOAD CONTROL BOX - CABLE HOLE LAYOUT CONTROL/INTERLOCK WIRING CONNECTIONS Install HAA90 FROM WIRE REMARKS Route WG54 power 4-port switch SL-T2-3 WE32 Interlock control box wiring and connect as shown below 4-port switch SL-T2-4...
-
Page 48: Atu- Installation Tasks
See Kintronics assembly drawings/instructions in Appendix C. (e) Install/assemble the ATU safety cage (see Figure 2-12). See Kintronics assembly instructions in Appendix C. NX200 Main-Standby Transmitter System Installation and Operation Manual Page 2-33 (2-34 Blank) Section 2 Preparation for Use and Installation... - Page 50 Antenna Tuning Unit Ground Switch Views Issue 0.3 Not to Scale Figure 2-11 Page 2-35...
- Page 51 Antenna Tuning Unit Safety Screen Views Issue 0.3 Not to Scale Figure 2-12 Page 2-36...
-
Page 52: Ac Power Components - Installation Tasks
See Table 2-7 for specifications and kits associated with the ac mains equipment used in each NX200 Transmitter system. Table 2-7: Specifications and Kits for the Ac Main Equipment for the NX200 System Primary Secondary... -
Page 53: Not Used
See transmitter system layout drawings, if necessary. (d) Locate the Surge Box Kit (Nautel Part # 228-8310) from the Mains Equipment Kit. This kit contains the NAX188 Surge Protection Panel and the 228-8324 NAX188 Installation... -
Page 54: Ac Breaker Panel
(b) Remove the steel top plate from the top of the ac breaker panel. Locate the aluminum cover in the Misc Parts Kit (Nautel Part # 228-8313-01 for NX200 systems) and install it in its place using the existing mounting holes in the top of the breaker panel (see Figure 2-15). - Page 56 Access through the front and View of cabinet bottom right-hand side panels. BREAKER LOCATIONS (right and left access covers removed) Assembly Details - Breaker Panel (UE183A) for NX200 Systems Issue 0.3 Not to Scale Figure 2-15 Page 2-41 (2-42 Blank)
-
Page 57: Ac Wiring Cable Trays
NX power transformer's primary. (b) Cut equal length pieces of WT05 (six for NX200 systems) and WT06 (one wire only) that are of sufficient length to comfortably route between the breaker panel's high-current output terminals and the ac disconnect switch's input copper plates, via the cable tray. - Page 58 (j) Cut equal length pieces of WT05 (six for NX200 systems) and WT06 (one wire only) that are of sufficient length to comfortably route between the ac disconnect switch's output copper plates and the primary of the NX power transformer, via the cable tray (see Figure 2-21).
- Page 59 Ensure the main ac power source for the transmitter system is disabled or locked out before proceeding. If this is not observed, voltages that are fatal will be present. Figure 2-16: Step-by-step instruction to install cable cleats NX200 Main-Standby Transmitter System Installation and Operation Manual Page 2-45 Section 2 Preparation for Use and Installation...
- Page 60 (m) Connect the end of the WT05 wires to the copper plates provided for each phase (see Figure 2-18). Secure the wire(s) for each phase (two for NX200 systems) to these copper plates [torque to 50 in-lbs (5.6 N-m) for HAM81 lugs]. Repeat this for each of the three phases.
- Page 61 WT05 and WT06 wires to cable tray and NX power transformer NOTE: For NX200 systems, wires enter through the bottom and exit through the top Figure 2-18: Ac Disconnect Switch wiring connection (NX300 switch shown), door removed for clarity...
- Page 62 WT05 wires and the WT06 ground wire and install lug connectors (Nautel Part # HAM81 for WT05; Nautel Part # HAM82 for WT06) on the ends of the wires. Note that each lug connector has four bolts (M14 for HAM81; M12 for HAM82) that must be tightened to secure the wire in the lug.
-
Page 63: Secondary Ac Wiring
Transmitter's Installation Manual for connection details for the secondary wiring. (b) Cut lengths of WT04 (six for NX200 systems), WT02 (two for NX200 systems) and WT01 (one wire only) that are of sufficient length to comfortably route between the NX power transformer's secondary and the power compartment of the NX200 Transmitter cabinet(s), via the cable tray. - Page 64 (d) Route secondary wires along the cable tray to the NX200 Transmitter, ensuring that the phase wires groups (three wires each) are bundled together in triangular patterns and cable cleats (Nautel Part # HO59) are used to properly secure wires to the cable tray (see Figures 2-16 and 2-17 for examples of proper techniques).
-
Page 65: Other Ac Wiring
228-8326). Cut a suitable length of this wire to connect between the EMERGENCY ON/OFF SWITCH on the inside of the NX200 Transmitter (note there is also one in the front of the NX200 Transmitter) and the breaker panel. Access the switch wiring by routing wire through the top of the NX200 Transmitter. - Page 67 Nut, Hex, M8 X 1.25, SS NOTE: EQUIPMENT IS NOT DESIGNED TO SUPPORT CABLE TRAYS OR WIRING. ALL CABLE TRAYS AND WIRING MUST BE SUPPORTED. NX200 (Common) Mains Equipment - Primary (228-8322-01) and Secondary (228-8323-02) Wiring Kits Issue 0.3 Not to Scale...
- Page 68 REFERENCE PUMPS HEATER GROUND P.I.E. DRY COOLER RACK SODA FANS & INTLK LOAD CIRCUITS SWITCH NX200 CONTROL INTERLOCK & CONTROL S2070201 VG 4-PORT SWITCH One-Line Diagram - NX200 Ac Power Distribution Issue 0.3 Not to Scale Figure 2-22 Page 2-54...
- Page 69 CORRECT INCORRECT CABLE TRAY CROSS SECTION A = Phase A; B = Phase B; C = Phase C Ac Wiring/Connection Information for NX200 Systems Issue 0.3 Not to Scale Figure 2-23 Page 2-55...
- Page 70 Trip Circuit for Breaker Panel's Main Breaker Issue 0.3 Not to Scale Figure 2-24 Page 2-56...
- Page 71 (a) Unpack the 4-Port Switch Kit (see Table 2-8) and impedance matching unit (IMU) (see also Appendix E) for your NX200 Transmitter system. The 4-Port Switch Kit contains the 4-port switch (see Table 1), control/monitor assembly (228-2100) and interconnecting cable (W1, 228-2117).
- Page 72 RF inhibit control for the transmitter system. If it is not used, it must be shorted by a jumper to keep the system interlock circuit intact. NX200 Main-Standby Transmitter System Instruction Manual Page 2-58 Issue 0.3...
- Page 73 2.3.7 for details on the test load). XMTR A INTERLOCK: Provides an interlock for the NX200 Transmitter (transmitter A). If a system interlock or the test load interlock is open, or if the RF contactor has not completed a transfer, transmitter A is interlocked off. Install a suitable length of 2-...
- Page 75 NX200 SYSTEMS NX300 and NX100 SYSTEMS (supported on user- provided structure) REMOVE COVER REMOVE COVER TO GAIN ACCESS TO GAIN ACCESS TO K1J1 TO K1J1 W1P2 W1P2 (supported on user- provided structure) 25 ft (7.6 m) CONNECTOR MATING INFORMATION 25 ft (7.6 m)
- Page 76 RF output has successfully been routed interlock circuit is closed (intact) and it is will turn on when the transfer is complete. transmitter A (NX200 ALWAYS set to INHIBIT to open the to the antenna, as determined by the safe to apply RF output power.
- Page 77 RF SAMPLE A11A1J7 W3P1 ANTENNA UNIT 1 ANTENNA RF OUT (A) NX300 TUNING (50 OHMS) TRANSMITTER RF OUT (A) UNIT XMTR A ANTENNA INPUT (120 OHMS) IMPEDANCE ANTENNA MATCHING UNIT BALL GAP A11A1J6 W2P2 230 VAC 50/60 Hz A11A1J10 A11A4J5 TEST LOAD INPUT TEST...
- Page 78 Electrical Schematic - Control/Monitor Assembly (228-2100) Issue 0.3 Not to Scale Figure 2-28 Page 2-64...
-
Page 79: Transmission Line - Installation Tasks
(a) Unpack the Transmission Line Kit for your NX200 Transmitter system. The Transmission Line Kit (see Table 2-9) contains the coaxial hard-line (6-1/8 inch for NX200 systems) to interconnect the NX200 Transmitter's output and IMU input and the 120-ohm box-line to interconnect the IMU output, 4-port switch, existing on-site transmitter, test load and antenna. - Page 81 207-8160-09 CENTRE CONDUCTOR 228-6020-03 HMSP32F 228−6019 HAH81 Tools and jig are in box line cutting kit (Nautel Part # 228−6042) Transmission Line - Box-line 4-ft Section Assembly (Nautel Part # 228-6040) Issue 0.3 Not to Scale Figure 2-29 Page 2-67...
- Page 82 NUT, HEX, M5 X 0.8, SS HAH81 HMW04 WASHER, PLAIN, M5, SS HMW34 WASHER, SPLIT, M5, SS HMSP32F 228−6027 228−6021 M2280007 228−6035 Transmission Line Box-line Elbow Assembly (Nautel Part # 228-6030) Issue 0.3 Not to Scale Figure 2-30 Page 2-68...
- Page 83 Cutback and Installation of Shively Hard Line (indoor only): Required tools: Reed tube cutter TC3Q: 3/8” to 3 ½” - require 1 Pc. Reed tube cutter TC6Q: 4” to 6 5/8” - require 1 Pc. Replacement cutter wheels, Reed part #63665 – 2PK-30-40 require 4 pack (8 wheels). ...
-
Page 84: Ventilation (Air Handling) System - Installation Tasks
The system's transmission line should be installed before the ventilation system given the area constraints at the top of the NX200 transmitter (see Figure 2-33). (a) Unpack the appropriate ventilation kit (see Table 2-10 to determine the specific kit numbers) and confirm that all parts have been included. - Page 85 (see Figure 2-32). (o) Install the vibration isolators as required noting the different sizes for each fan (see data sheets in Appendix G and Figure 2-35). NX200 Main-Standby Transmitter System Instruction Manual Page 2-72 Issue 0.3 Section 2 Preparation for Use and Installation...
- Page 86 THERMOSTAT 230 1 Φ 2 POLE BREAKER WE58 HA99 HY110 WHITE NX System HVAC Wiring 228-8328 HVAC Wiring Kit 100 FT WG52 WIRE, TECK90, 10AWG, 3 STRAND+ #12AWG GROUND WIRE, 600V HAA83 CONN, TECK, 3X10AWG, ALUMINUM SA80 SWITCH, DISCONNECT, 63A, 3 POLE, ABS HOUSING, IP66 HAJ69 NUT, ALUM, 1/2"...
- Page 87 Side View showing constrained area at top of NX200 transmitter. Exhaust fan assembly (with motor at bottom orientation) U1B Mounts – Hanging Style Example Photos of Transmitter Ventilation System Issue 0.3 Not to Scale Figure 2-33 Page 2-74 (2-75 Blank)
- Page 88 Canvas Canvas Vibration Vibration Dampener Dampener Hanging Vibration Isolator Assembly with Typical Installation Configuration (required for vibration and noise reduction) Issue 0.3 Not to Scale Figure 2-35 Page 2-76...
- Page 89 WORK IS 6 TO 8 INCHES ABOVE TOP OF TRANSMITTER CABINET 6 - 8 in. (15 - 20 cm) TOP OF NX200 TRANSMITTER Example of Using Tie-In Section to Fit Between Spiral and Square Ductwork Issue 0.3 Not to Scale Figure 2-36...
- Page 90 Transmitter and other points should not be shared. There should be a completely separate connection between the station reference ground point and each component. (c) Adjust the NX200 Transmitter’s RF output spark gap as detailed in section 7 of the NX Installation Manual.
- Page 91 Identification of locks and keys are stamped (indented) on the keys and locks themselves. The NX200 system is described in 2.4.1 and Figure 2-37. NX200 Main-Standby Transmitter System Instruction Manual Page 2-80 Issue 0.3...
- Page 92 Interlock Key 'A' to lock the ac power handle in the 'Off' position, releasing the 'A' key. (b) Insert the 'A' key into the 'A' lock in the Antenna Ground Switch on top of the NX200's output cabinet. Turn the 'A' key, engage the antenna grounding handle, turn the 'B' key, locking the ground handle in place and pull out the 'B' key.
- Page 93 Figure 2-37: Typical Key Sequence Diagram for NX200 Transmitter Systems NX200 Main-Standby Transmitter System Instruction Manual Page 2-82 Issue 0.3 Section 2 Preparation for Use and Installation...
-
Page 94: Commissioning And Operation
The precautionary information included in the NX200 Transmitter's Operations and Maintenance Manual should be read and fully understood prior to applying power, and must be observed during operation. -
Page 95: Initial Operation
If necessary, refer to the NX200 Transmitter manuals for detailed operating instructions. In this main-standby system, transmitter A is the Nautel NX200 transmitter and transmitter B is the existing on-site transmitter. Where applicable, refer to the existing transmitter's operating manual to perform similar tests to the NX200 Transmitter. - Page 96 (transmitter A or B to antenna) and set the transmitters for the desired power level. The system is not configured for automatic changeover operation. NX200 Main-Standby Transmitter System Instruction Manual Page 2-85 Section 2 Preparation for Use and Installation...
Need help?
Do you have a question about the NX200 and is the answer not in the manual?
Questions and answers