Table of Contents
Advertisement
Advertisement
Table of Contents

Related Manuals for joule NAVITAS


Summary of Contents for joule NAVITAS
- Page 1 NAVITAS joule navitas solar on-roof flat panel installation manual INSTALL...
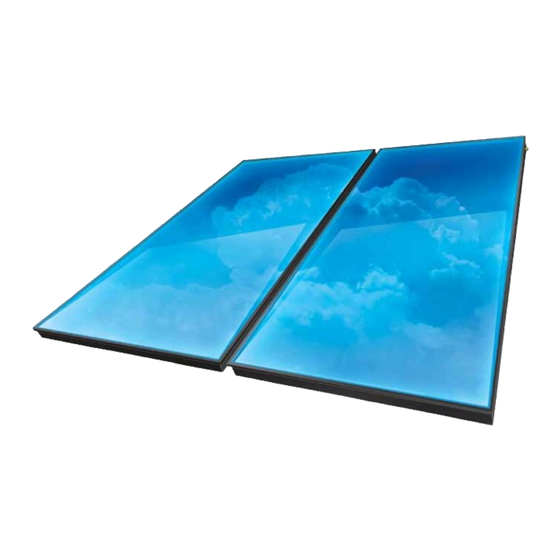
- Page 2 Installer Loyality Scheme Comming Soon...
-
Page 3: Table Of Contents
Important Pre Installation Information Roof Mounting Options Sloped Roof Bolt Mounting Kit Sloped Roof Tile Mounting Bracket Sloped Roof Slate Mounting Bracket Flat Roof Mounting Frame Collector Assembly Pump Station Safety Vessel Connection Electrical Solar Controller Commissioning Servicing and Maintenance NAVITAS installation manual... -
Page 4: Introduction
This guide will illustrate and explain how a system should be installed to conform to the Joule manufacturer guidelines for the Navitas product models. Us- ing this guide Stages of a solar installation are described in the following pages, with illustrations where necessary to explain how to install the relevant components, and contains general recommendations and important safety information. -
Page 5: Site Survey
(Confirm) Existing Plumbing System What type of plumbing system is in the dwelling (vented or un-vented)? Is solid fuel incorporated into the plumbing system? Is there adequate access to route pipe work from solar collectors down to cylinder location? (yes/no) Is there space in the hot press to locate solar pump station? (yes/no) NAVITAS installation manual... -
Page 6: Risk Assessment
Risk Assesment Safe Roof Access To Work Is there adequate access to area of house to mount scaffolding or ladders? (yes/no) Is there steady and secure base on which to mount scaffolding or ladders? (yes/no) Are the scaffolding and or ladders fit for use intended? (yes/no) All installers trained in working at heights? (yes/no) Are all harness and other safety equipment working correctly? (yes/no) All work carried out should be in accordance with all relevant good pratices and or current building stand- ards. All current regulations should be followed in relation to working at heights. Nothing stated in this guide takes pre- sedence over current standards. Condition of Roof What are the centres of roof rafters where solar collector is to be mounted (eg 400mm)? (mm) What is the size of roof rafters (eg 6x2”, 7x2”, 8x2”)? (inch) Are roof rafters cross braced? (yes/no) Is any of the timber showing discolouration (indicating rot)? (yes/no) To determine the total load on the roof you must get the total weight of the collectors and divide this weight by the number of roof fixing bolts or anchors used to hold the collector on the roof. This will give you the weight of the solar panels on each point of the roof. - Page 7 (confirm) Ensure that all wires are not in direct connection with any un-insulated pipe work or plant that could cause a (confirm) risk of burning Legionella / Bacterial Growth Ensure that there is no dead legs in the existing plumbing system that could induce the growth of legionella. (confirm) Ensure that the stats controlling the boiler and the stat controlling the immersion are set to 60 °C or above. (confirm) Ensure that the client understands the risk of legionella and the standard procedures for reducing the risk (confirm) of it forming. Also ensure that the client understands that you are their to install a solar thermal system and that you do not take any responsibility for auditing their hot water system for risk of legionnella forming. That you will endeavour to minimise the risk of it forming by the work that you carry out but any existing risk should be dealt with a certified professional. NAVITAS installation manual...
-
Page 8: Kit Components
Kit Components Standard Kit Components Solar Pump Solar Controller Solar Expansion Vessel Solar Panel & Profiles Solar Fluid Mounting Options Bolt Mounting Option Tile Bracket Option Slate Bracket Option Roof Flashing Options Lead Roof Flashing Aluminium Roof Flashing 4” Rubber Gasket Set... -
Page 9: Mounting Options
Mounting Options Piping Options DN16 Duo Pipe DN20 Pipe Stainless Tails & Copper Optional Accessories Installation Hose Mounting Set Over Voltage Lightning 3/4” Thermostatic Mixing Valve Cooling Vessel NAVITAS installation manual... -
Page 10: Important Pre Installation Information
Area (m ltr/hr Copper External (mbar) (mbar) (mbar) (mm) 8.54 1.18 4.11 12.57 2.87 10.74 17.08 2.36 8.22 21.11 4.05 14.58 25.14 5.74 20.94 33.68 6.92 25.05 EXPANSION VESSSEL SIZING Model Collector Area System Volume Static Height Vessel Size (ltrs) Navitas 2 Panel Navitas 3 Panel Navitas 4 Panel... -
Page 11: Roof Mounting Options
Roof Mounting options The Navitas product range is available with a choice of roof fixing options to suit many roof types, see diagram below for the most common fixings. The most common fix- ings are illustrated and explained in the following section and may be easily secured to slate, tile or masonry finishes. Option Code Describtion RF-PA-MT-BO-X Sloped roof bolt kit option RF-PA-MT-SL-X Sloped roof slate mounting bracket option RF-PA-MT-TI-X Sloped roof tile mounting bracket option SOL-FRF-X-25 25° increase roof inclined bracket SOL-FRF-X-45 45° flat roof inclined roof bracket X= 2, 3, 4, 5, 6 Metal Roof Fixings Joule also supplies roof fixing kits for metal and other commercial roofs. Two options available utilise appropriate clamps so the fabric of the metal roof is not penetrated - see page xx. Note the minimum and maximum distances on each fixing kit. -
Page 12: Suggenstion For Attachment Points
STANDARD LOAD 1.9 kN/m If the roof structure prevents conformance to the specified maximum projection B, then the number of fastening points must be increased or an appropriate substructure must be fabricated on-site. For example: the use of additional supports. Care must be taken on-site to ensure that the roof battens are firmly screwed to the substructure in the vicinity of the collectors. The static load limits only apply in conjunction with the Suggenstion for attachment points maximum projection / number and clearance between supporting levels specified in the table. STANDARD LOAD 1.9kN/m² If the roof structure prevents conformance to the specified maximum projection B, then the number of The collector inclusive roof mountings are suitable of withstanding a maximum gust fastening points must be increased or an appropriate substructure must be fabricated on-site. - Page 13 Clearance between supporting levels / Fastening points in mm / see figure 1 Collectors 1540 ± 10 Supporting planes max. 265,5 1540 ± 10 1225 2453 3678 4906 6131 7359 max. 265,5 1225 2453 3678 4906 6131 7359 D2 - D3 D2 - D3 D5 - D6 D5 - D6 D8 - D9 D8 - D9 Abb.1 (v_2011-07) NAVITAS installation manual...
-
Page 14: Sloped Roof Bolt Mounting Kit
Sloped Roof Bolt Mounting Kit Mounting parallel bench srew mountingsystem General Note: Points 9-12, 17 and 18 of these instructions only apply when mounting more than two collectors! A = 1540 mm ±10 mm Measure the mounting points (for a suggestion see previous side) Drill tiles - Ø... -
Page 15: Sloped Roof Tile Mounting Bracket
The top piece can adjust to increase or decrease the height of the collector above the roof tile. The bracket is connected to the pro- file using nuts, bolts and washers. The bolt head slides through the profile to the desired location and then the bracket is fixed using the nut and washer. NAVITAS installation manual... -
Page 16: Sloped Roof Slate Mounting Bracket
Sloped Roof Slate Mounting Bracket Slate roof brackets are an ideal bracket for fixing the solar collectors to thin flat slates. The bracket is connected to the profile using nuts, bolts and washers. The bolt head slides through the profile to the desired location and then the bracket is fixed using the nut and washer. -
Page 17: Flat Roof Mounting Frame
30x30mm angle aluminium. The frame consists of triangle nunber A frame pieces with two back and sloped bars. Each A frame connects to the collec- tor profiles using nuts, bolts and washers. The frame is fixed to surface by installer. Preferred method f fixing to flat surface is dependent on type of surface and available supports. NAVITAS installation manual... -
Page 18: Collector Assembly
Collector Assembly Mounting parallel bench srew mountingsystem Mounting parallel bench srew mountingsystem 13: Hang the first collector in the lower mounting rail and adjust 13a ) 16 ) (13a + 13b!) d screw it tight 13: Hang the first collector in the lower mounting rail and adjust 13a ) After profiles have been installed on roof Note:... -
Page 19: Mounting Parallel Bench Srew Mountingsystem
11 ) 11 ) - washer - nut n - washer - nut he mounting he mounting t 7) t 7) 12a ) 12a ) unting part - unting part - NAVITAS installation manual... - Page 20 Collector Assembly Connection Information The Navitas panel has been designed to make connection between panels and to flow and return pipe work simple and with as little number of joints as possible. Connecting Panels Together The Navitas collector has a ¾” flat face male thread on one side and a swivel nut ¾” female on the other side. This means that each panel connects directly to the panel beside it. A fibre washer must be inserted between the flat face of the male thread and the internal of the female swivel nut. Connecting Flow & Return Pipework: Tails – 075m Stainless Steel Each tail has been manufactured with a swivel nut on each end. This swivel nut screws...
- Page 21 Stainless Steel Pipe Specification Silicone Cable Specification Insulation Specification NAVITAS installation manual...
-
Page 22: Pump Station
Pump Station The Joule product range offers both a single stream and a dual stream pump station. The flow rate required on a system is typically 1 litre per minute, per square metre installed. Therefore a 2-12 litre pump station will be sufficient for systems up to 12m². 1. Insulating box (back) in EPP 2. Safety unit consisting of: manometer 0/10 bar, solar safety valves cali- brated to 6 bars, 3/4” connection for expansion vessel 3. Security clips 4. Shutoff valves with integrated thermometers and check-valves 5. Solar pump 6. Visual flow balancing valve with filling and drain group 7. Hose connection 8. Insulating EPP box (cover) Connections of flow and return pipe work to the pump station are made vis the ¾” flat face thread connection on all points apart from the connection directly underneath the pump. This connection is to be made with 22mm smooth tube. When locating the pump station consideration should be given to future access for maintenance. -
Page 23: Safety Vessel Connection
It is recommended that the expansion vessel is located below the level of the connec- tion from the pump station to prolong its life. Temperature Reducing Vessel (TRV) Also known as a ‘cooling vessel’ or ‘stratification vessel’, the TRV is highly recommended where the distance between collectors and pump station is less than five meters. The TRV ensures that enough fluid is present between the collectors and expansion vessel to prevent damage to the expansion vessel membrane. PRV discharge point Wall bracket (supplied) Discharge container TRV kit Expansion vessel Dual stream pump station NAVITAS installation manual... -
Page 24: Electrical Solar Controller
In order to protect the normal operation of the control panel, it should be located at least 100 mm from in- sulated pipes which may become hot during operation. Control panels use PT1000 sensors containing twin core copper cable with a 0.75mm cross section. The sen- sors supplied are 1.5 metres in length. Sensor cables can be extended with twin core copper cable of 0.75mm diameter up to 50 metres and 1.50mm diameter between 50-100m. Screened cable should be used on the sensor cables to prevent RFI from electrical cables. All connections to extend the cables should be housed in a junction box for protection. The following diagrams show the connection of the solar pump and other relays on the Joule range of controllers. This should be read in conjunction with the Installation and Operation Manual supplied with each Joule control panel. - Page 25 NAVITAS installation manual...
- Page 27 NAVITAS installation manual...
-
Page 28: Commissioning
Commissioning Expansion Vessel IMPORTANT Prior to filling the system, the expansion vessel pressure must be set 0.3 Bar below the system pressure. Omitting to perform this check will result in irregular pressure readings during the commissioning of the system. The pressure is checked at the base of the vessel and the bleed valve may be bled or topped up with a pump. Filling the Loop It is important that a motorised flush and fill centre is used to fill and pressurise the system with solar fluid as follows: • Open the fill and drain valves to allow the liquid to circulate around the solar loop • Close the isolating valve above to the flow meter to ensure all air and liquid passes through the fill centre to filter any air and contaminants. • Run the fill centre pump to circulate solar fluid for approximately 60 minutes. • Open and close the isolating valve intermittently to circulate air bubbles which may accumulate in the sight glass. • Return isolating valve to closed position. -
Page 29: Setting The Flow Rate
3 seconds and the controller will enter the service menu. Press down through all options until option HND1 is visible. • Press the centre button once • SET begins to flash • When SET is flashing use the UP & DOWN arrow buttons to change the setting from AUTO to ON • Press the centre button to confirm • Pump will start to run and warning lights will flash to alert you to the fact that the pump is running continuously. • When finished carry out the above steps and change ON back to AUTO NAVITAS installation manual... -
Page 30: Servicing And Maintenance
Servicing and Maintenance Users should regularly check the temperatures which the solar control panel is re- cording. With the SC range of controllers, simply pressing the ‘SET’ button on the fascia once will display the upper and lower collector temperatures since the control panel was last reset. - Page 31 Upon Year 1 Year 2 Year 3 Year 4 Year 5 Year 6 Year 7 comissioning Date of inspection Expansion vessel setting before filling System pressure Expansion vessel setting before filling Flow rate Antifreeze level pH reading Inspection of barium get- ter on tubes Engineer details Print name Sign Telephone No. NAVITAS installation manual...
- Page 32 JOULE IE Kylemore Park West, Ballyfermot, Dublin 10 +353 1 6237080 +353 1 6269337 info@joule.ie www.joulesolutions.ie JOULE UK Newport Business Park, Newbridge Road, Ellesmere Port, Cheshire, CH65 4LZ t +44 (0) 1513 551 094 +44 (0) 1513 568 336 info@jouleuk.co.uk www.jouleuk.co.uk JOULE PL 23-200 Kraśnik, ul. Towarowa 34. biuro@joule-pl.pl www.joule-pl.pl...
Need help?
Do you have a question about the NAVITAS and is the answer not in the manual?
Questions and answers