Advertisement
Available languages
Available languages
Advertisement

Subscribe to Our Youtube Channel
Related Manuals for Bushnell Trophy Cam HD 119676


Summary of Contents for Bushnell Trophy Cam HD 119676
- Page 1 I N S T R U C T I O N M A N U A L VIDEO Model#s: 119676 / 119677 / 119678 03-14...
- Page 2 Besuchen Sie noch heute die deutsche Trophy Cam HD Community Internetseite, dort: • Finden Sie weitere Informationen zu den Funktionen und Anwendungen der Bushnell Trophy Cam HDs • Können Sie mit anderen Nutzern der TrophyCam Ihre Erfahrungen austauschen und Tipps von Anwendern aus der ganzen Welt erhalten •...
-
Page 3: Table Of Contents
Visit the Trophy Cam HD community website for your country today, where you can: • See more information about the capabilities and applications of the Bushnell Trophy Cam • Discuss your Trophy Cam HD experiences with other users, share tips, belong to this new worldwide community •... -
Page 4: English
IMPORTANT NOTE Congratulations on your purchase of one of the best trail cameras on the market! Bushnell is very proud of this little unit and we are sure you will be pleased with it as well. We appreciate your business and want to earn your trust. Please refer to the notes below and the instructions in this manual to ensure that you are completely satisfied with this product. - Page 5 The Trophy Cam HD HD is designed for outdoor use and is resistant against water and snow. Your trail camera is one of the latest generation of Bushnell Trophy Cam HD HDs, and includes many new or improved features, including: •...
- Page 6 Especially useful for those who setup multiple Trophy Cam HDs to monitor large or widely separated areas. • Multi Flash Mode (LED Control)- prevents overexposed flash photos in close range applications • Hybrid Capture Mode-allows both still photos and videos to be captured at each trigger, up to highest resolution settings for each.
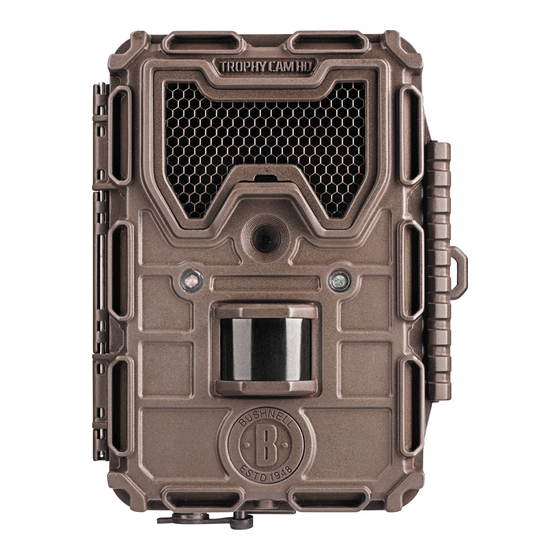
- Page 7 Video Mic LED IR Lens Flash Motion/ Low Battery Indicator Light DC in Sensor Lock Cover Plug Tripod Socket Hole Fig. 1: Connections Latch Sensor Video Mic USB Port FRONT VIEW DC In SD Card Slot INSIDE VIEW Cable to Battery Compartment LCD Screen UP/Video...
- Page 8 (negative or “flat” end against the long spring of each battery slot). Bushnell recommends using a full set of new lithium AA (Energizer brand) or alkaline AA batteries. NiMh ®...
- Page 9 Inserting the SD Card The Trophy Cam HD has 32MB of internal memory, which can hold only about 20 photos (@ 5MP resolution). This is handy for testing and getting familiar with the camera, but you will no doubt want to leave the camera unattended for longer than a day, so using an SD card is recommended for all models.
- Page 10 USING THE Trophy Cam HD Once you’ve prepared your Trophy Cam HD by properly installing batteries and an SD card, you could simply take it outside, strap it to a tree, switch it on and leave-and you might get some great photos that are exactly what you wanted.
- Page 11 when it is triggered by the PIR sensor’s detection of activity in the area it covers. You can either move the power switch directly from OFF to ON mode, or stop at the SETUP position first to change one or more settings, then move the switch to ON after you have finished doing so.
- Page 12 Fig. 3: SETUP Information Screen Camera (Still Photo) Mode SD Card Status Image Size (Resolution) Still Photo Mode Battery Level Date:Month-Day- Y ear Time Stamp Time Field Scan On Hour:Minute:Second # of Photos Taken Remaining Photo Capacity Video Mode Video Resolution Video Sound On Video Mode Available Video Recording Time...
- Page 13 USING THE SETUP MENU TO CHANGE SETTINGS The main purpose of the SETUP mode is to allow you to change the settings of the camera’s parameters (19 different ones are available!) so your Trophy Cam HD operates exactly the way you want it to. You will do this by entering the SETUP Menu and pressing the keys below the LCD display, which will show you each parameter and its setting.
- Page 14 Fig. 4: Selecting Parameter Settings Press MENU (4a) Press DOWN (4b) Press OK...
- Page 15 EXAMPLES-Changing the Settings of Some Common Parameters Following this page, you will find tables listing all of the parameters found in the SETUP Menu, along with their possible settings (or range of settings), and a detailed description of what the parameter controls and what the settings do.
- Page 16 Field Scan 2x with Live Trigger Feature Field Scan is a revolutionary new feature for the Bushnell Trophy Cam HD, which allows you to monitor your food plots or field edges with time lapse images or video. When set to “On”, the Trophy Cam HD will take a photo...
- Page 17 5. After you finish setting the Stop minutes, press OK to confirm your settings for the first block of Field Scan recording. If desired, you can create a second block of time by pressing the DOWN key to select "B" (Step 4), then press OK and follow the same process to set Start and Stop times for Field Scan block "B"...
- Page 18 7:00 PM. No Field Scan recording would occur from 8AM to 5:30PM, or from 7PM to 6AM. Remember, Field Scan recording is independent of normal triggers due to animal activity–even if no animals enter the IR sensor coverage zone, an image or video will still be captured every 15 minutes during the block(s) of time.
- Page 19 The SETUP Menu – Parameters and Settings List w/Descriptions Parameter Description Settings (Bold=default) Mode Camera, Video, Selects whether still photos or video Hybrid clips are captured when the camera is triggered. Hybrid mode combines both Camera and Video, so a still photo and a video clip are both captured for each trigger.
- Page 20 Parameter Description Settings (Bold=default) Low, Medium, Controls how many LED lamps fire LED Control (Multi-Flash when images are taken in low light. High feature) “High”=all 33 LEDs fire, which is the default setting. Set to Medium or Low if you are getting overexposed flash photos or will place the camera at very close range to the subject you want to photograph.
- Page 21 Parameter Description Settings (Bold=default) Sets length per captured video Video Length 10S (second) (only affects clip. Settings begin with 10 second default, with 60S video clips in default when parameter is first to 5S possible Video or Hybrid selected. After stepping down to range modes) 5S, video length settings start over...
- Page 22 Parameter Description Settings (Bold=default) Low, Normal, Selects the sensitivity of the PIR Sensor Level High, Auto sensor. The “High” setting will make the camera more sensitive to infrared (heat) and more easily triggered by motion, and the “Low” setting makes it less sensitive to heat and motion.
- Page 23 Parameter Description Settings (Bold=default) Execute (followed Deletes (erases) all files stored Format by an additional on a card to prepare it for reuse. No/Yes step) Always format a card that has been previously used in other devices. Caution! Make sure you have downloaded and backed up any files you want to preserve first! Press OK to execute, press MENU...
- Page 24 Parameter Description Settings (Bold=default) On, Off Turns Field Scan (Time Lapse) Field Scan (After On is recording mode on/off. When selected): “A” activated, Field Scan forces the Start/Stop, “B” camera to take photos or videos Start/Stop, even when it is not triggered by a Interval nearby live animal, useful for constant monitoring of an area that might be...
- Page 25 Parameter Description Settings (Bold=default) On, Off Select “On” to record audio along Video Sound (only affects with the video when the camera is video clips in set to video mode (saved file sizes Video or Hybrid will be slightly larger). modes) Default Set Cancel,...
- Page 26 USING THE SETUP MENU INPUT SCREENS Camera Name Input After selecting the Camera Name parameter (the only setting is "Input"), press OK. If necessary, delete the previous or default name by pressing the RIGHT key until the backspace symbol ( ) (located between letters "A"...
-
Page 27: Mounting
MOUNTING and POSITIONING the TROPHY CAM HD Mounting After you’ve set up the camera’s parameters to your personal preferences at home or in your truck, you’re ready to take it outside and slide the power switch to “ON”. When setting up the Trophy Cam HD for scouting game or other outdoor applications, you must be sure to mount it in place correctly and securely. -
Page 28: Sensing Angle And Distance Test
(#119657C for 119676/119677, #119658C for 119678) and Deluxe Tree Bracket (# 119652C fits all 3 camera models) are also available-please see your Bushnell dealer or website for more details. Note: an accessory solar panel (#119656C) supplemental power source is also available - please visit www.bushnell.com for more information. - Page 29 farther the possible sensing distance. The average sensing distance is about 45 ft. Before leaving the camera unattended, please check for the following: • Are the batteries or DC power supply inserted/connected with correct polarity and is the power level is sufficient? •...
- Page 30 Reviewing Images by Connecting the Camera to a Computer You can always unmount the entire camera from the tree and connect its USB port to a computer-it will be recognized as a “removable disk”, without the need to install any drivers or software. When using a PC (or Mac*) to view photos (or video clips*), first connect the device to the computer with the supplied USB cable.
- Page 31 DOWNLOADING THE PHOTOS/VIDEOS To download your photos/videos to a PC or Mac*, first make sure the Trophy Cam HD power switch is in the OFF position. Connect the supplied cable to the camera’s USB port, then directly to a main USB port on your computer- do not use front panel/keyboard USB ports or unpowered “hubs”.
- Page 32 Typically, the Trophy Cam HD will be able to capture several thousand images before the batteries die. 2. Check to make sure you have used new alkaline or lithium batteries. Bushnell recommends using a full set of Energizer Lithium ®...
- Page 33 #) in the battery compartment, starting at the top, filling battery spaces 1-4 with no “gaps”. Bushnell recommends using a full set of 8 or 12 Energizer ® Lithium AA batteries in your Trophy Cam HD (the max. capacity for your model).
- Page 34 If this is seen on a consistent basis, then the sensor may need servicing. Please contact Bushnell customer service. 7. Short video clips—not recording to the length set a. Check to make sure that the SD card is not full.
- Page 35 b. Make sure that the camera has good batteries in it. Near the end of the battery life, the camera may choose to record shorter video clips to conserve power. Date/Time Stamp not appearing on images Make sure that the “Time Stamp” parameter is set to “On”. Photos Do Not Capture Subject of Interest 1.
- Page 36 3. Screen comes on but then powers off Make sure that you have installed the SD card correctly. Camera won’t retain settings Make sure that you have been saving the changes to any parameter settings that you made while in Setup mode, by pressing “OK” after changing the setting.
- Page 37 TECHNICAL SPECIFICATIONS 3264x2448 (8MP) Maximum Pixel Size Lens F = 3.1; FOV=45°; Auto IR-Cut-Remove (at night) IR-Flash Range Selectable (Low/Med/High), up to 60’(19m) on High Display Screen Monochrome Display: 24x32mm(1.5”) Memory Card SD or SDHC Card, Maximum capacity 32GB Internal RAM 32MB 8MP = 3264x2448;...
- Page 38 ONE YEAR LIMITED WARRANTY Your Bushnell® product is warranted to be free of defects in materials and workmanship for one year after the date of purchase. In the event of a defect under this warranty, we will, at our option, repair or replace the product, provided that you return the product postage prepaid.
- Page 39 The device does not contain any user-serviceable parts. Repairs should only be made by an Authorized Bushnell repair center. Unauthorized repairs or modifications could result in permanent damage to the equipment, and will void your warranty and your authority to operate this device under Part 15 regulations.
-
Page 40: Français
N O T I C E D ’ U T I L I S A T I O N FrANçAIS www.trophycam.fr VIDEO Nos de modèle: 119676 / 119677 / 119678 03-14... - Page 41 IMPOrTANTES Nous vous remercions pour votre achat de l’un des meilleurs appareils photos de surveillance sur le marché ! Bushnell est extrêmement fier de ce concentré de technologie et nous sommes certains qu’il vous satisfera également. Nous vous sommes très reconnaissants de votre choix et désirons gagner votre confiance.
- Page 42 INTRODUCTION À propos du Trophy Cam HD Le Trophy Cam HD de Bushnell est un appareil photo de surveillance numérique. Il peut être déclenché par tout mouvement d'un animal ou d'un individu dans un endroit donné – repéré par un détecteur de mouvement ultra sensible à...
- Page 43 • Fonction de géomarquage GPS :elle permet à l'utilisateur de saisir la latitude et la longitude de l'emplacement du Trophy Cam HD, qui seront ensuite intégrées à chaque fichier photo. Ce système permet à Google Earth, Picassa et à d'autres logiciels compatibles avec le géomarquage d'afficher automatiquement une carte indiquant les lieux / sites des prises de vue lors de leur visionnage sur un ordinateur.
- Page 44 FACE INTERNE Câble de raccord au compartiment à piles Écran LCD HAUT/Vidéo BAS/Photo GAUCHE MENU OK/Lecture (REPLAY) MARCHE Marche (ON)/ CONFIGURATION DROITE/Déclencheur Configuration ARRÊT Manuel (SHOT) (SETUP)/ Arrêt (OFF) Fig. 2: Commutateur d’alimentation et interface de contrôle à six touches •...
- Page 45 Un commutateur d’alimentation à trois positions sert à sélectionner les modes d’opération principaux: OFF (ARRÊT), SETUP (CONFIGURATION), et ON (MARCHE) (Fig. 2). L’interface de contrôle à six touches sert principalement en mode SETUP (CONFIGURATION), pour sélectionner les fonctions et paramètres opérationnels.
- Page 46 (pôle négatif ou « plat » en contact avec le long ressort de chaque emplacement). Bushnell recommande d'utiliser un jeu complet de piles AA au lithium neuves (de la marque Energizer ) ou des piles AA alcalines. Nous recommandons ®...
- Page 47 Insertion de la carte SD Les Trophy Cam HDs ont une mémoire interne de 32 Mo, ce qui correspond à 20 photos environ (à une résolution de 5MP). Ceci est pratique pour faire des essais et pour se familiariser avec l’appareil, mais vous voudrez sans doute laisser celui-ci seul pendant plusieurs jours, par conséquent l’emploi d’une carte SD est recommandé.
- Page 48 UTILISATION DU Trophy Cam HD Une fois que vous avez préparé votre Trophy Cam HD en installant correctement les piles et une carte SD, vous pouvez simplement sortir, l’attacher à un arbre, l’allumer et vous en allez - et il se peut que vous obteniez des photos superbes qui correspondent exactement à...
- Page 49 Fig. 3 : Écran d’information du mode CONFIGURATION (SETUP) Mode vidéo Mode appareil photo (photos) Son vidéo activé Résolution Statut de la carte SD Mode Photo Mode vidéo Résolution vidéo Niveau de charge des piles Date: Mois-Jour- Impression de Année la date et de l’heure sur les Affichage de...
- Page 50 photos, etc. Le fait de déplacer le commutateur d’alimentation en position CONFIGURATION (SETUP) allumera l’écran LCD, et vous pourrez voir un écran d’information qui vous montrera combien de photos ont été prises, le niveau de charge des piles, si l’appareil est en mode photo ou vidéo, etc. (voir Fig.
- Page 51 Utilisation du Menu CONFIGURATION (SETUP) pour changer les réglages Le but principal du mode CONFIGURATION (SETUP) est de vous permettre de changer les réglages des paramètres de l’appareil (jusqu'à 19 configurations différentes !) pour que votre Trophy Cam HD fonctionne exactement comme vous le désirez.
- Page 52 Fig. 4: Sélection des réglages des paramètres Appuyez sur MENU (4a) Appuyez sur BAS (4b) Appuyez sur OK Affichage du réglage des paramètres Le réglage de chaque paramètre est affiché sur l'écran de votre Trophy Cam HD. Un seul réglage s'affiche à la fois, à commencer par le réglage en cours d'utilisation pour le paramètre qui vient d'être sélectionné...
- Page 53 réglages possibles (ou plage de réglages), une description détaillée de ce que contrôle le paramètre et le but des réglages. Si vous avez lu la section précédente détaillant comment sélectionner les paramètres et changer leurs réglages, vous devriez être en mesure de trouver le(s) paramètre(s) que vous désirez, et régler l’appareil selon vos préférences.
- Page 54 Le Field Scan - ou balayage de champ - est une fonctionnalité des Trophy Cam HDs Bushnell qui vous permet de surveiller des zones plus vastes, comme un champ ou une grande clairière, au moyen de photographies ou de vidéos prises à...
- Page 55 Quand vous avez réglé les minutes de l'heure d'arrêt, appuyez sur OK pour confirmer le réglage de la première période d'enregistrement du balayage de champ. Si vous le souhaitez, vous pouvez créer une seconde période d'enregistrement en appuyant sur le bouton BAS pour sélectionner "B" (Etape 4), puis appuyez sur OK et suivez le même procédé...
- Page 56 balayage de champ entre 8h et 17h30 et entre 19h et 6h. Rappelez-vous que ceci est indépendant des déclenchements normaux dus à l'activité détectée à proximité de l'appareil - même si aucun animal (ou humain) ne pénètre dans la zone de couverture du détecteur à infrarouge, une image sera prise, ou une vidéo enregistrée, toutes les 15 minutes pendant la/les période(s) de temps déterminée(s).
- Page 57 Liste des paramètres et réglages du Menu CONFIGURATION (SETUP) avec descriptions Paramètre Description Réglages (Gras=défaut) Mode Camera Sélectionnez au choix la prise de (photos) photos, de vidéos ou les deux lorsque Video, ou l’appareil se déclenche. Le mode de saisie hybride combine la fonction Hybrid (Saisie photo avec la fonction vidéo.
- Page 58 Paramètre Description Réglages (Gras=défaut) Capture Sélectionne combien de photos 1 Photo, Number sont prises en rafale à chaque 2 Photo, (Nombre de déclenchement en mode Appareil 3 Photo Photos) photo. Ce réglage concerne également (affecte les photos prises en mode Field Scan uniquement (pour prendre deux photos toutes les les photos...
- Page 59 Paramètre Description Réglages (Gras=défaut) Camera Permet à l'utilisateur de personnaliser (Saisie) Name (Nom le nom de l'appareil. Très utile pour Voir de l'appareil) l'identifier quand de multiples appareils UTILISATION sont installés puisque chacun d'entre eux marque son nom sur toutes les ECRANS DE SAISIE photos (mais pas sur les vidéos) qu'il...
- Page 60 Paramètre Description Réglages (Gras=défaut) Interval Sélectionne la durée pendant 10S (seconde) (Intervalle) laquelle l’appareil « attendra » avant par défaut, de répondre à des déclenchements avec une plage supplémentaires du capteur infrarouge de réglage passif après qu’un mouvement ait disponible été...
- Page 61 Paramètre Description Réglages (Gras=défaut) Sensor Level Low (faible), Sélectionne la sensibilité du capteur (Sensibilité Normal, High infrarouge passif. Le réglage « High (élevée), Auto du Capteur » rendra l’appareil plus sensible (automatique) infrarouge) aux infrarouges (chaleur) et il sera plus facilement déclenché par les mouvements, et le réglage «...
- Page 62 Paramètre Description Réglages (Gras=défaut) Camera Permet à l'utilisateur de limiter 24 Hrs (24 Mode (Mode le fonctionnement de l'appareil h), Day (Jour), appareil uniquement pendant le jour ou la nuit, Night (Nuit) photo) si nécessaire. Le niveau de lumière ambiante que perçoit le capteur de l'appareil détermine automatiquement s'il fait jour ou nuit.
- Page 63 Paramètre Description Réglages (Gras=défaut) Set Clock Set (régler) Appuyez sur OK et utilisez les (Réglage touches HAUT/BAS (pour changer Horloge) le réglage) et les touches GAUCHE/ DROITE (pour passer au champ suivant) pour régler les heures (format 24h uniquement, « 00 »=minuit, «...
- Page 64 Paramètre Description Réglages (Gras=défaut) Field Scan Active/Désactive le mode Field Scan. On, Off Si vous appuyez sur OK alors que « (Après avoir On » est sélectionné, vous arriverez sélectionné à l'écran de configuration mode On) : "A" Field Scan ; vous pourrez y régler les Démarrage/ horaires de démarrage et d’arrêt en Arrêt, "B"...
- Page 65 Paramètre Description Réglages (Gras=défaut) Coordinate Off, On Permet à l'utilisateur de saisir Input (désactivé, les coordonnées de latitude et de longitude correspondant à activé) l'emplacement de l'appareil. Ces Voir données seront intégrées aux fichiers UTILISATION enregistrés sur la carte SD de DES ECRANS l'appareil (si "On"...
- Page 66 UTILISATION DES ECRANS DE SAISIE DU MENU SETUP Saisie du nom de l'appareil Après avoir sélectionné le paramètre "Camera Name" (nom de la caméra, le seul réglage possible est "Input"), appuyez sur OK. Si nécessaire, effacez le nom précédent ou par défaut en appuyant sur le bouton DROITE jusqu'à ce que le symbole "effacer"...
- Page 67 MONTAGE ET POSITIONNEMENT DU Trophy Cam HD Montage Après avoir configuré les paramètres selon vos préférences, vous êtes prêt à mettre le commutateur sur la position "ON" (marche) et à installer le Trophy Cam HD sur le terrain. Lorsque vous configurez le Trophy Cam HD pour détecter le gibier ou pour toute autre application en extérieur, vous devez veiller à...
- Page 68 119676/119677, n°119658C pour 119678) et un support de montage sur arbre Deluxe (n°119652C adaptable sur les 3 modèles d'appareil) sont également disponibles. Veuillez consulter votre revendeur Bushnell ou notre site Internet pour plus de renseignements. Remarque : une source d'alimentation supplémentaire sous forme de panneau solaire (n°119656C) est également disponible.
- Page 69 secondes. Cela vous laissera assez de temps pour fermer et verrouiller le couvercle avant du Trophy Cam HD et sortir de la zone. Pendant ce temps, le voyant LED de l’indicateur de mouvements clignotera en rouge de manière continue. Après qu’il se soit arrêté de clignoter, l’infrarouge passif sera activé, et tout mouvement qu’il détectera déclenchera la prise de photos ou de vidéos selon la programmation faite dans le menu CONFIGURATION (SETUP).
- Page 70 VISIONNER/EFFACER LES PHOTOS/VIDÉOS Après avoir configuré, monté et activé votre Trophy Cam HD, vous aurez bien sûr hâte de revenir plus tard et regarder les photos (ou les vidéos) qu’il aura prises pour vous. Il y a plusieurs manières différentes de visionner les photos/vidéos prises.
- Page 71 Le Trophy Cam HD supporte 3 types de formats de système de fichiers, FAT12, FAT16 et FAT32. La valeur par défaut est FAT16 pour sauvegarder les photos et les vidéos. Voici quelques remarques à ce sujet: • Vous n’avez pas besoin de vous préoccupez du format du système de fichiers du Trophy Cam HD à...
- Page 72 Avec Windows XP ou plus récent, vous n’avez qu’à faire votre choix dans la fenêtre qui apparaîtra au moment du branchement du Trophy Cam HD à un port USB de votre ordinateur. Vous pourrez ainsi copier, visionner ou imprimer vos photos (voir capture d’écran ci-contre). Le Trophy Cam HD sera reconnu comme un «...
- Page 73 2. Vérifiez que vous avez utilisé des piles alcalines ou au lithium neuves. Bushnell vous recommande d'utiliser un jeu complet de piles AA au lithium Energizer® avec votre modèle Trophy Cam HD pour bénéficier d'une autonomie maximale.
- Page 74 à piles, en commençant par le haut et en remplissant les emplacements 1-4 sans laisser d’« espaces ». Bushnell vous recommande d'utiliser un jeu complet de 8 ou 12 piles AA au lithium Energizer® avec votre Trophy Cam HD (la capacité...
- Page 75 3. Après avoir changé le commutateur de la position « OFF » (Arrêt) à la position « SETUP » (Configuration) ou « ON » (Marche), veillez à ce qu’il soit en bonne position pour activer le mode qui convient (évitez les positions intermédiaires (commutateur placé...
- Page 76 Si cela se produit régulièrement, il se peut que le détecteur soit défectueux. Dans ce cas, veuillez contacter votre revendeur Bushnell. 7. Séquences vidéos courtes–n’enregistre pas pendant la durée fixée a. Vérifiez que la carte SD n’est pas pleine.
- Page 77 Les photos prises ne contiennent pas de sujet 1. Par temps chaud, réglez le niveau de sensibilité du capteur (Sensor Level) sur "High" (haut) et par temps froid, sur "Low" (faible). Quand le temps est variable, utilisez le réglage "Auto". 5.
- Page 78 3. L’écran s’allume mais s’éteint aussitôt Assurez-vous d’avoir inséré correctement la carte SD. L’appareil ne garde pas les réglages en mémoire Assurez-vous d’avoir sauvegardé tous les réglages que vous avez faits en mode SETUP (CONFIGURATION), en appuyant sur « OK » après avoir effectué...
- Page 79 CARACTÉRISTIQUES TECHNIQUES Résolution Maximale 3264x2448 (8 MP) Focale = 3,1 ; Champ de Vision = 42 ° ; Infrarouge à Objectif activation automatique Sélectionnable par l'utilisateur (High/Med/Low, c.-à-d. Portée du flash Élevé/Normal/Faible), jusqu'à 19 m si le paramétrage infrarouge est réglé sur « High » (Élevé). Écran d’affichage Affichage noir et blanc : 24x32 mm(1.5 pouces) Carte mémoire...
- Page 80 Vaughan, Ontario L4K 5W5 Pour les produits achetés hors des États-Unis ou du Canada veuillez contacter votre reven- deur local pour les informations applicables de la garantie. En Europe vous pouvez également contacter Bushnell à: Bushnell Germany GmbH European Service Centre Mathias-Brüggen-Str.
- Page 81 Traitement des déchets d’équipements électriques et électroniques (En vigueur dans l’Union européenne et autres pays européens ayant des systèmes de collecte des déchets séparés) Cet équipement contient des composants électriques et/ou électroniques et par conséquent ne doit pas être éliminé en fin de vie avec les autres déchets ménagers.
-
Page 82: Español
M A N U A L D E I N S T R U C C I O N E S ESPAñOL www.trophycam.es VIDEO Modelo: 119676 / 119677 / 119678 03-14... - Page 83 Servicio Atención al Cliente de Bushnell. Bushnell recomienda la utilización de un juego de pilas de litio AA Energizer® (8 o 12, en función del modelo) en estos modelos Trophy Cam HD para obtener la máxima duración de estas.
- Page 84 La Trophy Cam HD se ha diseñado para utilizarla en exteriores y resiste el agua y la nieve. Su cámara de trampeo es una de las Trophy Cam HDs de Bushnell de última generación, e incorpora muchas funciones nuevas o mejoradas, incluidas las siguientes: •...
- Page 85 de inicio/parada. Las señales de disparo generadas por la actividad salvaje cercana continuarán generando fotografías y vídeos como lo harían normalmente, con independencia del funcionamiento de Barrido de campo (Field Scan). • GPS Geotag Capability(Función de geoetiquetado GPS): Permite al usuario introducir la longitud y latitud de la posición de la cámara, que se insertarán en cada archivo de imagen.
- Page 86 VISTA INTERIOR Cable hacia el compar- timiento de las pilas Pantalla LCD ARRIBA/Vídeo ABAJO/Foto IZQUIERDA MENÚ ACEPTAR/Reproducción (Replay) ACTIVADO Interruptor de DERECHA/Disparo (SHOT) encendido/ CONFIGURACIÓN modo DESACTIVADO Fig. 2: Guía de botones e interruptores • Multi Flash Mode (LED Control)(Modo de flash múltiple con control LED): Evita las imágenes con flash sobreexpuestas en aplicaciones de corto alcance.
- Page 87 Aplicaciones La Trophy Cam HD puede usarse como cámara de rastreo para cazar o localizar piezas. Resulta poco adecuada para aplicaciones de vigilancia. PIEZAS Y CONTROLES La Trophy Cam HD incorpora las siguientes conexiones para dispositivos externos: puerto USB, ranura para tarjetas SD y entrada para alimentación CC externa (pág 85, Fig.
- Page 88 6 V CC al conector “DC In” de la parte inferior de la Trophy Cam HD. También está disponible un panel solar adicional (ref. 119656C-visite www. bushnell.com para obtener más información). Si se conecta una fuente de alimentación externa y se colocan pilas, la Trophy Cam HD se alimentará de la fuente de alimentación externa siempre que ofrezca una tensión adecuada...
- Page 89 Insertar una tarjeta SD La Trophy Cam HD cuenta con 32 MB de memoria interna, que pueden albergar únicamente unas 20 fotografías (con una resolución de 5 Mpx). Esto resulta práctico para probar la cámara y familiarizarse con ella, pero sin duda usted deseará...
- Page 90 • Para quitar tarjeta presione suavemente la tarjeta (no intente tirar de ella si presionarla antes). La tarjeta se suelta de la ranura y queda lista para quitarla cuando se oye un chasquido. UTILIZACIÓN DE LA Trophy Cam HD Después de preparar la Trophy Cam HD instalando correctamente las pilas y la tarjeta SD, basta con llevarla al exterior, sujetarla a un árbol, encenderla y dejarla, y así...
- Page 91 Fig. 3: Información en la pantalla de CONFIGURACIÓN Info tarjeta SD Tamaño de imagen Modo de vídeo Sonido del vídeo Resolución de activado Video Modo Nivel de Batería cámara Impresión Fecha Tiempo Hora Nº de imágenes Espacio Disponible Disponible vídeo tiempo de grabación Modo de cámara (foto estática) Modo de vídeo OFF Modo APAGADO...
- Page 92 Puede mover el interruptor de encendido directamente de OFF a ON o detenerlo antes en la posición SETUP para cambiar uno o más ajustes y pasar después a ON al terminar de hacerlo. SETUP CONFIGURACIÓN En modo CONFIGURACIÓN puede comprobar y cambiar los ajustes de la Trophy Cam HD con ayuda de la LCD integrada.
- Page 93 indica “SD PROTEGIDA”, apague la cámara, retire la tarjeta SD y deslice su interruptor de protección para desactivarlo. Utilización del menú CONFIGURACIÓN para cambiar ajustes El fin principal del modo CONFIGURACIÓN (SETUP) es permitirle modificar las configuraciones de los parámetros de la cámara (hay 19 diferentes) de manera que su Trophy Cam HD funcione exactamente como usted quiere.
- Page 94 Pantalla de configuración de parámetros Los ajustes para todos los parámetros aparecen en la pantalla de la Trophy Cam HD. Solo se muestra un ajuste cada vez, empezando por el ajuste actual para el parámetro cuando se selecciona por primera vez (Fig. 4a). Para cambiar el ajuste, utilice las teclas ARRIBA/ABAJO para visualizar el nuevo ajuste que desea (Fig.
- Page 95 Fig. 4: Selección de ajustes de parámetro Pulse MENÚ (4a) Pulse ABAJO (4b) Pulse OK por el conjunto de configuraciones; a continuación, pulse Aceptar (OK) con el fin de establecer la configuración para el número de fotografías que la cámara toma cada vez que se dispara. Presione la tecla DERECHA (RIGHT) hasta que alcance el último elemento del menú;...
- Page 96 Barrido de campo 2x con función de disparo directo El Barrido de Campo es una nueva función de la Bushnell Trophy Cam HD, que le permite monitorear sus parcelas de alimentación y los bordes del campo con imágenes o videos campturados por lapsos de tiempo.
- Page 97 pantalla para configurar las horas de inicio (Start) y finalización (Stop), que determinan las horas a las que comenzará y finalizará la grabación del primer bloque de Barrido de campo (Field Scan) cada día. Puede configurarlas con la hora y minuto exactos que desea, para obtener una "ventana"...
- Page 98 ). La configuración "Intervalo" (Interval) de Barrido de campo Paso 6 (Field Scan) le permite controlar la frecuencia con que se toman fotografías o se graba vídeo durante el bloque o bloques temporales que defina con las configuraciones de inicio (Start) y finalización (Stop).
- Page 99 de nuevo una imagen o vídeo una vez cada 15 minutos entre las 6.00 a. m. y las 8.00 a. m., así como entre las 5.30 p. m. y las 7.00 p. m. No tendrán lugar grabaciones de Barrido de campo (Field Scan) entre las 8.00 a. m. y las 5.30 p.
- Page 100 (Paso 1)-establezca el - establezca (Paso 3)-establezca el inicio (Paso 2) modo de Barrido de (Start) y la finalización el Barrido de campo campo (Field Scan) (Stop) del Barrido de (Field Scan) "A" como "Activado" (On) campo (Field Scan) "A" [pulse Aceptar (OK)] (Paso 5)-establezca el inicio (Paso 4)-)(opcional):...
- Page 101 Menú CONFIGURACIÓN (Setup) – Parámetros y Ajustes Parámetro Descripción Ajustes (Negrilla = predeterminado) Selecciona si se realizarán fotos Modo Cámara, Vídeo o fijas o vídeos cuando se active la Híbrido cámara. El modo Híbrido combina tanto cámara como vídeo, de modo que se realizan fotos fijas y vídeos para cada disparo.
- Page 102 Parámetro Descripción Ajustes (Negrilla = predeterminado) Selecciona cuantas fotos se toman Capture 1 Foto, en secuencia por tirada en modo Number/ 2 Foto, cámara. Esta configuración afecta Numero de 3 Foto también a las fotografías tomadas captura (sólo afecta a en modo Barrido de campo (Field las fotos fijas Scan) (para hacer dos fotografías...
- Page 103 Parámetro Descripción Ajustes (Negrilla = predeterminado) Nombre de [Entrada (Input)] Permite al usuario establecer un nombre personalizado para la cámara Consulte la cámara. Es útil para fines (Camera "Utilización de de identificación cuando se Name) las pantallas de configuran varias cámaras, puesto introducción que cada cámara imprimirá...
- Page 104 Parámetro Descripción Ajustes (Negrilla = predeterminado) Intervalo Selecciona el tiempo que la 10s (segundos) cámara “esperará” hasta volver a predeterminado, responder a una activación del PIR con una gama después de detectar un animal y disponible entre permanecer dentro del alcance 1S (segundo) y del sensor.
- Page 105 Parámetro Descripción Ajustes (Negrilla = predeterminado) Sensor Bajo (Low), Selecciona la sensibilidad del Normal, Alto sensor PIR. La configuración "Alta" Level / Nivel (High) y (High) hará que la cámara sea más del sensor sensible a los infrarrojos (calor) Automática y se dispare más fácilmente con (Auto) el movimiento;...
- Page 106 Parámetro Descripción Ajustes (Negrilla = predeterminado) Alto (High), Medio Afecta a la velocidad del obturador Obturador (Medium), Bajo durante el funcionamiento de de Visión la visión nocturna. El valor Alto nocturna (Low) (NV Shutter) congelará mejor el movimiento pero las fotos podrían ser más oscuras.
- Page 107 Parámetro Descripción Ajustes (Negrilla = predeterminado) Selecciona “On” si quieres la Time Stamp Desactivada, fecha y hora; hora (a la que la foto / Marca de Activada (Off / fue tomada) marcada en cada la hora (sólo afecta a foto o vídeo, selecciona “off” en las fotos) el caso que no quieras marcarla.
- Page 108 Parámetro Descripción Ajustes (Negrilla = predeterminado) Field Scan Activa el modo de grabación Field On, Off Scan (Lapso de tiempo) on/off. [Después Cuando esta activado, Field Scan de haber hace que la cámara tome imagines seleccionado o videos aun cuando no detecta Activado (On)]: movimiento, muy útil para una Inicio/Finalización...
- Page 109 Parámetro Descripción Ajustes (Negrilla = predeterminado) Coordinar Permite al usuario introducir Desactivada entrada las coordenadas de longitud y (Off), Activada (Coordinate latitud para la ubicación de la (On) Input) cámara. Este dato se insertará en los archivos que se guarden Consulte en la tarjeta SD de la cámara "Utilización de...
- Page 110 UTILIZACIÓN DE LAS PANTALLAS DE INTRODUCCIÓN DEL MENÚ CONFIGURACIÓN (SETUP) Introducción del nombre de la cámara Tras seleccionar el parámetro Nombre de la cámara (Camera Name) [la única configuración es "Entrada" ("Input")], pulse Aceptar (OK). Si es necesario, borre el nombre anterior o predeterminado pulsando la tecla DERECHA (RIGHT) hasta que el símbolo de retroceso ( ) (situado entre las letras "A"...
- Page 111 MONTAJE Y COLOCACIÓN DE LA Trophy Cam HD Montaje Después de configurar los parámetros de la cámara según sus preferencias personales, en casa o en el coche, ya está listo para salir al exterior y poner el interruptor de encendido en “ON”. Al configurar la Trophy Cam HD para rastrear piezas de caza u otras aplicaciones de exteriores, debe asegurarse de montarla en su lugar de forma correcta y segura.
- Page 112 Puede encontrar información al respecto en su distribuidor Bushnell o en la página web. Nota: También está disponible un panel solar adicional como fuente de alimentación complementaria (ref. 119656C). Visite www.bushnell.com para obtener más información. Ensayo de ángulo y distancia Para comprobar si la Trophy Cam HD puede observar eficazmente el área...
- Page 113 Encendido (ON) de la cámara Cuando conmute al modo encendido (ON), el LED indicador de movimiento (rojo) destellará unos 10 segundos. Esto le da tiempo para cerrar y bloquear la tapa delantera de la Trophy Cam HD y después alejarse. Durante este período el LED indicador de movimiento destellará...
- Page 114 REPRODUCCIÓN/SUPRESIÓN DE FOTOS/ VÍDEOS Después de configuración, montar y activar la Trophy Cam HD se supone que deseará volver más tarde y revisar las imágenes que ha capturado para usted. Hay varias maneras de hacerlo. Revisión de imágenes desde la tarjeta SD Este es el método más usado de ver las imágenes.
- Page 115 La Trophy Cam HD admite tres tipos de formatos de sistema: FAT12, FAT16 y FAT32. El valor determinado para guardar fotos y vídeos es FAT16. Aquí hay algunas notas al respecto: • No necesita preocuparse sobre el formato del sistema de archivos de la Trophy Cam HD excepto si su equipo tiene problemas leyendo la tarjeta SD.
- Page 116 DESCARGA DE FOTOS/VIDEOS Para descargar sus fotos/vídeos a un PC o Mac*, primero compruebe que el interruptor de encendido de la Trophy Cam HD está en la posición OFF. Conecte el cable incluido al puerto USB de la cámara y directamente a un puerto USB principal del ordenador, no utilice puertos USB de panel delantero/teclado ni concentradores (“hubs”) sin alimentación eléctrica.
- Page 117 2. Compruebe que ha utilizado baterías alcalinas o de litio nuevas. Bushnell recomienda utilizar un juego completo de pilas de litio AA Energizer en su Trophy Cam HD para obtener la máxima duración ®...
- Page 118 1-4 sin saltarse ninguno. 2. Bushnell recomienda utilizar un juego completo de 8 o 12 pilas de litio AA Energizer en su Trophy Cam HD (el máx. de capacidad ®...
- Page 119 4. Después de cambiar de “Off” o “Setup” a “On”, compruebe que el interruptor de encendido está en la posición correcta para asegurar el modo correcto (evite posiciones “entre” dos modos). 5. No mueva el interruptor directamente de “On” a “Setup”, cambie siempre primero a “Off”...
- Page 120 Si pasa con frecuentemente, el sensor puede necesitar una revisión. Por favor contacte con el Servicio de Posventa de Bushnell. 7. Videoclips cortos – no se graban hasta la duración fijada a. Compruebe que la tarjeta SD no esté llena.
- Page 121 3. En algunos casos colocar la cámara cerca del agua puede provocar que tome imágenes sin ningún sujeto en ellas. Intente apuntar la cámara sobre el suelo. 4. Intente evitar colocar la cámara en árboles pequeños, que tienden a moverse con viento fuerte. 5.
- Page 122 Humedad u hormigas dentro de la cámara 1. Para mantener la humedad y la lluvia fuera de la cámara, asegure el enchufe de entrada CC firme en su lugar. 2. Las hormigas pueden ser atraídas por la vibraciones electrónicas de bajo nivel, e ingresar a travéz de alguna apertura que conecte el exterior con el interior de la cámara.
- Page 123 ESPECIFICACIONES TÉCNICAS Tamaño máximo en 3264x2448 (8MP) píxeles Objetivo F=3.1; FOV=42°; Auto IR-Cut-Remove (para uso nocturno) Seleccionable (Bajo/Medio/Alto), hasta 60' (19 m) en el valor Alcance del flash IR Alto Pantalla de Pantalla B/N: 24x32 mm (1,5”) visualización Tarjeta SD o SDHC, Capacidad máxima 32 GB Tarjeta de memoria RAM interna 32MB...
- Page 124 Servicio Autorizado de Bushnell. Cualquier devolución hecha bajo esta garantía debe acompañarse con los siguientes artículos:...
- Page 125 Eliminación de equipos eléctricos y electrónicos (Aplicable en la UE y otros países europeos con sistemas de recogida separada) Este equipo contiene elementos eléctricos o electrónicos y por tanto no debe eliminarse con los residuos domésticos normales. En cambio, debe eliminarse en los correspondientes puntos de recogida para reciclaje previstos por las comunidades.
-
Page 126: Deutsch
G E B R A U C H S A N L E I T U N G DEuTSCH www.trophycam.de VIDEO Modellnummern: 119676 / 119677 / 119678 03-14... - Page 127 WICHTIGEr HINWEIS Wir gratulieren Ihnen zum Kauf einer der besten Wildkameras auf dem Markt! Bushnell ist auf die Entwicklung dieses Produktes sehr stolz, und wir sind sicher, dass auch Sie mit Ihrer Wahl zufrieden sein werden. Wir freuen uns über Ihren Kauf und danken Ihnen für das in uns gesetzte Vertrauen.
- Page 128 EINLEITUNG Angaben zur Trophy Cam HD Bei der Trophy Cam HD von Bushnell handelt es sich um eine digitale Wildkamera. Ausgelöst wird die Kamera durch Bewegungen des Wilds mittels einem hochempfindlichen passiven Infrarot-Bewegungssensor (PIR). Die Trophy Cam HD liefert Bilder (Standfotos bis zu 8MP) und Videos in HD-Qualität.
- Page 129 • GPS Geotag -Funktion, ermöglicht Ihnen die Eingabe des Längen- und Breitengrads der Kameraposition. Diese Angaben werden dann in jeder Fotodatei erfasst. Dies ermöglicht eine automatische Anzeige der Kameraposition in Google Earth, Picasa und anderer Geotag- fähiger Software, wenn Sie sich Fotos auf einem Computer ansehen. Diese Funktion ist besonders nützlich, wenn Sie mehrere Trophy Cam HDs betreiben, um große oder weit auseinander liegende Bereiche zu überwachen.
- Page 130 Eine Leiste mit sechs Funktionstasten wird hauptsächlich im SETUP (Einstellungs)-Modus für die Auswahl der Bedienfunktionen und -parameter verwendet. Wie in Abb. 2 dargestellt handelt es sich bei diesen Tasten um: AUFWÄRTS, ABWÄRTS, LINKS, RECHTS, OK und MENÜ. Vier der Tasten beinhalten neben ihrer eigentlichen noch eine zweite Funktion (Schnelltasten im SETUP-Modus): Die ABWÄRTS-Taste kann auch zum Einstellen der Kamera in den Foto-Modus (Standbild-Symbol) verwendet werden und mit der AUFWÄRTS-Taste lässt sich der Videomodus der...
- Page 131 INNENANSICHT Kabel zum Batteriefach LCD- NACH OBEN/Video Bildschirm NACH UNTEN/Photo LINKS MENÜ OK/Wiedergabe Ein-/Setup- Aus-/Modus- RECHTS/Fotoaufnahme SETUP Schalter Tasten- Abb. 2: und Schalterübersicht EINLEGEN DER BATTERIEN UND SD-KARTE Bevor Sie sich mit dem Gebrauch Ihrer neuen Trophy Cam HD vertraut machen, müssen Sie Batterien und eine SD-Karte einlegen.
- Page 132 Satz von 12 Batterien verwenden, müssen Sie beim Einlegen der Batterien auf die korrekte Polung achten (negative oder abgeflachte Seite an die lange Sprungfeder in den einzelnen Batteriefächern anlegen). Bushnell empfiehlt die Verwendung eines kompletten Satzes Lithium-AA- Batterien (Marke Energizer ) oder Alkali-AA-Batterien. Wiederaufladbare ®...
- Page 133 Einlegen der SD-Karte Die Trophy Cam HDs verfügen über einen internen Speicher von 32 MB, der für ca. 20 Fotos ausreichend ist (bei einer Auflösung von 5 MP). Dies bietet sich für die ersten Tests mit der Kamera an. Da die Kamera aber bestimmt länger als einen Tag an Ihrem Bestimmungsort verbleiben soll, empfehlen wir Ihnen die Verwendung einer SD-Karte.
- Page 134 GEBRAUCH DER Trophy Cam HD Nach dem Sie Ihre Trophy Cam HD durch das korrekte Einlegen der Batterien und einer SD-Karte vorbereitet haben, ist sie bereit für den Einsatz im Freien. Sie lässt sich ganz einfach im eingeschalteten Zustand an einem Baum befestigen und liefert Ihnen genau die tollen Fotos, die Sie sich gewünscht haben.
- Page 135 EIN-Modus (ON Mode) Sobald Batterien und SD-Karte ordnungsgemäß in die Kamera eingelegt, bzw. eingesteckt wurden, kann sie eingeschaltet werden. Wenn sich die Funktionstaste in der oberen Stellung befindet, geht die Kamera in den EIN (Live)-Modus über. Die LED für die Bewegungsanzeige (Seite 130, “Vorderansicht”) blinkt etwa 10 Sekunden lang rot auf.
- Page 136 Abb. 3: Anzeige der SETUP-Informationen Kamera-Modus (Standfoto) Video-Modus SD-Kartenstatus Auflösung (Bildgröße) Video-Ton Ein Videoauflösung Video Modus Batteriestand Standfoto Modus Datum Monat/ Zeitstempel Tag/Jahr (Time Stamp) Uhrzeit Field Scan St.:Min.:Sek. Modus verbleibende Aufnahmezeit Anzahl der Aufnahmen Verbleibende Aufnahmen / Kapazität SETUP-Modus (Schnelltasten/Funktionen) Wie bereits oben im Abschnitt “Teile &...
- Page 137 EINSTELLUNGEN äNDERN MIT DEM SETUP-Menü Der SETUP (Einstellungs)- Modus dient zur Änderung der Einstellungen der Kameraparameter (es stehen 20 verschiedene Parameter zur Verfügung), damit Sie die Trophy Cam HD exakt auf Ihre Bedürfnisse einstellen können. Gehen Sie dazu in das SETUP-Menü, drücken Sie die Tasten unter dem LCD-Display, worauf Ihnen jeder einzelne Parameter und seine Einstellung angezeigt wird.
- Page 138 Abb. 4: Auswahl der Parametereinstellungen MENÜ-Taste drücken (4a) NACH UNTEN drücken (4b) OK drücken Anzeige der Parameter-Einstellungen Die Einstellungen der einzelnen Parameter werden auf dem Bildschirm Ihrer Trophy Cam HD angezeigt. Es wird immer nur eine Einstellung gleichzeitig angezeigt, beginnend mit der aktuellen Einstellung für den Parameter, der zunächst ausgewählt wurde (Abb.
- Page 139 sich die Änderungen auswirken. Nachdem Sie im vorigen Kapitel gelesen haben, wie die einzelnen Parameter ausgewählt und ihre Einstellungen verändert werden, sollten Sie in der Lage sein, sofort mit den Parametern zu arbeiten und die Kamera Ihren Vorstellungen entsprechend einzustellen. Sie können sich jedoch auch erst das ein oder andere Beispiel ansehen: Wenn Sie Änderungen an den Einstellungen der Parameter vornehmen möchten, muss sich der Einschaltknopf grundsätzlich in der SETUP-Position...
- Page 140 Feldsuchfunktion „Field Scan“ „Field Scan“ ist eine revolutionäre neue Funktion für die Bushnell Trophy Cam HD, die Ihnen die Überwachung Ihrer Futterfelder oder Feldränder mit Zeitrafferbildern oder Videos ermöglicht. Wenn Sie hier „On“ (Ein) wählen, nimmt die Trophy Cam HD automatisch Fotos (oder Videoclips) auf. Dies erfolgt in den von Ihnen gewählten Zeitintervallen (z.
- Page 141 eine Minute, als auch volle 24 Stunden oder ein beliebiges Zeitintervall dazwischen betragen kann. 4. Stellen Sie die [Start]- und [Stopp]-Zeiten ein. Beginnen Sie dabei mit der Startstunde und verwenden Sie die AUFWÄRTS-/ABWÄRTS- Tasten zum Ändern der Einstellung (Schritt 3). Die Einstellung der Stunden basiert auf einer 24-Stunden-Uhr, wobei „00“...
- Page 142 7. Hier sehen Sie ein Beispiel dazu, wie die Kamera basierend auf den folgenden „Field Scan“-Einstellungen funktionieren würde: Field Scan: On Hinweis: Um die beabsichtigte Funktionsweise sicherzustellen, Field Scan A: sollten beim Einstellen [Start]: 6:00 Start- Stoppzeiten Überschneidungen „Field [Stop]: 8:00 Scan“-Aufnahmeblöcke Field Scan B: B vermeiden.
- Page 143 (Schritt 1)- Field Scan-Modus auf (Schritt 2)- Field Scan A wählen (Schritt 3)- Start und Stopp für Field „On“ (Ein) festlegen (OK drücken) Scan A einstellen Schritte 4 und 5 sind optional (nur erforderlich, wenn Sie einen zweiten „Field Scan“- Aufnahmeblock mit anderen Start- (Schritt 4) (optional) - Field...
- Page 144 SETUP-Menü (Aufstellung und Beschreibung der Menüparameter für EINSTELLUNGEN) Parameter Einstellungen Erklärung (Fett= Standardeinstellung) Modus Kamera ,Video oder Bestimmt, ob bei Auslösen der Kamera Standfotos oder Hybrid Videoaufnahmen gemacht werden. Der Hybrid-Modus verbindet die Foto- und Videofunktionen, d.h. es werden bei jedem Auslösen der Kamera sowohl ein Standfoto als auch ein Video erzeugt.
- Page 145 Parameter Einstellungen Erklärung (Fett= Standardeinstellung) Capture 1 Foto, 2 Fotos, 3 Fotos Damit wird die Anzahl der Aufnahmen nach Auslösen Number der Kamera im Kameramodus (gilt nur für innerhalb einer bestimmten Standfotos im Sequenz bestimmt. Diese Kamera- oder Einstellung wirkt sich auch auf Hybridmodus) Fotos aus, die im „Field Scan“- Modus aufgenommen wurden...
- Page 146 Parameter Einstellungen Erklärung (Fett= Standardeinstellung) Camera Name Hier kann der gewünschte (Eingabe) Name für die Kamera Siehe „Verwendung der (Kameraname) Eingabebildschirme im eingestellt werden. Nützlich bei Setup-Menü“ Verwendung mehrerer Kameras, da auf Fotos (jedoch nicht in Videos) die Bezeichnung der jeweiligen Kamera eingefügt wird.
- Page 147 Parameter Einstellungen Erklärung (Fett= Standardeinstellung) Zeitabstand 10S (Sekunden) Bestimmt die Länge der Wartezeit der Kamera, bis Einstellungen von 60 sie auf weitere Auslöser des Min. bis zu 1 Sek. PIR-Sensors reagiert, nachdem möglich. das Tier das erste Mal von der Kamera entdeckt wurde und (60 - 1 Min.
- Page 148 Parameter Einstellungen Erklärung (Fett= Standardeinstellung) Hier wird die Empfindlichkeit Sensor Level Low (Niedrig), Normal, des PIR-Sensors eingestellt. Mit (Sensoreinstel- High (Hoch), Auto der Einstellung “Hoch” reagiert lung) (Automatisch) die Kamera empfindlicher auf Infrarot (Wärme) und wird durch Bewegung leichter ausgelöst. Mit der Einstellung “niedrig”...
- Page 149 Parameter Einstellungen Erklärung (Fett= Standardeinstellung) High (Hoch) (= kurze Beeinflusst die Belichtungszeit NV (Night Belichtungzeit), Medium bei Nachtaufnahmen. Eine kurze Vision)- (Mittel) (= mittlere Belichtungszeit ergibt höhere Verschluss Belichtungszeit), Bewegungsschärfe, jedoch Low (Niedrig) (= lange geringer belichtete Fotos. Belichtungszeit) Eine lange Belichtungszeit ermöglicht hellere Fotos, führt jedoch zu Bewegungsunschärfe.
- Page 150 Parameter Einstellungen Erklärung (Fett= Standardeinstellung) Ausführen Löscht sämtliche auf einer Karte Format gespeicherten Daten, damit sie erneut verwendet werden kann. Jede zuvor in einem anderen Gerät verwendete Karte sollte formatiert werden. Achtung! Überprüfen Sie, ob Sie wirklich alle Dateien, die Sie speichern möchten heruntergeladen und gesichert haben! Drücken Sie zum Ausführen OK, danach...
- Page 151 Parameter Einstellungen Erklärung (Fett= Standardeinstellung) Set Clock (Zeit- Einstellen Drücken Sie OK und ändern Sie die Einstellungen mit den einstellungen) Tasten AUFWÄRTS/ABWÄRTS zum Ändern der Einstellungen und die LINKS/RECHTS Tasten, um in das nächste Feld zu gelangen, wo Stunden (nur im 24-Stundenformat, “00”...
- Page 152 Parameter Einstellungen Erklärung (Fett= Standardeinstellung) Coordinate Off (Aus), On (Ein) Hier können Sie die Koordinaten der Längen- und Breitengrade Input der Kameraposition einstellen. ( Eingabe von Siehe „Verwendung der Diese Daten werden in die Koordinaten) Eingabebildschirme im Dateien eingebunden, die Setup-Menü“...
- Page 153 VERWENDUNG DER EINGABEBILDSCHIRME IM SETUP-MENÜ Eingabe des Kameranamens Wählen Sie den Parameter „Camera Name“ (Kameraname) (die einzige Einstellung ist „Input“ (Eingabe)) und drücken Sie OK. Löschen Sie gegebenenfalls den vorherigen Namen oder Standardnamen, indem Sie die RECHTS -Taste drücken, bis das Rücktasten- Symbol ( ) (befindet sich zwischen den Buchstaben „A“...
- Page 154 Verwenden eines Stativs: Auf der Unterseite befindet sich ein Standardgewinde (1/1-20) für ein Stativ oder eine andere Halterung. Eine weitere Fassung auf der Rückseite der Kamera dient Haltevorrichtungen, die als Zubehörteile erhältlich sind. Wahlweise sind zwei Haltevorrichtungen in Ihrem Bushnell-Fachgeschäft erhältlich: ein bärensicheres Metallgehäuse...
- Page 155 Modelle). Weitere Informationen erhalten Sie auf unserer Webseite. Hinweis: ein Solarmodul (Art.-Nr. 119656C) als ergänzende Stromquelle ist auch als Zubehörteil erhältlich - Besuchen Sie unsere Webseite www.bushnell.com für nähere Informationen. Abb. 5: Befestigung des Gurtbands Sensorwinkel- und Entfernungstest Um zu überprüfen, ob die Trophy Cam HD den von Ihnen ausgewählten Bereich auch wirklich zuverlässig überwacht, wird ein Test des Sensorwinkels...
- Page 156 Kamera EINSCHALTEN Sobald die Kamera sich im ON — Modus befindet, beginnt der Bewegungsmelder (rote LED-Leuchte) etwa für 10 Sekunden zu blinken. Solange bleibt Ihnen ausreichend Zeit, die vordere Abdeckung der Trophy Cam HD zu schließen, sie zu verriegeln und den überwachten Bereich zu verlassen.
- Page 157 ABSPIELEN UND LÖSCHEN DER FOTOS ODER VIDEOS Nach Einrichten, Befestigen und Aktivieren Ihrer Trophy Cam HD, können Sie es sicherlich kaum erwarten zu sehen, welche Bilder Ihre Kamera für Sie eingefangen hat. Hierfür können Sie unter verschiedenen Möglichkeiten wählen. Bilder direkt von der SD-Karte ansehen Dies ist die am häufigsten verwendete Methode, Bilder anzusehen.
- Page 158 Für die Ansicht der *“.avi”- Videodateien auf einem Mac ist eventuell eine weitere Software erforderlich. Die Trophy Cam HD unterstützt 3 verschiedene Dateisystem: FAT12, FAT16 und FAT32. Standardmäßig werden Fotos und Videos mit FAT16 gespeichert. Es folgen einige nützliche Hinweise: •...
- Page 159 HERUNTERLADEN DER FOTOS UND VIDEOS Zum Herunterladen der Fotos oder Videos auf einen PC oder MAC überprüfen Sie zunächst, ob sich der Einschaltknopf der Trophy Cam HD in der Position OFF(AUS) befindet. 1) Schließen Sie das mitgelieferte Kabel an den USB-Anschluss der Kamera, dann direkt an den USB-Hauptanschluss Ihres Computers - benutzen Sie keine USB Anschlüsse an der Frontplatte/ Tastatur oder einen stromlosen USB-Verteiler.
- Page 160 Batterieleistung der Trophy Cam HD für mehrere tausend Aufnahmen. 5. Vergewissern Sie sich, ob Sie neue Alkali- oder Lithiumbatterien eingelegt haben. Bushnell empfiehlt bei allen Trophy Cam HD- Modellen die Verwendung von zwölf Energizer®-Lithium-AA- Batterien für eine optimale Lebensdauer der Batterien.
- Page 161 3. Überprüfen Sie, ob der Einschaltknopf der Kamera sich auf “ON (Ein)” und nicht auf “OFF (AUS)” oder im “(SETUP)” -Modus befindet. 4. Sorgen Sie dafür, dass sie eine qualitativ hochwertige SD-Karte in der Kamera verwenden. Bushnell empfiehlt Karten bis zu 32 GB der Marke SanDisk ®...
- Page 162 2. Achten Sie darauf, dass die Batterien korrekt und richtig gepolt eingelegt sind. Die Batterie muss immer mit dem negativen (flachen) Pol in Richtung der Feder in das Batteriefach der Kamera eingelegt werden. 3. Prüfen Sie nach dem Betätigen des Einschaltknopfes von “OFF(Aus)” in “(SETUP)”...
- Page 163 Farbergebnissen führt. b. Sollte dies aber regelmäßig auftreten, muss der Sensor eventuell gewartet werden. Wenden Sie sich in diesem Fall bitte an Ihren Bushnell-Fachhändler. 7. Kurze Videoaufnahmen—Gerät nimmt nicht in der vollständigen eingestellten Länge auf a. Ist die Speicherkarte eventuell voll.
- Page 164 b. Prüfen Sie, ob Sie qualitativ hochwertige Batterien eingelegt haben. Gegen Ende der Batterielaufzeit kann die Kamera die Aufnahmezeit für Videos verkürzen, um Energie zu sparen. Datums- und Zeitstempel werden nicht auf den Fotos aufgedruckt Überprüfen Sie ob der Parameter für “Time Stamp” auf “ON(Ein)” steht. Auf den Fotos ist nicht das gewünschte Objekt zu sehen 1.
- Page 165 Probleme mit dem LCD-Bildschirm 1. Der LCD-Bildschirm ist eingeschaltet, aber es erscheint kein Text. a. Prüfen Sie nach dem Betätigen des Einschaltknopfes von “(OFF)” in “(SETUP)” oder “(ON)”, dass sich der Einschaltknopf in der richtigen Position befindet. Der Knopf darf sich nicht “zwischen” zwei Funktionen befinden.
- Page 166 Feuchtigkeit oder Ameisen in der Kamera 1. Um das Eindringen von Feuchtigkeit oder Regen in die Kamera zu verhindern, muss der DC-Eingangsstecker sicher eingesteckt sein. 2. Ameisen können durch geringe elektronische Vibrationen angezogen werden und durch Spalten zwischen dem Äußeren und dem Inneren der Kamera eindringen.
- Page 167 TECHNISCHE SPEZIFIKATIONEN Maximale Pixelauflösung 3264 x 2448 (8 Megapixel) F = 3,1; FOV = 42°; automatisch entfernbarer Infrarot- Objektiv Cut-Filter (Auto IR-Cut-Remove) (bei Nacht) Wählbar (Niedrig, Mittel, Hoch), bis zu 19 m bei Reichweite IR-Blitz Einstellung "Hoch" Bildschirmanzeige Schwarz/weiß-Bildschirm 24 x32 mm SD- oder SDHC-Karte, maximale Speicherkapazität Speicherkarte von 32 GB...
- Page 168 BESCHRäNKTE EIN-JAHRES-GARANTIE Wir garantieren für ein Jahr ab Erwerbsdatum, dass Ihr Bushnell-Produkt frei von Material- und Verarbeitungsfehlern ist. Bei allen Schäden unter dieser Garantie behalten wir uns nach eigenem Ermessen vor, das Produkt entweder zu reparieren oder zu ersetzen, vorausgesetzt, dass Sie das Produkt frei Haus an uns senden.
- Page 169 Entsorgung von elektrischen und elektronischen Geräten (Gültig in der EU und anderen europäischen Ländern mit getrennten Sammelsystemen) Dieses Gerät enthält elektrische und/oder elektronische Bauteile und darf deshalb nicht im normalen Haushaltmüll entsorgt werden. Stattdessen sollte es an den entsprechenden Sammelstellen für Recycling der jeweiligen Gemeinden abgegeben werden.
-
Page 170: Italiano
M A N U A L E D I I S T R U Z I O N I ITALIANO www.trophycam.it VIDEO No modelli: 119676 / 119677 / 119678 03-14... - Page 171 Bushnell al numero (800) 423-3537. In Canada, (800) 361-5702. Al fine di ottenere la massima durata delle batterie, Bushnell raccomanda l'impiego di un set completo di batterie AA al litio di marca Energizer (8 o 12, ®...
- Page 172 La Trophy Cam HD è progettata per un uso all’esterno ed è resistente all’acqua e alla neve. La trail camera è una delle ultime generazioni di Bushnell Trophy Cam HDs e si presenta con tante caratteristiche nuove e migliorate, tra cui: •...
- Page 173 • GPS Geotag Capability- consente all'utente di immettere la longitudine e latitudine della posizione della videocamera, che verrà inclusa in ciascun file fotografico. In tal modo, si consente a Google Earth, Picasa e altri software con funzioni di geotag di visualizzare automaticamente la cartina in cui venga segnalata l'ubicazione di ciascuna videocamera, in caso di visualizzazione di gruppi di fotografie su un computer.
- Page 174 Un’interfaccia con sei tasti viene usata principalmente in modalità SETUP (Impostazione) per selezionare le funzioni e i parametri operativi. Come si vede in Fig. 2, questi tasti sono: UP (su), DOWN (giù), LEFT (sinistra), right (destra). Quattro di questi tasti possono anche effettuare una seconda funzione (operazioni veloci in modalità...
- Page 175 Cavo al comparto batteria Schermo UP (su)/Video DOWN (giù)/Foto LEFT (sinistra) MENU Power OK/Replay (Ripeti) (Alimentazione)/ ON (Acceso) RIGHT (destra)/ commutatore scatto IMPOSTAZIONI modalità OFF (Spento) Fig. 2: Pulsante e Guida interruttore INSTALLAZIONE DELLE BATTERIE E DELLA SCHEDA SD Prima di imparare l’uso della Trophy Cam HD, occorre installare un set di batterie e inserire una scheda SD.
- Page 176 (il segno di negativo o l'estremità piatta contro la molla lunga di ciascuno slot). Bushnell raccomanda l'impiego di un set completo di batterie nuove al Litio AA (marca Energizer ) o batterie alcaline AA. NiMh , in quanto il voltaggio ®...
- Page 177 Inserimento di una scheda SD Le Trophy Cam HD dispongono di una memoria interna di 32MB, che possono archiviare solo circa 20 foto (con risoluzione di 5MP). Ciò è comodo per testare e acquisire familiarità con la fotocamera, ma non per lasciarla incustodita per più...
- Page 178 USO DELLA Trophy Cam HD Una volta preparata la Trophy Cam HD con l’installazione delle batterie e della scheda SD, si potrebbe semplicemente portarla fuori, agganciarla ad un albero, accenderla e lasciarla; e prendere le foto a piacere. Comunque, raccomandiamo di spendere un po’ di tempo con lettura di questo manuale, e di fare prove con la fotocamera fino ad imparare qualcosa a proposito del funzionamento del commutatore a 3 vie e dei tasti di controllo.
- Page 179 lasciare l’area monitorata. Nella modalità ON non sono necessari o possibili controlli manuali (i tasti di controllo non hanno effetti). La Trophy Cam HD scatterà foto e video automaticamente (in funzione dei parametri impostati) quando viene attivata dal rilevamento di un movimento da parte del sensore PIR nell’area monitorata.
- Page 180 Tasti/funzioni veloci della modalità SETUP Come menzionato in precedenza in “Parti e Controlli”, quattro dei seguenti tasti nel display LCD hanno funzioni secondarie “abbreviate” quando la fotocamera è commutata su SETUP (ma il tasto MENU non è stato premuto): • Premere il tasto UP per impostare rapidamente la fotocamera a riprendere filmati.
- Page 181 tasto LEFT fa ritornare al parametro precedente), e premendo il tasto UP o DOWN si possono scorrere le impostazioni diverse da quelle correnti. Una volta selezionato il nuovo parametro preferito, premere il pulsante OK per salvare la nuova impostazione. Terminata la modifica delle impostazioni di uno o più...
- Page 182 Fig. 4: Selezionare le impostazioni dei parametri Premere MENU (4a) Premere DOWN (4b) Premere OK Per modificare qualunque impostazione del parametro, iniziare sempre con il commutatore nella posizione SETUP. Dopo l’accensione dell’LCD, premere il tasto MENU. Il primo parametro visualizzato una volta effettuato l'accesso al menu SETUP è...
- Page 183 Funzione Field Scan Field Scan è la nuova rivoluzionaria funzione per Bushnell Trophy Cam HD, che consente all'utente di monitorare le esche con cibi o i confini dei campi mediante la realizzazione di immagini o videoclip entro intervalli di tempo prestabiliti.
- Page 184 inizio e di fine, nella quale vengono stabiliti gli orari di inizio e fine delle registrazioni di Field Scan per ciascuna giornata. Gli orari possono essere impostati con le ore e i minuti esatti secondo quanto desiderato e ottenere così un periodo di registrazione di qualsiasi durata, da 1 minuto a 24 ore complete.
- Page 185 • Field Scan: On Attenzione: evitare eventuali sovrapposizioni di blocchi di • Field Scan A: registrazione A e B di Field Scan • Start [Inizio]: 6.00 quando vengono impostati gli orari di inizio e fine; in tal • Stop [Fine]: 8.00 modo si garantisce il corretto •...
- Page 186 (Fase 1)-impostare la (Fase 2)-selezionare Field (Fase 3)-impostare inizio e fine modalità Field Scan su "On" Scan "A" (premere OK) "A" di Field Scan Le fasi 4 e 5 sono opzionali (unicamente necessarie per impostare una secondo blocco di (Fase 4) (opzionale)- selezionare (Fase 5) (opz.)-impostare inizio registrazioni di Field Field Scan "B"...
- Page 187 Menu SETUP - Parametri ed elenco impostazioni con descrizioni Parametro Impostazioni Descrizione (Grassetto=predefinita) Modalità "Camera", "Video" o Seleziona se catturate foto o filmati quando la telecamera "Hybrid" ("Mode") viene attivata. La modalità Hybrid combina le funzionalità di fotocamera e videocamera, catturando sia fotografie che filmati video quando il dispositivo viene attivato.
- Page 188 Parametro Impostazioni Descrizione (Grassetto=predefinita) Seleziona quante foto vengono Numeri di 1 foto, 2 foto, 3 foto prese in sequenza per ogni scatti scatto in modalità Fotocamera. ("Capture Tale impostazione riguarda Number") anche le foto scattate in (influisce sulle modalità Field Scan (ad fotografie solo esempio, per aprire due nelle modalità...
- Page 189 Parametro Impostazioni Descrizione (Grassetto=predefinita) Controllo LED Basso, medio, alto Controlla il numero dei LED che si accendono (Funzione quando vengono scattate multi-flash) le fotografie in condizioni di bassa illuminazione. Elevato = accensione di tutti i 33 LED; si tratta dell'impostazione predefinita. L'utente può...
- Page 190 Parametro Impostazioni Descrizione (Grassetto=predefinita) Nome (Immissione) Consente all'utente di impostare un nome Cfr. "Utilizzo delle Camera personalizzato per la schermate di videocamera. Funzione utile inserimento nel menu per finalità di identificazione di setup" in caso di impostazioni di diverse videocamere, in quanto ciascuna videocamera imprime il proprio nome su tutte le foto che cattura (ma non sui video).
- Page 191 Parametro Impostazioni Descrizione (Grassetto=predefinita) Intervallo 10 Sec (secondi) Seleziona la durata di predefiniti, con una tempo che la fotocamera "Interval" “aspetterà” prima di gamma disponibile di impostazione da 60 rispondere a qualunque attivazione addizionale min (minuti) a 1 Sec proveniente dal PIR dopo (secondi).
- Page 192 Parametro Impostazioni Descrizione (Grassetto=predefinita) Livello del Basso, Normale, Alto, Selezione della sensibilità del sensore sensore PIR. L'impostazione Auto "Sensor “High” (alta) renderà la videocamera più sensibile Level" all'infrarosso (heat) e più facilmente attivata dal movimento, mentre l'impostazione “Low” (bassa) la rende meno sensibile al calore e al movimento.
- Page 193 Parametro Impostazioni Descrizione (Grassetto=predefinita) NV Shutter High, Medium, Low Imposta la velocità dell'otturatore durante il (otturatore funzionamento con visione per visione notturna. L'impostazione High notturna) congela meglio il movimento, ma le foto possono risultare più scure. L'impostazione della velocità dell'otturatore Low produce foto più...
- Page 194 Parametro Impostazioni Descrizione (Grassetto=predefinita) Formattare Esegui (Seguito da Cancella tutti i file archiviati su "Format" un addizionale No/Si una scheda per prepararla al riutilizzo. Formattare sempre on solo ai modelli con una scheda se è stata usata in visore a colori) precedenza su altri dispositivi.
- Page 195 Parametro Impostazioni Descrizione (Grassetto=predefinita) Impostare Impostare Premere OK e usare i tasti orologio UP (SU)/DOWN (GIÙ) (per modificare l’impostazione) Impostare e i tasti LEFT (sinistra)/ orologio "Set RIGHT (destra) (per spostarsi Clock" al campo successivo) per impostare l’ora (solo formato 24 ore, “00”=mezzanotte, “12”=mezzogiorno) e i minuti, e poi (nella riga inferiore), l’anno,...
- Page 196 Parametro Impostazioni Descrizione (Grassetto=predefinita) Field Scan On, Off Attivazione/disattivazione della modalità di registrazione (intervallo temporale) di Field (Una volta selezionato Scan. L'utente può impostare On): "A" inizio/fine, "B" gli orari di inizio e fine per un inizio/fine, intervallo massimo di due "blocchi" indipendenti di registrazioni Field Scan, nonché...
- Page 197 Parametro Impostazioni Descrizione (Grassetto=predefinita) Immissione Off (disattiva), On Consente all'utente di coordinate impostare le coordinate (attiva) di latitudine e longitudine secondo la posizione della Cfr. "Utilizzo delle videocamera. Tali dati verranno schermate di inclusi nei file salvati sulla inserimento nel menu SD card della videocamera di setup"...
- Page 198 Parametro Impostazioni Descrizione (Grassetto=predefinita) Impostazione Annulla, Esegui Selezionare “Execute” (esegui) e premere OK per predefinita ripristinare tutti i parametri "Default Set" alle impostazioni predefinite di fabbrica. Se la fotocamera si comporta in modo non coerente e pensate di aver fatto una modifica accidentalmente (ma non siete sicuro quale), questa operazione...
- Page 199 UTILIZZO DELLE SCHERMATE DI INSERIMENTO NEL MENU DI SETUP Inserimento nome videocamera Una volta selezionato il parametro Camera Name (l'unica impostazione è "Input"), premere OK. Laddove necessario, eliminare il nome precedente o di default premendo il tasto DESTRO fino a che il simbolo di backspace ) (posizionato tra le lettere "A"...
- Page 200 MONTAGGIO E POSIZIONAMENTO DELLA TROPHY CAM HD Montaggio Dopo aver impostato i parametri della fotocamera in base alle vostre preferenze a casa o nell’autoveicolo, siete pronti a portarla fuori e posizionare l’interruttore di potenza su “ON”. Quando si imposta la Trophy Cam HD per il gioco di esplorazione o per altre applicazioni esterne, si deve essere sicuri di posizionarla correttamente e con sicurezza.
- Page 201 119676/119677, n. 119658C per 119678) e una staffa deluxe per albero (n. 119652C che si adatta a tutti e tre i modelli delle fotocamere); consultare il rivenditore o il sito Web Bushnell per ulteriori dettagli. Nota: è anche disponibile una fonte di alimentazione supplementare a pannello solare (n.
- Page 202 si arresta il lampeggiamento, il PIR è attivo, ed ogni movimento che viene rilevato attiva la cattura di foto o video come programmato nel SETUP Menu. Assicurarsi di aver letto la descrizione del Capture Number (numero di scatti), della lunghezza del Video, dell’intervallo e deii parametri del livello del sensore.
- Page 203 la fotocamera e collegarla al computer non è molto comodo, è più facile togliere la scheda. Togliendo la scheda SD (scambiandola con una nuova scheda se si preferisce) e portandola a casa per vedere le immagini usando un lettore di schede SD (fornito dall’utilizzatore) collegato al computer (alcuni computer e TV hanno uno slot incorporato per le schede SD), si può...
- Page 204 FAT16 a meno di possedere un visualizzatore di immagini in formato FAT12 o FAT32. Eliminare foto e video Si possono anche cancellare tutti i file dalla scheda usando il parametro Format (Formattare, pg. 194). SCARICO DELLE FOTO E DEI VIDEO Per scaricare foto e video su un PC o Mac, assicurarsi che il commutatore dellaTrophy Cam HD sia nella posizione OFF.
- Page 205 e modificati con qualche software adatto. I file video .avi possono essere visualizzati con Windows Media Player (versione 7 o successivi) e con altri programmi di visualizzazione video che possono essere forniti con il computer, o disponibili online. * I file video “.avi” possono richiedere un software addizionale per essere visualizzati con il Mac.
- Page 206 2. Controllare se sono state usate batterie alcaline o a Litio nuove. La Al fine di garantire la durata massima della batteria nella presente Trophy Cam HD, Bushnell raccomanda l'impiego di un set completo di batterie Energizer al litio tipo AA.
- Page 207 3. Assicurarsi che il commutatore di potenza si trovi nella posizione “On”, non in modalità “Off” o “Setup”. 4. Assicurarsi di usare una scheda SD di buona qualità. La Bushnell raccomanda schede SD SanDisk ® fino a 32 GB. 5. Se la scheda SD ha l’interruttore di protezione alla scrittura in posizione di blocco, la fotocamera non riprenderà...
- Page 208 3. Dopo aver spostato il commutatore da “Off” a “Setup” o a “On”, assicurarsi che il commutatore sia posizionato correttamente (evitare posizioni “fra” due modi). 4. Non spostare direttamente il commutatore da “On” a “Setup”; spostare sempre il commutatore prima su “Off” e poi su “Setup”. Problemi con la qualità...
- Page 209 Se questo si vede in un modo evidente, allora il sensore va controllato. Contattare il servizio assistenza della Bushnell. 7. Filmati troppo brevi: registrazione non corrispondente all’impostazione a. Assicurarsi che la scheda SD non sia piena.
- Page 210 3. In alcuni casi, disponendo la fotocamera vicino all’acqua si potranno avere immagini prive di soggetto. Provare a puntare la fotocamera verso il terreno. 4. Evitare di montare la telecamera su piccoli alberi che si possono muovere sotto l’azione di venti forti. 5.
- Page 211 La fotocamera non conserva le impostazioni Assicurarsi di aver salvato le modifiche delle impostazioni dei parametri fatte in modalità Setup, premendo “OK” dopo aver modificato l’impostazione. Se non si salva la nuova impostazione dopo averla modificata, la fotocamera continuerà ad usare l’impostazione originaria predefinita per quel parametro.
- Page 212 SPECIFICHE TECNICHE Massima dimensione in Pixel 3264x2448 (8MP) Obiettivo F=3,1; FOV=42°; Auto IR-Cut-Remove (di notte) Campo del flash IR Selezionabile (Low/Med/High), fino a 19 metri su High Schermo display Display B&W : 24x32 mm(1,5 pollici) Scheda di memoria Scheda SD o SDHC, Capacità massima 32 GB RAM Interna 32 MB 8MP = 3264x2448;...
- Page 213 Vaughan, Ontario L4K 5W5 Per prodotti acquistati fuori dagli Stati Uniti o dal Canada, rivolgersi al rivenditore per le clauso- le pertinenti della garanzia. In Europa si può anche contattare la Bushnell al seguente recapito: Bushnell Germany GmbH European Service Centre Mathias-Brüggen-Str.
- Page 214 Smaltimento di apparecchiature elettriche ed elettroniche (Vigente presso i Paesi UE e altri Paesi europei con sistemi di raccolta differenziata dei rifiuti) Il presente apparecchio componenti elettriche e/o elettroniche e non può pertanto essere smaltito come rifiuto domestico ordinario. Al contrario, dovrebbe essere smaltito presso punti di raccolta destinati al riciclaggio, in base alle istruzioni delle amministrazioni locali.
- Page 216 For further questions or additional information please contact: Bushnell Outdoor Products 9200 Cody, Overland Park, Kansas 66214 (800) 423-3537 • www.bushnell.com ©2014 Bushnell Outdoor Products...
Need help?
Do you have a question about the Trophy Cam HD 119676 and is the answer not in the manual?
Questions and answers