Advertisement
Quick Links
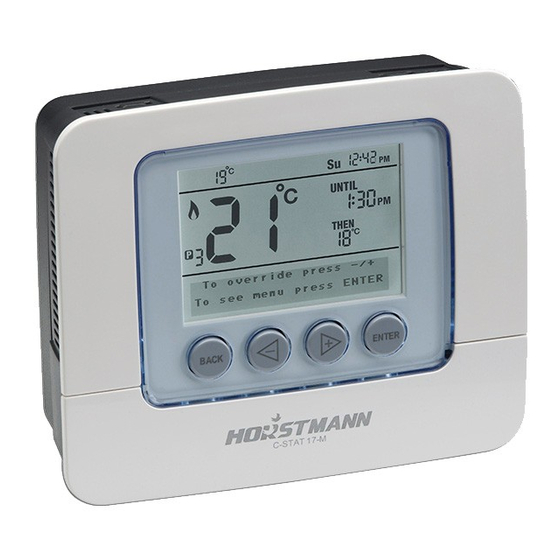
C-Stat 11-M | C-Stat 17-M
Installation Instructions
Mains Operated Programmable Room Thermostat
Programmable room thermostats are widely recognised as one
of the best ways in which to control central heating. Horstmann
C-Stat programmable room thermostats have a large display
and intuitive user interface, making them easy to set up and use.
C-Stat uses a sophisticated time proportional integral (TPI)
algorithm for accurate temperature control and energy
efficiency. Being mains powered these models won't need the
batteries changing every two years.
Installation and connection should only be carried out by a
suitable qualified person and in accordance with the edition of
the IEE wiring regulation.
Warning: Isolate mains supply before commencing installation.
1
Advertisement


Need help?
Do you have a question about the C-Stat 11-M and is the answer not in the manual?
Questions and answers