Fujitsu DL7400 Installation Manual
Hide thumbs
Also See for DL7400:
- Quick start manual (1 page) ,
- User manual (275 pages) ,
- Maintenance manual (159 pages)
Advertisement
Quick Links
Download this manual
See also:
User Manual
Installation Guide for Fujitsu Dot Matrix Printer 1.6
Version History:
VERSION
DESCRIPTION
0.1
Draft written for first initial review
0.2
Update the prerequisites section & minor
changes
1.0
Added additional prerequisites
1.2
- Updated the prerequisites for user &
engineer.
- 2 generic local administrator account &
password for CX owned PC
1.3
Incorporate documentation for IE8 settings
required for ezyfreight Print MAWB
function
1.4
Updated the installation pre-requisites for
IE requirements.
1.5
Updated the installation pre-requisites for
CX PC Asset Ids.
1.6
Updated the skipping of IE security setting
for CX computers
About this manual:
This installation guide is designed for onsite Fujitsu engineer to:
1. Unpack and setup the dot matrix printer;
2. Install the printer drivers; and
3. Be able to print the AWB print form via the Ezyfreight web application.
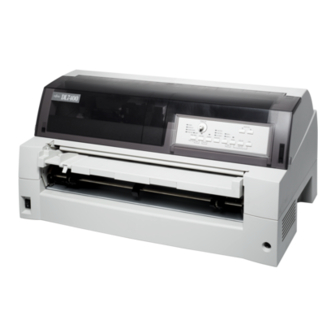
Fujitsu DL7400 Dot Matrix Printer will be used as an example in this manual.
Please read this Installation Guide thoroughly before going onsite to
perform the installation. If you have any questions regarding the
installation procedure please contact Fujitsu Hong Kong
(<lchau@hk.fujitsu.com>).
Installation guide for Fujitsu Dot Matrix Printer_1.6
AUTHOR
DATE
Henry Chan
20Oct2011
Henry Chan
21Oct2011
Henry Chan
4Nov2011
Prashant Pande
30Nov2011
Pak Wong
03Jan2012
Pak Wong
11Jan2012
Pak Wong
18Jan2012
Henry Chan
14Feb2012
Page 1
Advertisement

Related Manuals for Fujitsu DL7400


Summary of Contents for Fujitsu DL7400
-
Page 1: Version History
2. Install the printer drivers; and 3. Be able to print the AWB print form via the Ezyfreight web application. Fujitsu DL7400 Dot Matrix Printer will be used as an example in this manual. Please read this Installation Guide thoroughly before going onsite to perform the installation. - Page 2 If End Users are using CX GalaCXy PC, the PC asset IDs (which are in the format “MXXXXXX” on a sticker attached to the PC) should be provided to the Fujitsu Engineer before they are onsite for the installation. The reason is that some IE8 configurations settings need to be remotely deployed to the PC in order for neutral printing to work.
- Page 3 Inform the user one week in advance before onsite, to prepare and complete the above section “Prerequisites for End User”. Please contact Fujitsu Hong Kong contact (<lchau@hk.fujitsu.com>) if the End User is not able to provide all the prerequisites above.
- Page 4 (Please tick) Website http://jp.fujitsu.com/group/fit/en/support/downloads/dl7/ download the driver for Fujitsu DL7400 for backup purpose, in case the CD driver software cannot be read Call the user 2 hours before onsite to re-confirm the appointment If the dedicated workstation to install the printer is owned by GHA, please ask local GHA support staff to provide with local administrator username/password.
-
Page 5: Unpacking The Printer
Installing procedures for Fujitsu Engineer: Fujitsu DL7400 Dot Matrix Printer will be used as an example in this section. Unpacking the printer 1. Open the carton box and remove the printer and its components, please handle with care. Make sure that you have all of the items shown below. DO NOT use the power cord inside the package and use the power cord prepared by the engineer. - Page 6 (show below). 5. Inform the user to store the original shipping carton box and packaging materials for at least 1 week in case for full package RMA Installation guide for Fujitsu Dot Matrix Printer_1.6 Page 6...
-
Page 7: Setting The Paper Table
Installing the Ribbon cartridge 1. Before installing the ribbon cartridge, make sure the power cord is not connected or turn off the printer Installation guide for Fujitsu Dot Matrix Printer_1.6 Page 7... - Page 8 3. Remove the ribbon cartridge from its package. Push in the two ribbon release tabs on the side, and slide the roller from the LOCK position to the FREE position. Turn the ribbon feed knob clockwise to be sure that it feeds properly. Installation guide for Fujitsu Dot Matrix Printer_1.6 Page 8...
- Page 9 4. Thread the ribbon between the print head and the print guide, gently press down on the ribbon cartridge against the printer until it clicks into place. 5. Turn the ribbon feed knob clockwise to take up any slack in the ribbon. 6. Close the front cover. Installation guide for Fujitsu Dot Matrix Printer_1.6 Page 9...
-
Page 10: Connecting The Usb 2.0 Interface Cable
1. Attach the one end of USB cable (Type B connector) to the USB connector at the right side of the printer. 2. Attach the other end of USB cable (Type A connector) to one of the available port of the dedicated workstation. Installation guide for Fujitsu Dot Matrix Printer_1.6 Page 10... -
Page 11: Connecting The Power Cord
Otherwise, DO NOT plug in the power cord to the printer and power outlet. 1. Plug one end of the power cord into the power connector on the rear of the printer. Installation guide for Fujitsu Dot Matrix Printer_1.6 Page 11... - Page 12 2. Plug the other end of the power cord into the power outlet. 3. Make sure the power cord is securely connected. 4. Turn the power by pressing the side marked “I” on the power switch. Installation guide for Fujitsu Dot Matrix Printer_1.6 Page 12...
-
Page 13: Installing The Printer Driver
Fujitsu DL7400 Dot Matrix Printer will be used as an example in this section. 1. Make sure the printer is connected to the dedicated computer and turn the power on. - Page 14 7. Next step, choose Search for the best driver in these locations a. Uncheck Search removable media (floppy, CD-ROM…) b. Check Include this location in the search: c. Then click Browse Installation guide for Fujitsu Dot Matrix Printer_1.6 Page 14...
- Page 15 If another letter is being used for the CD/DVD drive letter, change the drive letter accordingly. a. Expand the folders Drivers- >DL7400->English->Win2kxp b. Press OK to proceed 9. D:\Drivers\DL7400\English\Win2kxp will be displayed, then choose Next Installation guide for Fujitsu Dot Matrix Printer_1.6 Page 15...
- Page 16 10. In the Hardware Installation dialog box, choose Continue Anyway to process 11. Driver software will be installed for Fujitsu DL7400 12. The wizard has finished installing the software. Click Finish to end the wizard. Installation guide for Fujitsu Dot Matrix Printer_1.6...
- Page 17 13. Now click Start button, then select Control Panel 14. In the Control Panel, double-click the icon Printers and Faxes Installation guide for Fujitsu Dot Matrix Printer_1.6 Page 17...
-
Page 18: Paper Handling
Paper Handling Adjusting for paper thickness Fujitsu DL7400 Dot Matrix Printer will be used as an example in this section. 1. Use the MANUAL GAP DIAL to adjust the paper thickness manually. This printer can handle paper up to 8-ply. For the Ezyfreight AWB print form which comes with 2-ply, please adjust the MANUAL GAP DIAL to “2”... - Page 19 1. Make sure that the printer is turned on. Remove any single-sheet paper from the printer. 2. Lift up the paper table as shown below. 3. Release the tractor locking levers by pulling them up. Open the tractor paper holders. See the following figure. Installation guide for Fujitsu Dot Matrix Printer_1.6 Page 19...
- Page 20 Installation guide for Fujitsu Dot Matrix Printer_1.6 Page 20...
- Page 21 5. Fit the paper feed holes onto the LEFT and RIGHT tractor pins, ensure fitting the holes on both tractor pins is equal to each other and the print form maintains a horizontal level. See the following figure. Installation guide for Fujitsu Dot Matrix Printer_1.6 Page 21...
- Page 22 6. Adjust the right tractor to the width of the form. 7. Close the LEFT and RIGHT paper holders. See the following figure. Installation guide for Fujitsu Dot Matrix Printer_1.6 Page 22...
- Page 23 10. Lower the paper table to the down position. CAUTION • Before lowering the paper table, make sure that paper holders are closed and all locking levers are securely locked won. Installation guide for Fujitsu Dot Matrix Printer_1.6 Page 23...
- Page 24 11. For printing the Ezyfreight continuous print form, press the PAPER PATH button to select “TRACTOR F” (The indicator lights.) 12. Press the LOAD button to advance the paper to the top-of-form position. Installation guide for Fujitsu Dot Matrix Printer_1.6 Page 24...
- Page 25 13. Press the LF/FF button twice to advance the paper (DO NOT hold the button more than three seconds). 14. Press the MICRO button 5 times to fine tune the position of the paper. Installation guide for Fujitsu Dot Matrix Printer_1.6 Page 25...
- Page 26 15. Press the ONLINE and LOAD buttons simultaneously saves this new position permanently. 16. Press the ONLINE button to ensure the indicator lights into online mode. Installation guide for Fujitsu Dot Matrix Printer_1.6 Page 26...
- Page 27 Unzip the CASPOL.ZIP file into drive C (MUST unzip into C:\, folder name called CASPOL), the folder location and files must be the same as below, otherwise the batch files cannot be run successfully. Installation guide for Fujitsu Dot Matrix Printer_1.6 Page 27...
- Page 28 After running the batch program, the window will be closed automatically. 3. In the folder CASPOL again, double-click to run the file AWBPrtCtrl.bat to modify the security policy. After running this batch program, the window will be closed automatically. Installation guide for Fujitsu Dot Matrix Printer_1.6 Page 28...
- Page 29 4. Open Internet Explorer, choose the Tools pull-down menu and select the Internet Options. Installation guide for Fujitsu Dot Matrix Printer_1.6 Page 29...
- Page 30 5. Click the Security tab, then click Trusted sites, then press the Sites button to add a website into trusted sites. 6. In the Trusted sites dialog box, uncheck Require serve verification (https:) for all sites in this zone. Installation guide for Fujitsu Dot Matrix Printer_1.6 Page 30...
- Page 31 “Add this website to the zone:”, then click Add button. 7. Type http://www.ezyfreight.biz The website is added into the list as shown below, then press Close button. Installation guide for Fujitsu Dot Matrix Printer_1.6 Page 31...
- Page 32 8. Select the Security Tab. In the Security dialog select the Trusted Sites zone and then click on the Custom level button. Installation guide for Fujitsu Dot Matrix Printer_1.6 Page 32...
- Page 33 9. In the Security Setting – Trusted Sites Zones dialog select the “Run components not signed with Authenticode” setting and set it as “Enable”. Click on OK to save settings. 10. Press OK button to close the Internet Options. Installation guide for Fujitsu Dot Matrix Printer_1.6 Page 33...
- Page 34 The printer and program printer have now been installed and configured. The next step is to align the printout on the preprinted AWB stationery (Please refer to the Section “Ezyfreight AWB Sample Test Print“). This will require the participation of the End User. Installation guide for Fujitsu Dot Matrix Printer_1.6 Page 34...
- Page 35 Unzip the CASPOL.ZIP file into drive C (MUST unzip into C:\, folder name called CASPOL), the folder location and files must be the same as below, otherwise the batch files cannot be run successfully. Installation guide for Fujitsu Dot Matrix Printer_1.6 Page 35...
- Page 36 After running the batch program, the window will be closed automatically. 3. In the folder CASPOL again, double-click to run the file AWBPrtCtrl.bat to modify the security policy. After running this batch program, the window will be closed automatically. Installation guide for Fujitsu Dot Matrix Printer_1.6 Page 36...
- Page 37 Important Notes: If it’s a Cathay Pacific Workstation (i.e. GalaCXy PC), please skip the IE security setting procedures. Installation guide for Fujitsu Dot Matrix Printer_1.6 Page 37...
- Page 38 Internet Explorer web browser and login using their EDMP account. 2. From the Operations drop-down menu, select the Ezyfreight option. Click “Operation” in horizontal menu bar and select “Ezyfreight” in drop-down menu. Installation guide for Fujitsu Dot Matrix Printer_1.6 Page 38...
- Page 39 4. Under the Search by Flight Tab, enter a flight no in the Flight fields. Then click on the Search Button to find the flight details. e.g. CX870/28Jun input Flight/Date information and click “Search” button; Such request is in processing…….. Installation guide for Fujitsu Dot Matrix Printer_1.6 Page 39...
- Page 40 Select ‘Neutral’ print type 6. A separate Internet Explorer window will be launched. Click Select Pri to display the printer dialog window. From the printer dialog window select the Fujitsu dot matrix printer DL7400. Installation guide for Fujitsu Dot Matrix Printer_1.6...
- Page 41 9. Tear the paper(s) off at rear stacker and check the margins are properly aligned. See sample below for an AWB printout which is properly aligned. Installation guide for Fujitsu Dot Matrix Printer_1.6 Page 41...
- Page 42 Below is good sample of AWB printout which alignments are correct set. Installation guide for Fujitsu Dot Matrix Printer_1.6 Page 42...
- Page 43 The printout may be slightly not aligned, engineer have to fine tune the position of the paper by adjusting in the tractor ruler or using the MICRO / MICRO buttons. Then repeating steps 6 to 9 above to reprint the AWB. Installation guide for Fujitsu Dot Matrix Printer_1.6 Page 43...
- Page 44 Print MAWB icon Select ‘Neutral’ print type 11. Once the align is correct for single AWB and multiple AWB printing the Fujitsu Engineer should get the User to sign-off the Service Report Form. Installation guide for Fujitsu Dot Matrix Printer_1.6...
- Page 45 3) Arrival/Department Date/Time; 4) Service Detail; 5) Machine No. 6) Action Taken; 7) Engineer signature; 8) Company Chop & Signature Service will not be complete unless the User signs-off the Service Report Form. Installation guide for Fujitsu Dot Matrix Printer_1.6 Page 45...
- Page 46 Installation guide for Fujitsu Dot Matrix Printer_1.6 Page 46...
Need help?
Do you have a question about the DL7400 and is the answer not in the manual?
Questions and answers