Table of Contents
Advertisement
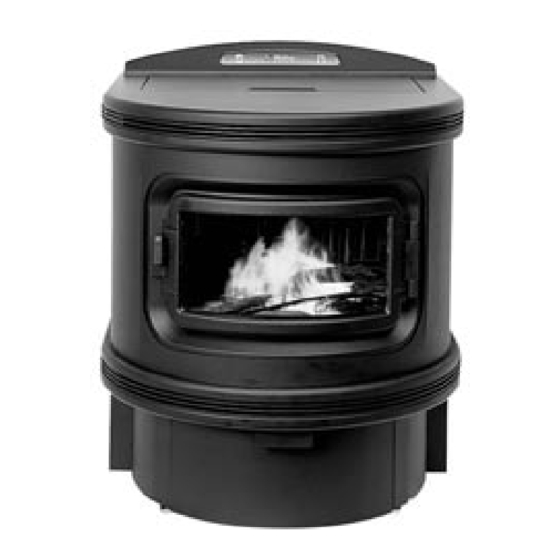
PREPARING THE BIXBY MaxFire STOVE FOR BURNING
1)
The stove does not react quickly to any changes made to it.
2)
When making any adjustments to the Trim Pot Knobs, only turn them 1 line/number at a time. Each
line/number represents a 6% increase or decrease change.
3)
After making any adjustments....DO NOT MAKE ANY OTHER ADJUSTMENTS FOR AT LEAST
20 MINUTES!
4)
When first setting up a MaxFire for a proper burn, start out with the Trim Pot Knobs set at the
a. Factory Presets, which are:
Exhaust Fan:
Feed Rate:
This is a starting reference point for the stove but not necessarily the point at which the stove will
perform at its best. (Start by leaving the exhaust fan knob on 0 and adjusting the feed rate).
5)
After about 10-15 minutes into the startup of the stove, you should watch the flame for
characteristics of the burn. Watch the flame for 10 minute periods. During this time note the burn
characteristics as explained in the "Trim Pot Adjustment."
6)
Characteristics of a Lean Burn are:
a)
Hard Clinkers (cookie, hockey puck, hamburger, biscuit, wafer for example.)
b)
An oscillating flame – slowly graduating from a high to a low to a high to a low flame over a
period of 3 to 8 minutes. (High flame decreasing to a low flame (5 min.) going to a high
flame (5 min.) etc.
c)
A build up in only one side of the Burn Pot
d)
The flame seemingly coming out one side of the Burn Pot only.
NOTE: Colder air contains more oxygen per cubic foot of air than warmer air. A cold snap or sudden
change in the weather can cause the stove to run Lean and you may have to increase the Feed
Rate during this time.
NOTE: The outside air temperature, the corn moisture content, the corn type and the conditions which it
was grown will all be factors in how the stove burns.
7)
Charasteristics of a Rich Burn are:
a)
An even build up in the Burn Pot.
b)
A darker, lazier flame.
c)
Excessive soot build up on the glass door.
NOTE: Fuel build up on one side of the burn pot is a Lean Burn.
Fuel build up evenly in the burn pot is a Rich Burn.
STOP - READ!
Basic Guidelines:
+/-0
+/-0
Advertisement
Table of Contents

Related Manuals for Bixby Energy MaxFire


Summary of Contents for Bixby Energy MaxFire
- Page 1 After making any adjustments….DO NOT MAKE ANY OTHER ADJUSTMENTS FOR AT LEAST 20 MINUTES! When first setting up a MaxFire for a proper burn, start out with the Trim Pot Knobs set at the a. Factory Presets, which are: Exhaust Fan:...
- Page 2 How to adjust the Trim Pot Knobs Both the Exhaust Fan Trim Pot knob and the Feed Rate Trim Pot knob accomplish the same thing BUT they work inverse to each other. Thus, if both trim pot knobs are turned in the same direction, they cancel each other's effect on the flame, therefore it is best and our recommendation to work with just the Feed Rate Trim Pot knob initially.
- Page 3 Trouble Shooting the Flame You must first determine if the flame is rich or lean to aid in trouble shooting the problem. Besides trim pot adjustments, other things to look for are: Feed wheel has lifted off the back plate do to a buildup of fines or other material that may get under the feed wheel.
- Page 4 The Ash Dump Process The ash dump of the Maxfire and UBB is done according to the amount of fuel that it is fed. At the time of an ash dump, there should be about 1/2" to 3/4" of burning embers in the upper burn pot.
- Page 5 The area behind the tubes goes back about 4" Be sure to get all the way to the rear. To effectively clean the Bixby 110 MaxFire to allow maximum burn efficiency, the exhaust manifold BEHIND the lower portion of the convection tubes must be kept clean and open.
-
Page 6: Maintenance And Cleaning Procedures
MAINTENANCE AND CLEANING PROCEDURES The Bixby Room Heater has been designed to reduce the frequency of cleaning. However, if the simple maintenance tasks detailed below are not performed - the Room Heater will not run properly and will lead to reduced heating effi ciency, increased operational problems and potential harm to its components. -
Page 7: Heat Exchanger Tubes
The ash drawer should be checked / emptied after burning approximately 100-200 lbs. (1 - 2 full hoppers) of fuel. Actual frequency will vary with usage, check every few days. Ashes should be placed in a metal container with a tight- fi... -
Page 8: Exhaust Fan
EXHAUST FAN CAUTION: Unplug the Room Heater from its power source before cleaning the impeller. To access this component, remove fasteners, open Right Side Panel, and remove inspection covers. Using a brush and a vacuum, clean the impeller. Inspect gasket. If it is torn, Fan Cover replace gasket before placing unit in service. -
Page 9: Fuel Hopper
FUEL HOPPER The Fuel Hopper should be cleaned out on a regular basis (monthly) to remove fi nes and ensure proper fuel delivery. Clean this area Remove the hopper cover and set aside. Empty the hopper of as much fuel as possible by either running the Room Heater, shop vac, or by hand. -
Page 10: Cleaning The Lower Paddle
CLEANING THE LOWER PADDLE The Lower Paddle needs to be cleaned once a month in order to operate effi ciently. The ash dumping process Burn Pot causes the holes in the lower paddle to eventually clog with ash. Make sure the Room Heater is off and cool. Holes On the control panel, push the “ON”... - Page 11 MaxFire Trouble Shooting Guide ***UNPLUG THE STOVE*** - BEFORE - ***DOING ANY WORK IN OR ON THE STOVE*** This guide is provided only as a suggested manner of troubling shooting and is not all inclusive. This guide is to be used only per the qualified abilities of the consumer "At their own risk"!
- Page 12 Burn Drive (Ash Dump Motor) Burn Drive Motor Assembly. A. Burn drive motor brake: Does it release or NOT set? B. Is the Burn drive motor switch adjusted properly? C. Check wire connections: They should be firmly, securely attached. Burn Drive Motor does not run: A.
- Page 13 c) Wires on the plug of the convection fan may have a bad connection, or the connection to the capacitor may be bad. 1) Contact your Bixby Dealer Feed System: Feed system and Hopper: A. Feeder Wheel Cover: a) The Feeder Wheel cover protects the Feeder Wheel from the weight of the corn in the hopper and should be used at all times.
- Page 14 WING REFERENCES SMALL AMOUNT 03/2007 Page 1 of 1 110_Burner Assembly...
Need help?
Do you have a question about the MaxFire and is the answer not in the manual?
Questions and answers