Table of Contents

Related Manuals for MQ Multiquip Mikasa MVH60

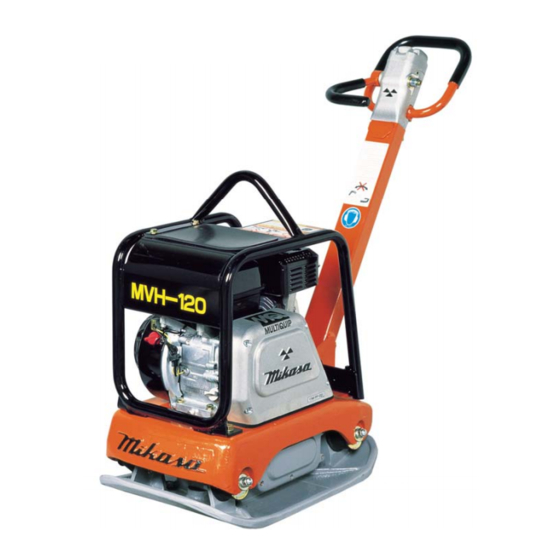
Summary of Contents for MQ Multiquip Mikasa MVH60
- Page 1 SERVICE ® • • • • MAINTENANCE ○ DISASSEMBLY DIAGRAMS ○ TROUBLESHOOTING Updated 3/30/15 Manual No. MVH60120150SM...
-
Page 2: Proposition 65 Warning
Proposition 65 Warning: Engine exhaust and some of its constituents, and some dust created by power sanding, sawing, grinding, drilling and other construction activities contains chemicals known to the State of California to cause cancer, birth defects and other reproductive harm. Some examples of these chemicals are: ... -
Page 3: Table Of Contents
C O N T E N T S 1. Tools・・・・・・・・・・・・・・・・・・・・・・・・・・・・・・・・・・・・・・・ 1 2. Inspection Procedure・・・・・・・・・・・・・・・・・・・・・・・・・・ 2 3. Engine, Oil and V-belt・・・・・・・・・・・・・・・・・・・・・・・・・・ 2 4. General Rules for Conducting Service・・・・・・・・・・・・・ 3 5. Disassembly and Reassembly・・・・・・・・・・・・・・・・・・・・ 4 1. Operation System・・・・・・・・・・・・・・・・・・・・・・・・・・ 4 2. Basic Macine・・・・・・・・・・・・・・・・・・・・・・・・・・・・・・ 8 3. -
Page 4: Tools
1.Tools 1. Wrench 10mm 12mm 13mm 14mm 17mm 19mm 22mm 24mm 27mm Offset wrench/Socket wrench/Adjustable wrench 2. Hexagonal wrench 3/16inch 5mm 8mm 10mm 14mm 3. Plier 4. External snap ring plier/Internal snap ring plier(bent type also use) 5. Screwdriver, flat and cross 6. -
Page 5: Inspection Procedure
2. INSPECTION PROCEDURE 1. External appearance check (1) Installation of parts (loosened screw, defective parts, etc.) (2) Damage on machine (3) Oil check (level and contamination) a. Engine oil (SAE10W-30 when shipped) (See Table 1 for the capacity) b. Vibrator c. - Page 6 4. RULES FOR CONDUCTING SERVICE WORK 1. In order to avoid deficient reassembly, know normal status of installation before removing or disassembling any part. Level check or replacement of vibrator oil should be carried out on level ground. 2. Each time disassembly is made involving oil seal, gasket, packing, o-ring, lock washer or the like, be sure to replace them with new ones.
- Page 7 5. DISASSEMBLING/REASSEMBLING THE MVH-R60~150: 5-1 OPEARTION SYSTEM (MVH-R60) Disassembly 1. Removing two bolts (51) causes throttle body (37) and throttle lever (39) to come off as an assembly. Removing the double nut (46, 47) causes the throttle lever to come off the throttle body. For removing throttle lever off the machine, remove the throttle wire (50) which has been screwed down to the engine.
- Page 8 For VIBRO-COMPACTOR MODEL MVR-R60 Reassembling the governor lever assembly: The governor lever assembly should be totally disassembled except for hollow setscrew (62) and nut M8 (63) (See Fig.A). <Note 1> (Fig.-A) Disassembled hollow setscrew (62) and thin nut M8 (63) Disassembling the Governor Lever Assembly: should be reassembled to be flush with each other as shown Parts not to disassemble.
- Page 9 5. Assemble plain washer (57) and o-ring (56) to throttle gear (Photo I). Tooth face of throttle gear, plain washer and o-ring should be coated with grease. Photo I: Throttle gear, etc. 6. Assemble throttle gear (52) to throttle body (51) as follows: ①...
-
Page 10: Disassembly And Reassembly
5-1 OPERATION SYSTEM (MVH-120) Disassembling: 1. Removing two bolts (26) allows to remove the Disassembled operation system assembly of grip (25), lever bracket (33) and throttle lever (35). Removing double nut (36, 37) causes throttle lever (35) to come off the lever bracket (33). To remove throttle lever from machine, remove governor wire which has been screwed down to engine. - Page 11 5-2 BASIC MACHINE MVH-R60, 120 and 150 ※MVH-R60 is used as an example. Disassembly: R60 main body corollary exploded view 1. With four bolts (21) removed, take off the outer belt cover (20). 2. Remove V-belt (16). 3. With bolt (15) removed, withdraw the clutch (12).
-
Page 12: Vibration System
5-3 VIBRATION SYSTEM During disassembly and reassembly work, use care not damage any parts. O-ring, oil seal, packing or the like must be replaced with new one. Disassembly MVH-R60, 120 and 150 ※MVH-R60 is used as an example. Fig.1 1. Remove any hydraulic hose connection. 2. - Page 14 (MVH-R60) (MVH-120 AND 150) 4-4 Remove seal cap (27). 4-4 Remove seal cap (25). 4-5 Remove pendulums (19, 20) from each 4-5 Remove pendulum (18) from each pendulum pendulum shaft (See Fig.4). shaft (See Fig.8). 4-6 With the driven shaft assembly pushed out to Pendulums Fig.4 the side opposite to pulley and the bearing (2)
- Page 15 MVH - 120, 150 VIBRATOR 1. Models MVH-120 and MVH-150 are different with respect to bearing (2), pendulum (18), hex socket head bolt (19), pendulum pulley (35), washer (37), mounting bolt (38), belt cover (lower)(45) and mounting socket head bolt (46). 2.
- Page 16 MVH-60, 120 AND 150 ※MVH-120 is used as an example: Disassembling the driving shaft side: 5-1 With its mounting bolt (38) removed, pull out the Fig.12 pendulum pulley (35) from drive shaft. Have the key (6) removed as well (See Fig.12). 5-2 With its four mounting bolts removed, remove the bearing cover (21) (See Fig.12).
- Page 17 REASSEMBLY MVH-R60, 120 AND 150 ● Jigs to be used (3 types) Jig A Jig B Jig C ● Before proceeding with reassembly, remove residual liquid packing thoroughly from mating surface of vibrator case and compaction plate. Clean and de-grease all the other parts as well. ●...
- Page 18 Reassembling the driven shaft: Fig.21 Press-in MVH-120 and 150 1. Insert 210°cam ring (7) to drive shaft (4). Pay attention to the direction of flange face to install. (See Fig.18) Shifter piston side. Pay attention o direction of flange face. Coat with molybdenum grease.
- Page 19 Reassembling the driven shaft: Fig.25 MVH-120 and 150 6. Install bearing holder (8) to driven shaft gear with four hex socket head bolts 6x30 (10). (See Fig.25) Apply Locktite 271. Apply Loctite 271 to the bolts. Tightening torque: 180kgf-cm Tightening torque: 180kgf-cm 7.
- Page 20 Reassembling the piston: MVH-R60, 120 and 150 1. Have the expansion stop ring installed over the piston rod and insert two bearings before retaining it with contraction stop ring (See Fig.29). (When using single shield type bearing, it should be installed with its seal surface facing outward.) Seal surface ○...
- Page 21 Assembling the cylinder to vibrator case: MVH-R60, 120 and 150 Install o-ring to the cylinder and coat it with grease. (See Fig. 32) MVH-R60 90 ° ○ Coat the cylinder mounting bolt elbow, while MVH-120 with Loctite #242. and 150 have straight Tightening torque: 350kgf-cm connector.
-
Page 22: Hand Pump System
5-4 HAND PUMP SYSTEM Disassembling/reassembling the hand pump: * In this Section, for the case where index numbers drawings different MVH-120/150 and MVH-R60, drawings for MVH-120/150 will be shown in { }. 1. Removing the hand pump: 1-1 Disconnect hydraulic hose off the compactor cylinder. - Page 23 4. Reassembling the hand pump: (All the O-rings should be renewed.) 4-1 Assemble piston CP (4) to pump body (1) and install stop plug (19, {18}). In case of MVH-R60, install accumulator case (15), piston ring (14) and cylinder CP (3) as well. 4-2 Within the pump body, insert control shaft (8,{7}) to cam COMP (A) and retain it with spring pin (20,{13}).
-
Page 24: Periodical Inspection And Maintenance Work
6. PERIODICAL INSPECTION AND MAINTENANCE WORK ! Note: Inspection or maintenance service should be conducted on hard and level ground. Be sure to have engine shutdown before starting such inspection or service work. 1. Inspection and maintenance chart: To enable the use of machine always in its top condition, be sure to conduct maintenance inspection in accordance with the chart below: Machine Inspection: Item... - Page 25 4. Checking and replacing V-belt and clutch: a. Checking the V-belt (See Fig.33) In every 200 hours of operation, with the belt Belt cover (upper) cover (upper) removed, check the tension of Clutch V-belt. The tension is normal if the bend is about 10mm when the belt is pressed with our finger at midway between the pulleys.
- Page 26 5. Checking the vibrator oil (See Fig.35): In every 100 hours of operation, position the machine horizontally and remove the vibrator oil level check plug (use 14mm wrench) to see oil is up to the port. In every 300 hours of operation, change the Effective range of oil vibrator oil.
- Page 27 7. Replacing the hydraulic oil: Change the oil at first 200 hours and in every 1,000 hours of operation thereafter. Hydraulic hose Breather plug ! Note: e careful not to allow any dust to enter t he hand pump during the work.
- Page 28 8. Checking the battery: The battery installed is of maintenance-free type and replenishment with electrolyte is not needed. If voltage drops, replace with new battery because rapid charging is not possible. a. Removing the battery: 1. With two M8 nuts removed, take off the battery cover. 2.
-
Page 29: Trouble Shooting
7 TROUBLE SHOOTING 1. Gasoline Engine (1) Deficient start up Spark plugs being bridged. Fuel available but Power available at Carbon accumulated on spark plugs. Short circuit due to deficient insulation spark plugs do not high voltage cord. at spark plugs. fire. - Page 30 2. DIESEL ENGINE (1) Starting deficiency: (A) Due to deficient compression: Intake or exhaust valve defective No compression Decompression adjustment deficient. available. Valve seat contact deficient. Nearly no or very Piston ring worn. little Compression Cylinder worn. Mating surface between cylinder and cylinder head deficient. available: Nozzle seat loose.
- Page 31 Piston, cylinder and ring worn. Misfires accompanying Nozzle hole clogged. Piston ring stuck. white smoke exhaust Piston ring installed upside down. (unloaded): Injection timing improper. Valve open/close timing improper. Injection pump joint loosened. Leakage from fuel passage. Fuel consumption Air cleaner element clogged. Defective fuel due to foreign matter entering.
-
Page 32: Wiring Diagram
8. WIRING DIAGRAM MVH−150DS(DY23) Sky blue Sky blue Rectifier Generator Black Blue Sky blue Sky blue Gray Starter motor ● Key switch actuation Terminal Black Position 0 1 ○ ○ 2 ○ ○ ○ (Example) Battery 30A19L How to check regulator: ●... - Page 33 Corporate Headquarters • Multiquip Inc. 18910 Wilmington Ave. Carson, Ca. 90746 Multiquip Inc. ◦ MVH 60 120 150 Plate Compactors ◦ Manual No. MVH60120150SM...
Need help?
Do you have a question about the Mikasa MVH60 and is the answer not in the manual?
Questions and answers