
Related Manuals for TVonics DTR-HV250


Summary of Contents for TVonics DTR-HV250
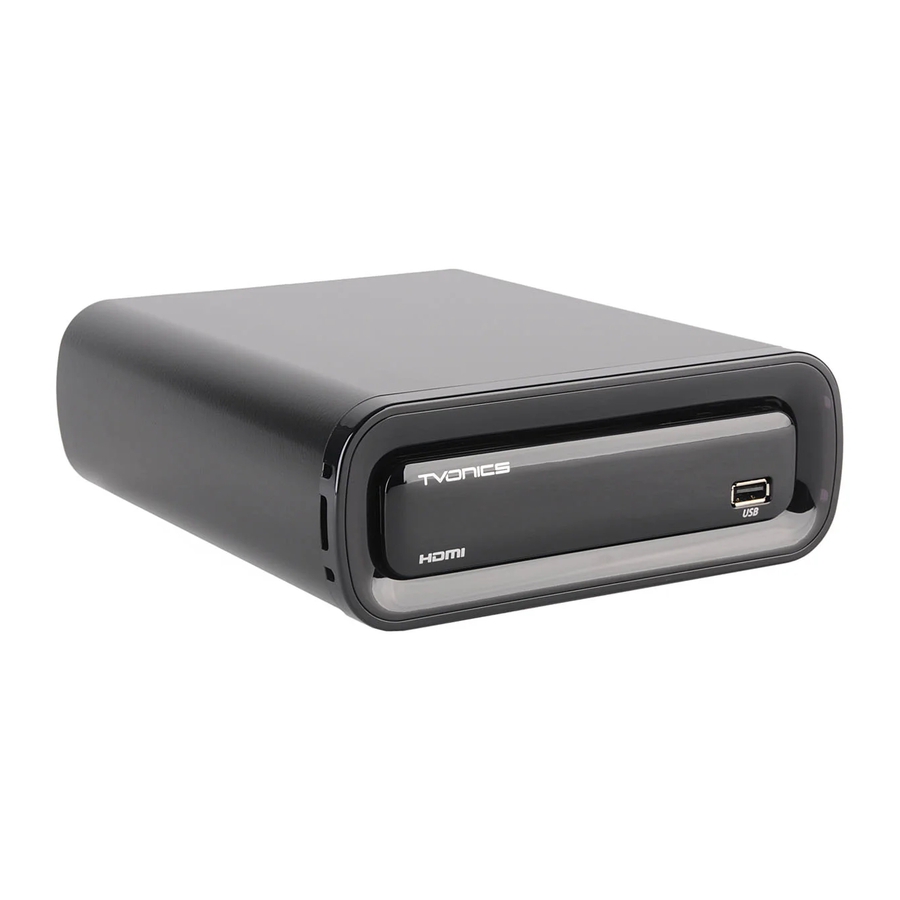
- Page 1 Digital TV recorder DTR-HV250 User guide DTR-HV250 User Guide V2.indb 1 10/12/09 16:46:50...
-
Page 2: Important Safety Information
Important Safety Information Thank you for choosing this TVonics Digital TV recorder. Before using the Digital TV recorder, please take a minute to read the following important safety information. • Only use the supplied AC mains adaptor. • Do not place any objects on the unit. -
Page 3: Table Of Contents
Programming the Remote Control ........................... 32 Automatically Programming the Remote Control ....................33 Finding the Remote Control’s Current Codes ....................... 33 Troubleshooting ................................34 Specifications ..................................36 Remote Control Brand Codes ............................. 38 End User License ................................39 DTR-HV250 User Guide V2.indb 3 10/12/09 16:46:51... -
Page 4: Package Contents
Package Contents INPUT TEXT DTR-HV250 Digital TV recorder (DTR) Remote control Batteries (2xAA) SCART cable AC mains adaptor RF cable User guide Quick start guide DTR-HV250 User Guide V2.indb 4 10/12/09 16:46:52... -
Page 5: Overview Of The Digital Tv Recorder
Front panel display USB socket Rear Panel SCART output socket Aerial input socket Aerial (loop) output (AV1) socket HDMI output socket HDMI input sockets 1/2 USB socket SPDIF output Power socket (Standard TOS link connector) DTR-HV250 User Guide V2.indb 5 10/12/09 16:46:52... -
Page 6: Overview Of The Remote Control
Overview of the Remote Control INPUT 2& TEXT 1& DTR-HV250 User Guide V2.indb 6 10/12/09 16:46:52... - Page 7 PIP - Enters Picture In Picture mode. Refer to page 18 for more information. 2& - Switches the Digital TV recorder, TV* or DVD* on/into standby. *Once the remote control has been programmed to operate your equipment. Refer to page 32. DTR-HV250 User Guide V2.indb 7 10/12/09 16:46:53...
-
Page 8: Inserting The Batteries Into The Remote Control
Don’t forget to get rid of old batteries safely. Check with your local council for how you should get rid of batteries. Never put batteries on a fire or in the bin with normal household waste. DTR-HV250 User Guide V2.indb 8 10/12/09 16:46:53... -
Page 9: Connecting Equipment To The Rear Of The Recorder
HDMI cable is recommended as it gives higher quality picture and sound. Note: • Socket names vary according to make and model of your equipment. • Photo Viewer socket does not support all USB devices or cameras DTR-HV250 User Guide V2.indb 9 10/12/09 16:46:54... -
Page 10: Switching Your Digital Tv Recorder On
This will give you information about the DTT/Radio channel that is currently being watched or listened to. It also displays symbols such when using the Digital TV recorder functions. When using the Photo Viewer function USB is displayed. DTR-HV250 User Guide V2.indb 10 10/12/09 16:46:54... -
Page 11: Automatically Tuning
[OK] to restart automatically tuning. Once the automatic tuning is complete, a summary screen is displayed. Press [OK] to exit the automatic tuning process. Congratulations ! The Digital TV recorder is now ready to use. DTR-HV250 User Guide V2.indb 11 10/12/09 16:46:54... -
Page 12: Everyday Use
Check if Audio Description is available... If Audio Description is available, an [AD] symbol is shown on the information display. *Once the remote control has been programmed to operate your TV. Refer to page 32. DTR-HV250 User Guide V2.indb 12 10/12/09 16:46:54... - Page 13 If you plan to leave the Digital TV recorder unattended for a long period and have not set any programmes to record, put the Digital TV recorder into standby and wait for 20 seconds before switching it off at the mains. DTR-HV250 User Guide V2.indb 13 10/12/09 16:46:54...
-
Page 14: Common Symbols
Timer is set to “Series Record”. Playback of recording has been locked. Recording has been protected from deletion. Play. Pause. Record. Slow motion. Fast Forward. Rewind. Fast Forward (x16) Fast Rewind (x16) Fast Forward (x128) Fast Rewind (x128) DTR-HV250 User Guide V2.indb 14 10/12/09 16:46:55... -
Page 15: The Electronic Programme Guide (Epg)
Exit the EPG and switch to a previewed [OK] button. programme... [EPG] or [BACK] button. Exit the EPG... If you accidentally set a wrong programme to record, press the [ REC] button again to cancel. DTR-HV250 User Guide V2.indb 15 10/12/09 16:46:56... -
Page 16: The Channel List
[RED] button. Display the previous nine channels in the list... [GREEN] button. Display the next nine channels in the list... Switch to the selected channel... [OK] button. [BACK] button. Exit the Channel List... DTR-HV250 User Guide V2.indb 16 10/12/09 16:46:57... -
Page 17: The Info Display
After pressing the [ REC] button, if ‘Series Record’ is available for the selected programme you can press the [BLUE] button to record all programmes in the series. [INFO] or [BACK] button. Exit Info... DTR-HV250 User Guide V2.indb 17 10/12/09 16:46:58... -
Page 18: Picture In Picture (Pip)
Swap the channels on the PIP screen and the [ ] button. main picture... [PIP] button, when the PIP screen is selected/ Exit Picture In Picture... highlighted. Picture In Picture is not available when recording programmes. DTR-HV250 User Guide V2.indb 18 10/12/09 16:46:59... -
Page 19: Recording Programmes
[BLUE] button to record the entire series. Alternatively, if you do not want to record the entire series, press the [OK] button. Programmes set to record as part of a series are identified in the “Timers” menu with a symbol. DTR-HV250 User Guide V2.indb 19 10/12/09 16:46:59... -
Page 20: Recording Conflicts
The Digital TV recorder will also automatically add 3 minutes to the end of each recording to make sure the entire programme is recorded. However, if any subsequent recording starts during those 3 minutes, then the first recording will be stopped to allow the new recording to commence. DTR-HV250 User Guide V2.indb 20 10/12/09 16:46:59... -
Page 21: Timeshifting
3 times to fast forward faster. Watching in slow motion • Press to pause live TV or a recording. • Press to watch in slow motion. Press to return to normal. Stopping timeshifting STOP. • Press DTR-HV250 User Guide V2.indb 21 10/12/09 16:47:00... -
Page 22: The Timers Screen
Show all timers currently set (including all [BLUE] button. Press again to display a ‘Series Record’ programmes) ... summary of all timers currently set. [TIMER] or [BACK] button. Exit the Timers menu... DTR-HV250 User Guide V2.indb 22 10/12/09 16:47:01... - Page 23 Manually setting a timer [YELLOW]. With the ‘Timers’ menu displayed, press [ ] or [ ] to highlight the required setting. Use the [ / / / ] and [0]-[9] buttons to Press make changes. DTR-HV250 User Guide V2.indb 23 10/12/09 16:47:02...
-
Page 24: The Library Menu
Add the selected recording to the playlist... [YELLOW] button (see below for more details). [BLUE] button. Press the corresponding colour Sort the recordings... button to select the required sort option. [LIB] or [BACK] button. Exit the Library menu... DTR-HV250 User Guide V2.indb 24 10/12/09 16:47:03... - Page 25 Video or DVD recorder. While the playlist is playing, press and hold to skip to the next programme in the playlist. Press and hold to return to the start of the current programme. DTR-HV250 User Guide V2.indb 25 10/12/09 16:47:03...
-
Page 26: Using The Photo Viewer
Do not connect a DSC, USB Card reader or USB Flash drive using a USB Hub. Pictures may not be displayed correctly, or may cause a malfunction. • Certain types of DSC may not work with this Photo Viewer function. DTR-HV250 User Guide V2.indb 26 10/12/09 16:47:03... - Page 27 • An Error Message will be displayed if there are no compatible images on the memory device. • Functions, such as Picture In Picture and Channel selection are not available during photo viewing. DTR-HV250 User Guide V2.indb 27 10/12/09 16:47:04...
-
Page 28: Navigating The Main Menu
[MENU] button. [ / ] buttons. Highlight an option... Select an option... [OK] button. [ / ] buttons. Adjust an option’s settings..[BACK] button. Go back a step... Exit the Main Menu... [MENU] button. DTR-HV250 User Guide V2.indb 28 10/12/09 16:47:04... -
Page 29: Main Menu Options
Choose this option if you do not want to have a black bar at the top and bottom of the screen. Programmes broadcast in widescreen will fill the whole screen but you will lose the left and right edges of the picture. DTR-HV250 User Guide V2.indb 29 10/12/09 16:47:04... -
Page 30: Service Menu
PIN is 0000. Service Menu Manufacturers Details Allows you to check the software and hardware versions running on your Digital TV recorder. Signal Strength Allows you to check the DTT signal strength. DTR-HV250 User Guide V2.indb 30 10/12/09 16:47:05... - Page 31 CAUTION ! Resetting the Digital TV recorder will clear all settings and all channel information. After resetting, the Digital TV recorder will need to retune all channels. Only recorded programmes stored on the hard disk will be kept. DTR-HV250 User Guide V2.indb 31 10/12/09 16:47:05...
-
Page 32: Programming The Remote Control
The codes you enter may be lost if weak batteries are not replaced immediately. Even if your TV/DVD brand is listed in the code table, in some instances it may not be possible to operate all of the available functions. DTR-HV250 User Guide V2.indb 32 10/12/09 16:47:05... -
Page 33: Automatically Programming The Remote Control
Press the [4] button and count the number of times the [TV]/[DVD] button flashes. The number of flashes is the fourth number of the code. DTR-HV250 User Guide V2.indb 33 10/12/09 16:47:05... -
Page 34: Troubleshooting
If the remote control does not operate the equipment, even when the remote control has been set to the correct mode, re-programme the remote control (refer to page 32). • Replace the batteries. DTR-HV250 User Guide V2.indb 34 10/12/09 16:47:05... - Page 35 Hard disk will permanently delete all recordings. TVonics Helpline: 0870 80 30 551 (calls charged at national rate) TVonics Website: www.tvonics.com TVonics E-mail support: support@tvonics.com DTR-HV250 User Guide V2.indb 35 10/12/09 16:47:06...
-
Page 36: Specifications
(1.0 V pk to pk 75 ohm) RGB (0.7V pk to pk 75 ohm) Audio output 21-pin SCART connector - Left & right audio (2V rms 10K ohm) Audio line out Digital optical (SPDIF) – TOS link connector DTR-HV250 User Guide V2.indb 36 10/12/09 16:47:06... - Page 37 1080i 50Hz 1080i 60Hz 1080p 24Hz / 50Hz / 60Hz HDCP (pass-through) CEC (pass-through) HDMI Output (not from HDMI pass-through) Signal name Frequency 576i 50Hz 576p 50Hz 720p 50Hz 1080i 50Hz 1080p 50Hz DTR-HV250 User Guide V2.indb 37 10/12/09 16:47:06...
-
Page 38: Remote Control Brand Codes
Use the brand codes in the following list when programming the remote control to operate your TV or DVD player (refer to page 32). Please refer to “www.tvonics.com/codes” for a complete list of all brands covered. TV Brand List Brand... -
Page 39: End User License
Remote Control Brand Codes Please refer to “www.tvonics.com/codes” for a complete list of all brands covered. DVD Brand List Brand Code(s) Brand Code(s) Brand Code(s) Aiwa: 0671, 0725, 0899, 0563 JVC: 0653, 0588, 1931, 1970, 1194, Samsung: 0603, 0774, 1962, 0850, 1105,... - Page 40 © Nov 2009 TVonics Solutions Ltd. Printed in UK U-MAN-001-98 71-800-039-20 DTR-HV250 User Guide V2.indb 40 10/12/09 16:47:06...
Need help?
Do you have a question about the DTR-HV250 and is the answer not in the manual?
Questions and answers