Table of Contents
Advertisement
Quick Links
Advertisement
Table of Contents

Subscribe to Our Youtube Channel
Related Manuals for SMA HM-BT-10


Summary of Contents for SMA HM-BT-10
- Page 1 Installation Manual SUNNY HOME MANAGER HoMan-IA-en-17 | Version 1.7 ENGLISH...
- Page 2 The information contained in this document is the property of SMA Solar Technology AG. Publishing its content, either partially or in full, requires the written permission of SMA Solar Technology AG. Any internal company copying of the document for the purposes of evaluating the product or its correct implementation is allowed and does not require permission.
-
Page 3: Table Of Contents
2.2.1 SMA Devices ........ - Page 4 SMA Energy Meter ........
- Page 5 11.1 Sunny Home Manager ........68 11.2 SMA Radio-Controlled Socket......70 11.3 Plug-In Power Supplies.
-
Page 6: Information On This Document
Validity This document is valid for the following device types: • HM-BT-10.GR2 (Sunny Home Manager) from firmware version 1.10 • BT-SOCKET-10 (SMA radio-controlled socket) from firmware version 12.12.111.R You can find the latest version of this document, matching the current software version of the products, at www.SMA-Solar.com. - Page 7 SMA Solar Technology AG 1 Information on this Document Symbols Symbol Explanation Indicates a hazardous situation which, if not avoided, will result in death or serious injury Indicates a hazardous situation which, if not avoided, can result in death or serious injury...
- Page 8 SMA BLUETOOTH Repeater, BLUETOOTH Repeater ® SMA BLUETOOTH Repeater Outdoor Sunny WebBox, Sunny WebBox mit Sunny WebBox ® BLUETOOTH Wireless Technology ® SMA BLUETOOTH Wireless Technology BLUETOOTH ® SMA radio-controlled socket with BLUETOOTH SMA Radio-Controlled Socket Wireless Technology HoMan-IA-en-17 Installation Manual...
-
Page 9: Safety
For safety reasons, it is not permitted to modify the product or install components that are not explicitly recommended or distributed by SMA Solar Technology AG for the product. Unauthorized changes and modifications will void all warranty claims and the operating permission. - Page 10 For safety reasons, it is not permitted to modify the product or install components that are not explicitly recommended or distributed by SMA Solar Technology AG for this product. Unauthorized changes and modifications will void all warranty claims and the operating permission.
-
Page 11: Supported Devices
2 Safety 2.2 Supported Devices 2.2.1 SMA Devices The Sunny Home Manager supports a maximum of 16 SMA devices. Of the 16 devices, the Sunny Home Manager supports a maximum of twelve SMA inverters or ten SMA radio-controlled sockets. SMA Inverters •... -
Page 12: Devices From Other Manufacturers
Inverters from other manufacturers can be integrated in PV systems with Sunny Home Manager provided that the following requirements are met: ☐ The power output of the inverters must be captured via a separate SMA Energy Meter. ☐ The SMA Energy Meter must be configured in Sunny Portal as a PV production meter (for information on how to configure the energy meters, see the user manual of the Sunny Home Manager). -
Page 13: Skills Of Qualified Persons
– At a maximum allowed grid feed-in of less than 1,500 W: at least 500 pulses per kWh Routers SMA Solar Technology AG recommends the use of a router that supports DHCP. Other Devices: • Heat pump Stiebel Eltron WWK 300 •... -
Page 14: Safety Precautions
2 Safety SMA Solar Technology AG 2.4 Safety Precautions This section contains safety precautions that must be observed at all times when working on or with the product. To prevent personal injury and property damage and to ensure long-term operation of the product, read this section carefully and follow all safety precautions at all times. - Page 15 • Do not operate SMA radio-controlled sockets plugged into each other. Damage to the wall outlet If the SMA radio-controlled socket is operated in a wall outlet that is not suitable for the power of the connected load, damage to the wall outlet could result.
-
Page 16: Scope Of Delivery
Screw Screw anchor 4-pole plug CD with product documentation and Sunny Home Manager Assistant Quick reference guide for commissioning Label Scope of Delivery of SMA Radio-Controlled Socket Figure 2: Components included in the scope of delivery Position Quantity Designation SMA radio-controlled socket... -
Page 17: Product Description
The Sunny Home Manager is a device for monitoring PV systems and for controlling loads in households with PV systems. The Sunny Home Manager carries out the following tasks: • Read-out of energy meter data and data from SMA devices with BLUETOOTH or Speedwire communication interface •... - Page 18 Reading Out Energy Meter Data and Data from SMA Devices with BLUETOOTH or Speedwire Communication Interface The Sunny Home Manager reads out the data of the connected energy meters and SMA devices. The Sunny Home Manager is connected to the energy meters via network cables.
- Page 19 SMA inverters, from an SMA Energy Meter, or from another energy meter. The Sunny Home Manager receives the data on grid feed-in and purchased electricity from an SMA Energy Meter or at least one other energy meter. Control of...
- Page 20 Sunny Home Manager for this purpose (see the Manufacturer's Declaration "Feed-In Management In Accordance with the Renewable Energy Sources Act (EEG) 2012 with SMA Sunny Home Manager (SHM) from SMA" available at www.SMA-Solar.com). Using an SMA Energy Meter or a suitable feed-in meter, the Sunny Home Manager monitors the active power that is fed into the utility grid.
-
Page 21: Type Label
Sunny Home Manager helps to use excess PV power in households directly and increases the self-consumption quota as a result. For PV systems with SMA battery inverters, the Sunny Home Manager preferentially uses the derated active power to charge the battery. -
Page 22: Leds
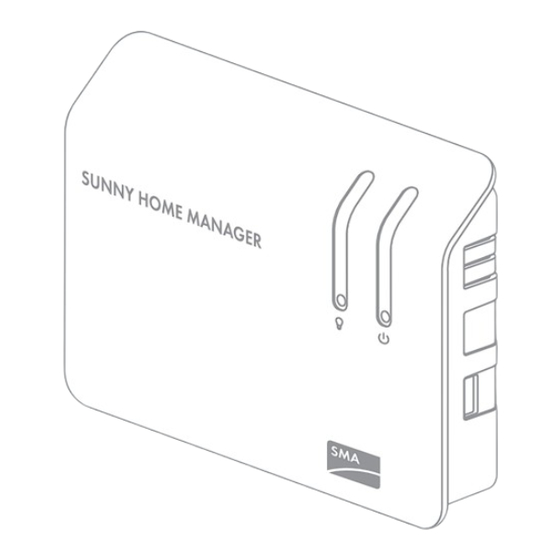
4 Product Description SMA Solar Technology AG Symbols on the Type Label Symbol Designation Explanation C-Tick The product complies with the requirements of the applicable Australian EMC standards. FCC marking The product complies with the requirements of the applicable FCC standards. - Page 23 SMA Solar Technology AG 4 Product Description Energy Consumption LED The energy consumption LED is only active if either the bidirectional meter for grid feed-in and purchased electricity is connected or one feed-in meter and one purchased electricity meter are connected.
-
Page 24: System Requirements
At least one feed-in meter is required for the function Limitation of active power feed-in (recommended: SMA Energy Meter). The Sunny Home Manager receives the PV generation data via the connected SMA inverters or via an optionally connected PV production meter. -
Page 25: Sma Radio-Controlled Socket
Implementing Control Commands of the Sunny Home Manager The Sunny Home Manager can switch the SMA radio-controlled socket on and off. As a result, specific electrical devices can be switched on if e.g. a lot of PV power is available. -
Page 26: Led Display
SMA Solar Technology AG Improving the Wireless Connection between BLUETOOTH Devices If the distance between BLUETOOTH devices is too great or obstructions interfere with the BLUETOOTH connection, the SMA radio-controlled socket can be used as a repeater to bridge the dead zone. Figure 6:... - Page 27 Operating mode/status of the SMA radio-controlled socket Glowing red System is starting. Update process is running. In this status, do not unplug the SMA radio-controlled socket from the outlet. Otherwise, the SMA radio-controlled socket could be damaged. Lower Horizontal LED Figure 8:...
-
Page 28: Preparing For Mounting And Commissioning Of The Sunny Home Manager
5.1.1 Commissioning a BLUETOOTH PV System All devices must be set to the same NetID so that the SMA BLUETOOTH devices in a PV system can communicate with each other. The NetID is used to distinguish between PV systems using SMA BLUETOOTH located in close proximity to one another. -
Page 29: Configuring The Netid On The Sunny Home Manager
• On the type label on the back of the Sunny Home Manager • On the cover of the supplied CD 5. With the exception of the Sunny Home Manager and the SMA radio-controlled socket, commission all BLUETOOTH devices (see BLUETOOTH device manuals). -
Page 30: Preparing For Speedwire Communication
Make sure that the distance to the mounting location of the Sunny Home Manager is not too great, as the Sunny Home Manager must later be connected to the same router/network switch. * You can obtain the SMA Connection Assist software free of charge from the download area at www.SMA-Solar.com. HoMan-IA-en-17... -
Page 31: Installation
6.2 Requirements for the Mounting Location of the SMA Radio-Controlled Socket ☐ The SMA radio-controlled socket must only be operated in wall outlets that are suitable for the power of the connected load. ☐ A minimum distance of of 1 m must be maintained from devices using the 2.4 GHz radio spectrum (e.g. -
Page 32: Checking The Bluetooth Connection At The Designated Mounting Location
6.3 Checking the BLUETOOTH Connection at the Designated Mounting Location If the Sunny Home Manager is to communicate with other SMA devices via BLUETOOTH, e.g. with SMA radio-controlled sockets, you must check the BLUETOOTH connection at the designated mounting location. -
Page 33: Mounting The Sunny Home Manager
SMA Solar Technology AG 6 Installation 6.4 Mounting the Sunny Home Manager 6.4.1 Mounting the Sunny Home Manager on the Wall 1. Define the position of the Sunny Home Manager on the wall. 2. Mark the position of the drill holes on the wall (distance between drill holes: 58 mm). -
Page 34: Connection
7 Connection SMA Solar Technology AG 7 Connection 7.1 Connection Area Bottom of Enclosure Figure 12: Terminals on the bottom of the enclosure Position Designation Explanation Power Pin connector for plug-in power supply NetID Rotary switch for configuring the NetID BLUETOOTH LED... - Page 35 SMA Solar Technology AG 7 Connection Right Side of Enclosure Figure 13: Terminal on the right side of the enclosure Position Designation Explanation USB port Currently without function Left Side of Enclosure Figure 14: Terminal on the left side of the enclosure...
- Page 36 7 Connection SMA Solar Technology AG Contact Pin Assignment of the Pin Connector Figure 15: Contact pin assignment of the pin connectors at the bottom of the Sunny Home Manager enclosure Upper contact pin row for D0: Signal Specification Description Voltage supply...
-
Page 37: Connecting The Sunny Home Manager To Energy Meters
7.2.1 Connecting the Sunny Home Manager to the SMA Energy Meter The SMA Energy Meter and the Sunny Home Manager must be connected to the same router. Additionally required material (not included in the scope of delivery): ☐ 1 network cable (for cable requirements, see Section 4.1.4) Procedure 1. -
Page 38: Interface
7 Connection SMA Solar Technology AG Procedure 1. Position the magnet retainer of the optical probe at the front upper right-hand corner of the energy meter. The infrared interfaces on the optical probe and on the energy meter must be perfectly aligned. - Page 39 SMA Solar Technology AG 7 Connection ☐ Recommended pulse length: 1,000 pulses per kWh For the function Limitation of active power feed-in, energy meters with an S0 interface must have the following pulse rates: – For systems with maximum permitted grid feed-in of more than 1,500 W: at least 250 pulses per kWh –...
- Page 40 7 Connection SMA Solar Technology AG Procedure 1. Remove 4 cm of cable sheath. 2. Shorten the cable shield to approximately 5 mm. Fold the surplus cable shield back onto the cable sheath. 3. Shorten unused insulated conductors flush with the cable sheath.
-
Page 41: Replacing Energy Meters
1. Decommission the energy meter to be replaced (see energy meter manual). 2. If the SMA Energy Meter is replaced, note the serial number of the new SMA Energy Meter. The serial number is to be found on the type label of the SMA Energy Meter. -
Page 42: Supplying The Sunny Home Manager With Voltage
7 Connection SMA Solar Technology AG 7.6 Supplying the Sunny Home Manager with Voltage 7.6.1 Supplying the Sunny Home Manager with Voltage via the Plug-In Power Supply 1. Connect the DC plug of the plug-in power supply to the Power connector of the Sunny Home Manager. - Page 43 SMA Solar Technology AG 7 Connection 3. Write down the color of the insulated conductors: Terminals on the top-hat rail Insulated conductor color power supply DC − 4. Remove 4 cm of the cable sheath at the other end of the cable.
- Page 44 7 Connection SMA Solar Technology AG Danger to life due to electric shock Lethal voltages are present at the connection point of the utility grid. • Disconnect the connection point from the utility grid via the disconnector (e.g. in the distribution board).
-
Page 45: Commissioning
SMA Solar Technology AG 8 Commissioning 8 Commissioning 8.1 Establishing a Connection to Sunny Portal Requirements: ☐ DHCP must be activated on the router (see router manual). If your router does not support DHCP, you can configure the static network settings on the Sunny Home Manager using the Sunny Home Manager Assistant (see Section 9.4, page 62). - Page 46 8 Commissioning SMA Solar Technology AG Tip: If you have SMA radio-controlled sockets, insert these into outlets and configure the NetID of the PV system (see Section 5.1.3 "Configuring the NetID on the SMA Radio-Controlled Socket", page 29). This will enable you to register the SMA radio-controlled sockets together with the Sunny Home Manager.
- Page 47 SMA Solar Technology AG 8 Commissioning Logging in as an Existing User in Sunny Portal Requirement: ☐ You must already have one PV system in Sunny Portal. Procedure 1. Select the field I am already registered in Sunny Portal. 2. Enter the e-mail address and the Sunny Portal password in the fields E-mail address and Password.
- Page 48 8 Commissioning SMA Solar Technology AG 6. Select [Identify]. ☑ Sunny Portal searches for the Sunny Home Manager with the corresponding serial number and registration ID. The PV System Setup Assistant displays the correct Sunny Home Manager with a green tick.
- Page 49 • Select SMA Energy Meter xxx. The placeholder for the SMA Energy Meter serial number is xxx. If there are two SMA Energy Meters in the PV system, select the desired SMA Energy Meter. • Activate the checkbox Bidirectional meter (consumption and feed-in).
-
Page 50: Setting The Operating Mode Of The Sma Radio-Controlled Socket
8.3 Setting the Operating Mode of the SMA Radio-Controlled Socket You can configure the operating mode of the SMA radio-controlled socket via the touch key on the SMA radio-controlled socket or via Sunny Portal (see user manual "SUNNY HOME MANAGER in Sunny Portal"). - Page 51 Manually switched off Glowing orange 3. To adopt the operating mode, wait approximately one second. Do not tap the touch key. ☑ After approximately two seconds, the SMA radio-controlled socket audibly switches to the selected operating mode. Installation Manual HoMan-IA-en-17...
-
Page 52: Troubleshooting
Corrective measures: • Disconnect the Sunny Home Manager from the voltage supply and then reconnect (see Section 7.6). • If the status persists, contact the SMA Service Line. Flashing red The Sunny Home Manager cannot establish a connection to Sunny Portal. - Page 53 SMA Solar Technology AG 9 Troubleshooting LED status Cause and corrective measures Flashing green and The Sunny Home Manager is connected to Sunny Portal, but is not yet orange intermittently registered in Sunny Portal. Corrective measures: • Register the Sunny Home Manager in Sunny Portal (see Section 8.2).
-
Page 54: States Of The Bluetooth Led
• If possible, select a different mounting location and check the connection. • If no other mounting location is possible, use an SMA BLUETOOTH Repeater or an SMA radio-controlled socket. This will extend the wireless range of your BLUETOOTH network. HoMan-IA-en-17... -
Page 55: Errors In The Sma Radio-Controlled Socket
Corrective measures: • If possible, select a different mounting location. • If no other mounting location is possible, use an SMA BLUETOOTH Repeater or an additional SMA radio-controlled socket. This will extend the wireless range of your BLUETOOTH network. Installation Manual... -
Page 56: Errors During Registration In Sunny Portal
• Ensure that the Sunny Home Manager is supplied with voltage (see Section 7.6, page 42). • Contact the SMA Service Line if the Sunny Home Manager is correctly connected to the router and is supplied with voltage but all LEDs remain off. - Page 57 • Commission the devices. Insufficient radio range of the inverter with BLUETOOTH communication interface. Corrective measures: • Use SMA BLUETOOTH Repeater or SMA radio-controlled socket. This will extend the wireless range of your BLUETOOTH network. Insufficient transmission power of the inverter with...
- Page 58 Problem Cause and corrective measures The PV System Setup Assistant It is possible that the SMA device is not correctly connected to the lists none or not all of the new router or is not supplied with voltage. SMA devices that are Corrective measures: connected via Speedwire.
- Page 59 Problem Cause and corrective measures The PV System Setup Assistant The network cable that connects the SMA device to the router/ lists none or not all of the new network switch is not suitable for 100 MBit/s. SMA devices that are Corrective measures: connected via Speedwire.
- Page 60 9 Troubleshooting SMA Solar Technology AG Problem Cause and corrective measures The PV System Setup Assistant A different BLUETOOTH system within radio range of the lists own and third-party Sunny Home Manager is using the same NetID as your devices.
- Page 61 • If possible, contact the previous owners and ask them to delete the Sunny Home Manager system in Sunny Portal. • Contact the SMA Service Line. After you have entered the The devices with warning symbols are inverters with BLUETOOTH system password, some devices Piggy-Back.
-
Page 62: Using The Sunny Home Manager Assistant
In addition, you can use the Sunny Home Manager Assistant to display the latest connection status to Sunny Portal, the network settings and the connected BLUETOOTH devices, and save these as a log file. If servicing should be necessary, the SMA Service Line can use this log file to analyze the problem. -
Page 63: Resetting The Sunny Home Manager
SMA Solar Technology AG 9 Troubleshooting 9.6 Resetting the Sunny Home Manager The reset button is located in a small aperture on the bottom of the Sunny Home Manager. Depending on how long you hold down the reset button, the Sunny Home Manager is partially or completely reset. -
Page 64: Reassigning The Sunny Home Manager After Resetting The Sunny Home Manager System
9 Troubleshooting SMA Solar Technology AG 9.7 Reassigning the Sunny Home Manager after Resetting the Sunny Home Manager System If you have performed a complete reset of the Sunny Home Manager (see Section 9.6), you must reassign the Sunny Home Manager to your Sunny Home Manager system in Sunny Portal. Otherwise, Sunny Portal will not accept any data from the Sunny Home Manager. -
Page 65: Resetting The Sma Radio-Controlled Socket To Default Settings
• You wish to reset the measured values of the SMA radio-controlled socket. Procedure 1. Unplug the SMA radio-controlled socket from the outlet and then plug it back in. ☑ The upper horizontal LED glows red for approximately ten seconds. -
Page 66: Decommissioning
10 Decommissioning SMA Solar Technology AG 10 Decommissioning 10.1 Disassembling the Sunny Home Manager 1. If the Sunny Home Manager is supplied with voltage via the plug-in power supply: • Pull the plug-in power supply out of the outlet. • Unplug the DC plug of the plug-in power supply from the Power terminal of the Sunny Home Manager. -
Page 67: Packing The Sunny Home Manager/Sma Radio-Controlled
SMA Solar Technology AG 10 Decommissioning 10.2 Packing the Sunny Home Manager/SMA Radio-Controlled Socket for Shipping • Pack the device for shipment. Use the original packaging or packaging that is suitable for the weight and size of the device (see Section 11 "Technical Data", page 68). -
Page 68: Technical Data
11 Technical Data SMA Solar Technology AG 11 Technical Data 11.1 Sunny Home Manager General Data Status display LEDs Maximum length of cables to energy meters with 30 m S0 interface Maximum length of cables to energy meters with 15 m... - Page 69 * maximum range in free-field conditions Internal Memory Cache for PV system data 5 days Number of Devices Maximum number of SMA devices Maximum number of SMA inverters Maximum number of SMA radio-controlled sockets Maximum number of devices controlled via a...
-
Page 70: Sma Radio-Controlled Socket
11 Technical Data SMA Solar Technology AG 11.2 SMA Radio-Controlled Socket General Data Status display LEDs Certified countries Belgium, Germany, France, Greece, Great Britain, Italy, Luxembourg, Austria, Portugal, Spain, Czech Republic, Switzerland Minimum service life* 20,000 switching cycles * when switched at full load (16 A) -
Page 71: Plug-In Power Supplies
SMA Solar Technology AG 11 Technical Data Ambient Conditions for Storage/Transport Ambient temperature − 25°C to +80°C Relative humidity* 5% to 95% Maximum altitude above MSL 3,000 m * non-condensing Communication Interface to Other Devices Sunny Home Manager BLUETOOTH, Speedwire... - Page 72 11 Technical Data SMA Solar Technology AG TaiyTech, TYT251200200EU/3000M Mechanical Data Width x height x depth 92.0 mm x 90.6 mm x 36.0 mm Weight 190 g Voltage Supply Voltage 100 V AC to 240 V AC Frequency 50/60 Hz Maximum current 0.85 A...
-
Page 73: Accessories
12 Accessories 12 Accessories You will find the corresponding accessories and spare parts for your product in the following overview. If required, you can order these from SMA Solar Technology AG or from your distributor. Designation Brief description SMA order number... -
Page 74: Contact
SMA Solar Technology AG 13 Contact If you have technical problems concerning our products, please contact the SMA Service Line. We require the following information in order to provide you with the necessary assistance: • Serial number and software package of the Sunny Home Manager •... - Page 75 Hybrid Energy Solutions Sunny Island : +33 472 09 04 42 Power Plant Solutions Sunny Central : +33 472 09 04 43 India SMA Solar India Pvt. Ltd. +91 22 61713888 Mumbai Italia SMA Italia S.r.l. +39 02 8934-7299 Milano Κύπρος/...
- Page 76 +66 2 670 6999 대한민국 SMA Technology Korea Co., Ltd. +82 2 508-8599 서울 +971 2 234-6177 SMA Middle East LLC Other International SMA Service Line Toll free worldwide: 00800 SMA SERVICE countries (+800 762 7378423) Niestetal HoMan-IA-en-17 Installation Manual...
- Page 77 SMA Solar Technology www.SMA-Solar.com...
Need help?
Do you have a question about the HM-BT-10 and is the answer not in the manual?
Questions and answers