Table of Contents
Advertisement
Ver 1.0
Robot Cleaner
ME770
Thank you for purchasing the ME770
robot cleaner.
Before using the product, please read this User Manual carefully, and keep it for future reference.
Depending on your model, some contents of this User Manual may di er from the actual product.
The contents of this User Manual are subject to change without notice.
Advertisement
Table of Contents

Related Manuals for Moneual ME770 Style


Summary of Contents for Moneual ME770 Style
-
Page 1: Robot Cleaner
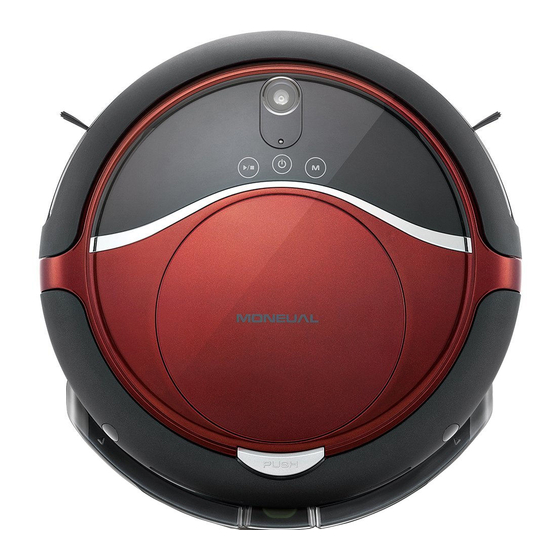
Ver 1.0 Robot Cleaner ME770 Thank you for purchasing the ME770 robot cleaner. Before using the product, please read this User Manual carefully, and keep it for future reference. Depending on your model, some contents of this User Manual may di er from the actual product. The contents of this User Manual are subject to change without notice. - Page 2 Overview Robot Cleaner Rear Control buttons and indicators Bumper Obstacle and signal detection sensors Air outlet Adaptor jack Bottom Power switch Signal receiving sensor Cli detection sensors Charging terminals Wheels Side brush installation pins Dust inlet Main brush Mop plate installation holes...
- Page 3 Robot Cleaner Control Buttons and Indicators Start/stop button Power button Cleaning mode selection button indicator indicator mode indicator indicator indicator Charger Front Back Power/charging lamp Guide signal transmission sensor Charging terminals Adaptor holder Adaptor jack Sensor’s signal distance selection switch...
-
Page 4: Remote Control
Before Use Remote Control You can conveniently access the various functions of the robot cleaner with your remote control. Functions that can be controlled through the control panel on the robot cleaner: mop cleaning, and charging. Functions that can be controlled through the remote control: cleaning, cleaning, cleaning,... -
Page 5: Installing The Charger
Installing the Charger Connect the power adaptor. Set the robot cleaner detection distance (5 m or 8 m). Place the power adaptor in the holder of the charger. Check the power connection (blue lamp). Check the location of the charger. Clear all obstacles in the area within 1 m in front, left, and right of the charger If you install the robot cleaner in a place where it will be exposed to direct sunlight, the heat of the sun may... - Page 6 Charging If you have prepared the charger, main body, and remote control, you must then charge the battery of the robot cleaner to use it. To charge the robot cleaner, follow these steps: Turn the power switch on. Hold the robot cleaner with both hands and put it on the charger. Match the terminals of the robot cleaner with the terminals of the charger.
-
Page 7: Installing The Water Supply Big Mop Kit
Robot Cleaner Installing the Water Supply Big Mop Kit Turn the power switch o Supply water into the mop plate and attach (on the lower rear side of the the mop to it. robot cleaner). Attach the mop plate. Fit the joint parts well to the holes of the robot cleaner. -
Page 8: Big Mop Recommendation
Product Operation Robot Cleaner Big Mop Recommendation ’s specially designed Big Mop can be rewashed and reused. Dampen the Big Mop before attaching it to the Tank. Make sure the Big Mop is not excessively wet to avoid the wheels from slipping. You may add cleaning solution to the Big Mop, but it may create wheel slippage. -
Page 9: Before You Start
Product Operation Product Operation Before You Start Check the following before you start the robot cleaner. Be careful not to break the robot cleaner when you pull the robot cleaner out of the box. For information of installing the robot cleaner, see page 14. Check the location (L/R) of the brushes and install them. -
Page 10: Starting & Stopping Cleaning
Robot Cleaner Starting & Stopping Cleaning Starting Cleaning Turn the power switch on. If you are cleaning an area that is di cult to clean using auto cleaning mode, change to the proper cleaning mode. Stopping Cleaning After cleaning, the robot cleaner returns to the charger or stops on the spot according to the cleaning mode. - Page 11 Product Operation Changing the Cleaning Mode User can set the cleaning mode to match the cleaning environment. Cleaning modes that you can select using the Mode (M) button on the robot cleaner: Hybrid Vacuum Intensive Shadow Cleaning Cleaning Cleaning Cleaning Cleaning Cleaning modes that you can select using the remote control: Hybrid...
-
Page 12: Hybrid Cleaning
Product Operation Product Operation Hybrid Cleaning In Hybrid Cleaning, the robot cleaner performs the Vacuum Cleaning and Mop Cleaning at the same time. Hybrid Cleaning o ers a comprehensive oor care solution because of the use of the twin side brushes, the main brush, the BLDC suction, and the reusable micro ber Big Mop with the Water Supply Tank all together. -
Page 13: Vacuum Cleaning
Product Operation Robot Cleaner Vacuum Cleaning Vacuum cleaning is used where the needs are vacuum suction only without mop cleaning. It can be used on hard oor or carpet. Turn the system power switch on. Turn the main power button on. Select the Vacuum Cleaning with the Mode button on the Control Panel and press the Start/Stop button or just press the Vacuum Cleaning button on the remote control. -
Page 14: Mop Cleaning
Product Operation Mop Cleaning Mop Cleaning mode is used for when you need mopping only without vacuuming. If Mop Cleaning mode is used on carpet or rug, the carpet or rug can be damaged. Therefore, please use the Mop Cleaning mode only on hard oor. -
Page 15: Intensive Cleaning
Product Operation Product Operation Intensive Cleaning The robot cleaner intensively cleans the surrounding area relative to its current location. Turn the power switch on. In Auto Cleaning mode, the robot cleaner stops on the spot after it has nished the cleaning. In the area in which there are many obstacles, the robot cleaner may not operate in normal cleaning modes. -
Page 16: Shadow Cleaning
Product Operation Robot Cleaner Shadow Cleaning You can clean under your bed or furniture. To use shadow cleaning mode, turn the room light on. In a dark room, the robot cleaner can’t detect the space under the bed or furniture. The robot cleaner moves to a place under the bed or furniture to start shadow cleaning. -
Page 17: Manual Cleaning
Product Operation Product Operation Manual Cleaning You can control the robot cleaner directly using the remote control. Stop the robot cleaner that is operating by pressing the Start/stop ( ) button. Press the Manual button on the remote control. Air suction will start in its current place. If you press the Manual button again, air suction will be stopped. - Page 18 Robot Cleaner Scheduled Cleaning (Reservation Cleaning) For daily e cient hands free cleaning, the robot cleaner provides 2 Reservation Cleaning modes. One starts cleaning after 1 hour from the time you set it and the other starts at the same time everyday. Reservation Cleaning only works from the charging station after you set the Reservation Cleaning.
-
Page 19: Turbo Option
Product Operation Product Operation Turbo Option While you are using the Hybrid / Vacuum / Intensive / Shadow / Manual Cleaning, by pressing the Turbo button on the remote controller you can control suction power. Turbo option is not available in Hybrid Cleaning mode and Mop Cleaning mode. Power o Power on Threshold Option... -
Page 20: Double Deep Cleaning Option
Robot Cleaner Double Deep Cleaning Option The Double Deep Cleaning Option performs 2 cleaning sessions of the vertical pattern overlapped by the horizontal pattern. Deep Cleaning Pattern Double Deep Cleaning Option Vertical pattern overlapped by Performs 2 cleaning sessions of the vertical the horizontal pattern pattern overlapped by the horizontal pattern. - Page 21 Product Operation Product Operation Select any one of Hybrid / Vacuum / Mop / Shadow Cleaning. To learn how to select these options, you may refer to the relevant sections on the User Manual. Press the Double CL button on the remote control. The robot cleaner will perform 2 cleaning The Double Deep Cleaning Option indicator is sessions of the vertical pattern overlapped...
-
Page 23: Cleaning Sensors And Wheels
Product Operation Cleaning Sensors and Wheels Cleaning Sensors Clean (blow or wipe) the three sensors with the included clean- ing brush or a cotton swab. If sensors are severely contaminated, wipe with a moistened cotton swab. Do not wipe directly with water, and do not use benzene or alcohol to clean sensors. -
Page 24: Cleaning The Dust Inlet
Robot Cleaner Cleaning the Dust Inlet Remove the dust inlet cover. Remove the main brush. Check the groove’s shape and insert the main brush into the xing hole, and then secure Clean the removed main brush the wing of the xing pin to with the cleaning brush. -
Page 25: Using And Managing The Battery
Using and Managing the Battery The battery is a consumable item. The more you use the battery, the shorter the battery’s lifetime. Battery Lifetime We guarantee 6 months of use in a normal environment. Always charge the battery for the best use experience. The battery lifetime may vary depending on the use environment. -
Page 26: Battery Replacement
If you notice that the operating time has been signi cantly reduced, you may need to replace the battery. You must use a battery that is manufactured by Moneual. Remove the battery from the robot cleaner when the system power is o . - Page 27 If you leave the fully discharged battery for a long time, the battery may become damaged and you may not be able to use it. If you use a battery other than Moneual’s for use with the robot cleaner or the battery may be damaged. Remove the battery before disposing of the robot cleaner.
Need help?
Do you have a question about the ME770 Style and is the answer not in the manual?
Questions and answers
Pozdravljeni! Imam iRobotski sesalnik 2 v 1. Sesa in pomiva, ima tudi daljinca ter postajo za polnitev. Letos sem se preselila, in izgubila daljinca. Prosim vas., če mi lahko pomagate in mi svetujete kje bi lahko daljinca za Robotski sesalnik Moneual Hybrid Rydis H68 Pro MRC6500 dobila. V prilogi vam pošiljam tudi sliko. Lp. Marina Dagarin