Advertisement
Advertisement

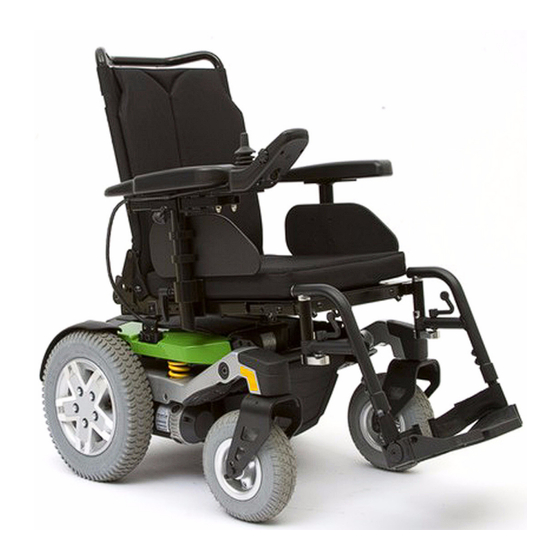
Related Manuals for Pride Mobility Quantum R44


Summary of Contents for Pride Mobility Quantum R44
- Page 1 QUANTUM...
- Page 2 INTENDED USE The intended use of the Pride Mobility Products device is to provide mobility to persons limited to a seated postion that have the capability of operating a powered wheelchair. Quick Reference Information:...
-
Page 3: Table Of Contents
C O N T E N T S INTRODUCTION ........................... 4 SAFETY ..............................5 III. YOUR POWER CHAIR ........................18 IV. COMFORT ADJUSTMENTS ......................22 BATTERIES AND CHARGING ...................... 29 VI. CARE AND MAINTENANCE ......................33 www.pridemobility.com... -
Page 4: Introduction
I . I N T R O D U C T I O N SAFETY WELCOME to Quantum Rehab, a division of Pride Mobility Products (Pride). The power chair you have pur- chased combines state-of-the-art components with safety, comfort, and styling in mind. We are confident that these design features will provide you with the conveniences you expect during your daily activities. - Page 5 I I . S A F E T Y PRODUCT SAFETY SYMBOLS The symbols below are used on the power chair to identify warnings, mandatory actions, and prohibited actions. It is very important for you to read and understand them completely. Read and follow the information in the owner’s manual.
- Page 6 I I . S A F E T Y Do not connect an extension lead to the AC/DC converter or the battery charger. Removal of grounding prong can create electrical hazard. If necessary, properly install an approved 3-pronged adapter to an electrical outlet having 2-pronged plug access. Battery posts, terminals, and related accessories contain lead and lead compounds.
- Page 7 I I . S A F E T Y Use only AGM or Gel-Cell batteries to reduce the risk of leakage or explosive conditions. Keep tools and other metal objects away from battery terminals. Contact with tools can cause electrical shock. Battery Set Configuration: + = Positive (Red) Terminal Post - = Negative (Black) Terminal Post...
- Page 8 I I . S A F E T Y Disposal and recycling - Contact your Quantum Rehab Provider for information on proper disposal and recycling of your Pride product and its packaging. Unlocked and in freewheel mode. Place unit on level ground and stand to one side when changing from drive mode to freewheel mode or freewheel mode to drive mode.
- Page 9 I I . S A F E T Y Indicates that tested and approved power chair, with similarly labeled tested and approved seating system, conforms to ISO 7176-19 for transport of an occupied power chair in a motor vehicle. Indicates power chair securement points. Indicates electrical shock hazard.
- Page 10 I I . S A F E T Y GENERAL GUIDELINES MANDATORY! Do not operate your new power chair for the first time without completely reading and understanding this owner’s manual. Your power chair is a state-of-the-art life-enhancement device designed to increase mobility. Pride provides an extensive variety of products to best fit the individual needs of the power chair user.
-
Page 11: Your Power Chair
I I . S A F E T Y Weight Limitations Your power chair is rated for a maximum weight capacity. Please refer to the specifications table for this limit. Keep in mind that the maximum weight capacity includes the combined weight of the user and any accessories mounted to the power chair. - Page 12 I I . S A F E T Y WARNING! If your power chair is equipped with a reclining seatback, do not attempt to negotiate inclines with the seat in a reclined position. Do not attempt to negotiate obstacles with the seat in a reclined position unless an attendant is present to help stabilise the chair.
- Page 13 I I . S A F E T Y Public Streets and Roadways WARNING! You should not operate your power chair on public streets and roadways. Be aware that it may be difficult for traffic to see you when you are seated on your power chair. Obey all local pedestrian traffic rules.
- Page 14 I I . S A F E T Y Figure 2. Correct Kerb Approach Figure 3. Incorrect Kerb Approach Stairs and Escalators Power chairs are not designed to travel up or down stairs or escalators. Always use a lift. WARNING! Never use your power chair to negotiate steps or escalators. Doors Determine if the door opens toward or away from you.
- Page 15 I I . S A F E T Y WARNING! Pride does not recommend using the power chair as a seat in a motor vehicle. The power chair user should transfer into the vehicle seat and use the vehicle-installed belt restraint system if and whenever feasible.
- Page 16 I I . S A F E T Y Preventing Unintended Movement WARNING! If you anticipate being seated in a stationary position for an extended period of time, turn off the power. This will prevent unexpected motion from inadvertent joystick contact. This will also eliminate the possibility of unintended chair movement from electromagnetic (EM) sources.
- Page 17 I I . S A F E T Y WARNING! Consult your physician if you are taking prescribed or over-the-counter medication or if you have certain physical limitations. Some medications and limitations may impair your ability to operate your power chair in a safe manner. Alcohol/Smoking The power chair user must exercise care and common sense when operating his/her power chair.
- Page 18 I I I . Y O U R P O W E R C H A I R THE R44 Your power chair has two main assemblies: the seat and the power base. See figures 5 and 6. Typically, the seat assembly includes the armrests, seatback, and seat base.
- Page 19 I I I . Y O U R P O W E R C H A I R Electrical Components The electrical components are located on the front of the power base. See figure 6. Main Circuit Breaker: The main circuit breaker is a safety feature built into your power chair. When the batteries and the motors are heavily strained (e.g., from excessive loads), the main circuit breaker trips to prevent damage to the motors and the electronics.
- Page 20 I I I . Y O U R P O W E R C H A I R Kerb Climber (Optional) Your power chair may be equipped with a kerb climbing mechanism designed to work with your built-in suspension system to further stabilise your power chair when climbing kerbs or other obstacles.
- Page 21 I I I . Y O U R P O W E R C H A I R Manual Freewheel Levers For your convenience, your power chair is equipped with two manual freewheel levers mounted on the motors. These levers allow you to disengage the drive motors and maneuver the chair manually. You can manually push the power chair by the seatback.
-
Page 22: Comfort Adjustments
Your Quantum Rehab Provider has evaluated your power chair and made any necessary adjustments to suit your specific requirements. Do not change your seating configuration without first contacting Pride Mobility Products or your Quantum Rehab Provider. - Page 23 I V . C O M F O R T A D J U S T M E N T S Power Positioning Systems Adjustment Your power chair may be equipped with a power recline, power tilt, or power elevating leg rest system. You can change the position of these options through the controller.
- Page 24 I V . C O M F O R T A D J U S T M E N T S Seat Angle (Dump) Adjustment Your seat may be equipped with mechanism that allows you to adjust the seat angle (dump) from -5° to +10° in 2.5° increments.
- Page 25 I V . C O M F O R T A D J U S T M E N T S Armrest Height Adjustment Armrest height adjustments can be made on both the top and the bottom of the armrest. The total height adjustment range is 15.24 cm (6 in.)—from 27.94 to 43.18 cm (11 to 17 in.).
- Page 26 I V . C O M F O R T A D J U S T M E N T S Controller Position You can move the controller in toward or out away from the armrest, or change the position of the controller for either left- hand or right-hand use.
- Page 27 I V . C O M F O R T A D J U S T M E N T S Anti-Tip Wheels The anti-tip wheels are designed to give your power chair increased stability on rough surfaces. The anti-tip wheels are preset at the factory for smooth surfaces or indoor use only.
- Page 28 I V . C O M F O R T A D J U S T M E N T S Positioning Belt Your power chair may be equipped with a positioning belt that can be adjusted for operator comfort. See figure 21.
-
Page 29: Batteries And Charging
V . B A T T E R I E S A N D C H A R G I N G BATTERIES AND CHARGING The R44 uses two long-lasting, 12-volt, deep-cycle batteries. These batteries are sealed and maintenance free. Since they are sealed, there is no need to check the electrolyte (fluid) level. - Page 30 V . B A T T E R I E S A N D C H A R G I N G To charge the batteries using the off-board charger: 1. Position the front of your power chair next to a standard electrical outlet.
- Page 31 V . B A T T E R I E S A N D C H A R G I N G NOTE: Your power chair’s charger will not operate after the batteries have been discharged to nearly zero voltage. If this happens, call your Quantum Rehab Provider for assistance. How often must I charge the batteries? Many factors come into play when deciding how often to charge the batteries.
- Page 32 V . B A T T E R I E S A N D C H A R G I N G It might take a few days for the temperature of the battery to stabilise and adjust to its new ambient temperature. More importantly, it will take a few “charging cycles”...
-
Page 33: Care And Maintenance
V I . C A R E A N D M A I N T E N A N C E CARE AND MAINTENANCE Your R44 is a sophisticated power chair. Like any motorised vehicle, it requires routine maintenance checks. You can perform some of these checks, but others require assistance from your Quantum Rehab Provider. - Page 34 V I . C A R E A N D M A I N T E N A N C E All wheel bearings are prelubricated and sealed. They require no subsequent lubrication. The body shroud has been sprayed with a clear sealant coating. You can apply a light coat of car wax to help it retain its high-gloss appearance.
- Page 35 V I . C A R E A N D M A I N T E N A N C E Storage Your power chair should be stored in a dry place, free from temperature extremes. When storing, disconnect the batteries from the power chair.
- Page 36 V I . C A R E A N D M A I N T E N A N C E TYRE TUBE FRONT RIM HALF LUG NUT SCREWS REAR RIM HALF Figure 23. R44 Drive Wheel Figure 24. R44 Drive Wheel Disassembled Follow these easy steps for a quick and safe repair for both pneumatic and solid tyres: 1.
- Page 37 V I . C A R E A N D M A I N T E N A N C E To replace the batteries: 1. Turn off the power to the controller. 2. Push the manual freewheel levers down for drive mode. 3.
- Page 38 V I . C A R E A N D M A I N T E N A N C E When to See Your Quantum Rehab Provider for Service The following symptoms could indicate a serious problem with your power chair. If necessary, contact your Quantum Rehab Provider.
- Page 40 Quality Control - R44 Inclusion of all Parts Joystick Serial Number Controller Serial Number Left Motor Serial Number Right Motor Serial Number Fit and Finish Performance Pride keeps a more detailed report on file at the factory. Date Inspected Inspector *INFMANU4344* Serial Number...
Need help?
Do you have a question about the Quantum R44 and is the answer not in the manual?
Questions and answers