Table of Contents
Advertisement
Advertisement
Table of Contents

Related Manuals for Avera 40AER10


Summary of Contents for Avera 40AER10
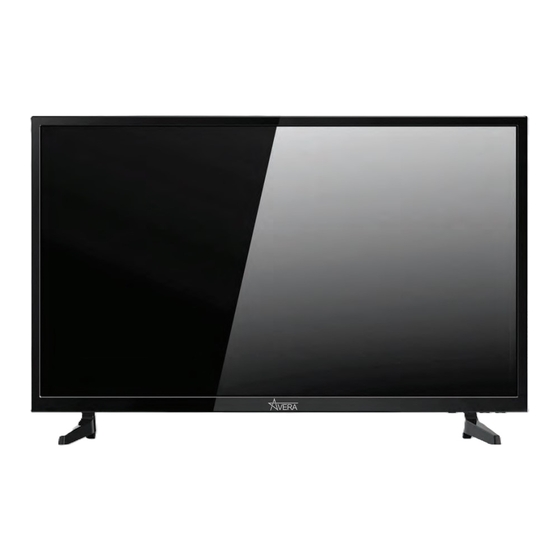
- Page 1 40AER10 USER’S MANUAL 40” LED TELEVISION...
-
Page 2: Important Safety Instructions
Instruction: The exclamation point within an equilateral triangle is intended to alert the user to the presence of important operating and servicing instructions in the literature accompanying the appliance. 40AER10-1... -
Page 3: Safety Instructions
To protect the TV during a lightning storm, or when it is left unattended and unused for long periods of time, unplug it from the wall outlet and disconnect the antenna or cable system. This will prevent damage to the TV from lightning and power-line surges. 40AER10-2... - Page 4 If the TV has been dropped or the cabinet has been damaged. f. If the TV exhibits a distinct change in performance. 40AER10-3...
- Page 5 - Increase the separation between the equipment and television. - Connect the equipment into an outlet on a circuit different from that to which the television is connected. - Consult your dealer or an experienced radio / TV technician for assistance. ’s authority to operate the equipment. 40AER10-4...
-
Page 6: Table Of Contents
Advanced Settings ..............................26 CEC Settings ................................27 Parental Control ................................28 Channel Settings Favorite ..................................30 Show / Hide ..................................30 Channel Label ................................30 TV Channel Setup & Channel Auto Scan ........................31 Aspect Modes ................................32 USB Modes ..................................33 MHL Setting ..................................34 ................................35 Troubleshooting ................................36 40AER10-5... -
Page 7: Introduction
Please refer to this guide whenever you have questions about features and functions. This instruction book will get you up and running with the best possible connection type for your devices. Enjoy! The 40AER10 package includes the following items. Save the carton & packing for future shipping • Remote Control •... -
Page 8: Installing The Base
Installing the Base Place the TV face down on a soft cloth or cushion. Position base as shown. Insert 4 screws (provided) through the holes in the bottom of the base into the post holes and tighten securely. Do not over-tighten. 40AER10-7... -
Page 9: Battery Install
Cable / Satellite remote to operate this ETEC TV, follow the programming instruc- tions included with your providers’ remote and use the following codes. Comcast or Direct TV : 10030 AT & T (U-verse) : 1043 Dish Network : 0030 RCA Universal : 0030 40AER10-8... -
Page 10: Overview
Remote Control Overview 40AER10 40AER10-9... - Page 11 27. MTS Press to select a program’s second audio channel (if available). 28. CCD Press to select closed caption subtitles (if available) OFF - ON - CC ON MUTE Press number keys to enter channel numbers. 29. NUMBER KEYS 40AER10-10...
-
Page 12: Front & Side Panel
4. Channel (-CH+) - Press the CH- / CH+ buttons to select a channel in the TV mode. 5. Volume (-VOL+) - Press the VOL- / VOL+ buttons to adjust the volume up or down. 40AER10-11... -
Page 13: Rear Panel
TV Overview Rear Panel Wall Mounting NOTE: You must remove the pedestal before wall mounting. It is recommended that you consult a professional before mounting this TV a wall. Use VESA 200x100 wall mount hardware. PC AUDIO CABLE - ANTENNA HDMI 1 HDMI 2 (MHL) HDMI 3 (ARC) -
Page 14: Connect A Digital Cable Box, Satellite Recei Ver, Or Dvd Player With An Hdmi Cable
HDMI in on the panel. Source Selec t How to Use • Press the INPUT button on the remote, then use the arrows to highlight HDMI. Press ENTER . Component / AV HDMI 1 HDMI 2 HDMI 3 Media 40AER10-13... -
Page 15: Connect A Digital Cable Box, Satellite Recei Ver, Or Dvd Player With A Component Connection
Installation Connection to Component YPbPr Input Connecting a device with a Component connection. HDMI 1 Optional Component cables (not included) Digital set top box, gaming console or DVD Source Selec t How to Connect Component / AV • Match and insert the green (Y), blue (Pb), and red (Pr) cables into HDMI 1 the device and TV. -
Page 16: Connect A Digital Cable Box, Satellite Recei Ver, Or Dvd Player With Composite Cables (Yellow, Red, & White)
Match and insert the yellow, red, and white A / V cables into the device and TV. Source Selec t How to Use • Press the INPUT button on the remote. Then use the arrow Component / AV buttons to highlight AV. Press ENTER. HDMI 1 HDMI 2 HDMI 3 Media 40AER10-15... -
Page 17: Connecting The Power And Basic Cable Connection
Connect the RF coaxial (75 ohm) cable from Wall Outlet existing roof top / indoor antenna, or wall outlet. • Finger tighten the Coaxial / RF Cable end to the TV input on the panel. Coaxial / RF Cable (not included) 40AER10-16... -
Page 18: Connection To A Personal Computer
TV’s panel. HDMI 3 How to Use • Press the INPUT button on the remote control. Use the buttons to Media highlight PC. Press ENTER. NOTE: If your PC uses a standard signal mode, the screen will adjust automatically. 40AER10-17... -
Page 19: Connection To A Home Theater System
ENTER. Surround Left Surround Right Speaker Speaker How to Use (Audio) Select the appropriate input from your audio equipment. *NOTE: Refer to the User Manual from your home theater equipment for recommended audio settings. 40AER10-18... -
Page 20: Initial Setup Wizard
Time Format 12-hour Go to next step Use the arrow button to select Go to next step and press the Select the time zone & Daylight saving time Select Move Return MENU button to complete the step. 40AER10-19... - Page 21 Once Channel Auto Scan has ended, Initial Setup is Total Found : complete. You may now begin enjoying your TV, or make further adjustments to the TV settings which are Exit MENU explained in the following pages of this manual. 40AER10-20...
-
Page 22: Contrast
Cool (more bluish tone), Normal or Warm setting. • Advanced Settings Adjust advanced video features to fine tune the picture. Press button to enter. Note: When adjustments are completed, you may select another menu by pressing the Menu button. 40AER10-21... -
Page 23: Audio Settings
Sets the sound to the second audio program. • Audio Language Press down arrow button to highlight Audio Language. Press button to select English - Francais - Español. Note: When adjustments are completed, you may select another menu by pressing the Menu button. 40AER10-22... -
Page 24: Date & Time Settings
Navigate using the arrow buttons to turn this feature On or Off. • Clock and Date are automatically set the first time the tuner receives a broadcast channel. Note: When adjustments are completed, you may select another menu by pressing the Menu button. 40AER10-23... -
Page 25: Setup Settings
Press ENTER / button to enter. external amplifier through adjusting connected to the HDMI inputs. the TV’s volume. Refer to your device’s manual for CEC options. NOTE: Closed Caption and Advanced are features described on the following pages. 40AER10 -24... -
Page 26: Closed Captions
Menu Adjustments Closed Captions The Setup menu includes adjustments for activating the Closed Caption text feature for display on-screen and customiz- ing CC display types and font styles. How to Navigate: Press the MENU button on the remote control. Navigate using arrow buttons to select Setup. Menu Language English CC Mode... -
Page 27: Advanced Settings
Exit • Highlight V-Pos. Navigate • Highlight Auto. Press the using the arrow buttons to arrow button to automatically adjust adjust the position of images the display to the best setting. displayed up and down. 40AER10 -26... -
Page 28: Cec Settings
Connect. Press the highlight Root Menu. Press the arrow button to connect TV and arrow button to enter DVD menu. DVD Player. Note: When adjustments are completed, you may select another menu by pressing the Menu button. 40AER10-27... -
Page 29: Parental Control
TV-G General Audience PG-13 Parents Strongly Cautioned TV-PG Parental Guidance Suggested Restricted TV-14 Parents Strongly Cautioned NC-17 No One Under 17 Permitted TV-MA Mature Audience Only Adults Only NOTE: PRT Setting and Reset RRT are not user adjustable settings. 40AER10-2... - Page 30 13 ans+ Appropriate for Children 13 years old and up 16 ans+ Appropriate for Children 16 years old and up 18 ans+ Mature Audience Only Select Move Exit Note: When adjustments are completed, you may select another menu by pressing the Menu button. 40AER10-...
-
Page 31: Channel Settings
Menu Adjustments Channel Settings The Channel menu provides the setup / changes of your television to receive broadcast channels, store your favorite channels, add or skip channels in memory and label or name channels. How to Navigate: Press the MENU button on the remote control. Navigate using arrow buttons to select Channel. Press the down ... -
Page 32: Tv Channel Setup & Channel Auto Scan
Press the arrow button to highlight Air. • Press the arrow button to highlight Auto Scan and press ENTER. Press the arrow button to highlight YES and press ENTER to begin Auto Scan. NOTE: Channel Auto Scan may take several minutes to complete. 40AER10-31... -
Page 33: Aspect Modes
Stretches certain 4:3 content and may reduce visible black bars. 3. ZOOM viewing widescreen content. The Zoom effect will crop images somewhat. 4. CINEMA n eliminating visible side black bars. It may also eliminate or reduce black bars on certain widescreen movies. 40AER10-3... -
Page 34: Usb Modes
USB Modes 1. Press the INPUT button on the remote control to display the Input menu. Use the ▲▼ buttons to select Media. 2. Use the ◄ / ► buttons to highlight an individual USB option. Source Selec t Press the ▲▼ buttons to select Media in the Source menu, and then press the ENTER button Component / AV to enter. -
Page 35: Mhl Setting
Connect a MHL cable to the micro USB port on the device, then connect the other end of the cable to the HDMI2 (MHL) jack on the TV. HDMI 3 (ARC) CABLE / ANTENNA HDMI Cable with MHL-Enabled Device HDMI-to-MHL Adatper You should now see the screen image of your connected device on the TV. 40AER10-34... - Page 36 40” Diagonal 16:9 480p / 720p / 1080i/1080p 1920 x1080 3000:1 178° 178° 16.7M 75 W 2 X 8W 36.6” x 3.3” x 21.7” 24.2 lbs Weight (may vary ± 10%) HDMI with MHL 40AER10-35...
-
Page 37: Troubleshooting
Troubleshooting Symptom Possible Solutions • Perform Channel Scan to add channels into the TV tuner memory. Cannot receive certain See page channels through the • Readjust your antenna and retry Auto Channel Scan. antenna • Signal from the TV station may be weak in your area. •...
Need help?
Do you have a question about the 40AER10 and is the answer not in the manual?
Questions and answers
How to connect a sound bar?
To connect a sound bar to the Avera 40AER10 TV, use one of the following methods:
1. Digital Audio Output:
- Locate the Digital Audio Output port on the back of the TV.
- Connect a digital audio (optical) cable from the TV’s Digital Audio Output to the sound bar’s optical input.
- On the TV, go to the Sound settings.
- Highlight "Digital Audio Output" and adjust as needed (e.g., set to "Raw").
2. Analog Audio Output (if available):
- Use red and white RCA audio cables to connect the TV’s audio out (L & R) to the sound bar’s analog input.
3. HDMI (if sound bar supports ARC):
- Connect an HDMI cable from the HDMI3 (ARC) port on the TV to the HDMI ARC port on the sound bar.
- Enable HDMI ARC settings on the sound bar and TV if needed.
Note: Make sure to adjust the TV’s sound output settings to route audio to the sound bar.
This answer is automatically generated