Table of Contents
Advertisement
Quick Links
Advertisement
Table of Contents

Related Manuals for Videocon V7400


Summary of Contents for Videocon V7400
-
Page 2: Table Of Contents
Table of conTenTs Legal Notices ............v Basic Operations ..........13 Switch the phone on or off ......13 Safety Precautions..........1 Screen lock/unlock ..........13 Software Update Information......3 Make a call ..............14 Getting started...........4 Assembling the device .........4 Composing messages .........17 Charging the battery ..........6 Adjusting volume ..........19 Know Your device..........8... - Page 3 Table of conTenTs Adding contacts ...........24 Working with Email ......... 38 Importing contacts ..........25 Adding an Email account ........38 Entering Information ........28 Adding other Email account ......38 Display virtual keypad ........28 Customizing Email setting .......39 Working with Input Methods ......28 Connectivity .............
- Page 4 Table of conTenTs Modem ..............48 RoadSync Calendar ..........59 RoadSync Mail ............59 Entertainment ..........49 Camera ..............49 Servo Search ............64 Camcorder ...............51 Calendar ..............64 Using the Gallery ..........52 Alarm .................66 Music ................53 Sound Recorder ............68 Listening to the FM Radio ........55 File manager ............68 Calculator ..............71 Google Mobile Services ........
- Page 5 Table of conTenTs Youtube ..............76 Managing phone functions using a computer ..........84 SIM Toolkit ..............76 Start Mobile Modem ..........86 Netmanager ............76 Start PC Suite ............88 Managing your Device ........77 File Transfer............94 Call Settings ............77 Date & Time Settings .........78 Sound &...
-
Page 6: Legal Notices
“as it is. Except as required by applicable law, contents in this document in any form without no warranties of any kind, either expressed or the prior written permission of VIDEOCON is implied, including, but not limited to, the implied prohibited. -
Page 7: Safety Precautions
safeTy PRecauTions Please comply with these precautions / measures aircraft’s navigation and communication system. to avoid actions that may endanger your safety You are legally obliged to comply with this and those of other road users, and maximize recommendation. device performance. Potentially hazardous environments Road safety Switch your phone off when entering any... - Page 8 safeTy PRecauTions • Use the USB cable to charge the device only Even if you are out of the coverage area of your during an emergency. home mobile network, the device is programmed to connect to any available network and place your call.
-
Page 9: Software Update Information
To enhance device performance, we recommend that you get in touch with the nearest Videocon Authorized Service Center, regarding availability of updated firmware for your device. Please see the enclosed Service Center Directory for the Videocon Authorized Service Center nearest to your location. -
Page 10: Getting Started
geTTing sTaRTed 2. If the battery is in the compartment, lift and assembling the device pull it out in the direction of an arrow. 1. Press gently the back cover and slide in upward direction to open. PAGE 4... - Page 11 geTTing sTaRTed 3. Insert the SIM card in the given slot. Make 4. Insert memory card. Insert the micro SD card sure that the contact area on the card is by aligning it and then sliding it into its slot, facing the connectors on the device and that until it clicks into place.
-
Page 12: Charging The Battery
geTTing sTaRTed 5. Insert the battery. Align the connectors of the charging the battery battery with the corresponding connectors Before using the phone for the first time, you on the battery compartment and insert in the must charge the battery. direction of the arrow. - Page 13 geTTing sTaRTed 2. Put the adaptor end of the travel charger into a standard AC wall socket. 3. When the battery is charged completely, the battery indicator icon on the screen becomes stable and stops scrolling. 4. Unplug the travel adaptor from the phone. PAGE 7...
-
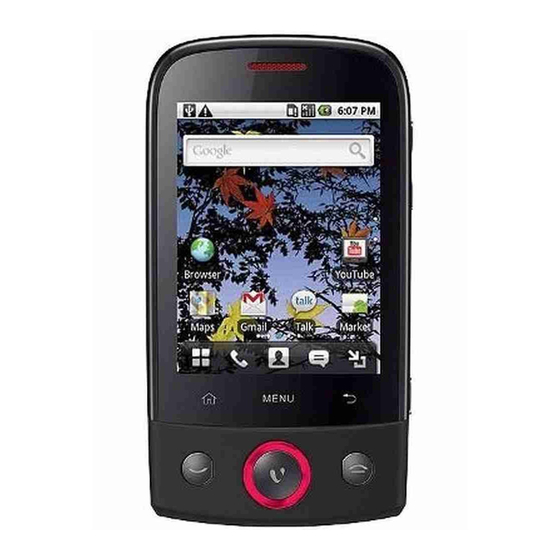
Page 14: Know Your Device
Know youR device Phone layout PAGE 8... -
Page 15: Button Layout
Know youR device button layout soft buttons button action button action Display Phone menu Dial/Send key. In idle mode, press to view recently dialed contacts. In idle mode, touch to launch virtual keypad. Scroll in all four directions to select on- screen items or menu. -
Page 16: Notification Icons
Know youR device button action icon description Displays panel with functions that Call in progress affect the currently active screen or Call in progress using Bluetooth device application. Go back to the previous screen you Call forwarding were working on. Press to close virtual Call on hold keypad. - Page 17 Know youR device icon description icon description Signal strength GPS connected Vibration mode Speaker on Airplane mode Alarm is activated Synchronizing data New text message Low battery New email message Full battery Bluetooth active Battery is charging Wi-Fi connected PAGE 11...
-
Page 18: Using The Touch Screen
Know youR device • Drag: Touch & hold an icon for a few seconds using the touch screen and then, without lifting your finger, move Use your finger to use the icons, buttons, menu your finger on the screen until you reach items, the onscreen keyboard, and other items the target position. -
Page 19: Basic Operations
basic oPeRaTions screen so that only you can unlock it to make switch the phone on or off calls, or access your private data. Press and hold the power key (top of the phone) Configure your phone to automatically lock the to switch on the phone. -
Page 20: Make A Call
Approach If you are concerned about securing your phone the nearest Videocon Service Center for further data, you can choose to set a more complex lock assistance. for the touch screen. - Page 21 basic oPeRaTions followed by the country code, area code using call log (without the initial zero) and phone number. Touch call log, select the contact to call, 4. To make a call, press the dial key on the and press the Dial key. phone.
-
Page 22: Answer Calls
basic oPeRaTions prompted to dial the second participant. 1. While you are on two calls, press Menu, and then touch Swap calls. 3. Place the next call, using the Phone tab, the Call log, or your contacts. 2. The current call is placed on hold and you are connected to the other call. -
Page 23: Composing Messages
basic oPeRaTions • composing messages Hold Single Call: Place the active call on hold. This device offers several ways to create and • End Single Call: End the active call. send text message. • New Call: Place a new call to start a using messaging interface conference (network service). - Page 24 basic oPeRaTions 4. Press menu attach and browse for an 4. Touch the Type to compose area, enter the image, video, or audio file to attach with the message. message, and return to the New message 5. Press menu attach and browse for an screen.
-
Page 25: Adjusting Volume
basic oPeRaTions 5. Press menu to view additional options such adjusting volume as attach multimedia files, add a subject and Three types of volume controls are available; so forth. each caters to a different set of applications or 6. Compose the message and touch send. modules: •... - Page 26 basic oPeRaTions opens to show the current ringer volume; the Ringer volume indicator moves as you adjust the volume. To increase/decrease ringer volume: call volume 1. Touch settings sound & display When a call is in progress or active, use the Ringer volume.
- Page 27 basic oPeRaTions Alternately, while listening to music or watching a video, press the device’s Volume Up/Down buttons to adjust the volume. A panel opens to show the current ringer volume; the indicator moves as you adjust the volume. PAGE 21...
-
Page 28: Customizing The Home Screen
cusTomizing THe Home scReen The Home screen is your starting point to access 1. Touch & hold the shortcut you want to phone features. It displays application icons, remove. widgets, shortcuts, and other components. You 2. Drag the shortcut and drop it in the trash can customize the Home screen by changing can visible at the bottom right side of the the wallpaper, or add or remove shortcuts and... -
Page 29: Changing Wallpapers
cusTomizing THe Home scReen To add a widget: 2. Touch live wallpaper to select animated wallpapers installed on your phone as 1. Touch and hold the blank area on the Home wallpaper. Some live wallpapers change screen. according to the current time, display current 2. -
Page 30: Contacts
conTacTs The Contacts function enables you to save and 1. In the contacts list press Menu, options panel manage information such as phone numbers and is displayed. Alternately, touch the create addresses of your contacts. Once you save the contact button on the upper left side of the contact information on your phone, it gives you contacts screen. -
Page 31: Importing Contacts
conTacTs 5. If you have more than one account with phone. Similarly, you can export contacts in vCard contacts, touch the account to which you format onto a micro SD card, to back them up want to add the contact. In the contacts list press menu, options panel is displayed. -
Page 32: Adding Contacts
conTacTs 5. Touch copy. If you have more than one 3. Enter the name of the contact for which you account on your phone, touch the account are searching. into which you want to import the contacts. 4. As you type, contacts with matching names adding contact favorites displays below the Search box. - Page 33 conTacTs 2. You can also press menu, and then touch edit delete contact in the options menu. contact while viewing a contact’s details. 2. Touch oK to confirm that you want to delete 3. Touch a category of contact information, such the contact.
-
Page 34: Entering Information
enTeRing infoRmaTion Enter text using the onscreen keypad. TouchPal displaying the virtual keypad Touch TouchPal to display the uppercase keypad style. Some applications launch keypad automatically. In some applications, touch an editable field to display the keypad. To hide the keypad, press back key. working with input methods Touch and hold an editable field to select an alternate input method. - Page 35 enTeRing infoRmaTion TouchPal keypad layouts Touch to toggle between the uppercase and To facilitate typing, the phone let’s you choose a the Lowercase keypad style. customized keypad. Each keypad is suited for a certain category of users to enable faster typing based on the type of keypad they have used most often.
-
Page 36: Android Keypad
enTeRing infoRmaTion one side of the keypad, and flick it towards the Touch to display the numeric and special edge of the screen. character keypad. android keypad Touch Android keyboard to view the default keypad. Turn your phone sideways to have a wider keyboard layout. - Page 37 enTeRing infoRmaTion • customizing keypad settings Key press vibration: Have the phone vibrate briefly each time you touch a key on the TouchPal settings onscreen keyboard. Touch settings language & keyboard • Layout in portrait mode: Select the layout TouchPal, to customize the TouchPal to display in portrait mode.
- Page 38 enTeRing infoRmaTion • you to slide on candidate words for synonyms Select languages: Select the languages you or other relevant. want to use. • Help: Access the online user manual for The options under Prediction and Gestures are: using TouchPal. •...
-
Page 39: Messaging
messaging Use messaging to exchange messages (text, 1. Touch a message thread to open it, and touch multimedia, or e-mail) with contacts. to view the available options. Touch messaging to display the Messaging 2. Touch Reply or Reply to all: window. - Page 40 messaging forwarding a message to view the available options. In the messaging window; 2. Scroll to the end of the message and touch delete. Touch oK when prompted to 1. Touch a message thread to open it, and touch confirm. to view the available options.
- Page 41 messaging 2. Highlight the message to delete by flicking 4. Go to new message. your finger upward or downward across the 5. Touch and hold Type to compose. message screen. 6. Touch Paste to paste the copied texts to 3. Touch and hold the highlighted message. your new message.
-
Page 42: Sms Settings
messaging • stored on your SIM card—for example, if you Text message limit: Touch to set the used the SIM card in another kind of phone number of messages to save per thread of where you exchanged text messages. text messages. When the limit is reached, •... -
Page 43: Notification Settings
messaging • notification settings Auto-retrieve: Uncheck to download only the heading of multimedia messages, which • Notifications: Check to receive a notification you can then touch to open a menu to whenever you receive a new message. download the whole message. This is useful •... -
Page 44: Working With Email
woRKing wiTH email name you want other people to see when adding an email account they receive an email from you. Before you can start using the Email function Note: For manual setup, you would need to of the phone, you must configure your email know the server type that the provider uses, account. -
Page 45: Customizing Email Setting
woRKing wiTH email on the Your accounts screen, and then touch the necessary details manually, although you add account to create another email account. will typically need to contact your email service provider to determine the right settings for the Tip: When adding a subsequent email account, account. -
Page 46: Connectivity
connecTiviTy • gPRs/3g Check the type of access point you need with your service provider for the service you want Your device supports 3G and GPRS. Both of these to access. For availability and subscription technologies use packet data technology to send to packet data connection services, contact data over the mobile network. -
Page 47: Data Connection
connecTiviTy do not change the parameters of the access need access to a wireless access point called a point, or you might not be able to access network “hotspot”. The range of a Wi-Fi signal is affected sources. by the obstacles that may be in its way. Turning on data services accessing wi-fi To activate data services:... - Page 48 connecTiviTy your mobile phone to its default settings. settings wireless & networks wi-fi settings. 3. On the Wi-Fi settings screen, touch add wi- 2. List of detected Wi-Fi networks in the Wi-Fi fi network to add a new Wi-Fi network. settings screen is displayed.
-
Page 49: Browsing Web
connecTiviTy would need to have the necessary credentials to page or open a new web page on the connect to this wireless router. screen. • Refresh: Touch to refresh the current To launch the Browser: page. 1. Touch browser to open the browser. •... - Page 50 connecTiviTy 2. As you enter the URL, the browser displays using browser history matching URLs in a list. As you browse the web, the browser keeps track 3. Touch an address to go directly to that web of the pages you visit, to help find your way back page or continue entering the web page later.
-
Page 51: Bluetooth
connecTiviTy adding a bookmark bluetooth To add bookmark: Your mobile phone has Bluetooth, which allows you to create a wireless connection with 1. On a browser screen, go to the web page you other Bluetooth devices so that you can share want to bookmark. - Page 52 connecTiviTy 1. Touch 1. Ensure that the Bluetooth function on your settings wireless & networks. Wireless & network settings mobile phone is enabled. screen is displayed. 2. Touch settings wireless & 2. Select the bluetooth check box to turn on networks bluetooth settings.
-
Page 53: Connecting To A Computer
connecTiviTy Note: Before you use Bluetooth, you need to 4. To disconnect the Bluetooth device, touch pair your phone with another Bluetooth device and hold the connected device. You can also as explained earlier. just touch a connected device to disconnect sending files via bluetooth 5. -
Page 54: Modem
connecTiviTy 2. Open the notification panel, and then touch 6. Carefully remove the micro SD card from your USB connected. phone. configuring modem 3. Touch mount in the dialog box that opens to confirm that you want to transfer files. Connect your phone to a computer (using the USB Your PC will detect the micro SD card as a data cable or over Bluetooth) and act as a modem... -
Page 55: Entertainment
enTeRTainmenT In addition to being a communication device 2. Press back key to close the camera. and personal assistant, your mobile phone 3. On the capture screen, touch the screen to also provides you with endless entertainment show the zoom in or out controls. possibilities. - Page 56 enTeRTainmenT 4. Touch and hold the Capture key. When the 2. Touch the onscreen buttons to do any of the frame turns green, the content of the frame following: is in focus. • Touch deleTe to delete the photo. 5. Release the Capture key to take your photo. •...
-
Page 57: Camcorder
enTeRTainmenT recording. You can capture another video or using the camcorder preview your videos. To capture a video: viewing videos 1. Open the camera, and then switch to To view video: camcorder mode. Alternately touch camcorder. 1. After recording a video, a thumbnail of the video you have just recorded is shown in 2. -
Page 58: Using The Gallery
enTeRTainmenT • launching the gallery Touch Play to play the video. On the video playing screen, touch the controls To access gallery: to skip forward or back or to play or 1. Touch gallery to open the viewer. The pause. Gallery application categorizes your pictures 3. -
Page 59: Music
enTeRTainmenT • 2. Touch Rotate. Drag an edge of the cropping tool to resize it to any proportion. 3. Select either Rotate left or Rotate right. The • picture is saved with the new orientation. Drag a corner of the cropping tool to resize it with fixed proportions. - Page 60 enTeRTainmenT 1. In the Gallery, touch an audio track that you 2. List of songs are displayed. Use the want to listen to. Navigation key to reach the song you want to add to the playlist. 2. To use any other phone application and continue playing music in the background, 3.
-
Page 61: Listening To The Fm Radio
enTeRTainmenT 2. Touch and hold the playlist you want to available FM channels, save them as presets, play. and play the first FM channel found. 3. Press Menu to display the operations panel 3. Touch Play icon to play the playlist. and set more FM Radio options. -
Page 62: Google Mobile Services
google mobile seRvices Sign-in to Google Applications using your Google 4. Once logged in, you can begin reading and credentials to gain access to the following sending emails from your Gmail account. features: google Talk gmail Google Talk is Google’s instant messaging Gmail is Google’s web-based email service. -
Page 63: Market
google mobile seRvices • 5. Press Menu. Options panel is displayed and To configure Google Talk settings: do any of the following: Touch menu more settings. • • To Sign out: Touch menu View friend’s list: Select All friends. List more sign of Friends is displayed. - Page 64 google mobile seRvices 2. Touch next to setup your Google account. 3. Touch create to create a new account or Sign in to sign in your existing Google account (same as Gmail, Picasa, etc.). 4. Once you are signed in, you can start searching and downloading applications from the Android Market.
-
Page 65: Using Other Applications
using oTHeR aPPlicaTions • Roadsync calendar Slide your finger on screen to pan the calendar. Use the Roadsync calendar to view and add • events or appointments on your calendar. To change the calendar view, touch menu agenda, Day, Week, or Today. Note: RoadSync must be set up first to use this •... - Page 66 using oTHeR aPPlicaTions • To edit e-mail settings, touch menu 1. Touch Roadsync mail. more settings. 2. Do any of the following: • To view on-line help, touch menu more • To view a message, touch the message. Help. • To create a new message, touch menu using Roadsync new message.
- Page 67 using oTHeR aPPlicaTions 4. Enter your name and Email to register disable SSL. RoadSync, and then touch Register. data sync settings 5. Enter your Exchange account information Touch to choose the data to synchronize. Touch user name, Password, server address, to select the check boxes of the following: domain and ssl option.
- Page 68 using oTHeR aPPlicaTions • sync schedule Peak days: Touch to choose the days of the week to set the peak day(s). Touch to set the synchronization schedule. • Sync when roaming: Touch to enable • Peak schedule: To set the time interval for synchronization even when roaming.
- Page 69 using oTHeR aPPlicaTions • calendar options My Email Address: To enter the e-mail address to exclude when sending or replying Touch to configure the calendar settings: Emails to all. • Calendar date range: To set the date range • Status bar: Select this check box to display to synchronize.
-
Page 70: Servo Search
using oTHeR aPPlicaTions phonebook then messages, and then the micro start synchronization SD card, which takes ages to complete. 1. Touch Roadsync calendar. Servo Search offers a single window interface 2. On the RoadSync main screen, touch start to search information stored anywhere on your sync to start synchronization. - Page 71 using oTHeR aPPlicaTions 8. When finished, touch save to return to the creating an event calendar. To create an event: setting an event Reminder 1. Touch calendar. To set an event reminder: 2. Press menu new event and enter event details.
-
Page 72: Alarm
using oTHeR aPPlicaTions ringtone to sound when you receive an customizing calendar settings event reminder. To customize calendar settings: • Vibrate: Select to vibrate the mobile 1. On any Calendar view, press Menu. Calendar phone when you receive an event Menu is displayed. - Page 73 using oTHeR aPPlicaTions 1. On the alarm screen, press menu customizing alarm settings set alarm screen is displayed. alarm To access alarm settings: 2. To set the Alarm, lists of options are; 1. On the Alarm screen, press menu settings. •...
-
Page 74: Sound Recorder
using oTHeR aPPlicaTions waits before it sounds again. 2. Touch start button to start recording. Recording time is also displayed in the • Side button behavior: Touch to open a screen. dialog where you can set what happens if you press the side buttons when an alarm 3. - Page 75 using oTHeR aPPlicaTions • 4. Touch save, New folder is displayed with the Phone Memory: Displays files and folders in desired name. your mobile phone memory. • moving or copying a file Micro SD card: Displays files and folders in your micro SD card.
- Page 76 using oTHeR aPPlicaTions 4. Touch menu to open the options panel, and 3. Write a key word of the name of your file or then touch done to cut or copy the file. folder in the search box. 4. Touch search. Your device starts the search. 5.
-
Page 77: Calculator
using oTHeR aPPlicaTions • 3. This screen allows you to view the memory Clear history: To remove the previous status and available memory on your phone calculation from the calculator. and micro SD card. • Advanced panel: Touch Advanced panel calculator to view Scientific calculator. -
Page 78: Documents To Go
using oTHeR aPPlicaTions 3. Touch add note, to create a note virtual Microsoft® Word documents (.doc and .docx). It QWERTY Keypad is displayed on the screen. supports embedded pictures, font color, bold, italics, underline, bulleted, numbered list and 4. You can create note with the help of virtual more. - Page 79 using oTHeR aPPlicaTions • ® sheet To go viewer To view other worksheets on file, tap Menu ; View ; Worksheets, then tap the Sheet To Go® Viewer allows you to view worksheet name you want to view. Microsoft® Excel spreadsheets (.xls and .xlsx). It supports cell and number formatting, row and 4.
- Page 80 using oTHeR aPPlicaTions 1. Tap 2. Tap Open File. documents To go slideshow To go viewer. 3. Tap the file you want to open. 2. Tap Open File. • Tap the screen to bring up the zoom 3. Tap the file you want to open. controls.
-
Page 81: Facebook
using oTHeR aPPlicaTions 3. Follow the on-screen instructions to complete the place search. • purchase. Touch direction: menu directions. facebooK • To select a Map mode: Touch menu layers, To launch Facebook, touch facebook. Use then touch Traffic, Satellite, or Latitude. your Facebook user name password to access •... -
Page 82: Youtube
using oTHeR aPPlicaTions • sim Toolkit To view information about Google Map: Touch menu more:about. Directly connect to and use services provided by youTube your mobile service provider. Touch YouTube is an online video streaming service sim Toolkit. that allows you to view, search, and upload netmanager videos. -
Page 83: Managing Your Device
managing youR device comma (,) to insert a pause into the number—for call settings example, to add a password after the phone Use Call settings to configure settings such as number. If you are using Google Voice, opens call forwarding, call waiting, and other special a screen where you can view the Google Voice features offered by your service provider. -
Page 84: Date & Time Settings
managing youR device • • Call waiting: Check to see and respond to FDN list: Opens a screen that lists any FDNs new calls when you’re already on a call. saved on your SIM card. Press and touch add contact to add an FDN number to your fixed dialing numbers SIM. -
Page 85: Sound & Display Settings
managing youR device 2. To manually set the dates clear the 7. Touch select date format to select how you automatic check box. want the date to display on your phone. sound & display settings 3. Touch set date. On the set date screen, touch the up or down button to adjust the Touch sound &... - Page 86 managing youR device • • Phone ringtone: Touch to display the Audible selection: Set the device to sound Ringtones dialog box. In the Ringtone dialog when you select an application or option on box, check the ringtone you want to use as the touch screen.
-
Page 87: Managing Applications
managing youR device animation when switch between o Press Menu, and then touch Sort by size. windows. Then touch an application to view its details. • Brightness: Set the brightness of the o Press Menu, and then touch Filter. Select displayed screen. -
Page 88: Configuring Wi-Fi Settings
managing youR device • configuring wi-fi settings Back up my settings: Enable to backup phone settings and data to Google servers • Wi-fi settings: Set up and manage wireless using your Google Account. This back will access points. come in handy when you misplace your •... -
Page 89: Reset Phone
managing youR device code each time the device is switched on. third-party applications will be lost. To enable SIM card lock: WARNING; Resetting the phone does not erase any system software updates or information 1. Touch settings location & security that is stored in your memory or SIM card. -
Page 90: Managing Phone Functions Using A Computer
managing PHone funcTions using a comPuTeR Use PC Suite to synchronize data between your 2. Touch and drag to view the Notifications phone and computer, use the phone as a modem dialog-box. for the computer, or view this user manual in the electronic form. - Page 91 managing PHone funcTions using a comPuTeR Touch mount to have the computer read the 2. In the my computer window, double- contents of the memory card (if inserted in the click v-connect (icon in the devices with device.) Removable storage pane) to display the options dialog box.
-
Page 92: Start Mobile Modem
managing PHone funcTions using a comPuTeR • install modem driver files File Transfer: Move or copy files between the phone and the c9omputer. For information on To install driver files, click Start Mobile Modem transferring files between the phone and the to begin instilling the drive files. - Page 93 managing PHone funcTions using a comPuTeR NOTE: the Options dialog-box. • You will need to perform the installation 2. In the left pane, select General, to view once only. available options. • Make sure that you have subscribed to the GPRS data service.
-
Page 94: Start Pc Suite
managing PHone funcTions using a comPuTeR the computer. Similarly, check Minimize window Make the required changes, and click OK to on startup to allow the connection window to exit the settings dialog box. minimize to the Windows System tray as an icon 4. - Page 95 managing PHone funcTions using a comPuTeR suite for android Handset window. Now to connect the phone to the computer: 1. In the Pc suite for android Handset window, click Tools; Connect Guide start the Connection Wizard. PAGE 89...
- Page 96 managing PHone funcTions using a comPuTeR 2. Click usb as the mode of communication 3. Select a device from the phone list, and click between the phone and the computer. Click finish to complete the connection. next to have the application automatically NOTE: If you cannot see your device listed, search for all devices connected to the repeat the process after you restart...
- Page 97 managing PHone funcTions using a comPuTeR working with Pc suite In the PC Suite window Manage SMS View Phonebook Synchronize data 2. Enter the recipients’ number. You may either Composing messages enter it manually or click Send to select one In the PC Suite window: from the Phonebook.
- Page 98 managing PHone funcTions using a comPuTeR • Click Cancel to exit the Create a dialog box without sending a message. You may also view or delete messages that are stored in various messaging folders on the phone, such as Inbox, Drafts, Trash and so forth. view Phonebook In the PC Suite window, click Phonebook to display the contacts stored the phone memory.
- Page 99 managing PHone funcTions using a comPuTeR o Slow synchronization: Updated contents o Same as phone: The entry on the phone on the phone are synchronized to the PC gets preference. and vice versa. o Ignore: Do not synchronize 2. From the Source drop-down menu, select o Prompt user: The application will prompt the of the email client to use while you to choose a suitable action if it...
-
Page 100: File Transfer
managing PHone funcTions using a comPuTeR file Transfer Add the device as a removable drive on your computer. Use Windows Explorer computer and work with files and folders as you would on a standard hard disk partition. PAGE 94...
Need help?
Do you have a question about the V7400 and is the answer not in the manual?
Questions and answers