Table of Contents
Advertisement
Advertisement
Table of Contents

Related Manuals for MagniSight Journey MSJ-17


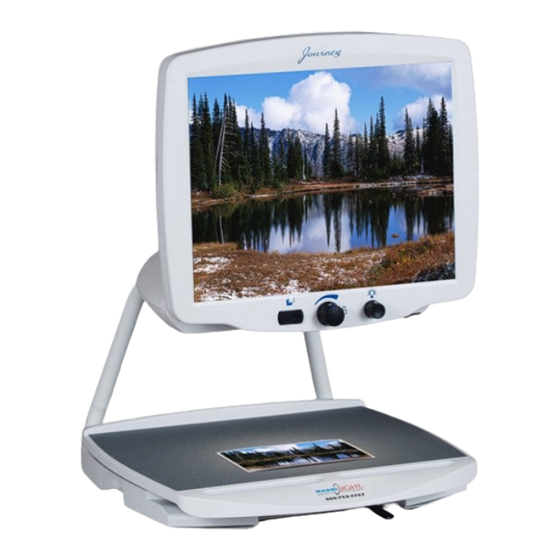
Summary of Contents for MagniSight Journey MSJ-17
- Page 1 MSJ-17 User's Manual...
-
Page 2: Table Of Contents
Table of Contents SECTION 1: Unpacking and Set-Up of System........2 SECTION 2: Features and Operating Instructions......4 Turning ON the System..............4 Selecting Viewing Mode..............4 Adjusting Magnification..............6 Adjusting Brightness..............7 Adjusting LED Lights..............7 Using the Viewing Table...............8 SECTION 3: Service and Safety Information........9 FCC Information: This equipment has been tested and found to comply with the limits for a Class B digital device, pursuant to part 15 of the FCC Rules. -
Page 3: Section 1: Unpacking And Set-Up Of System
Section 1: Unpacking & Set-Up 1. Remove User’s Manual and power adapter from top foam compartments. 2. Next, pull UP on the rear portion of the foam, and then remove foam packing sleeve by sliding it off of the LCD Monitor. 3. - Page 4 Set-Up (cont’d) or best performance and optimal image quality, the system should be at normal room temperature b efore turning the system ON (see Page 4). 6. Tilt LCD Monitor to a vertical position. Adjust Monitor to desired height by gripping both sides of the LCD monitor and sliding it up or down on its adjustable track in a smooth, even motion.
-
Page 5: Section 2: Features And Operating Instructions
Section 2: Features & Instructions Turning ON the System Turn the unit ON using the Power Switch located on the front, right corner of the camera housing. The LED Lighting should illuminate the Viewing Table, and the screen should automatically come on after a normal delay of a few seconds. - Page 6 Selecting Viewing Mode (cont’d) Once chosen, the setting will remain permanent until you make a different choice. By pushing the Mode Switch to the RIGHT or to the LEFT you cycle forward or backwards through the following viewing modes: 1. Full Color Mode (the factory default) 2.
-
Page 7: Adjusting Magnification
Adjusting Magnification Magnification, or SIZE of the image being viewed, is adjusted by turning the Size Control (large middle knob below the screen). Size Control Turn RIGHT to make image LARGER Turn LEFT to make image SMALLER The size setting is retained when turning OFF the unit and will start with that setting when you power ON the machine. -
Page 8: Adjusting Brightness
Adjusting Brightness The Brightness Control is used to BRIGHTEN or DARKEN the image being viewed. Brightness can be readjusted whenever needed, in any mode. Brightness Control Turn LEFT to Darken image Turn RIGHT to Brighten Adjusting LED Lights The long-lasting LED Lights provide a warm white, non-glaring light. The factory setting allows for the most light and best image (decreasing the light intensity causes loss of color and reduced image quality) -
Page 9: Using The Viewing Table
Using the Viewing Table The Viewing Table (sometimes referred to an X-Y Table) is mounted on a slide mechanism allowing it to move under the camera left to right and also front to back. This assists you in moving the material you are viewing under the camera. -
Page 10: Section 3: Service And Safety Information
Your Unit CONTAINS NO USER SERVICEABLE PARTS. ALL SERVICE MUST BE DONE BY AN AUTHORIZED SERVICE CENTER. In the event of malfunctions or questions, please contact us: MagniSight, Inc. 3631 North Stone Ave. Colorado Springs, CO 80907 Call (719) 578-8893... - Page 11 Service Information (cont’d) In the event Service is required, you may be asked to send all or part of the unit. The camera head (camera housing and monitor) can be removed from the Frame and Viewing Table base for portability or for service.
Need help?
Do you have a question about the Journey MSJ-17 and is the answer not in the manual?
Questions and answers