Sena 10C User Manual
Motorcycle bluetooth camera & communication system
Hide thumbs
Also See for 10C:
- User manual (74 pages) ,
- Quick start manuals (2 pages) ,
- User manual (49 pages)
Table of Contents
Advertisement
Advertisement
Table of Contents

Subscribe to Our Youtube Channel
Related Manuals for Sena 10C


Summary of Contents for Sena 10C
- Page 1 Motorcycle Bluetooth ® Camera & Communication System www.sena.com User's Guide...
- Page 2 ® word mark and logos are owned by the Bluetooth SIG, Inc. and any use of such marks by Sena is under license. iPhone, iPod touch are registered trademarks of Apple Inc. Zumo™ is a trademark of Garmin Ltd. or its subsidiaries. TomTom™ is the trademark or registered...
-
Page 3: Table Of Contents
CONTENTS INTRODUCTION .......................5 PAIRING THE 10C WITH BLUETOOTH DEVICES ..........22 6.1 Mobile Phone Pairing - Mobile Phone, Bluetooth Stereo Device .........23 PACKAGE CONTENTS ....................6 6.2 Second Mobile Phone Pairing - Second Mobile Phone, GPS, and SR10 ......24 6.3 Advanced Selective Pairing: A2DP Stereo or Handsfree .............25 INSTALLING THE 10C ON YOUR HELMET ............8... - Page 4 12 FM RADIO ......................44 CERTIFICATION AND SAFETY APPROVALS ............63 12.1 FM Radio On/Off ........................44 FCC Compliance Statement ......................63 12.2 Preset Stations........................44 FCC RF Exposure Statement .....................63 12.3 Seek and Save ........................44 FCC Caution ..........................63 12.4 Scan and Save ........................45 CE Declaration of Conformity ....................64 12.5 Temporary Preset ........................45 Industry Canada Statement ......................64...
-
Page 5: Introduction
1080p Full HD video with 3.5MP still shot image capture Thank you for choosing the Sena 10C, Motorcycle Bluetooth Camera & Communication System. With the 10C, you can record videos, take Video mode: 1080p:30fps, 720p:30/60fps photos, call handsfree on your Bluetooth mobile phone, listen to stereo... -
Page 6: Package Contents
Can be used while charging on road trips 2 PACKAGE CONTENTS Support microSD 32GB memory card (not included) Firmware upgradeable * in open terrain Bluetooth 4.1... - Page 7 Speaker Attachable Boom Microphone Others Wired Microphone...
-
Page 8: Installing The 10C On Your Helmet
2. Insert the back plate of the clamp unit between the internal 3 INSTALLING THE 10C ON YOUR HELMET padding and external shell of the left side of the helmet. 3.1 Installing the Main Unit 3.1.1 Using the Clamp Unit 1. - Page 9 4. Open the SD card cover and insert a microSD card (sold 3.1.2 Using the Glued Surface Mounting Plate separately) into the card slot on the bottom of the main unit to use If you cannot install the clamp unit on the helmet, you can use the camera functions.
-
Page 10: Installing The Speakers
Then, attach the pads to the ear pockets inside CAUTION: the helmet. Sena recommends using the clamp unit. The glued surface mounting plate is provided for convenience, but is not the recommended mounting method. Sena is not responsible for its use. -
Page 11: Installing The Microphone
3.3 Installing the Microphone Note: 3.3.1 Using the Attachable Boom Microphone 1. The speaker with the shorter wire is for the left ear and the speaker with the longer one is for the right ear. 1. Peel off the cover of the velcro pad for attachable boom 2. - Page 12 2. Attach the attachable boom microphone's mounting plate to the 3. Make sure that the microphone’s receiver is located near your velcro pad. mouth. 4. Adjust the head of the microphone so that the tab is facing away from your mouth. Note: 1.
- Page 13 6. Insert the speaker connector into the speaker port to connect it to the main unit. Note: After connecting the microphone and speaker cable, store any excess cable behind the internal padding of helmet to prevent wires from becoming damaged. CAUTION: When you remove the headset, make sure that you first detach the speaker cable from the main unit.
- Page 14 3. Align the arrows on the microphone and speaker cables and 3.3.2 Using the Wired Microphone insert the microphone cable into the speaker cable. If you have a full face helmet, you can use the wired microphone. 1. Attach the included velcro microphone pad for wired microphone to the inside of the helmet’s chin guard.
-
Page 15: Adjusting The Angle
3.4 Adjusting the angle 5. Close the cover of the speaker cable to lock the cable to the port. You can adjust the angle for taking photos or recording videos. 1. You can rotate the vertical angle by 360º. Loosen the wheel next to the main unit and rotate the main unit to set the desired angle. -
Page 16: Getting Started
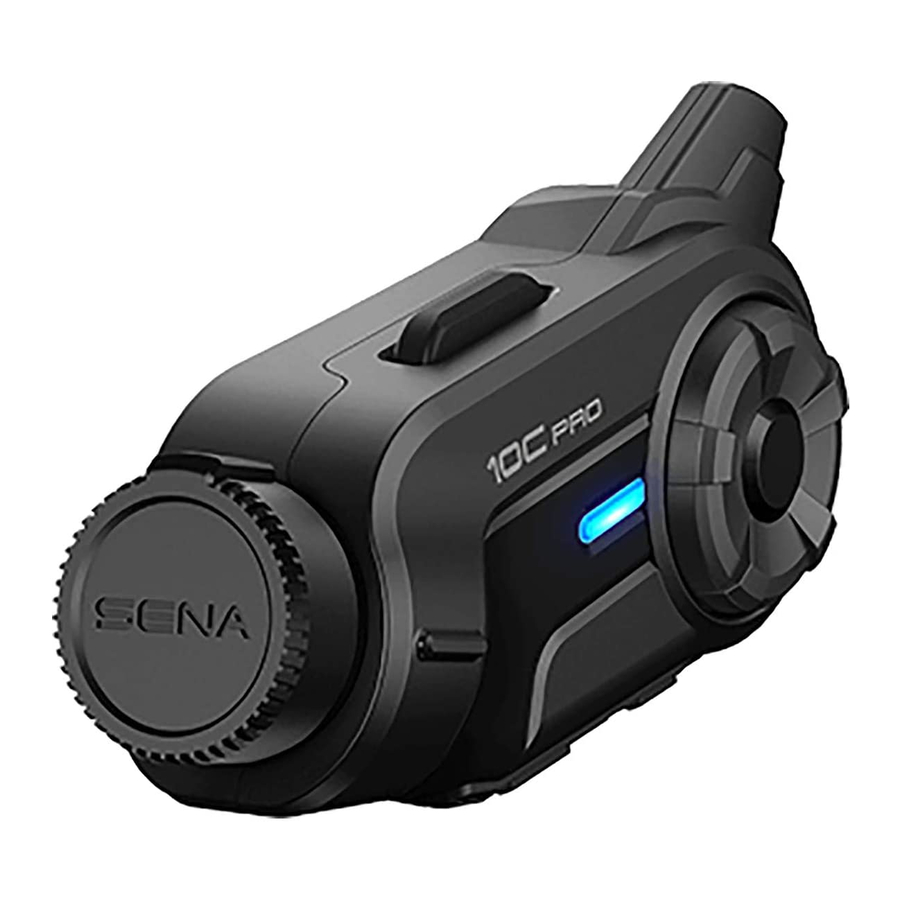
4 GETTING STARTED 4.1 Button Operation Status LED MicroSD Card Slot Antenna Camera Button Micro HDMI Cable Port Charging LED DC Power Charging & Lens Firmware Upgrade Port Jog Dial Speaker and Phone Button Microphone Port... -
Page 17: Powering On And Off
4.2 Powering On and Off 4.5 Checking the Battery Level Press the Jog Dial and the Phone Button at the same time to power on You can check the battery level in two different ways when the headset or off the headset. To power on the headset, press the Jog Dial and the is powering on. -
Page 18: Volume Adjustment
User's Guide and the Quick Start Guide on your phone. volume is set and maintained independently at different levels for Pair your phone with your 10C headset (please refer to section 6.1, each audio source even when you reboot the headset. For example, “Mobile Phone Pairing - Mobile Phone, Bluetooth Stereo Device”... -
Page 19: Camera Operation
5.2 Camera Modes 5 CAMERA OPERATION Mode Application Button Record normal video or Press and hold the Video timelapse video Camera Button for 1 sec 5.1 Camera On or Off Capture a single photo To turn on the camera, tap the Camera Button. The camera turns off Photo (Single Shot) or 5 photos in Tap the Camera Button... -
Page 20: Video Recording
5.3 Video Recording Below is a table of approximate video recording times to microSD card 5.3.1 Normal Video Mode 1080p/30fps 720p/60fps 720p/30fps To record a normal video, set the video mode setting in the camera 9 min 12 min 24 min 18 min 24 min 48 min... -
Page 21: Photo Taking
5.4 Photo Taking 5.5 Video Tagging Video Tagging allows the camera to continuously record videos, but 5.4.1 Single Shot Mode To take a single photo, set the photo mode setting in the camera unnecessary video content. You have to enter Video Tagging mode before using Video Tagging. -
Page 22: Pairing The 10C With Bluetooth Devices
To browse videos and photos: 1. Plug the headset into a TV/HDTV with a micro HDMI cable. Before using the 10C Bluetooth headset with any other Bluetooth 2. The TV displays previews of videos and photos stored on the microSD card. -
Page 23: Mobile Phone Pairing - Mobile Phone, Bluetooth Stereo Device
3. Enter 0000 for the PIN. Some mobile phones may not ask for the PIN. and the 10C is ready to use. You will hear a voice prompt, “Your headset is paired”. 5. If the pairing process is not completed within three minutes, the... -
Page 24: Second Mobile Phone Pairing - Second Mobile Phone, Gps, And Sr10
1. If the GPS is also your preferred Bluetooth stereo music source, you can Typical Bluetooth headsets can connect with only one HFP (Hands- pair the GPS to the 10C by following the simple procedures in 6.1, “Mobile Phone Pairing - Mobile Phone, Bluetooth Stereo Device”. -
Page 25: Advanced Selective Pairing: A2Dp Stereo Or Handsfree
4. Enter 0000 for the PIN. Some mobile phones may not ask for PIN. the 10C. To clear the pairing list on the 10C, please do a factory reset or follow the pairing list clearing procedure described in section 17.4, 6.3.2 HFP for Phone Call Only... -
Page 26: Intercom Pairing
1. Turn on the two 10C headsets (A and B) that you would like to pair with each other. 2. Press and hold the Jog Dial of the headset A and B for 5 seconds a voice prompt, “Intercom pairing”. - Page 27 Pairing A & C Pairing A & D The 10C can be paired with all other Sena headset models such as the 20S, SMH10 and the SMH5 for intercom conversation. Please follow the same procedure as above to pair with these headset models.
-
Page 28: Mobile Phone, Gps, Sr10
6. There are several ways to make a phone call: 7 MOBILE PHONE, GPS, SR10 – Enter numbers on your mobile phone’s keypad and make a call. Then the call is automatically transferred to the headset. – For some older mobile phones, which do not automatically transfer calls to the headset, press the Phone Button after 7.1 Mobile Phone Call Making and Answering entering phone numbers on the mobile phone keypad. -
Page 29: Speed Dialing
Button or the Jog Dial. If you do not press any button within 3. Tap the Phone Button to select a voice menu among the followings: 15 seconds, the 10C will exit the voice speed dial menu and go (1) Last number redial (4) Speed dial 3 back to stand-by mode. -
Page 30: Gps Navigation
Answer Tap Phone Button or Tap Jog Dial or Say “Hello” If you pair a Bluetooth GPS to the 10C as described in section 6.2, Tap Phone Button or Press Jog Dial for 2” “Second Mobile Phone Pairing - Second Mobile Phone, GPS, and SR10”... -
Page 31: Stereo Music
8.1 Bluetooth Stereo Music The Bluetooth audio device must be paired with the 10C by following the “Mobile Phone Pairing - Mobile Phone, Bluetooth Stereo Device” procedures described in the section 6.1. The 10C supports the Audio/ 2. -
Page 32: Music Sharing
8.2 Music Sharing 3. To track forward or track back, rotate while pressing the Jog Dial clockwise or counter clockwise. You can start sharing music with an intercom friend using Bluetooth stereo music during a two-way intercom conversation (please refer to section 9.1, “Two-way Intercom”... -
Page 33: Intercom
9.1.2 Ending Two-way Intercom 9 INTERCOM To terminate an intercom conversation, single tap the Jog Dial. Any intercom connection with any intercom friend will be terminated by a single tap. A double or triple tap will do nothing in this case. Please make sure your intercom devices are paired as described in section 6.4, “Intercom Pairing”... -
Page 34: Three-Way Intercom
1. You (A) need to be paired with two other friends (B & C) for three- way conference intercom. 9.2.1 Starting Three-way Intercom You (A) can have a three-way conference intercom with two other 10C friends (B & C) by establishing two intercom connections simultaneously. While a three-way conference intercom is in progress, mobile phone connection of all three participants is temporarily disconnected. - Page 35 For example, by single tapping the Jog Dial, you can terminate the intercom 4. Now you (A) and two 10C intercom friends (B & C) are having a three-way conference intercom. have the intercom connection with your second intercom friend (C).
-
Page 36: Four-Way Intercom
As same in the case of three-way intercom, you can completely get out 9.3.1 Starting Four-way Intercom of the four-way conference intercom or just disconnect a single You can have four-way conference intercom with three other 10C users intercom connection. by adding one more intercom participant to the three-way intercom. -
Page 37: Three-Way Conference Phone Call With Intercom Participant
2. When you have an incoming intercom call during a mobile phone 10 THREE-WAY CONFERENCE PHONE CALL call, you will hear 4 high toned beeps, alerting you that there is an incoming intercom call. You will also hear a voice prompt, WITH INTERCOM PARTICIPANT “Intercom requested”. -
Page 38: Universal Intercom
You can have an intercom conversation with non-Sena Bluetooth Press Jog Dial for 2” headsets using the Universal Intercom function. Non-Sena Bluetooth headsets can be connected to the Sena Bluetooth headset if they Tap Phone Button may differ depending on the performance of Bluetooth headset that it Wait for the called person to end the call is connected to. -
Page 39: Universal Intercom Pairing
Sena) is turned on, then the multipoint connection is automatically deactivated. And the non-Sena headset is automatically 2. Press and hold the Jog Dial on the 10C for 8 seconds until the connected to Sena headset as a Universal Intercom. So you “Universal... -
Page 40: Two-Way Universal Intercom
Bluetooth headsets using the same intercom connection method as 10Cs and one non-Sena Bluetooth headset. If the intercom connection you would between other Sena headsets. You may single tap the Jog is made, all headsets connected cannot use the mobile phone call... - Page 41 5. You may disconnect three-way Universal Intercom using the same way as you do in normal three-way intercom. Please refer to section 9.2.2, “Ending Three-way Intercom” . 3. The other 10C (C) may join the intercom by making an intercom call to you (A).
-
Page 42: Four-Way Universal Intercom
(A), a non-Sena Bluetooth headset (B), and two other 10C headsets (C and D). You may make the four-way Universal Intercom call the same way as a normal four-way intercom call. 2. The other 10C (C) may join the intercom by making an intercom call to you (A). - Page 43 11.4.2 Four-way Universal Intercom Case 2 intercom by making an intercom call to the 10C (C). Three 10C headsets (A, C and D) and one non-Sena Bluetooth headset The procedure is the same as case 1 described in section 11.4.1 .
-
Page 44: Fm Radio
2 seconds until you hear a voice prompt, “Preset (#)”. Phone Button for 2 seconds until you hear a voice prompt, “FM off”. When you power it off, the 10C will remember the last station frequency. 4. Rotate the Jog Dial clockwise or counter clockwise, in order to When you power it on, the last station frequency will be playing. -
Page 45: Scan And Save
Note: 1. You can save FM stations to presets before using FM radio. Connect the 10C to your PC and open the Sena Device Manager. It allows you to save 8 seconds, then scanning to the next station frequency. up to 10 FM station frequency presets on the 10C settings menu. You 3. -
Page 46: Region Selection
12.6 Region Selection 13 FUNCTION PRIORITY You can select the proper FM frequency region from the Sena Device Manager. With the region setting, you may optimize the seek function to avoid unnecessary frequency ranges (factory default: worldwide). The 10C operates in the following order of priority:... -
Page 47: Configuration Setting
3. You can enable the feature or execute the command by tapping the Phone Button, or disable the feature by tapping the Jog Dial. 4. If any button is not pressed within 10 seconds, the 10C will exit Dial until you hear a voice prompt, , and tap the Phone Button. - Page 48 1. After assigning a phone number to one of three speed dials, you can continually assign another phone number to the rest of two speed dials. Factory Default 2. You can also assign phone numbers for speed dialing by using the Sena Execute Tap the Phone Button Device Manager software or the Sena Smartphone App.
- Page 49 Jog Dial, you will not be able to start intercom by voice temporarily. In this case, you have to tap the Jog Dial to restart the intercom. This is to prevent repeated unintentional intercom connections by strong wind noise. After rebooting the 10C, you can start intercom by voice again.
- Page 50 14.1.5 Enabling/Disabling Voice Prompts 14.1.6 Enabling/Disabling RDS AF Voice Prompt “Voice prompt” Voice Prompt “RDS AF setting” Factory Default Enable Factory Default Disable Enable Tap the Phone Button Enable Tap the Phone Button Disable Tap the Jog Dial Disable Tap the Jog Dial RDS AF allows a receiver to re-tune to the second frequency location following voice prompts are always on.
- Page 51 Voice Prompt “Remote control pairing” Note: Factory Default If you use your 10C with the Bluetooth Audio Pack for GoPro, you can enable or disable this feature only during Normal Audio Recording Mode. Execute Tap the Phone Button This feature is automatically disabled while in Ultra HD (UHD) Audio Mode.
- Page 52 14.1.11 Rotate Jog Dial Tap Phone Button Tap Jog Dial Voice Prompt Speed Dial Execute Factory Default Audio Boost Enable Disable Execute Tap the Phone Button VOX Phone Enable Disable VOX Intercom Enable Disable rotate the Jog Dial until you hear a voice prompt, Voice Prompt Enable Disable...
- Page 53 Phone Button. 14.2.1 Photo Mode 4. If you do not press any buttons for 10 seconds, the 10C will exit You can select the photo mode to be either single shot or burst shot. Single shot takes a single photo while burst shot takes 5 photos in one second.
- Page 54 14.2.2 Video Mode 14.2.3 Video Resolution You can select the video mode to be either video mode or timelapse You can select the video resolution to be 1080p/30fps, 720p/60fps, or mode. Video mode records a standard video while timelapse mode 720p/30fps.
- Page 55 To set the right time for date caption, you must initially set the date using the Sena Smartphone App. Pair your 10C with your smartphone, turn on the 10C camera, and run the Sena Smartphone App. The date will be updated automatically.
- Page 56 14.2.7 Auto Camera Sleep Rotate Jog Dial Tap Phone Button Single Shot Mode inactivity. This feature does not work while charging the camera. When Photo Mode Setting you hear the voice prompt, “Auto camera sleep”, tap the Phone Burst Shot Mode Button to either turn on or off this feature.
-
Page 57: Remote Control
Type Operation Button Command You can remotely control the 10C via Bluetooth using the Handlebar Remote (sold separately). This eliminates the need to take off your Volume Move the Joystick up or hand for button operations. Your 10C and the Handlebar Remote must... - Page 58 Type Operation Button Command Type Operation Button Command Press the Front Button Press the Rear Button FM radio on for 5 seconds for 1 second Intercom pairing Tap the Front Button of any one of the two Press the Rear Button FM radio off headsets for 1 second...
-
Page 59: Firmware Upgrade
If your intercom friend goes out of range while having an intercom conversation, you may hear static noise and eventually the intercom will be disconnected. In this case, the 10C automatically tries to reconnect the intercom and you will hear high tone double beeps until the intercom is reestablished. -
Page 60: Fault Reset
17.3 Fault Reset 17.4 Factory Reset When the 10C is not working properly or is in faulty status for any 1. To restore the 10C to factory default settings, press and hold the reason, you may reset by pushing the Pin-hole Reset Button at the Phone Button for 12 seconds until the LED shows solid red and back of the headset main unit. -
Page 61: Operation Quick Reference
Type Function Button Command Beep 18 OPERATION QUICK REFERENCE Blue & red High tone Mobile phone Press the Phone Button for alternatively multiple pairing 5 seconds beeps Press the Jog Dial for Multiple Type Function Button Command Beep Second mobile 5 seconds beeps Press the Phone Button and... - Page 62 Type Function Button Command Beep Type Function Button Command Beep Play/pause Press the Jog Dial for Mid-tone High tone Press the Phone Button for Bluetooth music 1 second double beep Solid red double 12 seconds Music Factory reset beeps Rotate the Jog Dial while Reset Track forward/back pressing...
-
Page 63: Certification And Safety Approvals
Connect the equipment into an outlet on a circuit different from that CERTIFICATION AND SAFETY APPROVALS to which the receiver is connected. FCC Compliance Statement Consult the dealer or an experienced radio/TV technician for help. This device complies with part 15 of the FCC rules. Operation is FCC RF Exposure Statement subject to the following two conditions: This equipment complies with FCC radiation exposure limits set forth... -
Page 64: Ce Declaration Of Conformity
Bluetooth SIG, Directive (99/5/EC). Hereby, Sena declares that this product is in Inc. and any use of such marks by Sena is under license. Other compliance with the essential requirements and other relevant trademarks and trade names are those of their respective owners. -
Page 65: Safety Information
Do not store the product in humid environments, especially for long SAFETY INFORMATION time storage. Please ensure that the product is properly used by observing the Product Use warnings and cautions below to prevent any risk and/or damage to property. In some regions, it is prohibited by law to ride motorcycles while wearing headsets or earbuds. -
Page 66: Battery
When using the product, be certain to conform to laws regarding the Any 3rd party USB charger can be used with Sena products if the use of communications devices while riding. charger is approved by either the FCC, CE, IC or other locally approved agencies that Sena accepts. -
Page 67: Product Warranty And Disclaimer
Here, product warranty extends to be certain to read and understand the following terms and conditions the product only. Sena will not be liable for any loss, damage of human before using the product. Use of this product will constitute consent to life, or loss of property which may result from using the product beyond this agreement, and forfeiture of rights to all claims. - Page 68 Sena; together with employees, managers, partners, subsidiaries, When you use the product, use good judgment; never use it sellers of Sena (collectively referred to as “the company”) recommend that, before using the product and similar devices of 6. You must read and completely understand all terms and conditions any brands including its derivative models, you collect any of legal rights and warnings that are involved in using the product.
-
Page 69: Warranty Exclusions
LOSS ARISING OUT OF OR IN CONNECTION WITH THE SALE, that may have occurred while you use the product. Further, Sena will INSTALLATION, MAINTENANCE, USE, PERFORMANCE, FAILURE, OR not be liable for any substantial damage not related to the condition, INTERRUPTION OF ITS PRODUCTS, EVEN IF SENA OR ITS environment, or malfunction of the product. -
Page 70: Warranty Service
In addition to damages which may occur due to the use of the product, To obtain product warranty service, send the defective product, at Sena will not be liable for damages of the product which occur due to your expense, to the manufacturer or the seller along with proof of the following events. - Page 71 1.0.1 www.sena.com User's Guide for Firmware v1.0.1...
Need help?
Do you have a question about the 10C and is the answer not in the manual?
Questions and answers