CipherLab 1500 User Manual
Hide thumbs
Also See for 1500:
- User manual (187 pages) ,
- User manual (168 pages) ,
- User manual (150 pages)
Table of Contents
Advertisement
Quick Links
Advertisement
Table of Contents

Related Manuals for CipherLab 1500


Summary of Contents for CipherLab 1500
- Page 1 1500 Barcode Scanner Setup labels included. Version 1.11...
- Page 2 Due to continued product development this information may change without notice. The information and intellectual property contained herein is confidential between CIPHERLAB and the client and remains the exclusive property of CIPHERLAB CO., LTD. If you find any problems in the documentation, please report them to us in writing.
-
Page 3: For Canada
IMPORTANT NOTICES FOR USA This equipment has been tested and found to comply with the limits for a Class B digital device, pursuant to Part 15 of the FCC Rules. These limits are designed to provide reasonable protection against harmful interference in a residential installation. This equipment generates, uses and can radiate radio frequency energy and, if not installed and used in accordance with the instructions, may cause harmful interference to radio communications. -
Page 4: For Product With Laser
DISPOSE OF USED BATTERIES ACCORDING TO THE INSTRUCTIONS. The use of any batteries or charging devices, which are not originally sold or manufactured by CipherLab, will void your warranty and may cause damage to human body or the product itself. -
Page 5: Release Notes
Modified: 2.2.2 Baud Rate — change setup label for 4800 bps 1.09 Nov. 25, 2009 (change 100079 to 100100) Modified: 1.10 Auto-Sense Mode (1500 Only) — Continuous mode 1.08 Oct. 30, 2009 as an alternative Modified: 1.12 Symbologies Supported — ISBT 128 enabled by default Modified: 2.2.2 Baud Rate —... - Page 6 Sep. 11, 2008 improving sensitivity Modified: section 1.2 Transmit Buffer — The use of transmit buffer 1.01 July 23, 2008 is different from memory mode, and the latter is not supported by 1500 scanner! 1.00 May 26, 2008 Initial release...
-
Page 7: Table Of Contents
CONTENTS IMPORTANT NOTICES ........................- 3 - For USA ............................- 3 - For Canada ............................ - 3 - For Product with Laser ........................- 4 - Safety Precautions ........................- 4 - Care & Maintenance ........................- 4 - RELEASE NOTES .......................... - Page 8 1.7 Scanning Timeout........................26 1.8 Delay between Re-read ......................27 1.9 Read Redundancy for All Symblogies..................28 1.10 Addon Security for UPC/EAN Barcodes ................29 1.11 Auto-Sense Mode (1500 Only) ....................30 1.12 Negative Barcodes .........................31 1.13 Effective Decoding Area......................32 1.13.1 Positioning Window......................32 1.13.2 Adjusting Window......................32...
- Page 9 1500 Barcode Scanner User Guide 3.4.1 Select Start/Stop Pattern ....................62 3.4.2 Verify Check Digit ......................63 3.4.3 Transmit Check Digit......................63 3.4.4 Code Length Qualification ....................64 3.5 Code 39............................. 65 3.5.1 Transmit Start/Stop Characters..................65 3.5.2 Verify Check Digit ......................65 3.5.3 Transmit Check Digit......................66 3.5.4 Standard/Full ASCII Code 39 ..................66...
- Page 10 1500 Barcode Scanner User Guide 3.19.4 Transmit Check Digit .....................90 DEFINING OUTPUT FORMAT ......................91 4.1 Letter Case..........................91 4.2 Character Substitution ......................92 4.2.1 Select a Set for Character Substituion ................92 4.2.2 Symbologies for Character Substitution (All 3 Sets) ............93 4.3 Prefix/Suffix Code........................
- Page 11 1500 Barcode Scanner User Guide Key Status ..........................142 Example ............................143 NUMERAL SYSTEMS........................145 Decimal System..........................145 Hexadecimal System........................146 ASCII Table.............................147...
-
Page 13: Introduction
A new ordering option is provided for adapting a wide angle scan engine to read long barcodes. Owing to the slim, ergonomic design, extremely low power consumption, and powerful decoding capability, CipherLab Barcode Scanners are the best choice for the following applications – Receiving in Retail Product labeling &... -
Page 14: Inside The Package
Save the box and packaging material for future use in case you need to store or ship the scanner. Barcode Scanner: 1500 or 1500WA Product CD Note: (1) You will need to purchase one or more interface cable separately. For USB Virtual COM (Part #308), find the associated driver on the CD. -
Page 15: Symbologies Supported
Introduction SYMBOLOGIES SUPPORTED Most of the popular barcode symbologies are supported, as listed below. Each can be individually enabled or disabled. The scanner will automatically discriminate and recognize all the symbologies that are enabled. Refer to Chapter 3 Changing Symbology Settings for details of each symbology. - Page 16 1500 Barcode Scanner User Guide DataBar GS1 DataBar Omnidirectional (RSS-14) Disabled (RSS) GS1 DataBar Limited (RSS Limited) Disabled GS1 DataBar Expanded (RSS Expanded) Disabled Enter Setup...
-
Page 17: Quick Start
QUICK START The configuration of the scanner can be done by reading the setup labels contained in this manual or via the ScanMaster software. This section describes the procedure of configuring the scanner by reading the setup barcodes and provides some examples for demonstration. Note: If RS-232 is selected for output interface, the host can directly send serial commands to configure the scanner. -
Page 18: Enter Configuration Mode
1500 Barcode Scanner User Guide ENTER CONFIGURATION MODE For the scanner to enter the configuration mode, you must have it read the "Enter Setup" label, which can be located at the bottom of almost every even page of this manual. -
Page 19: Default Settings
Quick Start DEFAULT SETTINGS SAVE USER SETTINGS AS DEFAULTS For the scanner to keep the customized settings as user defaults, you must have it read the “Save as User Defaults” label. This is a normal label, and the scanner will respond with two beeps (low-high tone). -
Page 20: Read A Setup Label
1500 Barcode Scanner User Guide READ A SETUP LABEL CONFIGURE PARAMETERS For most of the scanner parameters, only one read is required to set them to new values. The scanner will respond with two beeps when each parameter is set successfully. - Page 21 Quick Start The example below shows how to save your settings as “User Default” so that you may restore user defaults at a later time: Steps Action User Feedback if Successful Power on the scanner… The scanner will respond with a long beep (high tone) and its LED indicator will become solid red and go off quickly.
- Page 22 1500 Barcode Scanner User Guide The example below shows how to set numeric parameters: Steps Action User Feedback if Successful Power on the scanner... The scanner will respond with a long beep (high tone) and its LED indicator will become solid red and go off quickly.
- Page 23 Quick Start The example below shows how to set string parameters: Steps Action User Feedback if Successful Power on the scanner... The scanner will respond with a long beep (high tone) and its LED indicator will become solid red and go off quickly. Enter the Configuration Mode…...
-
Page 24: List The Current Settings
1500 Barcode Scanner User Guide LIST THE CURRENT SETTINGS The current settings of all scanner parameters can be sent, via Keyboard Wedge or RS-232, to the host computer for user inspection. The listing includes pages as shown below. You can select the page of interest by having the scanner read the “List Page x”... - Page 25 Quick Start List Page 8 List settings regarding Editing Format 1 List Page 9 List settings regarding Editing Format 2 List Page 10 List settings regarding Editing Format 3 List Page 11 List settings regarding Editing Format 4 List Page 12 List settings regarding Editing Format 5 Update...
- Page 26 1500 Barcode Scanner User Guide Enter Setup...
-
Page 27: Understanding The Barcode Scanner
1.8 Delay between Re-read..........27 1.9 Read Redundancy for All Symblogies ......28 1.10 Addon Security for UPC/EAN Barcodes ......29 1.11 Auto-Sense Mode (1500 Only) ........30 1.12 Negative Barcodes ........... 31 1.13 Effective Decoding Area ..........32 1.1 POWER Connect the interface cable between the scanner and your computer. -
Page 28: Led Indicator
1500 Barcode Scanner User Guide 1.3 LED INDICATOR The dual-color LED on top of the scanner is used to provide user feedback. For example, the LED becomes solid red and goes off quickly upon powering on or running out of transmit buffer. - Page 29 Chapter 1 Understanding the Barcode Scanner 1) Read the label above to specify the time interval before the Good Read LED goes off. 2) Read the “Decimal Value” label on page 145. For example, read “1” and “5” for the Good Read LED to go off after 150 milliseconds.
-
Page 30: Beeper
1500 Barcode Scanner User Guide 1.4 BEEPER The scanner has a buzzer to provide user feedback in various operating conditions. Beeping Meaning One long beep, high tone Power on, with red LED on (1 second) and off quickly One short beep, high tone... -
Page 31: Good Read Beep
Chapter 1 Understanding the Barcode Scanner 1.4.2 GOOD READ BEEP Frequency 8 kHz * 4 kHz 2 kHz 1 kHz Duration *Shortest Shorter Longer Longest Update... -
Page 32: Send "Nr" To Host
1500 Barcode Scanner User Guide 1.5 SEND “NR” TO HOST This feature only works when Keyboard Wedge or RS-232 is selected for output interface. You may have the scanner send the “NR” string to the host to notify the No Read event. -
Page 33: Scan Modes
Chapter 1 Understanding the Barcode Scanner 1.6 SCAN MODES Different scan modes are supported – select the scan mode that best suits the requirements of a specific application. Refer to the comparison table below. Scan Mode Start to Scan Stop Scanning Always Press Hold... -
Page 34: Continuous Mode
1500 Barcode Scanner User Guide 1.6.1 CONTINUOUS MODE The scanner is always scanning. After a successful decoding, the removal of barcode is required. It is not allowed to proceed to decode until the decoding delay time has passed. To decode the same barcode repeatedly, move away the barcode and put it back again and again for scanning. -
Page 35: Test Mode
Chapter 1 Understanding the Barcode Scanner 1.6.2 TEST MODE The scanner is always scanning. Capable of decoding the same barcode repeatedly without removing it, for testing purpose. Test Mode 1.6.3 LASER MODE The scanner will start scanning once the trigger is hold down. The scanning won't stop until (1) a barcode is decoded, (2) the pre-set timeout expires, or (3) you release the trigger. -
Page 36: Auto Power Off Mode
1500 Barcode Scanner User Guide 1.6.5 AUTO POWER OFF MODE The scanner will start scanning once the trigger is pressed. The scanning won't stop until the pre-set timeout expires, and, the pre-set timeout period re-counts after each successful decoding. Note: Refer to “Delay between Re-read” and “Scanning Timeout”. -
Page 37: Multi-Barcode Mode
Chapter 1 Understanding the Barcode Scanner 1.6.7 MULTI-BARCODE MODE The scanner will be scanning as long as the trigger is held down, capable of decoding not only one single barcode but a concatenation of unique barcodes. The scanning won't stop until you release the trigger. Multi-Barcode Mode Note: (1) A barcode is considered unique when its Code Type or data is different from others. -
Page 38: Scanning Timeout
1500 Barcode Scanner User Guide 1.7 SCANNING TIMEOUT Specify the scanning time interval (1~254 sec.; 0= Disable) when the scan mode is set to any of the following – Laser mode Auto Off mode Auto Power Off mode Aiming mode Scanner Time-Out after 0~254 seconds (*10) 1) Read the label above to specify the time interval before the scan engine times out. -
Page 39: Delay Between Re-Read
Chapter 1 Understanding the Barcode Scanner 1.8 DELAY BETWEEN RE-READ This is also referred to as the “Blocking Time”, which is used to prevent the scanner from accidentally reading the same barcode twice when the scan mode is set to any of the following –... -
Page 40: Read Redundancy For All Symblogies
1500 Barcode Scanner User Guide 1.9 READ REDUNDANCY FOR ALL SYMBLOGIES Select the level of reading security. For example, If "No Redundancy" is selected, one successful decoding will make the reading valid and induce the "READER Event". If "Three Times" is selected, it will take a total of four consecutive successful decoding of the same barcode to make the reading valid. -
Page 41: Addon Security For Upc/Ean Barcodes
Chapter 1 Understanding the Barcode Scanner 1.10 ADDON SECURITY FOR UPC/EAN BARCODES You may like to enforce read redundancy (0~30 times) on UPC/EAN barcodes with addons only. Note: UPC/EAN Addon 2 and Addon 5 must be enabled individually for this setting to take effect. -
Page 42: Auto-Sense Mode (1500 Only)
1500 Barcode Scanner User Guide 1.11 AUTO-SENSE MODE (1500 ONLY) This mode is only available when you want to seat the scanner in the Auto-Sense Stand. When you enable this mode, it will force the scanner to apply Laser mode as the scan mode. -
Page 43: Negative Barcodes
Chapter 1 Understanding the Barcode Scanner 1.12 NEGATIVE BARCODES Normally, barcodes are printed with the color of the bars darker than that of the spaces. But for negative barcodes, they are printed in the opposite sense just like negative films. The spaces of negative barcodes are printed with a color darker than that of the bars. -
Page 44: Effective Decoding Area
1500 Barcode Scanner User Guide 1.13 EFFECTIVE DECODING AREA By default, the effective decoding area is 100% covered by the scanned area. However, you may narrow down the decoding area to prevent reading the wrong barcode when a number of barcodes are printed closely. The scanner will only read barcodes that appear in the effective decoding area. - Page 45 Chapter 1 Understanding the Barcode Scanner Left 40% Left 30% Left 20% Left 10% Percentage for Right Half Right 10% Right 20% Right 30% Right 40% *Right 50% Update...
- Page 46 1500 Barcode Scanner User Guide Enter Setup...
-
Page 47: Selecting Output Interface
Chapter 2 SELECTING OUTPUT INTERFACE In order to establish a proper connection between your computer and the scanner, we suggest that you follow these instructions – 1) Connect the interface cable between the scanner and your computer. If using the RS-232 cable, join the power supply cord. If you are connecting the scanner to the USB port of the host computer via USB HID cable (part # 307), refer to 2.1 Keyboard Wedge... -
Page 48: Keyboard Wedge
1500 Barcode Scanner User Guide 2.1 KEYBOARD WEDGE The Y cable allows you to connect the scanner to the keyboard input port of PC and you may join the keyboard as well. The scanned data will be transmitted to the host keyboard port as if it is manually entered via the keyboard. -
Page 49: Keyboard Settings
Chapter 2 Selecting Output Interface Keyboard Type By default, the keyboard type is set to PCAT (US). The following keyboard types are supported – Keyboard Type Keyboard Type PCAT (US) PS55 001-2 PCAT (French) PS55 001-82 PCAT (German) PS55 001-3 PCAT (Italian) PS55 001-8A PCAT (Swedish) - Page 50 1500 Barcode Scanner User Guide US Keyboard Style – Normal QWERTY layout, which is normally used in western countries. Select “Lower Row” for the “Digits Layout” setting for the upper row is for special characters. French Keyboard Style – AZERTY French layout;...
- Page 51 Chapter 2 Selecting Output Interface Note: This setting only works when the keyboard type selected is US keyboard, such as PCAT (US). The Alphabets Layout and Digits Layout setting must match your keyboard. Digits Layout Select a proper layout that matches the alphabets layout. The scanner will make adjustments according to this setting.
- Page 52 1500 Barcode Scanner User Guide *Normal Capital Lock Shift Lock Capital Lock State Description Capital Lock OFF Assuming that the status of Caps Lock on the keyboard is OFF, transmitted characters are exactly the same as in the barcode (when "case-sensitive"...
- Page 53 Chapter 2 Selecting Output Interface Alphabets Transmission By default, the alphabets transmission is case-sensitive, meaning that the alphabets will be transmitted according to their original case, the status of Caps Lock on the keyboard, as well as the Capital Lock setting. Select [Ignore Case] to have alphabets transmitted according to the status of Caps Lock on the keyboard only.
- Page 54 1500 Barcode Scanner User Guide Digits Transmission By default, the alphanumeric keypad is used for transmitting digits. Select “Numeric Keypad” if you wish to use the keys on the numeric keypad. *Alphanumeric Key Numeric Key Note: If you select “Numeric Keypad”, the Num Lock status of the physical keyboard should be "ON".
-
Page 55: Inter-Character Delay
Chapter 2 Selecting Output Interface Laptop Support By default, laptop support is disabled. It is suggested to enable this feature if you connect the wedge cable to a laptop without an external keyboard being inter-connected. Enable *Disable 2.1.3 INTER-CHARACTER DELAY By default, the inter-character delay is set to zero. - Page 56 1500 Barcode Scanner User Guide 1) Read the label above to specify the inter-function delay. 2) Read the “Decimal Value” label on page 145 for the desired inter-function delay (millisecond). 3) Read the “Validate” label on the same page to complete this setting.
-
Page 57: Activate Rs-232 Interface
Chapter 2 Selecting Output Interface 2.2 RS-232 Use the RS-232 cable to cconnect the scanner to the serial port of PC and join the power adaptor to the RS-232 connector. The associated RS-232 parameters must match those configured on the computer. The scanned data will be transmitted to the serial port. RS-232 Settings Defaults Baud Rate, Data Bit, Parity, Stop Bit... -
Page 58: Data Bits
1500 Barcode Scanner User Guide * 9600 bps 4800 bps 2400 bps 1200 bps 600 bps 2.2.3 DATA BITS * 8 bits 7 bits 2.2.4 PARITY *No Parity Enter Setup... -
Page 59: Stop Bit
Chapter 2 Selecting Output Interface Even 2.2.5 STOP BIT 2 stop bits * 1 stop bit 2.2.6 FLOW CONTROL By default, there is no flow control in use. Select the flow control (handshake) method. Options Description No flow control Scanner Ready The scanner will activate the RTS signal upon powering on. -
Page 60: Inter-Character Delay
1500 Barcode Scanner User Guide Scanner Ready Data Ready Invert Data Ready 2.2.7 INTER-CHARACTER DELAY By default, the inter-character delay is zero. Specify a value, ranging from 0 to 254 in units of millisecond, to match the computer response time. Such delay time is inserted between every character being transmitted. -
Page 61: Ack/Nak Timeout
Chapter 2 Selecting Output Interface 1) Read this label above to specify the inter-function delay. 2) Read the “Decimal Value” label on page 145 for the desired inter-function delay (millisecond). 3) Read the “Validate” label on the same page to complete this setting. 2.2.9 ACK/NAK TIMEOUT By default, the scanner sends data to the host without waiting for an ACK/NAK response before sending more data. -
Page 62: Wand Emulation
1500 Barcode Scanner User Guide 2.3 WAND EMULATION The wand emulation cable allows you to connect the scanner to a data terminal that is expecting input from a wand scanner. Wand Emulation Settings Defaults Normal State Bar State High Module Time... -
Page 63: Module Time
Chapter 2 Selecting Output Interface 2.3.4 MODULE TIME By default, it is set 1 millisecond as the time span for bar and space modules. Select other value for the module time, in units of micro-second or millisecond. 250 µs 500 µs * 1 ms 1.5 ms 2 ms... -
Page 64: Margin Time
1500 Barcode Scanner User Guide 2.3.5 MARGIN TIME By default, it is set 20 milliseconds as the time span for the change in state for bar and space modules. Select other value for the margin time. 5 ms 10 ms... -
Page 65: Changing Symbology Settings
Chapter 3 CHANGING SYMBOLOGY SETTINGS In this chapter, a brief on the symbology settings is provided for your reference. IN THIS CHAPTER 3.1 Codabar ..............54 3.2 Code 25 – Industrial 25 ..........56 3.3 Code 25 – Interleaved 25..........59 3.4 Code 25 –... -
Page 66: Codabar
1500 Barcode Scanner User Guide 3.1 CODABAR *Enable Codabar Disable Codabar 3.1.1 START/STOP CHARACTERS SELECTION Select one of the four different start/stop character pairs – * abcd/abcd abcd/tn*e ABCD/ABCD ABCD/TN*E Enter Setup... -
Page 67: Start/Stop Transmission
Chapter 3 Changing Symbology Settings 3.1.2 START/STOP TRANSMISSION Decide whether to include the start/stop characters in the data being transmitted. Transmit Codabar Start/Stop Characters *Do Not Transmit 3.1.3 CLSI CONVERSION When enabled, the CLSI editing strips the start/stop characters and inserts a space after the first, fifth, and tenth characters of a 14-character Codabar barcode. -
Page 68: Code 25 - Industrial 25
1500 Barcode Scanner User Guide 3.2 CODE 25 – INDUSTRIAL 25 *Enable Industrial 25 Disable Industrial 25 3.2.1 SELECT START/STOP PATTERN This decides the readability of all 2 of 5 symbology variants. For example, flight tickets actually use an Industrial 2 of 5 barcode but with Interleaved 2 of 5 start/stop pattern. In order to read this barcode, the start/stop pattern selection parameter of Industrial 2 of 5 should set to "Interleaved 25". -
Page 69: Verify Check Digit
Chapter 3 Changing Symbology Settings 3.2.2 VERIFY CHECK DIGIT Decide whether to verify the check digit. If incorrect, the barcode will not be accepted. Verify Industrial 25 Check Digit *Do Not Verify 3.2.3 TRANSMIT CHECK DIGIT Decide whether to include the check digit in the data being transmitted. *Transmit Industrial 25 Check Digit Do Not Transmit... -
Page 70: Code Length Qualification
1500 Barcode Scanner User Guide 3.2.4 CODE LENGTH QUALIFICATION Because of the weak structure of the 2 of 5 symbologies, it is possible to make a "short scan" error. To prevent the "short scan" error, define the "Length Qualification" settings to ensure that the correct barcode is read by qualifying the allowable code length. -
Page 71: Code 25 - Interleaved 25
Chapter 3 Changing Symbology Settings 3.3 CODE 25 – INTERLEAVED 25 *Enable Interleaved 25 Disable Interleaved 25 3.3.1 SELECT START/STOP PATTERN This decides the readability of all 2 of 5 symbology variants. For example, flight tickets actually use an Industrial 2 of 5 barcode but with Interleaved 2 of 5 start/stop pattern. In order to read this barcode, the start/stop pattern selection parameter of Industrial 2 of 5 should set to "Interleaved 25". -
Page 72: Verify Check Digit
1500 Barcode Scanner User Guide 3.3.2 VERIFY CHECK DIGIT Decide whether to verify the check digit. If incorrect, the barcode will not be accepted. Verify Interleaved 25 Check Digit *Do Not Verify 3.3.3 TRANSMIT CHECK DIGIT Decide whether to include the check digit in the data being transmitted. -
Page 73: Code Length Qualification
Chapter 3 Changing Symbology Settings 3.3.4 CODE LENGTH QUALIFICATION Because of the weak structure of the 2 of 5 symbologies, it is possible to make a "short scan" error. To prevent the "short scan" error, define the "Length Qualification" settings to ensure that the correct barcode is read by qualifying the allowable code length. -
Page 74: Code 25 - Matrix 25
1500 Barcode Scanner User Guide 3.4 CODE 25 – MATRIX 25 Enable Matrix 25 *Disable Matrix 25 3.4.1 SELECT START/STOP PATTERN This decides the readability of all 2 of 5 symbology variants. For example, flight tickets actually use an Industrial 2 of 5 barcode but with Interleaved 2 of 5 start/stop pattern. In order to read this barcode, the start/stop pattern selection parameter of Industrial 2 of 5 should set to "Interleaved 25". -
Page 75: Verify Check Digit
Chapter 3 Changing Symbology Settings 3.4.2 VERIFY CHECK DIGIT Decide whether to verify the check digit. If incorrect, the barcode will not be accepted. Verify Matrix 25 Check Digit *Do Not Verify 3.4.3 TRANSMIT CHECK DIGIT Decide whether to include the check digit in the data being transmitted. *Transmit Matrix 25 Check Digit Do Not Transmit... -
Page 76: Code Length Qualification
1500 Barcode Scanner User Guide 3.4.4 CODE LENGTH QUALIFICATION Because of the weak structure of the 2 of 5 symbologies, it is possible to make a "short scan" error. To prevent the "short scan" error, define the "Length Qualification" settings to ensure that the correct barcode is read by qualifying the allowable code length. -
Page 77: Code 39
Chapter 3 Changing Symbology Settings 3.5 CODE 39 *Enable Code 39 Disable Code 39 3.5.1 TRANSMIT START/STOP CHARACTERS Decide whether to include the start/stop characters in the data being transmitted. Transmit Code 39 Start/Stop Characters *Do Not Transmit 3.5.2 VERIFY CHECK DIGIT Decide whether to verify the check digit. -
Page 78: Transmit Check Digit
1500 Barcode Scanner User Guide 3.5.3 TRANSMIT CHECK DIGIT Decide whether to include the check digit in the data being transmitted. *Transmit Code 39 Check Digit Do Not Transmit 3.5.4 STANDARD/FULL ASCII CODE 39 Decide whether to support Code 39 Full ASCII that includes all the alphanumeric and special characters. -
Page 79: Code 93
Chapter 3 Changing Symbology Settings 3.6 CODE 93 You can only configure the scanner to read this symbology or not. *Enable Code 93 Disable Code 93 3.7 CODE 128 You can only configure the scanner to read this symbology or not. *Enable Code 128 Disable Code 128 Update... -
Page 80: Ean-8
1500 Barcode Scanner User Guide 3.8 EAN-8 *Enable EAN-8 (No Addon) Disable EAN-8 (No Addon) Enable EAN-8 Addon 2 *Disable EAN-8 Addon 2 Enable EAN-8 Addon 5 *Disable EAN-8 Addon 5 Enter Setup... -
Page 81: Convert To Ean-13
Chapter 3 Changing Symbology Settings 3.8.1 CONVERT TO EAN-13 Decide whether to expand the read EAN-8 barcode, as well as its addons, into EAN-13. After conversion, the data follows EAN-13 format and is affected by EAN-13 programming selections (e.g. Check Digit). Convert EAN-8 to EAN-13 *Do Not Convert... -
Page 82: Ean-13
1500 Barcode Scanner User Guide 3.9 EAN-13 *Enable EAN-13 (No Addon) Disable EAN-13 (No Addon) Enable EAN-13 Addon 2 *Disable EAN-13 Addon 2 Enable EAN-13 Addon 5 *Disable EAN-13 Addon 5 Enter Setup... -
Page 83: Convert To Isbn
Chapter 3 Changing Symbology Settings 3.9.1 CONVERT TO ISBN Decide whether to convert the EAN-13 barcode, starting with 978 and 979, to ISBN. Convert EAN-13 to ISBN *Do Not Convert 3.9.2 CONVERT TO ISSN Decide whether to convert the EAN-13 barcode, starting with 977 to ISSN. Convert EAN-13 to ISSN *Do Not Convert 3.9.3 TRANSMIT CHECK DIGIT... -
Page 84: Security Level
1500 Barcode Scanner User Guide 4.9.4 SECURITY LEVEL Select the security level for reading EAN-13 barcodes. Normal *High Enter Setup... -
Page 85: Gs1-128 (Ean-128)
Chapter 3 Changing Symbology Settings 3.10 GS1-128 (EAN-128) Enable GS1-128 *Disable GS1-128 3.10.1 TRANSMIT CODE ID Decide whether to include the Code ID (“ ”) in the data being transmitted. Transmit GS1-128 Code ID *Do Not Transmit 3.10.2 FIELD SEPARATOR (GS CHARACTER) Decide whether to apply a field separator (to convert the control character to human FNC1... -
Page 86: Isbt 128
1500 Barcode Scanner User Guide Note: GS1-128 barcodes start with the control character to distinguish themselves FNC1 from other uses of Code 128. is also used to separate data fields in the FNC1 GS1-128 barcodes. 3.11 ISBT 128 You can only configure the scanner to read this symbology or not. -
Page 87: Msi
Chapter 3 Changing Symbology Settings 3.12 MSI Enable MSI *Disable MSI 3.12.1 VERIFY CHECK DIGIT Select one of the three calculations to verify check digit when decoding barcodes. If incorrect, the barcode will not be accepted. *Single Modulo 10 Double Modulo 10 Modulo 10 &... -
Page 88: Transmit Check Digit
1500 Barcode Scanner User Guide 3.12.2 TRANSMIT CHECK DIGIT Decide whether to include the check digit in the data being transmitted. *Last Digit Not Transmitted Both Digits Transmitted Both Digits Not Transmitted Enter Setup... -
Page 89: Code Length Qualification
Chapter 3 Changing Symbology Settings 3.12.3 CODE LENGTH QUALIFICATION Because of the weak structure of the symbology, it is possible to make a "short scan" error. To prevent the "short scan" error, define the "Length Qualification" settings to ensure that the correct barcode is read by qualifying the allowable code length. If "Max/Min Length"... -
Page 90: French Pharmacode
1500 Barcode Scanner User Guide 3.13 FRENCH PHARMACODE Enable French Pharmacode *Disable French Pharmacode 3.13.1 TRANSMIT CHECK DIGIT Decide whether to include the check digit in the data being transmitted. *Transmit French Pharmacode Check Digit Do Not Transmit Enter Setup... -
Page 91: Italian Pharmacode
Chapter 3 Changing Symbology Settings 3.14 ITALIAN PHARMACODE Enable Italian Pharmacode *Disable Italian Pharmacode 3.14.1 TRANSMIT CHECK DIGIT Decide whether to include the check digit in the data being transmitted. *Transmit Italian Pharmacode Check Digit Do Not Transmit Update... -
Page 92: Plessey
1500 Barcode Scanner User Guide 3.15 PLESSEY Enable Plessey *Disable Plessey 3.15.1 CONVERT TO UK PLESSEY Decide whether to change each occurrence of the character 'A' to character 'X' in the decoded data. Convert to UK Plessey *Do Not Convert 3.15.2 TRANSMIT CHECK DIGIT... -
Page 93: Gs1 Databar (Rss Family)
Chapter 3 Changing Symbology Settings 3.16 GS1 DATABAR (RSS FAMILY) 3.16.1 SELECT CODE ID Select a desired Code ID to use – GS1 DataBar Code ID “ “ or GS1-128 Code ID “ ”. “]C1” “]e0” (Default) 3.16.2 GS1 DATABAR OMNIDIRECTIONAL (RSS-14) Enable RSS-14 &... -
Page 94: Gs1 Databar Expanded (Rss Expanded)
1500 Barcode Scanner User Guide Transmit Application ID Decide whether to include the Application ID ("01") in the data being transmitted. *Transmit RSS-14 Application ID Do Not Transmit Transmit Check Digit Decide whether to include the check digit in the data being transmitted. -
Page 95: Gs1 Databar Limited (Rss Limited)
Chapter 3 Changing Symbology Settings Transmit Code ID Decide whether to include the Code ID in the data being transmitted. *Transmit RSS Expanded Code ID Do Not Transmit 3.16.4 GS1 DATABAR LIMITED (RSS LIMITED) Enable RSS Limited *Disable RSS Limited Transmit Code ID Decide whether to include the Code ID in the data being transmitted. -
Page 96: Check Digit
1500 Barcode Scanner User Guide Transmit Application ID Decide whether to include the Application ID ("01") in the data being transmitted. *Transmit RSS Limited Application ID Do Not Transmit Transmit Check Digit Decide whether to include the check digit in the data being transmitted. -
Page 97: Telepen
Chapter 3 Changing Symbology Settings 3.17 TELEPEN Enable Telepen *Disable Telepen 3.17.1 TELEPEN OUTPUT – FULL ASCII/NUMERIC Decide whether to support Telepen in full ASCII code. By default, it supports ASCII mode. AIM Telepen (Full ASCII) includes all the alphanumeric and special characters. Original Telepen (Numeric) * AIM Telepen... -
Page 98: Upc-A
1500 Barcode Scanner User Guide 3.18 UPC-A *Enable UPC-A (No Addon) Disable UPC-A (No Addon) Enable UPC-A Addon 2 *Disable UPC-A Addon 2 Enable UPC-A Addon 5 *Disable UPC-A Addon 5 Enter Setup... -
Page 99: Convert To Ean-13
Chapter 3 Changing Symbology Settings 3.18.1 CONVERT TO EAN-13 Decide whether to expand the read UPC-A barcode, as well as its addons, into EAN-13. After conversion, the data follows EAN-13 format and is affected by EAN-13 programming selections (e.g. Check Digit). Convert UPC-A to EAN-13 *Do Not Convert... -
Page 100: Upc-E
1500 Barcode Scanner User Guide 3.19 UPC-E *Enable UPC-E (No Addon) Disable UPC-E (No Addon) Enable UPC-E Addon 2 *Disable UPC-E Addon 2 Enable UPC-E Addon 5 *Disable UPC-E Addon 5 Enter Setup... -
Page 101: Select System Number
Chapter 3 Changing Symbology Settings 3.19.1 SELECT SYSTEM NUMBER Decide whether to decode the ordinary UPC-E barcodes only or both UPC-E0 and UPC-E1 barcodes. System number enabled for decoding UPC-E0 barcodes. System number enabled for decoding UPC-E1 barcodes. System Number 0 & 1 * System Number 0 Only Warning:... -
Page 102: Transmit System Number
1500 Barcode Scanner User Guide 3.19.3 TRANSMIT SYSTEM NUMBER Decide whether to include the system number in the data being transmitted. Transmit UPC-E System Number *Do Not Transmit 3.19.4 TRANSMIT CHECK DIGIT Decide whether to include the check digit in the data being transmitted. -
Page 103: Defining Output Format
Chapter 4 DEFINING OUTPUT FORMAT You may configure in which format the collected data will be output to the host computer. Barcode read by the scanner will be processed in the following sequence – 1) Perform character substitution on the data scanned. 2) Add Code ID Length Code... -
Page 104: Character Substitution
1500 Barcode Scanner User Guide 4.2 CHARACTER SUBSTITUTION Character substitution is performed on every occurrence of the first character specified. If only one character is specified, every occurrence of that character in the barcode will be taken away. The first character will be replaced by the second character(s). -
Page 105: Symbologies For Character Substitution (All 3 Sets)
Chapter 4 Defining Output Format 4.2.2 SYMBOLOGIES FOR CHARACTER SUBSTITUTION (ALL 3 SETS) By default character substitution will be performed on all symbologies. If the character substitution is not desired with one or more symbologies, read the “Do Not Apply” label for each undesired symbologies and all the three sets will be ignored for them. - Page 106 1500 Barcode Scanner User Guide Character Substitution for ISBT 128 *Apply Do Not Apply Character Substitution for EAN-8 (No Addon) *Apply Do Not Apply Character Substitution for EAN-8 Addon 2 Do Not Apply *Apply Character Substitution for EAN-8 Addon 5...
- Page 107 Chapter 4 Defining Output Format Character Substitution for EAN-13 Addon 5 *Apply Do Not Apply Character Substitution for French Pharmacode *Apply Do Not Apply Character Substitution for Italian Pharmacode Do Not Apply *Apply Character Substitution for Industrial 25 *Apply Do Not Apply Character Substitution for Interleaved 25 *Apply Do Not Apply...
- Page 108 1500 Barcode Scanner User Guide Character Substitution for MSI *Apply Do Not Apply Character Substitution for Plessey *Apply Do Not Apply Character Substitution for GS1 DataBar *Apply Do Not Apply Character Substitution for Telepen Do Not Apply *Apply Character Substitution for UPC-A (No Addon)
- Page 109 Chapter 4 Defining Output Format Character Substitution for UPC-A Addon 5 Do Not Apply *Apply Character Substitution for UPC-E (No Addon) Do Not Apply *Apply Character Substitution for UPC-E Addon 2 *Apply Do Not Apply Character Substitution for UPC-E Addon 5 *Apply Do Not Apply Update...
-
Page 110: Prefix/Suffix Code
1500 Barcode Scanner User Guide 4.3 PREFIX/SUFFIX CODE By default, there is no prefix code, and [ENTER] or [CR] (Carriage Return) is configured to be suffix code. Up to 8 characters can be configured, for example, “Barcode_”, and will have... -
Page 111: Code Id
Chapter 4 Defining Output Format 4.4 CODE ID Up to two characters for Code ID can be configured for each symbology. To make the Code ID configuration easier, the scanner provides five pre-defined Code ID sets that you can select one and make necessary changes on it. If "Keyboard Wedge"... -
Page 112: Change Code Id
1500 Barcode Scanner User Guide UPC-A Plessey Telepen Apply Code ID Set 1 Apply Code ID Set 2 Apply Code ID Set 3 Apply Code ID Set 4 Apply Code ID Set 5 4.4.2 CHANGE CODE ID 1) Read the label of a specific symbology below to change its code ID. - Page 113 Chapter 4 Defining Output Format Configure Code ID for Codabar Configure Code ID for Code 39 Configure Code ID for Code 93 Configure Code ID for Code 128 Configure Code ID for ISBT 128 Configure Code ID for EAN-8 Configure Code ID for EAN-13 Configure Code ID for Italian Pharmacode...
-
Page 114: Clear Code Id Settings
1500 Barcode Scanner User Guide Configure Code ID for Interleaved 25 Configure Code ID for Matrix 25 Configure Code ID for MSI Configure Code ID for Plessey Configure Code ID for Telepen Configure Code ID for UPC-A Configure Code ID for UPC-E 4.4.3 CLEAR CODE ID SETTINGS... -
Page 115: Length Code
Chapter 4 Defining Output Format 4.5 LENGTH CODE A two-digit code representing the length of barcode data (character count) can be inserted in front of data being transmitted. Such "Length" code can be individually enabled or disabled for each symbology. Length Code for Codabar Apply *Do Not Apply... - Page 116 1500 Barcode Scanner User Guide Length Code for EAN-8 *Do Not Apply Apply Length Code for EAN-13 *Do Not Apply Apply Length Code for French Pharmacode Apply *Do Not Apply Length Code for Italian Pharmacode *Do Not Apply Apply Length Code for Industrial 25...
- Page 117 Chapter 4 Defining Output Format Length Code for MSI *Do Not Apply Apply Length Code for Plessey Apply *Do Not Apply Length Code for Telepen Apply *Do Not Apply Length Code for UPC-A Apply *Do Not Apply Length Code for UPC-E Apply *Do Not Apply Update...
-
Page 118: Multi-Barcode Editor
1500 Barcode Scanner User Guide 4.6 MULTI-BARCODE EDITOR The Multi-Barcode Editor allows you to decide the output sequence of a concatenation of barcodes. Up to five barcodes can be specified. When you enable this mode, it will force the scanner to apply Laser mode as the scan mode. -
Page 119: Edit A Concatenation Of Barcodes
Chapter 4 Defining Output Format 4.6.1 EDIT A CONCATENATION OF BARCODES Edit Output Sequence 1) Read the label above to start editing a concatenation of barcodes. 2) Code Type setting – read the “Hexadecimal Value” label on page 146 for Code Type of the (first) barcode. -
Page 120: Activate The Concatenation Of Barcodes
1500 Barcode Scanner User Guide 4.6.2 ACTIVATE THE CONCATENATION OF BARCODES By default, the output sequence editing of the concatenation of barcodes is not applied. When “Enforce Output Sequence” is enabled, all barcodes read by the scanner must meet with the criteria for the concatenation. If data is found excluded from all output sequence sets (= not meeting with the criteria), the scanner will not accept the reading, and therefore, data will not be transmitted. -
Page 121: Removal Of Special Character
Chapter 4 Defining Output Format 4.7 REMOVAL OF SPECIAL CHARACTER You can only specify 1 character, but it will remove every matching character encountered from the starting position of barcode data until a different character is met. For example, if it is configured to remove the character “0” (hex value is “30”), one or more zeros will be stripped off the barcode data “012345”... - Page 122 1500 Barcode Scanner User Guide Enter Setup...
-
Page 123: Applying Formats For Data Editing
Chapter 5 APPLYING FORMATS FOR DATA EDITING The scanner allows advanced data editing by applying user-configured editing formats. The whole processed data can be divided into fields by user-specified rules. These fields together with the user-configurable additional fields consist of the data actually sent to the host computer. -
Page 124: Activating Editing Formats
1500 Barcode Scanner User Guide 5.1 ACTIVATING EDITING FORMATS 5.1.1 ACTIVATE EDITING FORMATS If you have already configured any editing format before, you may directly apply the editing format. If not, you must start with configuring an editing format first, and then, activate the editing format when it is desired in use. -
Page 125: Exclusive Data Editing
Chapter 5 Applying Formats for Data Editing Editing Format 4 Enable Format 4 *Disable Format 4 Editing Format 5 Enable Format 5 *Disable Format 5 5.1.2 EXCLUSIVE DATA EDITING By default, only barcodes found meeting with the criteria are processed by the editing formats. -
Page 126: How To Configure Editing Formats
1500 Barcode Scanner User Guide 5.2 HOW TO CONFIGURE EDITING FORMATS End Programming Format... -
Page 127: Select Format To Configure
Chapter 5 Applying Formats for Data Editing 5.2.1 SELECT FORMAT TO CONFIGURE Start Programming Format Select one editing format (Format 1~5) and the parameters pertaining to the editing format can then be configured – applicable code type, data length, matching string & location, total number of fields, field settings (field-dividing rule), additional fields, and field transmission sequence. -
Page 128: Restore Default Format
1500 Barcode Scanner User Guide 5.2.2 RESTORE DEFAULT FORMAT You may select an existing editing format and have the defaults restored. The default settings of an editing format are listed below. Editing format Defaults Applicable Code Type Data Length 0 (No qualification.) -
Page 129: Configuring Format - Define Data Criteria
Chapter 5 Applying Formats for Data Editing 5.3 CONFIGURING FORMAT — DEFINE DATA CRITERIA Three applicable conditions can be configured to check whether the data read by the scanner can be processed by the particular editing format. Note: Data editing cannot be performed unless the three conditions are all met. 5.3.1 APPLICABLE CODE TYPE By default, barcodes of all the supported symbologies will be processed by any editing format, if having been configured and enabled. - Page 130 1500 Barcode Scanner User Guide Editing Format for GS1-128 & GS1 DataBar *Apply Do Not Apply Editing Format for ISBT 128 *Apply Do Not Apply Editing Format for EAN-8 Do Not Apply *Apply Editing Format for EAN-8 Addon 2 Do Not Apply...
- Page 131 Chapter 5 Applying Formats for Data Editing Editing Format for EAN-13 Addon 5 Do Not Apply *Apply Editing Format for French Pharmacode Do Not Apply *Apply Editing Format for Italian Pharmacode *Apply Do Not Apply Editing Format for Industrial 25 *Apply Do Not Apply Editing Format for Interleaved 25...
- Page 132 1500 Barcode Scanner User Guide Editing Format for Plessey Do Not Apply *Apply Editing Format for Telepen *Apply Do Not Apply Editing Format for UPC-A *Apply Do Not Apply Editing Format for UPC-A Addon 2 Do Not Apply *Apply Editing Format for UPC-A Addon 5...
-
Page 133: Data Length
Chapter 5 Applying Formats for Data Editing Editing Format for UPC-E Addon 5 *Apply Do Not Apply 5.3.2 DATA LENGTH The length must include prefix, suffix (0x0d by default), length code, etc. By default, barcodes of any length (character count) are eligible for data editing. You may specify a value from 0 to 254. -
Page 134: Matching String & Location
1500 Barcode Scanner User Guide 5.3.3 MATCHING STRING & LOCATION By default, no matching string is specified, and therefore, it is disabled. You may enable this feature by specifying a matching string; up to four characters are allowed. When the Matching String Location is zero, the scanner will only check for the existence of the matching string in the barcode data. -
Page 135: Configuring Format - Define Data Field
Chapter 5 Applying Formats for Data Editing 5.4 CONFIGURING FORMAT — DEFINE DATA FIELD 5.4.1 START POSITION Data can be divided into fields in one of the following direction – from head (F1) to tail (F5) from tail (F1) to head (F5) *From Head From Tail 5.4.2 FIELD ADJUSTMENT... -
Page 136: Total Number Of Fields
1500 Barcode Scanner User Guide 5.4.3 TOTAL NUMBER OF FIELDS Data can be divided into at most 6 fields; each of them is numbered from F1 to F6 accordingly. However, only F1~F5 can be configured. The total number of fields must be specified correctly. If three fields are configured for the editing format, the data characters after F3 will be assigned to F4 automatically. -
Page 137: Field Settings
Chapter 5 Applying Formats for Data Editing 5.4.4 FIELD SETTINGS Data eligible for editing formats is divided into fields by user-specified rules – either using the field terminating string or specified field length. By Terminating String Specify the field terminating string. Up to two characters are allowed. The scanner will search for the occurrence of this particular string in the data. - Page 138 1500 Barcode Scanner User Guide Field 2 Setting Select Field Separator to Divide Field 2 … 1. Read the above label to divide field by a specified terminating string. 2. Read the “Hexadecimal Value” label on page 146 for the desired character string.
- Page 139 Chapter 5 Applying Formats for Data Editing Field 3 Setting Select Field Separator to Divide Field 3 … 1. Read the above label to divide field by a specified terminating string. 2. Read the “Hexadecimal Value” label on page 146 for the desired character string. 3.
- Page 140 1500 Barcode Scanner User Guide Field 4 Setting Select Field Separator to Divide Field 4 … 1. Read the above label to divide field by a specified terminating string. 2. Read the “Hexadecimal Value” label on page 146 for the desired character string.
- Page 141 Chapter 5 Applying Formats for Data Editing Field 5 Setting Select Field Separator to Divide Field 5 … 1. Read the above label to divide field by a specified terminating string. 2. Read the “Hexadecimal Value” label on page 146 for the desired character string. 3.
- Page 142 1500 Barcode Scanner User Guide Additional Fields Up to five additional fields can be created for each editing format; each of them is numbered from AF1 to AF5 accordingly. 1. Read the label below to specify an additional field, one at a time.
-
Page 143: Configuring Format - Define Transmission Sequence
Chapter 5 Applying Formats for Data Editing 5.5 CONFIGURING FORMAT — DEFINE TRANSMISSION SEQUENCE After configuring the data fields and additional fields, you must now program the transmission sequence of these fields that comprise the final data. This field transmission sequence can be assigned in any desired order and fields can be assigned multiple times as well. - Page 144 1500 Barcode Scanner User Guide 3) Read the “End” label to complete this setting. End Programming Format...
-
Page 145: Programming Examples
Chapter 5 Applying Formats for Data Editing 5.6 PROGRAMMING EXAMPLES 5.6.1 EXAMPLE I Extract data from the 10th character to the 19th character... The editing format should be configured as follows: 1. Read the “Enter Setup” label to enter the Configuration Mode. 2. -
Page 146: Example Ii
1500 Barcode Scanner User Guide 5.6.2 EXAMPLE II Extract the date code, item number, and quantity information from barcodes. Data in a barcode is encoded like this: From the 1 character to the 6 character is the date code. From the 7 character to the dash ‘-’... -
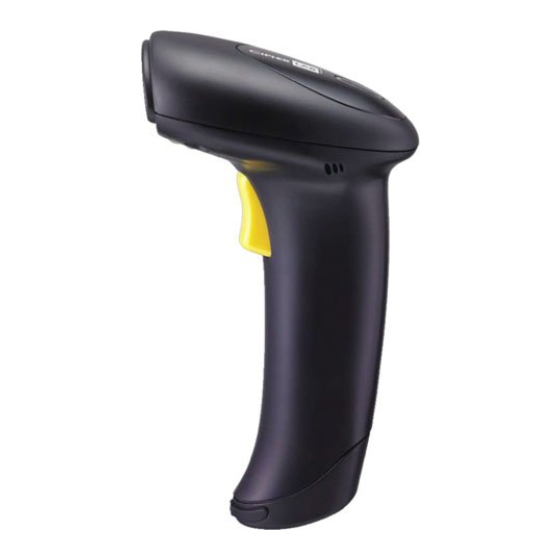
Page 147: Specifications
SPECIFICATIONS Optical Characteristics 1500 Scan Engine Non-contact type Optical Sensor CCD, 2500 pixels Light Source Visible red LED Physical Characteristics Color Black Switch Tactile switch Indication Dual-color LED (Red/Green) and beeper Interface Options Keyboard Wedge, RS-232, Wand Emulation Weight Approx. 145 g... - Page 148 1500 Barcode Scanner User Guide Environmental Characteristics Temperature Operating 0 °C to 50 °C Storage -20 °C to 60 °C Humidity Operating 10% to 90% (Non-condensing) Storage 5% to 95% Resistance Impact Resistance 1.5 m, 5 drops per 6 sides Electrostatic Discharge ±...
-
Page 149: Firmware Upgrade
Appendix I FIRMWARE UPGRADE 1) Use the RS-232 cable to cconnect the scanner to the serial port of PC and join the power adaptor to the RS-232 connector. 2) Read the following labels in sequence for the scanner to enter the download mode. The scanner will respond with beeps to indicate it is ready for downloading. - Page 150 1500 Barcode Scanner User Guide Note: The output interface will be reset to your previous settings, which may be Keyboard Wedge, RS-232 or Wand Emulation. Enter Setup...
-
Page 151: Host Serial Commands
Appendix II HOST SERIAL COMMANDS SERIAL COMMANDS Purpose To disable the scanner. Remarks “D” Purpose To enable the scanner. Remarks “E” #@ nnnnnn <CR> Purpose To configure the scanner. Remarks nnnnnn – the six digits of command parameters. For example, “109952” is to list the current Code ID settings. List Page 3 Serial Command “0x23”... -
Page 152: Example
1500 Barcode Scanner User Guide #@TRIGOFF<CR> Purpose Disable software trigger Remarks “0x23” + “0x40” + “0x54” + “0x52” + “0x49” + “0x47” + “0x4f” + “0x46” + “0x46” + “0x0d” #@TRIGON<CR> Purpose Enable software trigger Remarks “0x23” + “0x40” + “0x54” + “0x52” + “0x49” + “0x47” + “0x4f” + “0x4e” + “0x0d”... -
Page 153: Keyboard Wedge Table
Appendix III KEYBOARD WEDGE TABLE " Home Down & Left Right PgUp Exec < PgDn > ENTER* Note: (1) ~ : Digits of numeric keypad. (2) CR*/Send/ENTER*: ENTER key on the numeric keypad. KEY TYPE & STATUS KEY TYPE If "Keyboard Wedge" is configured for interface, Key Type and Key Status will then become applicable. -
Page 154: Key Status
1500 Barcode Scanner User Guide Scan Code KEY STATUS Decide whether or not to change key status when “Normal Key” is selected for Key Type. Add Shift Add Left Ctrl Add Right Ctrl Add Left Alt Add Right Alt Enter Setup... -
Page 155: Example
Appendix III Keyboard Wedge Table EXAMPLE KEY TYPE = NORMAL For example, if you want to program the character “!” as the prefix code: 1. Read the “Configure Prefix” label. 2. Read the “Hexadecimal Value” label on page 146 for “2” and “1”. 3. - Page 156 1500 Barcode Scanner User Guide Enter Setup...
-
Page 157: Numeral Systems
Appendix IV NUMERAL SYSTEMS DECIMAL SYSTEM Decimal Validate the Values Validate Update Abort... -
Page 158: Hexadecimal System
1500 Barcode Scanner User Guide HEXADECIMAL SYSTEM Hexadecimal Enter Setup... -
Page 159: Ascii Table
Appendix IV Numeral Systems Validate the Values Validate ASCII TABLE " & < > Update Abort... - Page 160 1500 Barcode Scanner User Guide Enter Setup...
Need help?
Do you have a question about the 1500 and is the answer not in the manual?
Questions and answers