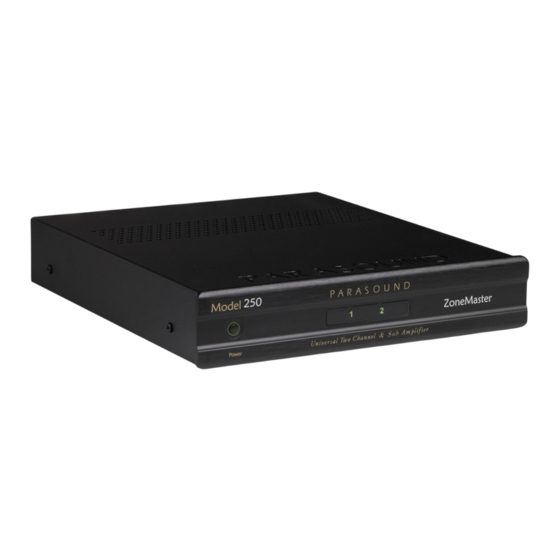
Summary of Contents for Parasound ZoneMaster 250
- Page 1 ® ZoneMaster Model 250 Universal Two Channel & Sub Amplifier Owner’s Manual...
-
Page 2: Important Safety Instructions
19. Wall or Ceiling Mounting ----- - Mount the product to a w all or ceiling only as recommended. 20. Heat ----- - The product should be situated aw ay from heat sources such as radiators, heat registers, stoves, and other products (including amplifiers) that produce heat. ™ 250 Owner’s Manual ® Parasound ZoneMaster Page 2... - Page 3 ™ 250 Owner’s Manual ® Parasound ZoneMaster Page 3...
-
Page 4: Introduction
Congratulations on your purchase of this precision audio product and thank you for selecting Parasound. We are proud to offer you this versatile amplifier, know ing that it w ill bring you many years of enjoyment and dependable operation. Please take a few moments to read the follow ing instructions so you can enjoy all the benefits of your new ZoneMaster 250’... -
Page 5: Table Of Contents
........™ 250 Owner’s Manual ® Parasound ZoneMaster Page 5... -
Page 6: Placement And Ventilation Guidelines
If you are installing the ZoneMaster 250 yourself, use input and output cables that are long enough to leave at least two feet of slack; that will enable you to pull the ZoneMaster 250 out of a cabinet to check or to change connections without inadvertently disconnecting cables. -
Page 7: 115V / 230V Ac Mains Voltage
60Hz (or 50Hz) hum heard in your speakers. To help avoid this problem plug your ZoneMaster 250 into the same AC wall outlet, power strip or line conditioner as all your other audio equipment. -
Page 8: Audio Input Connections
The Speaker Level Input Connector The speaker level input enables the ZoneMaster 250 to connect to any audio receiver or stereo system even if it lacks preamp output jacks. This is a high impedance input and the ZoneMaster 250’s Speaker Level input can connect to the speaker terminals on any receiver or amplifier. -
Page 9: Audio Output Connections
Speaker A and B Outputs The ZoneMaster 250 is equipped with connections for two speakers on each channel (labeled A and B). This unique feature gives system designers greater flexibility and can usually avoid the added expense, complexity, heat and power consumption of additional amplifiers. -
Page 10: Bridged Output Switch
The ZoneMaster Model 250 has an onboard low pass filter making it perfect for driving a passive in-wall subwoofer. ™ 250 Owner’s Manual ® Parasound ZoneMaster Page 10... -
Page 11: Speaker Connections In Bridged Mode
It is not recommended to run 2 subwoofers in this configuration as subwoofers typically require more power than a full range speaker. Sustained high power operation in Bridged Mode driving two speakers could overheat the ZoneMaster 250 if it is installed in a confined space without adequate ventilation. -
Page 12: Channel Level Controls And Uses
3. Turn the passive in-wall volume control knob fully clockwise to its maximum setting. 4. Slowly turn up the ZoneMaster 250’s Level controls until the volume level in the room or zone is as high as you or the home owner might ever want it to be. This is the most appropriate setting for the Level controls because it will improve sound quality and prevent the home owner from over-driving the speakers. -
Page 13: Turn On Options (Audio Trigger Or 12V Trigger)
250’s front panel Power button will be disabled to prevent the amplifier from being turned on or off manually or by mistake. Note: The 12V turn on trigger circuit in the ZoneMaster 250 requires a mere 5mA from the 12V trigger source. -
Page 14: Front Panel Power Buttons And Display
Checking for Short Circuits on the Speaker Outputs If your ZoneMaster 250’s front panel indicators are illuminated red or alternate illumination between green and red this indicates a problem. Your first step is to immediately turn off the amp. The most likely cause will be a short circuited speaker connection. -
Page 15: Frequently Asked Questions And Troubleshooting
You might be able to stop the hum by attaching a wire from the chassis of the offending component to the chassis or ground screw of your preamplifier. ™ 250 Owner’s Manual ® Parasound ZoneMaster Page 15... -
Page 16: If You Require Assistance Or Warranty Repair
1. Unit was not purchased from a Parasound Authorized Dealer. 2. You do not have the original bill of sale or sales receipt from a Parasound Authorized Dealer. 3. You are not the original owner. The Parasound warranty is not transferable. -
Page 17: Specifications And Details
Height, without feet: 1.75” (45 mm), 1U Weight: Net: 4.0 lbs. (1.8kg) Shipping: 7.0 lbs. (3.1 kg) Specifications and features subject to change or improvement without notice. Rev 1.0, Copyright 2015 ™ 250 Owner’s Manual ® Parasound ZoneMaster Page 17... -
Page 18: Installation Notes
Installation Notes _________________________________________________________________________ ____________________________________________ ____________________________________________ ____________________________________________ ____________________________________________ ____________________________________________ ____________________________________________ ____________________________________________ ____________________________________________ ____________________________________________ ____________________________________________ ____________________________________________ ____________________________________________ ____________________________________________ ____________________________________________ ____________________________________________ ____________________________________________ ____________________________________________ ____________________________________________ ____________________________________________ ____________________________________________ ____________________________________________ ™ 250 Owner’s Manual ® Parasound ZoneMaster Page 18... - Page 19 ™ 250 Owner’s Manual ® Parasound ZoneMaster Page 19...
- Page 20 Parasound Products, Inc. 2250 McKinnon Ave, San Francisco, CA 94124 Customer Service: 415-397-7100 www.parasound.com ™ 250 Owner’s Manual ® Parasound ZoneMaster Page 20...


Need help?
Do you have a question about the ZoneMaster 250 and is the answer not in the manual?
Questions and answers