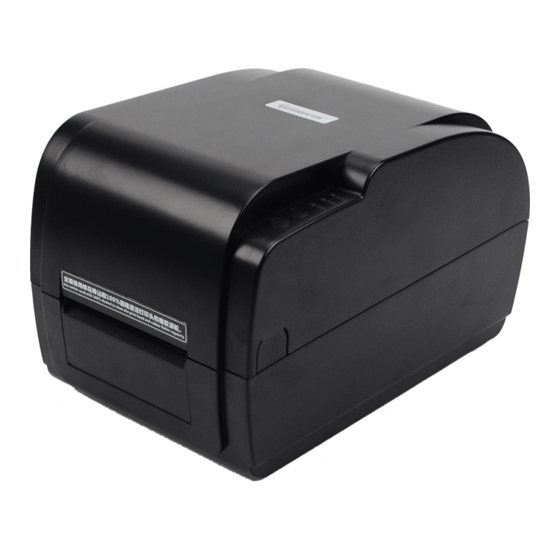
Summary of Contents for GPRINTER GP-9034T
- Page 1 User's Manual GP-9034T/9035T Thermal Transfer Barcode Printer 400 611 3828 Customer service hotline :...
-
Page 2: Table Of Contents
CONTENTS The printer Introduction Application Field Product features Standard equipment Optional accessories Specifications Printing specification Ribbon specification Paper specification Specification Printer Introduction Open and check Printer components Installation Cable connection Ribbon installation Paper installation LED Indicator and Function LED indicator Button Function Power on Function Maintenance... -
Page 3: The Printer
The printer Introduction Thanks for choosing GP-9034T, GP-9035T series direct thermal and thermal transfer label printer. This series printer is built with 2 sets of gear to drive motor, with capability of handling 300 meters long ribbon and large label roll. Printer inner volume is fit for 5" OD (Outer Diameter) paper roll, if using external paper holder, you can install 8.4"OD industrial grade label roll. -
Page 4: Product Features
Built in simplified Chinese, traditional Chinese and Korean font for programming. Can print text, bar code, pictures Support bar code Support picture Optional accessories External stand is standard accessory for GP-9035T, optional for GP-9034T. Specifications 186(W)x180(H)x290(D) Printer size 2.4KG Printer weight... -
Page 5: Printing Specification
Printing specification Model The print head Print mode Ribbon / thermal (widthxlength) Print speed (inches per second) Maximum print width Maximum print length Pulse excitation Thermal print head reliability Ribbon specification Ribbon diameter The ribbon length The ribbon axis size The ribbon width Ribbon winding way Outward winding... -
Page 6: Specification
Large gear in mechanism and newly designed transmission system, enable paper roll to feed more smoothly. ★ External paper holder are optional for Φ8.4" industral-grade large roll. ★ Built with 2-motor gear-driven engine,GP-9035T is able to handle 300 meters long ribbon and big label roll. GP-9034T GP-9035T Resolution 300 dpi 300 dpi... -
Page 7: Printer Introduction
Printer Introduction (a.) Open and check This series printer is with special package to prevent damage in transportation. If there is any unexpected damage occurred, please put in clean and stable surface and carefully open the package to check, inform local distributor with damage details, and keep packing mate -rials well in case you need to mail the printer. -
Page 8: Printer Components
(b.) Printer components LED indicator PAUSE button FEED button Label exit Press button for top cover open <Picture 2> Press button for top cover open Power on/off switch Label exit <Picture 3>... - Page 9 Label paper fixing stand Top cover Label paper supply hub Ribbon take-up hub Push button for thermal print head open <Picture 4> Bottom cover with DIP switch Power port Parallel port RS-232C serial port Ethernet port USB port Label entrance from external holder <Picture 5>...
-
Page 10: Installation
Installation (a.) Cable connection 1. Please put the printer on the stable surface. 2. Make sure printer power is turned off, please do not plug the power cable when the printer power is turned on. 3. Connect serial or USB or Parallel or Ethernet cable to printer and PC. -
Page 11: Ribbon Installation
Ribbon installation diagram Print head Gear for ribbon take-up Ribbon Empty paper tube <Picture 7> ( ) Paper installation 1.Open printer top cover; Insert blue label supply hub into label roll and fix onto printer. 2.Press Push button to open print head to install label paper same as picture showing. -
Page 12: Led Indicator And Function
Paper installation diagram Label paper Label paper transmission roller Label gap sensor Rubber roller Outward rolling label paper Black mark sensor Inward rolling label paper Paper fixing device <Picture 8> LED Indicator and Function There′re two buttons and three LED indicators, many functions can be realized through using different button, indicator and power on/off switch. -
Page 13: Button Function
Button Function 6.2.1FEED button When the printer is ready (Blue LED lights), press FEED button , label will feed one by one. 6.2.2 Printing pause when you press PAUSE button during printing is in progress, printing job will be paused, At this moment, POWER indicator will flash, again press PAUSE button, printing job will continue. - Page 14 9034T V1.1(2014-04-28) (2014-02-20) PARALLEL LABEL VALUE: MAX=783 MIN=771 VAL=230 0-71-80-100-40-124 80mm,40mm 0mm,0mm 118.9876543 14.8765432 HIGH ENABLED <Picture 9> <Picture 10>...
- Page 15 Skip AUTO.BAS program User can use TSPL2 command to save a code auto- running file (AUTO.BAS) into flash. When turn on printer, printer will run the program automatically. If you want to skip AUO.BAS program on power-up, then follow below steps: Press and hold PAUSE and FEED button, then turn on the printer.
-
Page 16: Troubleshooting
Troubleshooting Below table contains common problem descriptions and the solution which we can use in daily operation. If you follow below method and the failures still do not remove, please contact the local distributor or factory for further support. Problems Possible Reasons Solution and Suggestion Plug to AC outlet and plug to... - Page 17 Ribbon printing side wrong Check and re-install ribbon to make installed sure printing side touch label paper Print head not clean Clean print head and print again Print density setting wrong Suggest density set to be 7 Not printing Print head cable not well Re-connect print head cable connected Step Motor cable not well...
-
Page 18: Maintenance
Maintenance Printer Cleaning To ensure the printing quality, please proceed this maintenance section to keep your printer in good conditions and extend its life as well. Please use one of following material to clean the printer. Cotton swab ★ Lint-free cloth ★...


Need help?
Do you have a question about the GP-9034T and is the answer not in the manual?
Questions and answers