Table of Contents
Advertisement
Available languages
Available languages
Quick Links
Download this manual
See also:
User Manual
Advertisement
Table of Contents

Related Manuals for Spypoint LIVE


Summary of Contents for Spypoint LIVE
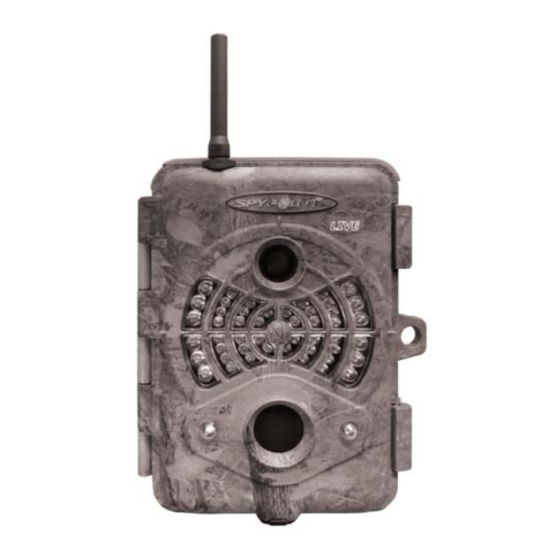
- Page 1 Cellular Camera Caméra Cellulaire Cellular Kamera LIVE model / Modèle LIVE / Modell LIVE VE model / Modèle LIVE / Modell User’s manual / Manuel de l’utilisateur / ’ l / M l d l’ tili Bedienungsanleitung WWW.SPYPOINT.COM...
- Page 2 ENGLISH SPYPOINT LIVE Thank you for choosing the monitoring system. This manual will help you get the most out of your new device. For the latest version of the user’s manual or for additional information, visit website www.spypoint.com. mySPYPOINT If you need information or to subscribe to service, go to www.myspypoint.com.
-
Page 3: Specifications
Composite video (PAL/NTSC) mySPYPOINT website Computer output USB 2.0 Power supply: (accessories sold separately, see “Options”) KIT INCLUDES Alkaline or lithium 8x AA SPYPOINT LIVE • camera batteries • GSM/GPRS cellular antenna Lithium battery pack Rechargeable battery pack (LIT-09/ • Installation strap LIT-C-8) •... -
Page 4: Installing The Sim Card
POWER SUPPLY Insert your SIM card into the compartment provided for this purpose The battery level is shown in the upper left corner of the screen SPYPOINT LIVE in your camera. The SIM card compartment is when the camera is in “Test” mode. When a single line remains, the located under the batteries. -
Page 5: Memory Storage
MAIN MENU EXTERNAL The camera can be powered from an external 12 volt DC input such Use the “UP” and “DOWN” button to navigate the interface or as a 12 volt battery (BATT-12/KIT-12V, sold separately) or a 12 volt to modify a selection, the “OK” button to select and the “BACK” adapter (AD-12V, sold separately). - Page 6 TEST VIEW Allows the user to test the detection system of the camera. When the Allows the user to view photos or videos on the built-in 3.5" screen “Test” mode is selected, no photo or video is recorded. Pass in front of the camera or on a TV set.
-
Page 7: Settings Menu
SETTINGS MENU Time Lapse: Allows the camera to take pictures at regular (Off/10min/30min/ preset intervals. This option may be useful to get Allows the user to set the advanced settings of the camera. To 1h/2h) pictures of animals outside the detection range of configure the system in another language, press the “DOWN”... - Page 8 Stamp: Select cancel imprinting date, time, Power: Allows the user to select the type of power supply. (Yes/No) (Batteries/ temperature and moon phases on photos. Electricity) Choose “Electricity” if the camera is powered of a main electric supply. (using a 12 volt DC New moon: adapter AD-12V, sold separately).
- Page 9 Mode: Sets the operating mode of the camera. When “Security” mode is activated, the (Standalone/ operation is the same as in “Cellular” mode, Cellular/Security) except: When “Standalone” mode is activated: • The camera operates normally by recording • Captured images are sent immediately to the mySPYPOINT photos or videos locally on the memory card.
- Page 10 Synchronize Defines at what time of day the camera Infrared: Selects the desired infrared illumination mode. mySPYPOINT communicates with (On/One LED/Off) server in order to update its status or All LEDs illuminate when taking photos or send photos user’s account. videos at night.
-
Page 11: Sms Configuration
1. Download the configuration file • Visit www.spypoint.com and download the file named "sms.zip" (located in the section "firmware update" for the LIVE camera and in the sub-section "SMS Configuration"). • Open this .zip file by double clicking on it. -
Page 12: Error Message
DOWNLOADING TO A COMPUTER ERROR MESSAGE To transfer or view pictures and videos using a computer, the camera Modem error The cellular modem of the camera is must be powered and set to the main menu before connecting the defective. USB cable (supplied) to the computer. - Page 13 OPTIONS 12 volt power cable, CB-12FT See your local dealer or visit www.spypoint.com to find out A 12 ft. cable allowing the user to connect the available products. The following products are popular options that SPYPOINT LIVE camera into an external 12 volt DC power.
-
Page 14: Limited Warranty
For technical assistance, write to workmanship starting on the date of original purchase. The sales tech@spypoint.com. Give a description of the problem with a receipt is your proof of purchase and should be presented if phone number where you can be reached. - Page 15 . Ce manuel d’utilisation vous permettra d’utiliser votre nouvel appareil de façon optimal. Pour la plus récente version du manuel d’utilisateur, ou pour toutes informations additionnelles, consultez notre site web au www.spypoint.com. Si vous désirez obtenir de l’information ou vous abonner au service mySPYPOINT...
-
Page 16: Spécifications
Piles alcalines ou au lithium 8x AA Bloc pile lithium Bloc pile rechargeable (LIT-09/ CONTENU DE L’EMBALLAGE LIT-C-8) SPYPOINT LIVE • Caméra modèle Externe (Prise 12V) Batterie 12 volts (BATT-12/ • Antenne cellulaire GSM/GPRS KIT-12V) / Adaptateur 12 volts •... -
Page 17: Installation De La Carte Sim
ALIMENTATION Insérez votre carte SIM dans le compartiment prévu à cet effet de Le niveau des piles est indiqué dans le coin supérieur gauche, lorsque SPYPOINT LIVE votre caméra . Le compartiment de la carte la caméra est en mode «Test». Lorsqu’il ne reste qu’une seule ligne, SIM se trouve sous les piles. -
Page 18: Menu Principal
MENU PRINCIPAL EXTERNE La caméra peut être alimentée au moyen d’une source externe de Utilisez les boutons «UP» et «DOWN» pour naviguer sur l’interface 12 volts telle qu'une batterie 12 volts (BATT-12/KIT-12V, vendu ou modifier une sélection, le bouton «OK» pour sélectionner et le séparément) ou un adaptateur 12 volts (AD-12V, vendu séparément). - Page 19 CONFIGURATION VISIONNEMENT Permets de paramétrer les options avancées de la caméra (voir Permets de visionner les photos ou les vidéos sur l’écran intégré section «Menu de Configuration» pour plus de détails). 3.5" ou sur un téléviseur. TEST Visionner avec l’écran intégré 3.5" : Permets de tester la caméra afin de déterminer si elle détecte bien Lorsque le mode «VISIONNEMENT»...
-
Page 20: Menu De Configuration
MENU DE CONFIGURATION Time Lapse: Permets la prise de photos à intervalles réguliers (Désactivé/10min/ prédéfinis. Cette option permet entre autres, Permets de paramétrer les options avancées de la caméra. Pour 30min/1h/2h) l’obtention de photos de gibiers en dehors du configurer le système en français, appuyez sur le bouton «DOWN» champ de détection de la caméra. - Page 21 Sensibilité: Permets de choisir la sensibilité de détection de Alimentation: Permets de sélectionner le type d’alimentation (Faible/Moyenne/ (Piles/Électricité) l’appareil. utilisé. Élevée) Note: Le système détecte uniquement les Choisissez «Électricité» si l'appareil est branché sources de chaleur en mouvement, il est donc à...
- Page 22 Langue: Permets de choisir la langue d’affichage des Lorsque le mode «Sécurité» est activé, le (English/Français) menus de la caméra. fonctionnement est le même que le mode «Cellulaire» en plus de: • Les images captées sont envoyées Mode: Permets de choisir le mode de fonctionnement immédiatement compte (Autonome/...
- Page 23 Synchronise à: Permets de choisir à quel moment de la Continu: Permets la prise de photos ou vidéos en (Oui/Non) journée la caméra communique avec le serveur continu. Lorsqu’il n’y a plus d’espace sur la mySPYPOINT pour mettre à jour son état carte mémoire pour enregistrer une photo ou ou pour envoyer des photos sur le compte de une vidéo, la caméra continue l’enregistrement...
- Page 24 1. Télécharger le fichier de configuration • Visiter le www.spypoint.com et télécharger le fichier nommé "sms.zip", situé dans la section mise à jour pour la caméra LIVE et dans la sous-section "Configuration messages texte". • Ouvrir ce fichier .zip en cliquant deux fois sur celui-ci.
-
Page 25: Message D'erreur
TRANSFERT VERS L’ORDINATEUR MESSAGE D'ERREUR Permets de transférer ou visionner les photos ou vidéos à l’aide Erreur de modem Le modem cellulaire de la caméra d’un ordinateur. La caméra doit être alimentée et afficher le menu est défectueux. principal avant de connecter le câble USB (fourni) de la caméra Erreur carte SIM La carte SIM est absente ou à... -
Page 26: Options Disponibles
Câble 12 volts, CB-12FT Pour connaître et avoir plus d’informations sur les options Câble de 12 pieds permettant de brancher disponibles, visitez le www.spypoint.com. Voici les principales l’appareil à une pile 12 volts. SPYPOINT LIVE options disponibles pour la caméra... -
Page 27: Garantie Limitée
à prix raisonnables. Pour le soutien à compter de la date d’achat. Le coupon de caisse est la preuve technique, s.v.p. écrire un courriel à tech@spypoint.com. Décrire d’achat et devra être présenté si la garantie est applicable. - Page 28 Bedienungsanleitung wird Ihnen helfen, Ihr neues Gerät bestmöglich zu nut-zen. Für die neueste Version der Bedienungsanleitung oder zusätzliche Informationen be-suchen Sie bitte unsere Website unter www.spypoint.com. Wenn Sie Informationen benöti-gen oder um mySPYPOINT -Service zu abonnieren, gehen Sie bitte auf www.
- Page 29 „Optionen“) mySPYPOINT -Website Alkali- oder 8x AA Lithiumbatterien DAS SET ENTHÄLT: Lithiumakku wiederaufladbarer Batterieakku (LIT-09/LIT-C-8) SPYPOINT LIVE • Kamera • GSM/GPRS Mobilfunkantenne Extern (12 V Anschluss) 12 Volt-Batterie (BATT-12/KIT- • Gurt 12V) / 12 Volt-Adapter (AD-12V) •...
- Page 30 INSTALLIEREN DER SIM-KARTE STROMVERSORGUNG Stecken Sie Ihre SIM-Karte in das dafür vorgesehene Fach in Der Batteriestand wird in der oberen linken Ecke des Bildschirms SPYPOINT LIVE Ihrer Kamera. Das SIM-Kartenfach befindet angezeigt, wenn sich die Kamera im „Test“-Modus befindet. Wenn sich unter den Batterien.
- Page 31 EXTERN 2.0 GB 4.0 GB 8.0 GB 32 GB Die Kamera kann von einer externen 12 Volt-Gleichstrom- Foto Einspeisung, wie einer 12 Volt-Batterie (BATT-12/KIT-12V, nicht im Lieferumfang enthalten)oder einem 12 Volt-Adapter (AD-12V, nicht 5 MP 1190 2380 4760 19040 im Lieferumfang enthalten betrieben werden). Wenn Sie eine 12 Volt- Video Verbindung ver-wenden, empfehlen wir Ihnen, die AA-Batterien zu entfernen, um Überspannung zu vermei-den.
- Page 32 Eigenständiges Gerät: Wird der „VIDEO“ –Modus gewählt, Der „Test“-Modus liefert auch Informationen über: 1. Den Batteriestand leuchtet die Testlampe am Vorderteil der Kamera für 60 Sekunden, 2. Die Netzsignalstärke um dem Benutzer die Möglichkeit zu geben, sich zu entfernen, ohne gefilmt zu werden.
- Page 33 andere Ende in den „TV OUT“- Ausgang der Kamera. Das zuletzt Zeitraffer: Ermöglicht Bilder regelmäßigen aufgenommene Bild oder Video erscheint auf dem Bildschirm. (AUS / 10min / voreingestellten Intervallen auf-zunehmen. Diese Um die Fotos oder Videos zu wechseln, nutzen Sie die „UP“ und 30min / 1h / 2h) Option kann nützlich sein, um Bilder von Tieren „DOWN“-Taste.
- Page 34 Empfindlich- Stellt Erkennungsempfindlichkeit Energie: Erlaubt Benutzer, (Batterien / keit: Kamera ein. Energieversorgung zu wählen. Elektrizitäts- (Niedrig/Mittel/ modus) Hoch) Hinweis: Das System erkennt nur Wärmequellen Wählen Sie „Elektrizitätsmodus“, wenn die in Bewegung. Deshalb ist es wichtig, während Kamera mit Netzan-schluss betrieben wird. (mit der Installation so viele Objekte wie möglich einem 12 Volt Gleichstromadapter AD-12V, nicht zu meiden, die die Kamera behindern.
- Page 35 Sprache: Stellt die Display-Sprache des Kameramenüs ein. Wenn der „Sicherheit“-Modus aktiviert ist, (English/Français) läuft der Betrieb wie im „Mobilnetz“-Modus, außer: Modus: Stellt den Operationsmodus der Kamera ein. • Aufgenommene Bilder werden sofort an (Eigenständiges mySPYPOINT -Benutzer-Account Gerät /Übertragung Wenn der „Eigenständiges Gerät“-Modus gesendet.
- Page 36 Synchronisie- Definiert, um welche Tageszeit die Kamera mit Beibehalten: Ermöglicht im Dauermodus zu arbeiten. Wenn mySPYPOINT (Ja/Nein) ren um: -Server verbunden ist, um auf der Speicherkarte kein Platz mehr ist, um ein Update ihres Status vorzunehmen oder Fotos Fotos oder Videos aufzunehmen, nimmt die auf das Nutzer-Account zu senden.
- Page 37 Mobilnetz-Account des Nutzers vertragsabhängig berechnet. 1. Herunterladen der Konfigurationsdatei • Gehen Sie auf www.spypoint.com und laden Sie die „sms.zip“ herunter (befindet sich im Abschnitt „Software-Update“ für die LIVE-Kamera und im Unterabschnitt „SMS Konfigu-ration“) • Öffnen Sie die .zip-Datei durch einen Doppelklick.
-
Page 38: Fehlerbehebung
HERUNTERLADEN AUF EINEN 6. Die Kamera sollte auf einem stabilen und unbeweglichen Untergrund (z.B. einem Baum) platziert werden. COMPUTER Die rote Lampe an der Kamerafront blinkt: Um Bilder und Videos auf einen PC zu übertragen oder anzusehen, • Die Kamera ist im „Foto“- oder „Video“-Modus eingestellt. muss die Kamera mit dem Hauptmenü... - Page 39 3,6m langes Stromkabel, PW-12FT für maximalen Diebstahlschutz. 3,6m langes Ersatzstromkabel, passend für KIT-12V. Verstärkerantenne, ANT-LIVE Externe 4,9 m Signalverstärker-antenne ist 12 Volt wiederaufladbare Bat-terie und mit der LIVE-Serie-Kameras kompatibel. Ladegerät, BATT-12V Externe 12 Volt wiederaufladba-re Batterie zur Stromversorgung der Kamera 12 Volt...
-
Page 40: Beschränkte Garantie
BESCHRÄNKTE GARANTIE REPARATURDIENSTE SPYPOINT LIVE Dieses Überwachungssystem, entwickelt von GG Telecom, verfügt über eine Ein-Jahres-Garantie auf Material Sollten Sie Hilfe benötigen, kontaktieren Sie bitte zuerst Ihren und Verarbeitung beginnend mit dem Datum des Erst-kaufs. Der Händler. Adressen von Reparaturwerkstätten finden Sie unter Kaufbeleg gilt als Kaufbeweis und sollte vorgelegt werden, www.spypoint.com.
Need help?
Do you have a question about the LIVE and is the answer not in the manual?
Questions and answers