Table of Contents
Advertisement
Kambrook - Australia
Building 2, Port Air Industrial Estate
1A Hale Street
Botany NSW 2019
Australia
Customer Service Line 1300 139 798
Customer Service Fax 1800 621 337
www.kambrook.com.au
Due to continual improvement in design or otherwise, the product you
purchase may differ slightly from the illustration in this book. Issue B14
Kambrook - New Zealand
Private Bag 94411
Botany, Manukau
Auckland 2163
New Zealand
Customer Service Line/
Spare Parts 0800 273 845
Customer Service Fax 0800 288 513
www.kambrook.co.nz
Advertisement
Table of Contents

Related Manuals for Kambrook KPR820


Summary of Contents for Kambrook KPR820
- Page 1 Kambrook - Australia Kambrook - New Zealand Building 2, Port Air Industrial Estate Private Bag 94411 1A Hale Street Botany, Manukau Botany NSW 2019 Auckland 2163 Australia New Zealand Customer Service Line 1300 139 798 Customer Service Line/ Customer Service Fax 1800 621 337...
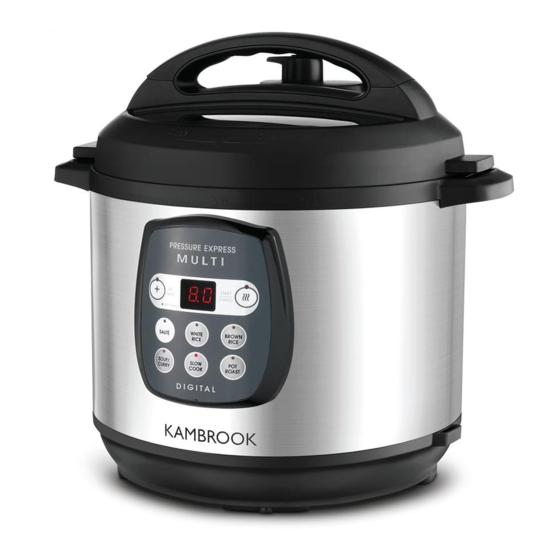
- Page 2 INSTRUCTION BOOKLET KPR820...
- Page 3 In the event that you need some assistance with your Kambrook appliance, please contact our Customer Service Department on 1300 139 798 (Australia) or 0800 273 845 (New Zealand). Alternatively, visit us on our website at...
- Page 4 Your Kambrook Pressure Express Multi Pressure Express Multi Quick Start Guide Using Your Kambrook Pressure Express Multi Functions of Your Kambrook Pressure Express Multi Pressure Express Multi Cooking Guide Troubleshooting Guide Care, Cleaning and Storage Handy Hints for Pressure Cooking...
- Page 5 IMPORTANT: Please retain your instruction book for future use. At Kambrook, we believe that safe performance is the first priority in any consumer product, so that you, our valued customer can confidently use and trust our products. We ask that any electrical appliance that you use be operated in a sensible fashion with due care and attention placed on the following important operating instructions.
- Page 6 • Do not use the removable cooking bowl for • Do not touch hot surfaces; use oven mitts to food storage. The removable cooking bowl is remove the lid and removable cooking bowl. not designed for storing food in the freezer. Lift and remove the lid carefully and away from yourself to avoid scalding from escaping • To prevent scratching the non-stick surface...
- Page 7 Kambrook service centre for heat or steam sensitive materials and provide examination and / or repair. adequate space above and on all sides for • Any maintenance other than cleaning should air circulation. be performed at an authorised Kambrook Service Centre.
- Page 8 Your Kambrook Pressure Express Multi Cool touch lid handle NOTE: For Pressure Cooking Pressure release valve settings, cooking times will only - controls the steam release start to count down once the from Pressure Express Multi and cooker has pressurised. It may...
- Page 9 Your Kambrook Pressure Express Multi continued 8. Pressure Release Valve: a) ‘Sealing’ – valve closed b) ‘Venting’ – valve open c) Clean any debris or residue position for pressurisation when position for fast release venting from around the pressure pressure cooking.
- Page 10 9. Pressure Safety Valve 10. Rubber Gasket: The pressure safety valve a) The rubber gasket helps seal b) To refit the rubber gasket provides an additional level the lid so that pressure can around the metal gasket ring, of safety. In the remote case build within the pressure cooker.
- Page 11 Your Kambrook Pressure Express Multi continued Other Features 12. Lid Markings 13. Lid Holder 14. Condensation Collector Clearly indicate the direction Slots are located in the handles Condensation collector to Open and Close the lid. on the sides of the pressure...
- Page 12 Pressure Express Multi Quick Start Guide Before Using Any Setting on the Pressure Express Multi Place the Pressure Express Multi Ensure the unit and all parts, including the removable cooking on a dry, level surface away bowl and rubber gasket, are cleaned and properly fitted back from curtains and walls.
- Page 13 Pressure Express Multi Quick Start Guide continued How to Sauté - Using the Sauté Setting With food in the cooking bowl Press the START/CANCEL button The digital display screen will and the lid remaining off, press to commence cooking. Three flash ‘- -’...
- Page 14 How to Pressure Cook - Using the White Rice, Brown Rice, Soup/Curry, Pot Roast Settings Lock the lid into place by Move pressure release valve to Select the desired pressure turning clockwise from ‘unlock’ the ‘sealing’ position. cooking setting on the digital to ‘locked’...
- Page 15 Pressure Express Multi Quick Start Guide continued How to Slow Cook - Using the Slow Cook Setting Lock the lid into place by turning Press the ‘SLOW COOK’ button Press the ‘START/CANCEL’ clockwise from ‘unlock’ to on the digital display panel. 8 button to commence cooking.
-
Page 16: Before First Use
Using Your Kambrook Pressure Express Multi Before First Use 4. Remove the silicone rubber gasket from the underside of the safety Remove and safely discard any locking lid (See Fig. 2) and wash with packaging material and promotional warm soapy water. Dry thoroughly. - Page 17 Functions of Your Kambrook Pressure Express Multi Remove and wash the removable cooking bowl in warm soapy NOTE: Never operate the Pressure water, rinse and dry thoroughly. Express Multi without food and Make sure there is no unwanted liquid in the removable cooking material on the exterior surface bowl.
- Page 18 Pre-Set Cooking Suitable for NOTE: If the pressure release valve Setting Function is not manually moved to the Sauté Sautéing Vegetables, ‘venting’ position when cooking simmer sauces is finished, the steam will vent and to seal meat slowly out of the pressure release valve automatically.
- Page 19 Functions of Your Kambrook Pressure Express Multi continued Using the Set Timer Function Using the Start/Cancel Function The Pressure Express Multi offers suggested pre-set cooking times The Start/Cancel Button starts and against each pressure cooking setting finishes the cooking process after the (White Rice, Brown Rice, Soup/Curry, desired cooking setting is selected.
- Page 20 Keep Warm Function The Keep Warm Function works only on the Slow Cook setting. Once the slow cooking time is counted down, the Keep Warm function will automatically activate keeping the food above 60°C for up to 4 hours. The Keep Warm function will not activate if the Start/Cancel button is pressed to stop the cooking process.
- Page 21 Pressure Express Multi Cooking Guide Using the Pressure Express NOTE: Before proceeding, ensure Multi that the minimum combined Make sure that the power outlet is food and liquid amount placed switched off and that the power into the removable cooking cord is unplugged from the power bowl is 250ml with at least 50ml outlet before starting.
- Page 22 6. If pressure cooking, move the NOTE: Once the pre-set cooking pressure release valve to the time has been selected, if the ‘sealing’ position (See Fig. 9). If Start/Cancel button has not been the pressure release valve is in the pressed within 30 seconds, the ‘venting’...
- Page 23 Pressure Express Multi Cooking Guide continued 11. If using a pressure cooking setting, 12. For Slow Cooking only, once the once the timer has fully counted cooking time has counted down, down and finished cooking, use the Keep Warm function will then the heat resistant serving spoon or activate and keep food above an oven mitt to turn the pressure...
- Page 24 NOTE: Be careful when removing WARNING: Do not touch the lid as condensation will have hot surfaces, use oven collected under the lid during the mitts to remove the cooking process. lid and or removable cooking bowl. Lift and remove the lid carefully and away from yourself WARNING: Do not to avoid scalding from...
- Page 25 Pressure Express Multi Cooking Guide continued White Rice Setting TIP: After cooking is over wait for at least 10 minutes before opening Pre-set cooking display time: 12min* the rice cooker. It will give some time to the rice to absorb any MIN –...
- Page 26 4. Once the selected cooking NOTE: The cooking table timer has counted down and the uses the cup provided for all cooking process has completed, measurements. For an accurate use the heat resistant serving result, pour the rice first and fill spoon or an oven mitt to turn with water until you reach the the pressure release valve to the...
- Page 27 Pressure Express Multi Cooking Guide continued Soup/Curry Setting NOTE: Ensure that the minimum combined food and liquid Pre-set cooking display time: 33min* amount of 250ml is placed into The Soup/Curry setting is perfect for the removable cooking bowl making soups, curries, legumes/dried before proceeding.
- Page 28 Soup Curry Soup can be quickly and easily made Cooking a traditional flavoursome using the Soup/Curry setting. Use curry can take hours but with the the Sauté function to brown onions, Pressure Express Multi it can take garlic and vegetables to get the most under an hour to create a rich curry.
- Page 29 Pressure Express Multi Cooking Guide continued Pot Roast Setting Dried Legumes, Beans & Pulses Rather than soaking dried legumes, Pre-set cooking display time: 24min* beans and pulses overnight, you can place them straight into the Pressure The Pot Roast setting allows you to Express Multi.
- Page 30 TIP: Use the stainless steel trivet to TIP: It is not recommended to use raise meat above the liquid level the Pressure Express to cook cuts of if required. meat under 750g or over 1kg and whole chickens in 1.4kg size. Large cuts of meat should be cut into NOTE: Ensure meat is thawed smaller sizes to ensure they cook...
- Page 31 Pressure Express Multi Cooking Guide continued Using the Sauté Setting If sautéing is recommended before cooking on the Pot Roast Pre-set cooking time: 60min* setting, refer to the ‘Using the Sauté Setting’ on this page. The Sauté setting is recommended 2.
- Page 32 Add the recommended ingredients CAUTION: Do not preheat as per recipe guidelines to the the removable cooking removable cooking bowl and stir bowl when empty for to combine. Depending on the more than 10 minutes as quantity of food to be cooked, you may damage the you may have to sauté...
- Page 33 Pressure Express Multi Cooking Guide continued Add the recommended ingredients (as per recipe guidelines) to the NOTE: The lid can be removed removable cooking bowl and stir during the cooking process to to combine, making sure that the be stirred, but then immediately ingredients are level in the bowl.
-
Page 34: Trouble Shooting Guide
Trouble Shooting Guide Problem Possible Reason Solution Difficulty closing the • Gasket not positioned • Ensure that gasket is in properly position properly (page 15) • Lid locking pin or lid lock • Push the pin or actuator in actuator is jammed and out gently and try again Leakage from the lid... - Page 35 1–2 thoroughly. years (contact your nearest 4. Remove the condensation Kambrook Service Centre). collector by gently pulling the collector away from the housing body and clean in warm water. Dry thoroughly and place it back IMPORTANT: The silicone in its original position.
- Page 36 The pressure release valve and the lid lock actuator sit side by side in the lid and should be cleaned both from the top and the bottom regularly. To clean the pressure release valve, remove the pressure release valve cover by pulling upwards away from the lid (See Fig.13 Fig.
- Page 37 Care, Cleaning & Storage continued IMPORTANT: Ensure the IMPORTANT: All safety pressure cooker is fully locking lid parts and cooled before storing. pressure release valve and cover must be reassembled correctly to ensure safety as well as optimal performance NOTE: A mixture of 1 tbsp of your Pressure Express vanilla, ½...
- Page 38 Handy Hints for Pressure Cooking Do’s Never • Always thaw frozen meat and • Place water or other liquids into poultry before cooking. the stainless steel base - only in the removable cooking bowl. Use dry oven mitts when lifting the removable cooking bowl • Immerse base, cord, or plug of after cooking.
- Page 39 Recipes Honey Baked Pumpkin Risotto Pressure cooking and slow cooking offer very similar results and are both Serves 8 great for tender results in cheaper cuts of meat. To pressure cook using a 1 tbsp honey slow cooking recipe, simply drop the 60g butter liquid content of the recipe somewhat 400g pumpkin peeled, cubed to 1cm...
- Page 40 Chicken and Pesto Risotto Vanilla Rice Pudding Serves 8 Serves 8 3 tbsp olive oil 2 tbsp butter, melted 1 large brown onion peeled, thinly sliced 2 cups medium grain white rice ⁄ 2 cloves garlic peeled, minced cup caster sugar ⁄...
- Page 41 Brown Rice Salad Smoked Ham and Split Pea Soup Serves 8 Serves 6-8 4 cups brown rice 1 tbsp olive oil 2 tsp turmeric 1 large brown onion, diced 4 cups water 3 cloves garlic, minced 1 cup rocket lettuce, washed, dried 1 ham hock (800g) 1 red onion, peeled, thinly sliced 500g green split peas, washed...
- Page 42 Thai Sweet Potato Soup with Green Curry Pumpkin Soup Coriander Pesto Serves 6-8 Serves 6-8 4 cloves garlic, whole 1 brown onion, peeled, roughly chopped 400ml can coconut milk (do not shake) 1 tbsp green curry paste 2 tbsp mild red curry paste 750g pumpkin, skin and seeds removed, 1.5kg sweet potatoes, peeled and cut cut into 5cm pieces...
- Page 43 Red Wine, Beef, Mushroom and Satay Beef Thyme Stew Serves 6 Serves 8 1tbsp peanut oil 1 brown onion thinly sliced 3 tbsp olive oil 1 clove garlic, peeled, minced 6 large French shallots, peeled, sliced ½ tsp lemon rind 3 cloves garlic, minced ½...
- Page 44 Sesame Chicken Wings NOTE: If using chicken nibblets, rather Serves 8 than wings, select the ‘BROWN RICE’ setting. ⁄ cup soy sauce 2 tbsp honey 1 tbsp sesame oil TIP: Kecap Manis is a sweet soy 1 tbsp kecap manis sauce and can be found in major 2 tsp rice wine vinegar supermarkets usually in the sauces...
- Page 45 Massaman Curry Using a food processor, place all the curry paste ingredients into the bowl and process Serves 8 until the mixture is smooth and consistent in texture. 500g diced lamb Select the ‘SAUTÉ’ setting on the digital 500g diced chuck steak control panel, then press ‘START/CANCEL’...
- Page 46 Butter Chicken Spicy Tomato Sauce and Meatballs Serves 6-8 Serves 6-8 2 tbsp olive oil 1kg beef mince 1 tbsp ginger, minced 1 red onion, peeled, finely diced 2 cloves garlic, chopped 1 cup fresh bread crumbs 3 small onions, sliced thinly 3 tbsp tomato paste ¼...
- Page 47 Chicken with Sicilian Olives and Ginger Chicken with Baby Snow Preserved Lemon Cous Cous Peas Serves 10 Serves 8 2kg chicken thigh fillets, fat trimmed 1 tbsp honey ⁄ 2 tbsp olive oil tsp rice wine vinegar ⁄ 1 tsp cinnamon cup ginger syrup 2 tsp dried parsley 2 tsp sesame oil...
- Page 48 Spicy Tomato and Capsicum Three Bean and Vegetable Stew Chicken Serves 8 Serves 4-6 2 tbsp olive oil 40g butter 3 tbsp lemon infused olive oil 4 cloves garlic, peeled, minced 1kg chicken thigh (approx. 6) 2 brown onions, thinly sliced 1 red onion, thinly sliced 2 tbsp tomato paste 2 cloves garlic, peeled, thinly sliced...
-
Page 49: Corned Beef
Corned Beef Red Wine, Garlic & Root Vegetable Lamb Shanks Serves 6 Serves 6 2 litres water 1 tsp black peppercorns 3 tbsp olive oil 1 tbsp brown sugar 8 eshallots peeled, halved 1 tbsp rock salt 1 head garlic with the base cut off, cloves 2 tbsp white vinegar separated and peeled ¾... - Page 50 Whole Chicken Stock Beef Ragu Makes 2 litres Serves 8 3 tbsp olive oil 2 tbsp grape seed oil 2 brown onions, diced 2 brown onions, diced 3 cloves garlic, peeled, thinly sliced 1 clove garlic, peeled, minced 4 sticks celery, roughly chopped 1.5kg beef bolar blade, cut into 4cm chunks 4 carrots, peeled, roughly chopped 8 baby Dutch carrots, tops removed, peeled...
- Page 51 Moroccan Chicken Tomato Passata Serves 8 Makes approx. 2 litres 2 tbsp olive oil 3 tbsp olive oil 1 brown onion, diced 2 brown onions, diced 2 cloves garlic, peeled, minced 2 cloves garlic, peeled, minced 1.5 kg chicken thigh fillets, trimmed 2 kg tomatoes, quartered 340g jar roasted capsicum, cut into 1 tbsp brown sugar...
- Page 52 Vegetable Green Curry Using a food processor, place all of the curry paste ingredients into the bowl Serves 8 and process until completely blended, approximately 2 minutes. 2 potatoes, diced into 2cm pieces Select the ‘SAUTÉ’ setting on the Digital 1 cup dried chick peas (washed) Control Panel and then press the ‘START/ 270ml can coconut milk...
Need help?
Do you have a question about the KPR820 and is the answer not in the manual?
Questions and answers