
Subscribe to Our Youtube Channel
Related Manuals for DCS ActiveSmart RF201A


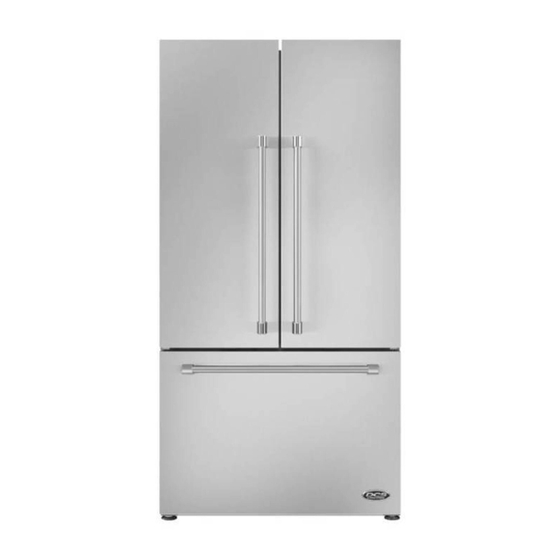
Summary of Contents for DCS ActiveSmart RF201A
- Page 1 INSTALLATION INSTRUCTIONS USER GUIDE INSTRUCTIONS D’INSTALLATION GUIDE D’UTILISATION ActiveSmart™ Refrigerator Ice & Water and Automatic Ice Réfrigérateur ActiveSmart™ Ice & Water et Automatic Ice RF201A models Modèles RF201A US CA...
- Page 2 INTRODUCTION Thank you for buying a DCS by Fisher & Paykel ActiveSmart™ Refrigerator. We are very proud of this refrigerator. This refrigerator combines size and storage space with the latest features and functions. Thousands of hours of food care research and refrigeration experience has been programmed into your refrigerator to give you the best possible performance.
-
Page 3: Safety And Warnings
– The doors should be removed and the shelves left in place so that children may not easily climb inside. Your DCS by Fisher & Paykel Authorized Service Agent will be able to give advice on environmentally friendly methods of disposing of your old refrigerator or freezer. - Page 4 Do not use a cord that shows cracks or abrasion along its length or at either the plug or appliance end. If the power supply cord is damaged, it must only be replaced by your DCS by Fisher & Paykel Authorized Service Agent because special purpose tools are required.
- Page 5 SAFETY AND WARNINGS Power failure – food safety Do not refreeze frozen foods that have thawed completely. The food may be dangerous to eat. Follow the recommendations below if you discover food in your freezer has thawed: – Ice crystals still visible – food may be refrozen but should be stored for a shorter period than recommended.
- Page 6 3. Ice & Water Your product must be installed by a qualified appliance installer as incorrect plumbing can lead to water leaks. DCS by Fisher & Paykel Appliances does not accept responsibility for damage (including water damage) caused by faulty installation or plumbing.
- Page 7 INSTALLATION INSTRUCTIONS 4. Product and cabinetry dimensions (Ice & Water and Automatic Ice) Flush with refrigerator chassis – full door rotation Flush with refrigerator door – full door rotation Flush with refrigerator door – 90° door rotation...
- Page 8 INSTALLATION INSTRUCTIONS PRODUCT DIMENSIONS inches (mm) Overall height of product 70 ⅓ ” (1795) Overall width of product 35 ⁄ ” (900) Overall depth of product 27 ⅜” (695) (excludes handle, includes rear compartment cover) RECOMMENDED CABINETRY DIMENSIONS Inside height of cavity 71 ¼”...
- Page 9 INSTALLATION INSTRUCTIONS 110VAC cord and water inlet dimensions 110VAC AND WATER INLET DIMENSIONS inches (mm) Power cord 40” (1016) Water inlet to bottom 5” (127) 110VAC to bottom 3” (76) 110VAC to edge 2” (51) Water inlet to edge 18” (457)
-
Page 10: Installation Precautions/Warning
The water connection to your Ice & Water refrigerator must be installed by an authorized plumber or DCS by Fisher & Paykel Authorized Service Agent. The water connection instructions below are intended only for the professional installer. The new tubings supplied with the refrigerator are to be used, old tubings from old Ice &... - Page 11 INSTALLATION INSTRUCTIONS Installation instructions: Ensure the refrigerator is NOT plugged into a power supply. Locate a cold water supply/feed only suitable for a water connection. Tee and tap fitting is not supplied. Connect the 8” (200 mm) blue tubing to the Diagram 1 outlet of the PRV (blue collet) and the inlet PRV connection...
- Page 12 INSTALLATION INSTRUCTIONS Attach double sided foam to the back of the water filter head as shown in Diagram 5. Write the date to be replaced on the filter (date Diagram 5 installed + 6 months). Remove the double sided foam backing and Double sided foam attachment attach the filter to the desired...
- Page 13 INSTALLATION INSTRUCTIONS IMPORTANT! All connections must be checked for leaks. Ensure white ¼” (6 mm) tubing is routed away from sharp objects, sharp corners (beware of kinking the tube as this will stop water flow), clear of the refrigerator rear compartment and not in a location where it can be kinked or squashed.
- Page 14 INSTALLATION INSTRUCTIONS IMPORTANT! To ensure your product is properly functioning, it is important to complete the following steps. All models Turn the ice maker on by pressing the button. The light above the button will be illuminated when the ice maker is on. To force an ice maker cycle press and hold the buttons together for 4 seconds, then close the refrigerator compartment and wait 30 seconds.
- Page 15 INSTALLATION INSTRUCTIONS 6. Installation Your refrigerator is fitted with front and rear rollers, designed for moving the product in the forwards and backwards direction. Avoid moving the product in a sideways direction as this may damage the rollers or Raise the front of the refrigerator the floor covering/surface.
- Page 16 INSTALLATION INSTRUCTIONS 8. What to do if your product is unstable Gently push the refrigerator back until the rear rollers contact the floor. Measure the gap under the front foot, which has come off the floor. Example only Obtain some solid packing material (hardwood, plastic, etc) which fits firmly into the gap under the foot.
- Page 17 INSTALLATION INSTRUCTIONS Before placing food in the fresh food or freezer compartments Remove all internal packaging. Ensure that all transit clips are removed from the refrigerator. These are small rubber stoppers located at the back of the shelves. Clean the inside of the appliance with a mix of warm water and a small amount of liquid detergent, and a soft cloth to remove manufacturing and transportation dust.
-
Page 18: Moving Or Storing Your Appliance
MOVING OR STORING YOUR APPLIANCE If your refrigerator is turned off for any reason, wait 10 minutes before turning it back on. This will allow the refrigeration system pressures to equalize before restarting. Moving your refrigerator Turn off the appliance and unplug from the power point. Remove all food. Turn the adjustable feet to the right as far as they will turn. -
Page 19: Door Closing
Keep hands and food items clear of the door opening when the gap is less than 45° (the soft close activation range). The soft closing feature is located inside the door cavity therefore it is not serviceable by the user. If a problem occurs, please contact your DCS by Fisher & Paykel Authorized Service Agent. - Page 20 ACTIVESMART™ REFRIGERATOR OPERATING INSTRUCTIONS The control panel enables you to view and modify all the features and options on your refrigerator. Temperature control When the refrigerator is first turned on, the powerful cooling system will automatically cool both refrigerator and freezer compartments to their set temperatures. This will take between 2 –...
- Page 21 ACTIVESMART™ REFRIGERATOR OPERATING INSTRUCTIONS Fresh food compartment The fresh food compartment light will automatically be illuminated. The temperature for this compartment will show as a series of lights. The temperature may be altered by pressing the buttons. One press on either of these buttons will reduce or increase the number of lights by one which indicates a small change in temperature.
- Page 22 ACTIVESMART™ REFRIGERATOR OPERATING INSTRUCTIONS Key Mute ‘Key Mute’ allows you to silence all button presses. To activate ‘Key Mute’ and silence buttons, press and hold the button for 4 seconds. icon on the internal control panel will be illuminated. The keys will be silenced when ‘Key Mute’ is activated. Door alarms and ‘Bottle Chill’...
- Page 23 ACTIVESMART™ REFRIGERATOR OPERATING INSTRUCTIONS Special Functions Bottle Chill This function allows you to chill your beverages more rapidly in the freezer without the worry of forgetting them. The timer is set for 15 minutes however the time taken to chill depends on the size of your beverage. If after 15 minutes your beverage is not cold enough, simply place it back in the freezer and reset the ‘Bottle Chill’...
- Page 24 ALL ABOUT THE EXTERNAL DISPLAY (ICE & WATER MODELS ONLY) This screen enables you to lock the water dispenser, indicates to you when ‘Bottle Chill’ is activated and when your water filter requires changing. Electronic external display EXTERNAL DISPLAY FEATURES Dispenser lock button Locks/unlocks the water dispenser.
-
Page 25: Using Your Water Dispenser
USING YOUR WATER DISPENSER (ICE & WATER MODELS ONLY) Dispensing Your water dispenser has been designed for one-handed operation. To dispense water push the dispensing pad gently, using a glass or container. This pad requires only a gentle press to activate. -
Page 26: Water Filter
It will flash, as a reminder, when water is dispensed. Replacement filter cartridges are available from your DCS by Fisher & Paykel Authorized Service Agent. The details of the replacement filter cartridge are labelled on the cartridge. - Page 27 WATER FILTER To reset the filter indicator IMPORTANT! We recommend the water filter to be used from the time of installation. Do not reset indicator before filter is changed or filter monitoring will be inaccurate. Press and hold for 4 seconds to reset the internal and external filter indicators. icon on the internal and external displays will turn off when reset.
-
Page 28: Using Your Ice Maker
USING YOUR ICE MAKER Ice On/Off Your ice maker is designed to automatically dispense ice until it senses that the bin is full. So the more ice you use, the more it makes. It is even clever enough to sense when there is no bin in place to catch the ice and it will not dispense any ice. - Page 29 Do not use ice cubes that may have become discolored, usually with a green-blue color. If such discoloration is noted, discard the ice cubes and contact your DCS by Fisher & Paykel Authorized Service Agent. Ensure the ice maker is connected to the filter and to a drinkable water supply only.
-
Page 30: Activesmart™ Refrigerator Special Features
ACTIVESMART™ REFRIGERATOR SPECIAL FEATURES Fruit and vegetable bins and humidity control lid The fruit and vegetable bins feature a unique lid which provides two functions: The humidity lid seals the bins and provides a humid microclimate to extend storage times of fruit and vegetables. The humidity lid prevents condensation, which forms at high humidities, from dripping down onto the fruit and vegetables by retaining it in the grooves of the lid. - Page 31 ACTIVESMART™ REFRIGERATOR SPECIAL FEATURES Slim storage drawer The slim bins at the bottom of the fresh food compartment provide storage space for items that you may want to keep separate from the rest of the refrigerator. These slim storage bins can be used for deli item storage, beverages or for defrosting foods.
-
Page 32: Cleaning And Caring For Your Refrigerator
CLEANING AND CARING FOR YOUR REFRIGERATOR Exterior (all models) Stainless exterior doors Clean the exterior door with liquid dishwashing detergent dissolved in warm water and a soft cloth. Dry the door with a lint-free cloth. The use of any abrasive or stainless steel cleaners and solvents will damage the door surface. - Page 33 CLEANING AND CARING FOR YOUR REFRIGERATOR Interior (all models) It is important to keep the interior of the refrigerator and freezer clean to help prevent food from becoming contaminated during storage. The amount and types of food stored determines how often cleaning should be carried out in the refrigerator (ideally once every 1 to 2 weeks).
- Page 34 CLEANING AND CARING FOR YOUR REFRIGERATOR Humidity Control System IMPORTANT! When cleaning the shelf above the vegetable bins, we recommend that you do not disassemble the Humidity Control System from the shelf. Retainer In the event that the humidity control lid (plastic lid) and humidity slides become separated from the glass shelf, follow these Humidity Slides...
- Page 35 CLEANING AND CARING FOR YOUR REFRIGERATOR To remove trays or fixed bins For ease of removal, empty food from tray/bin first. Hold the center front of the tray/bin handle. Lift vertically to unclip from the runners and pull tray/bin towards you to remove. Push both runners back into refrigerator.
-
Page 36: Storing Food In Your Refrigerator
STORING FOOD IN YOUR REFRIGERATOR Your refrigerator helps to extend the storage times of fresh perishable foods. The cold temperature slows down the major causes of food spoilage – namely, the growth of bacteria, moulds and yeasts, and any chemical and physical reactions. Fresh food care The quality of food before it is placed in the refrigerator is critical to successful storage. - Page 37 STORING FOOD IN YOUR REFRIGERATOR Red meat Place fresh red meat on a plate and loosely cover with waxed paper, plastic wrap or foil. Store cooked and raw meat on separate plates. This will prevent any juices lost from the raw meat contaminating the cooked product.
-
Page 38: Storing Food In Your Freezer
STORING FOOD IN YOUR FREEZER The use of temperatures of -0.4°F (-18°C) or colder to store food means that the food can be kept for longer periods than when refrigeration temperatures are used. This is because the growth of bacteria, moulds and yeasts are stopped, and chemical and physical reactions are severely restricted at such low temperatures. - Page 39 STORING FOOD IN YOUR FREEZER Meat, poultry and game Do not try to freeze more than 2.2 pound (1 kg) meat per 6.6 gal (25 L) or 0.88 cubic feet of freezer storage volume at any one time. Meat must be frozen quickly in order to maintain its texture.
- Page 40 ACTIVESMART™ REFRIGERATOR USER WARNINGS AND SOUNDS User warnings Faults In the unlikely event a fault occurs the icon will illuminate on the internal control panel and an alarm will sound when the fresh food compartment door is opened. Please count the number of beeps made when the fresh food compartment door is opened.
-
Page 41: Troubleshooting
TROUBLESHOOTING If there is a problem with your appliance, please check the following points before contacting your local DCS by Fisher & Paykel Authorized Service Agent or the Customer Care Center. All models PROBLEM POSSIBLE CAUSES WHAT TO DO Appliance does No electricity at power outlet. - Page 42 TROUBLESHOOTING All models PROBLEM POSSIBLE CAUSES WHAT TO DO Water in the Condensation is formed by A small amount of condensation is vegetable bins. the water produced by fruit beneficial for fruit and vegetable and vegetables. storage. Wipe out water with a cloth. Set humidity slide to low humidity setting Exterior of...
- Page 43 TROUBLESHOOTING All models PROBLEM POSSIBLE CAUSES WHAT TO DO Automatic ice Ice maker has not been turned on. Switch on ice maker (refer to maker does pages 15 and 29). not work. Bin is in the wrong way or there Place bin so scoop is on the is no bin in place.
- Page 44 TROUBLESHOOTING All models PROBLEM POSSIBLE CAUSES WHAT TO DO Wet ice/ Low water pressure. Check water pressure. ice clumping. Filter blocked. Replace filter. Long freezer door openings. Gently tap ice with scoop to unstick or, if large clumps occur, High ambient temperature. empty ice bin and make new ice.
- Page 45 TROUBLESHOOTING Ice & Water models only PROBLEM POSSIBLE CAUSES WHAT TO DO Water has poor Refrigerator not used for an Dispense 10 qt (10 L) of water so taste/odor. extended period. fresh water supply is replenished. Water dispenser Water supply turned off or not Turn water on.
-
Page 46: Service And Warranty
If after checking these points you still need assistance or parts or any questions about operating the product, please refer to the Service & Warranty booklet for warranty details and your nearest DCS by Fisher & Paykel Authorized Service Agent or Customer Care Center, or contact us through our website www.dcsappliances.com/customer-care/service-my-product/... - Page 48 www.dcsappliances.com Copyright © Dynamic Cooking Systems, lnc. 2015. All rights reserved. The product specifications in this booklet apply to the specific products and models described at the date of issue. Under our policy of continuous product improvement, these specifications may change at any time. You should therefore check with your Dealer to ensure this booklet correctly describes the product currently available.
Need help?
Do you have a question about the ActiveSmart RF201A and is the answer not in the manual?
Questions and answers