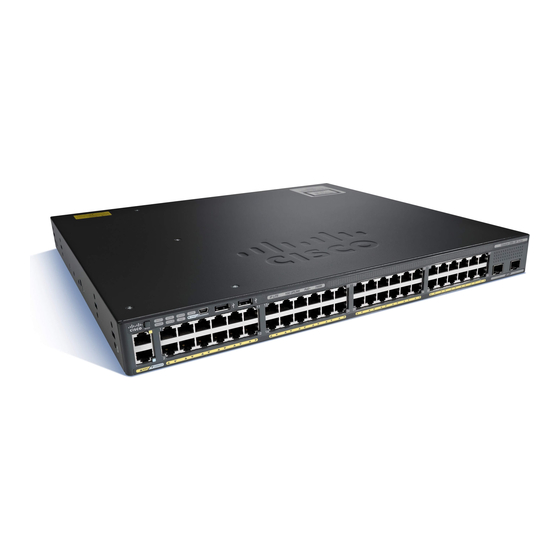
Cisco Catalyst 2960-X Getting Started Manual
Hide thumbs
Also See for Catalyst 2960-X:
- Security configuration manual (498 pages) ,
- Command reference manual (135 pages) ,
- Hardware installation manual (34 pages)

Related Manuals for Cisco Catalyst 2960-X


Summary of Contents for Cisco Catalyst 2960-X
-
Page 1: Table Of Contents
Getting Started Guide for the Catalyst 2960-X and 2960-XR Switches Getting Started with Your Switch Box Contents Running Express Setup Managing the Switch Planning and Installing a Switch Stack (Optional) Installing the Switch Connecting the FlexStack Cables (Optional) Connecting to the Switch Ports... -
Page 2: Getting Started With Your Switch
Catalyst 2960-XR switch (power supply modules not shown) AC power cord Four number-8 Phillips flat-head screws (48-2927-01) for Catalyst 2960-X switches Eight number-8 Phillips flat-head screws (48-2927-01) for Catalyst 2960-XR switches Four rubber mounting feet Two number-4 pan-head screws (48-0482-01) -
Page 3: Running Express Setup
When you first set up the switch, you should use Express Setup to enter the initial IP information. This enables the switch to connect to local routers and the network. You can then access the switch through the IP address for further configuration. To use the CLI-based initial setup program, see the switch hardware guide on Cisco.com. Note You need this equipment to set up the switch: •... - Page 4 Power the switch by connecting the AC power cord to the switch power supply and to a grounded AC outlet. For information about installing the power supplies in the Catalyst 2960-XR switches, see the hardware guide at http:// www.cisco.com/go/cat2960xr_docs Step 4 Observe the POST results.
- Page 5 MAST (master) LED is green if the switch is acting as the stack master. Before going to the next step, wait until POST is complete. If the SYST LED does not turn solid green, or turns amber, the switch failed the POST. Contact your Cisco Note representative or reseller.
- Page 6 • You are using an undamaged Category 5 or 6 Ethernet cable. • The other device is on. Step 7 Start a browser session on the PC, and enter the IP address https://10.0.0.1. When prompted, enter the default password, cisco. The switch ignores text in the username Note field.
-
Page 7: Managing The Switch
If you changed the static IP address on your PC in Step 2, change it to the previously configured static IP address. Step 13 You can now manage the switch by using Cisco Network Assistant, Device Manager, or both. See Managing the Switch for information about configuring and managing the switch. -
Page 8: Using Device Manager
Using Cisco Network Assistant Cisco Network Assistant is a software program that you download from Cisco.com and run on your PC. It offers advanced options for configuring and monitoring multiple devices, including switches, switch clusters, switch stacks, routers, and access points. Cisco Network Assistant is free—there is no charge to download, install, or use it. - Page 9 RJ-45 Console Port Procedure Step 1 Connect the supplied RJ-45-to-DB-9 adapter cable to the standard 9-pin serial port on the PC. Connect the other end of the cable to the console port on the switch. Step 2 Start a terminal-emulation program on the PC. Step 3 Configure the PC terminal emulation software for 9600 baud, 8 data bits, no parity, 1 stop bit, and no flow control.
-
Page 10: Planning And Installing A Switch Stack (Optional)
The FlexStack-Plus module is hot-swappable and can be inserted while the switch is powered on. • Order the appropriate cable from your Cisco sales representative. The length of FlexStack cable depends on your configuration. These are the different sizes available: ◦... - Page 11 Procedure Step 1 Use a number 2 Phillips-head screwdriver to remove the FlexStack-Plus module blank cover on the switch back panel. Step 2 Grasp the FlexStack-Plus module on the sides, and insert it into the module slot. Push the module in completely until you feel it snap into place.
- Page 12 Avoid overtightening the Note screws.
-
Page 13: Installing The Switch
Stack Cabling These figures show the switches stacked in a vertical rack or on a table. The connections are redundant. A Catalyst 2960-X switch is shown in the examples, the Catalyst 2960-XR switch can be stacked in the same way. -
Page 14: Installation Guidelines
(such as metal flakes from construction activities) as is possible. Installation Warning Statements This document includes the basic installation warning statements. Translations of these warning statements appear in the switch compliance and safety information guide document on Cisco.com. - Page 15 To prevent bodily injury when mounting or servicing this unit in a rack, you must take special precautions Warning to ensure that the system remains stable. The following guidelines are provided to ensure your safety: - This unit should be mounted at the bottom of the rack if it is the only unit in the rack. - When mounting this unit in a partially filled rack, load the rack from the bottom to the top with the heaviest component at the bottom of the rack.
- Page 16 Attaching the Rack-Mount Brackets for the Catalyst 2960-X Switches Procedure Use two Phillips flat-head screws to attach the long side of the bracket to each side of the switch. Figure 4: Attaching Brackets for 19-inch Racks Front-mounting position Mid-mounting position...
- Page 17 Attaching the Rack-Mount Brackets for the Catalyst 2960-XR Switches Procedure Use four Phillips flat-head screws to attach the long side of the bracket to each side of the switch. Figure 5: Attaching Brackets for 19-inch Racks Front-mounting position Mid-mounting position Number-8 Phillips flat-head screws (48-2927-01) Rear-mounting position...
- Page 18 Mounting in a Rack Procedure Step 1 Use the four supplied Phillips machine screws to attach the brackets to the rack. Step 2 Use the black Phillips machine screw to attach the cable guide to the left or right bracket. Cable guide Number-12 Phillips pan-head screws (48-0523-01) or Number-10 Phillips pan-head screws (48-0627-01)
-
Page 19: Connecting The Flexstack Cables (Optional)
Always use a Cisco-approved FlexStack cable to connect the switches. This is only supported on the stack-capable switches. Note Use only approved cables, and connect only to other Catalyst 2960-X or 2960-S switches. Equipment Caution might be damaged if connected to other nonapproved Cisco cables or equipment. -
Page 20: Connecting To The Switch Ports
Some switch models have SFP module slots and others have SFP+ module slots. The SFP slots support only the SFP modules. The SFP+ slots support both SFP and SFP+ modules. For a list of supported modules, see the release notes on Cisco.com. For detailed... -
Page 21: Troubleshooting
Troubleshooting If you experience difficulty, help is available in this section and also on Cisco.com. This section includes Express Setup troubleshooting, how to reset the switch, and where to find more information. - Page 22 Accessing Help Online First look for a solution to your problem in the troubleshooting section of the hardware installation guide on Cisco.com. You can also access the Cisco Technical Support and Documentation website for a list of known hardware problems and extensive troubleshooting documentation.
-
Page 23: Related Documentation
Cisco.com. For system requirements, important notes, limitations, open and resolved bugs, and last-minute documentation updates, see the release notes, also on Cisco.com. For translations of the warnings that appear in this publication, see the switch RCSI guide on Cisco.com. - Page 24 Cisco and the Cisco logo are trademarks or registered trademarks of Cisco and/or its affiliates in the U.S. and other countries. To view a list of Cisco trademarks, go to this URL: www.cisco.com/go/trademarks . Third-party trademarks mentioned are the property of their respective owners. The use of the word partner does not imply a partnership relationship between Cisco and any other company.
- Page 25 Cisco Systems, Inc. Cisco Systems (USA) Pte. Ltd. Cisco Systems International BV San Jose, CA 95134-1706 Singapore Amsterdam, The Netherlands Cisco has more than 200 offices worldwide. Addresses, phone numbers, and fax numbers are listed on the Cisco Website at www.cisco.com/go/offices.
Need help?
Do you have a question about the Catalyst 2960-X and is the answer not in the manual?
Questions and answers