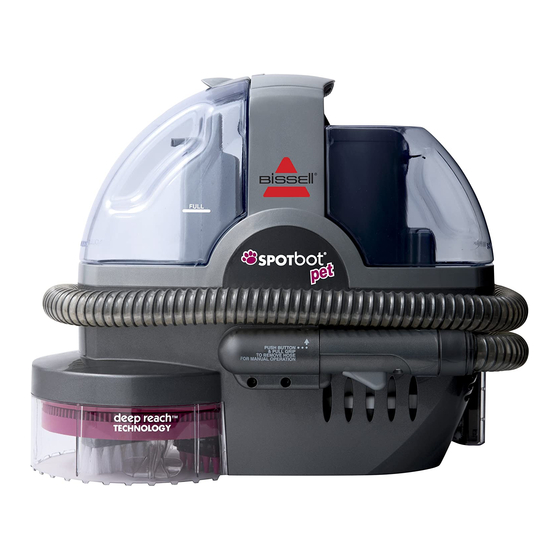
Bissell SpotBot 1200 Series User Manual
Hide thumbs Also See for SpotBot 1200 Series:

Advertisement

U S E R ' S G U I D E
1200/7887/12U9 SERIES
3
Safety Instructions
4-5 Product View
6-7 Special features
7-10 Operation
11 Maintenance and Care
12-13 Troubleshooting
14 Consumer Services
15
Replacement Parts
Additional Accessories
15
16 Warranty
TM

Advertisement

Table of Contents
loading

Summary of Contents for Bissell SpotBot 1200 Series

  • Page 1 U S E R ’ S G U I D E 1200/7887/12U9 SERIES Safety Instructions 4-5 Product View 6-7 Special features 7-10 Operation 11 Maintenance and Care 12-13 Troubleshooting 14 Consumer Services Replacement Parts Additional Accessories 16 Warranty...
  • Page 2 Your BISSELL SpotBot is well made, and we back it with a limited one year war- ranty. We also stand behind it with a knowledgeable, dedicated Consumer Services Department, so, should you ever have a problem, you’ll receive fast,...
  • Page 3: Important Safety Instructions

    INSTRUCTIONS of fire, electric shock, or injury: GROUNDING Use indoors only. ■ Use only BISSELL cleaning products intended for ■ INSTRUCTIONS use in this appliance. Do not use for any purpose other than described ■ This appliance must be connected to a grounded in this User’s Guide.
  • Page 4: Product View

    roduct view Clean/Solution Tank Dirty/Collection Tank Flex Hose Clip Spray Trigger Vacuum Flex Hose Release Button w w w . b i s s e l l . c a 1 - 8 0 0 - 2 6 3 - 2 5 3 5...
  • Page 5 Hands Free Cleaning Window tough Stain ™ Brush Storage Keep plenty of genuine BISSELL 2X Ultra Concentrated Formulas on hand so you can clean whenever it fits your schedule. Always use genuine BISSELL deep cleaning formulas. Non- BISSELL cleaning solutions may harm the machine and void the warranty.
  • Page 6: Special Features

    pecial features Front view Clean/solution tank Is located on the right of the unit when you are facing the unit. Automatic Smart System™ control paneI Located in the center of the unit and is where you will begin selection of the smart cleaning cycle you would like to use (detailed instructions on page 9). Dirty/collection tank Looking at the front of the unit, the dirty/ collection tank is on the left side. Vacuum flex hose Wraps around the center of the unit. This serves as the travel path for dirty water and formula that is suctioned up into the dirty/ collection tank. Spray trigger When cleaning in the manual mode, press the spray trigger to release water and formula onto the area to be cleaned. Underside view Handsfree cleaning brushes Provides cleaning action when using the surface stain or set-in handsfree cleaning cycles. Spray tip Water and solution are dispensed here when cleaning in the handsfree mode.
  • Page 7: Getting Ready

    Serves as a guide for the power cord storage. The cord wrap can be gently pushed in during use. peration Getting ready To fill the clean tank: A. Remove the clean tank by lifting it straight up and then away from the unit. B. Unscrew the cap at the bottom of the clean tank. There are 2 ways you can fill and use the tank: For common stains such as dirt, grime, pet, or oily stains, use the fill lines on the left side of the tank and fill with BISSELL 2X Little Green formula (trial size included) and water. For dye based stains such as coffee, fruit juices, cola and red wine, use the fill lines on the right hand side of the unit and fill with for- BISSELL 2X Little Green and Oxy GEN2 mulas (trial sizes included) and water. Replace and tighten black cap on bottom of clean tank. How to begin Tip: Using the Automatic Smart System™...
  • Page 8 peration How to begin continued Surface Stain Cycle This cycle has been designed for stains that are on the surface of your carpeting and have not had time to penetrate deep in to your carpet fibers. This cycle will run for approximately 3 minutes. Set-In Stain Cycle Use on stains that have had a period of time to set-in and penetrate deep into your carpet fibers. These are typically the most difficult stain types to remove. This cycle runs for approximately 6 minutes. Manual / Hose By selecting this option you can Tip: clean spots and stains manually on surfaces such as upholstery, car interiors, stairs or wherever you have a need to clean manually. Some spots and spills Pause/Resume Is used to check the require that you pick up the status of a cleaning cycle (Surface Stain or chunky debris with a rag Set-In). If you hit the Pause button once, it or towel before you begin pauses the cleaning cycle it is currently in.
  • Page 9 peration To begin cleaning Plug your SpotBot in. The power light will illumi- nate instructing you that there is power to the unit and it is ready to go. Place the filled Clean/Solution tank onto the unit. Handsfree cleaning Place the unit directly over the spot or stain, making sure the stain is in the center of the handsfree cleaning area. Select which cleaning cycle (surface stain or set-in) you would like to begin with. Your SpotBot will begin spraying, brushing and suctioning up the spots and stains, in its pre-programmed cycle. Both cycles have been tested and proven to deliver superior cleaning results, taking the guesswork out of cleaning for you. NOTE: If your unit has a built in heater (not Tip: standard on all models) press the heater button to turn on the heat feature.
  • Page 10: Manual/Hose Cleaning

    peration Manual/hose cleaning Remove the hose from the unit by depressing the release button. Remove the Tough Stain Brush from the back of the unit. Attach the Tough Stain Brush onto the grip of the flex hose. Select the manual/hose button on the control panel to start the SpotBot. NOTE: In manual mode, the SpotBot will not turn on until the grip is removed from the unit. If it is not removed within 30 seconds of pushing the start button, the unit will shut off. If your unit has a built in heater (not standard on all models) press the heater button to turn on the heat feature. Begin cleaning by holding the tool...
  • Page 11: Maintenance And Care

    aintenance and care Hose cleaning Before turning off the SpotBot, suction up clean water to thoroughly rinse out the inside of the vacuum flex hose. Then, lift the vacuum flex hose upwards to drain any remaining water into the dirty tank. Disconnect the cleaning tool from the vacuum flex hose by pushing down on the button lock and pulling straight off (do not twist tools to remove them). Once the tool is removed from the vacuum flex hose it can be cleaned by rinsing under clean running water. Storage Unplug the power cord from the outlet. Wrap power cord around the cord wrap. Tip: Empty and rinse the dirty/collection tank after each use, or when dirty water reaches the indicated maximum fill line. To remove If a significant amount of the tank, lift up the dirty tank latch and pull water and solution(s) remain the tank out. Dump out the dirty water and in the clean tank, your unit rinse with clean. Replace the tank into the unit for storage. After using the SpotBot’s can be stored with liquid in...
  • Page 12: Troubleshooting

    roubleshooting Handsfree Cleaning Cleaner will not run Possible Causes Remedies 1. Check electrical plug. Power cord not plugged in. Blown fuse/tripped breaker. 2. Replace household fuse or reset breaker. 3. Remove what is obstructing the The unit is not sitting flat on the carpeting. floors surface. 4. Check to make sure the Vacuum Vacuum Flex Hose is not snapped into place securely. Flex Hose is snapped into place. Unusual or Odd Noise Possible Causes Remedies Clean/Solution tank is out of fluid. 1. Fill Clean Solution Tank. Reduced or No Spray Possible Causes Remedies Spray Tip clogged.
  • Page 13: Please Do Not Return This Product To The Store

    Black Valve on the Dirty/Collection Tank is missing. Collection tank. Thank you for selecting a BISSELL product. If you should happen to need assistance during assembly or operation, call 1-800-263-2535. Please do not return this product to the store. w w w . b i s s e l l . c a...
  • Page 14 Niagara Falls, ON L2E 6W2 ATTN: Consumer Services Or visit the BISSELL website - www.bissell.ca When contacting BISSELL, have model number of cleaner available. please record your Model Number: ___________________ please record your purchase Date: ___________________ NOTE: Please keep your original sales receipt. It provides proof of date of purchase in the event of a warranty claim.
  • Page 15: Replacement Parts

    eplacement parts Item Part No. Part Name 203-6643 Clean Tank Assembly (includes Cap/Insert) 2 203-6644 Clean Tank Cap 3 203-6645 Dirty Tank 203-6647 Hose Clip dditional assessories Item Part No. Part Name 1 203-6651 3" Tough Stain Brush 2 203-6652 TurboBrush 3 203-6653 4” Upholstery Tool 4 203-6654 6” Wide Stair Tool 5 203-6655 Spraying Crevice Tool 6 203-6647 Storage Tray 7...
  • Page 16 BISSELL Representative at canada.custhelp@bissell.ca or at the phone number below will issue you a Return Authorization Number and a pre-paid mailing label to return the unit to BISSELL for warranty repair. the machine should be returned with a photocopy of your proof of purchase. (Your dated sales receipt is your warranty –...

This manual is also suitable for:

Spotbot 7887 series

Table of Contents