
Subscribe to Our Youtube Channel
Related Manuals for AUDIOLINE Switch 20x


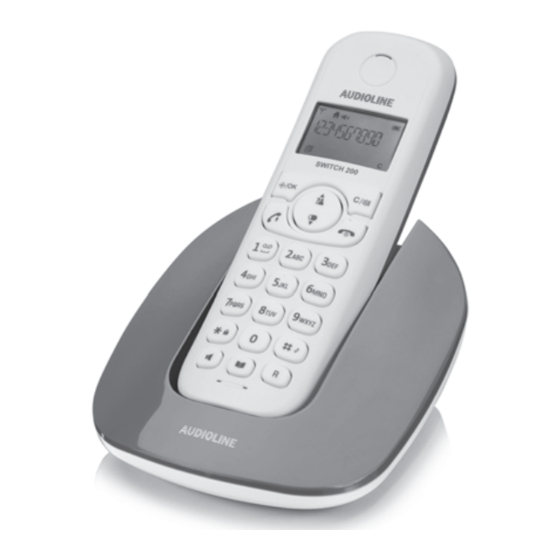
Summary of Contents for AUDIOLINE Switch 20x
- Page 1 Schnurloses DECT-/GAP-Telefon Cordless DECT/GAP telephone Operating Instructions Switch 20x...
-
Page 3: Table Of Contents
Table of contents 1 Safety Information ......... .2 2 Preparing the Telephone . -
Page 4: Safety Information
Safety Information 1 Safety Information Please read this operating instruction manual thoroughly. Intended use The telephone is suitable for telephoning within a public telephone network system. Any other use is considered unintended use. Unauthorised modifica- tion or reconstruction is not permitted. Under no circumstances open the device or complete any repair work yourself. -
Page 5: Medical Equipment
Safety Information Medical equipment Attention: Never use the telephone in the vicinity of medical equipment. Effects on such equipment cannot be fully ruled out. DECT telephones can cause an unpleasant humming sound in hearing aids. Disposal In order to dispose of your device, take it to a collection point pro- vided by your local public waste authorities (e.g. -
Page 6: Preparing The Telephone
Telephone connection cable Rechargeable batteries Operating instructions Visit www.audioline.de to find out whether this telephone is available. The power adapter plugs supplied fulfils the eco design directive of the European Council (Directive 2005/32/EC). This means that power consumption is considerably lower than power adapter plugs of an earlier design both in operating and idling modes. -
Page 7: Connecting The Base Station
Preparing the Telephone Connecting the base station Attention: Position the base station at least 1 m away from other electronic devices, otherwise there is a risk of mutual disturbance. Connect the base station as illustrated in the diagram. For reasons of safety, only use the power adapter plug and telephone connection line supplied. -
Page 8: Inserting The Batteries
Preparing the Telephone Inserting the batteries Open the battery compartment cover. Put in the batteries. Close the battery compartment cover. Attention: Use only type AAA NiMH 400 mAh rechargeable batteries. Never use normal batteries / primary cell batteries. Observe the correct polarity! Charging the batteries ☞... -
Page 9: Operating Elements
Operating Elements 3 Operating Elements Earpiece Arrow keys (Up/down) Display Call list Softkey (Internal Softkey call / Delete / Mute) (Menu / OK) On Hook button Off Hook button Digit keys Redial R-key Handsfree Phone book Microphone... - Page 10 Operating Elements Locate handset (Paging) Charge contacts...
-
Page 11: Preliminary Information
Preliminary Information 4 Preliminary Information This chapter provides basic information on using the operating instruction manual and the telephone. Description of operating sequences in the manual Display Description Press the button depicted. Enter digits or letters. Handset rings. Remove the handset from the base station. Place the handset in the base station. - Page 12 Preliminary Information You received a message in your answering machine provided by the telephone network (depending on telephone network/provider). With a long press (> 3s) on the digit key 1 the number of your voice mailbox will be dialled (only if a telephone number is stored, refer to page 23).
-
Page 13: Standby Mode
Preliminary Information Standby mode All descriptions in this operating manual assume that the handset is in Stand- by mode. The system switches to Standby mode by pressing the but- ton, within a menu multiple times if necessary. Low-radiation operation (ECO mode) In call mode, when the handset is close to the base unit, the radiation is reduced considerably as compared to standard, cordless DECT telephones. -
Page 14: Telephoning
Telephoning 5 Telephoning Taking a call Your phone is ringing. If the handset is not in the base station: Press the Off Hook button or the Handsfree button. If the handset is in the base station and AUTO ANSWER is not activated: Remove the handset from the base and press the Off Hook button or the Handsfree button. - Page 15 Telephoning Redial ☞ Your handset saves the last 5 dialled telephone numbers. If a caller is stored in your phone book, the name will be displayed. Whilst the name is displayed to show the respective number press The most recent last number will be displayed at the top of the list. Open the redial list.
-
Page 16: Muting The Microphone
Telephoning Call timer Your handset automatically times the duration of every call in hours, minutes and seconds. Setting the earpiece/loudspeaker volume During a call you can adjust the volume in 5 levels (if tele- phoning “normally“ -> earpiece volume, with hands-free -> loudspeaker volume). - Page 17 Telephoning Transferring an external call to another handset During an external call . . . Press the Menu softkey. Select INTERCOM and press OK. Enter the internal telephone number. The external call is put on hold. When the called handset answers you can announce the call transfer.
-
Page 18: Other Features
Other Features 6 Other features Key lock ☞ The key lock prevents functions assigned to buttons being activated inadvertently. Incoming calls can still be taken in the normal way even when the key lock function is activated. Press and hold down the star-key until the key lock icon appears in the display. -
Page 19: Call List / Redial
Call list / Redial 7 Call list / Redial Editing the call list Open the call list. Select an entry. Press the Menu softkey. Select one of the following options and confirm with OK: ADD TO PB The telephone number will be stored in the telephone book. Enter a name, confirm or edit the telephone number and select a ringtone melody for the entry. -
Page 20: Phone Book
Phonebook 8 Phone book ☞ Your phone can store up to 20 private phonebook entries with names and numbers. You can also select different ringtones for your phonebook entries. Always enter the phone numbers with the area code; this enables a correct display of the respective caller for whom there is an existing entry and whose phone number transmission to your connection is available. -
Page 21: Editing Telephone Book Entries
Phonebook Editing telephone book entries Press the phone book key. Select an entry. Press the Menu softkey. Select one of the following options and confirm with OK: You can create a new entry. VIEW The entry is shown. Using the up/down key you switch between name, number and melody. -
Page 22: Setting The Telephone
Setting the telephone 9 Setting the telephone Date/Time Press the Menu softkey. Select HS SETTINGS and press OK. Select DATE & TIME and press OK. Select one of the following options and confirm with OK: DATE FORMAT You can select your desired date format: (DD-MM-YY or MM-DD-YY). - Page 23 Setting the telephone Setting the ringer for the handset Press the Menu softkey. Select HS SETTINGS and press OK. Select RING SETUP and press OK. Select one of the following options and confirm with OK: INT. RING Select a melody for internal calls. EXT.
-
Page 24: Setting The Display
Setting the telephone Setting the handset name Press the Menu softkey. Select HS SETTINGS and press OK. Select RENAME HS and press OK. Delete the old name with , enter a new name using the digit keys and confirm with OK. Setting the display Press the Menu softkey. - Page 25 Setting the telephone Setting the Mailbox number Press the Menu softkey. Select HS SETTINGS and press OK. Select MAILBOX and press OK. Enter the telephone number and press OK. ☞ If your provider offers a voice mailbox, you can enter the phone number here.
-
Page 26: Resetting Your Phone
Setting the telephone Editing the PIN Press the Menu softkey. Select BS SETTINGS and press OK. Select CHANGE PIN and press OK. Enter the relevant PIN (default 0 0 0 0) and press OK. Enter the new PIN and press OK. Enter the new PIN again and press OK. -
Page 27: Registering/De-Registering Handsets
Registering/de-registering handsets 10 Registering/de-registering handsets 5 handsets can be registered to a base station. The handsets delivered with your telephone are already registered. To register a “foreign“ handset please refer to it’s user manual. Registering a handset of the same type Press the Menu softkey. -
Page 28: Pbx / Supplementary Services
PBX / Supplementary Services 11 PBX / Supplementary Services If the telephone is connected to a private branch exchange, functions such as transferring calls and automatic call back can be used via the R button. Refer to the operating manual provided with your private branch exchange as to which Flash time must be set in order to use these functions. -
Page 29: Appendix
Appendix 12 Appendix Menu Structure CALL LIST PHONEBOOK BS SETTINGS DELETE HS DIAL MODE TONE PULSE FLASH TIME SHORT MEDIUM LONG CHANGE PIN HS SETTINGS ALARM OFF/ON / Alarm time RING SETUP INT. RING MELODY 1...10 EXT. RING MELODY 1...10 RING VOLUME OFF, 1…5 TONE SETUP... -
Page 30: In Case Of Problems
In the case of technical problems, contact our Hotline. Please refer to our website www.audioline.de for the telephone number. In the case of claims under the terms of guarantee, contact your sales outlet. There is a 2 year period of guarantee. -
Page 31: Default Settings
Appendix Default settings Call list No entry Phonebook No entry Alarm Ringer handset Internal call: Melody 2 External call: Melody 1 Volume: 3 Tone setup Key tone: On Battery tone: On Out of range: On Language German Handset name SWITCH Handset display Handset name Auto answer... -
Page 32: Technical Data
Appendix Technical data Standard: DECT / GAP Number of channels: 120 duplex channels Frequencies: 1880 MHz to 1900 MHz Duplex mode: Time division multiplex, 10ms frame length Channel spacing: 1728 kHz Bit rate: 1152 kBit / s Modulation: GFSK Voice encoding: 32 kBit / s Transmitter power: 10 mW (average power per channel) Range: up to 300 m outside, up to 50 m inside buildings Electricity supply base station:... -
Page 33: Declaration Of Conformity
Do not use any cleaning agents or solvents. Guarantee AUDIOLINE equipment is produced and tested according to the latest produc- tion methods. The implementation of carefully chosen materials and highly developed technologies ensure trouble-free functioning and a long service life. - Page 34 If your device shows signs of defect during the period of guarantee, please return it to the sales outlet in which you purchased the AUDIOLINE device together with the purchase receipt. All claims under the terms of guarantee in accordance with this agreement can only be asserted at the sales outlet.
- Page 35 Appendix Index Alarm ......20 Guarantee .....31 Alert tones .
- Page 36 Appendix Package contents ....4 PBX ......26 Phone book .
- Page 38 Wichtige Garantiehinweise Die Garantiezeit für Ihr AUDIOLINE-Produkt beginnt mit dem Kaufdatum. Ein Garantie- anspruch besteht bei Mängeln, die auf Material- oder Herstellungsfehler zurückzufüh- ren sind. Der Garantieanspruch erlischt bei Eingriffen durch den Käufer oder durch Dritte. Schäden, die durch unsachgemäße Behandlung oder Bedienung, natürliche Abnutzung, durch falsches Aufstellen oder Aufbewahren, durch unsachgemäßen...
Need help?
Do you have a question about the Switch 20x and is the answer not in the manual?
Questions and answers