Table of Contents
Advertisement
Quick Links
Download this manual
See also:
Quick Start Manual
Advertisement
Table of Contents

Subscribe to Our Youtube Channel
Summary of Contents for Element14 Raspberry Pi
-
Page 1: Quick Start Guide
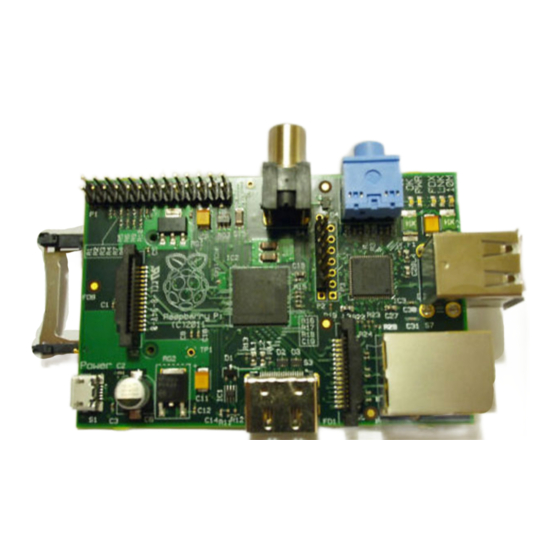
Quick Start Guide The Raspberry Pi – Single Board Computer Source: Raspberry Pi & Wiki... -
Page 2: Chapter 1: Rpi Hardware Basic Setup
As with any normal PC, it is likely you will need some additional hardware. The following are more or less essential: • Raspberry Pi board • Prepared Operating System SD Card • USB keyboard •... -
Page 3: Keyboard And Mouse
3. Plug the video cable into the screen (TV) and into the Pi. 4. Plug your extras into the Pi (USB WiFi, Ethernet cable, hard drive etc.). This is where you may really need a USB Hub. 5. Ensure that your USB Hub (if any) and screen are working. 6. -
Page 4: Power Supply
you will need a cable which adapts from 3.5mm to double (red and white) RCA connectors. Note: There is no VGA output available, so older VGA monitors will require an expensive adaptor. Using an HDMI to DVI-D (digital) adaptor plus a DVI to VGA adaptor will not work. HDMI does not supply the DVI-A (analogue) needed to convert to VGA - converting an HDMI or DVI-D source to VGA (or component) needs an active converter. - Page 5 Internet Connectivity This may be an Ethernet/LAN cable (standard RJ45 connector) or a USB WiFi adaptor. The RPi ethernet port is auto-sensing which means that it may be connected to a router or directly to another computer (without the need for a crossover cable). USB-Hub In order to connect additional devices to the RPi, you may want to obtain a USB Hub, which will allow multiple devices to be used.
-
Page 6: Chapter 2: Rpi Advanced Setup
First interaction with the board Connect the serial cable to the COM port in the Raspberry Pi, and connect the other end to the COM port or USB Serial Adapter in the computer. Serial Parameters The following parameters are needed to connect to the Raspberry. -
Page 7: Sd Card Setup
Windows Users above Windows XP must download putty or a comparable terminal program. Users of XP and below can choose between using putty and Hyperterminal. First Dialog If you get the prompt below, you are connected to the Raspberry Pi shell! prompt> # First command you might want try is "help": prompt>... - Page 8 3. $ ./mkcard.txt /dev/sdx, where x is the letter of the card. You can find this by inserting your card and then running dmesg | tail. You should see the messages about the device being mounted in the log. Mine mounts as sdc. Once run, your card should be formatted.
- Page 9 Now we want to set the geometry to 255 heads, 63 sectors and calculate the number of cylinders required for the particular SD/MMC card: =========================================================================== ===== Expert command (m for help): h Number of heads (1-256, default 4): 255 Expert command (m for help): s Number of sectors (1-63, default 62): 63 Warning: setting sector offset for DOS compatiblity ===========================================================================...
- Page 10 First cylinder (1-245, default 1): (press Enter) Using default value 1 Last cylinder or +size or +sizeM or +sizeK (1-245, default 245): +50 Command (m for help): t Selected partition 1 Hex code (type L to list codes): c Changed system type of partition 1 to c (W95 FAT32 (LBA)) Command (m for help): a Partition number (1-4): 1 ===========================================================================...
- Page 11 WARNING: Re-reading the partition table failed with error 16: Device or resource busy. The kernel still uses the old table. The new table will be used at the next reboot. WARNING: If you have created or modified any DOS 6.x partitions, please see the fdisk manual page for additional information.
- Page 12 You will need your SD card + reader and a Linux pc to use PiCard. After that, just plug the card into your Rpi. Setting up the boot args Wire up your Raspberry Pi and power it up As explained in Chapter 1...
- Page 13 SD Card Cloning/Backup Note: Update these instructions if required once they've been tried From windows you can copy the full SD-Card by using Win32DiskImager. Alternatively, you can use the following instructions; Note: Many built-in SD card readers do not work, so if you have problems use an external SD-USB adapter for this.
- Page 14 • The status of the respective ARM package repositories and their binary compatibility • The possibility to build other software + its dependencies for the R-Pi from sources. For more guides and projects involving the Raspberry Pi, see RPi Projects (http://elinux.org/RPi_Projects).


Need help?
Do you have a question about the Raspberry Pi and is the answer not in the manual?
Questions and answers