Zenith P50W28A Installation And Operating Manual
Hide thumbs
Also See for P50W28A:
- Installation and operating manual (32 pages) ,
- Service manual (36 pages) ,
- Service manual (36 pages)
Table of Contents
Advertisement
Quick Links
Download this manual
See also:
Service Manual
Advertisement
Table of Contents

Related Manuals for Zenith P50W28A


Summary of Contents for Zenith P50W28A
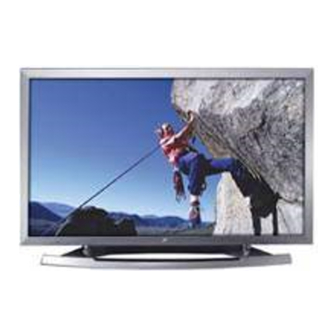
- Page 1 Installation and Operating Guide Model Number | P50W28A | PLASMA DISPLAY PANEL © Copyright 2002, Zenith Electronics Corporation.
-
Page 2: Warnings
CAUTION: Do not attempt to modify this product in any way without written authorization from Zenith Electronics Corporation. Unauthorized modification could void the user’s authority to operate this product. COMPLIANCE: The responsible party for this product’s compliance is:... -
Page 3: Safety Instructions
SAFETY INSTRUCTIONS Important safeguards for you and your new product Your product has been manufactured and tested with your safety in mind. However, improper use can result in potential electrical shock or fire hazards. To avoid defeating the safeguards that have been built into your new product, please read and observe the following safety points when installing and using your new product, and save them for future reference. - Page 4 SAFETY INSTRUCTIONS (Continued from previous page) 15. Lightning c. If the product has been exposed to rain or water. For added protection for this product (receiver) during a lightning d. If the product does not operate normally by following the storm, or when it is left unattended and unused for long periods operating instructions.
-
Page 5: Table Of Contents
Contents Warnings ........2 Screen Menu Options Safety Instructions . -
Page 6: Step 1. Monitor Installation & Setup Controls And Connection Options
Monitor Controls Front Panel Controls ON/OFF VOL. MENU INPUT SELECT INPUT SELECT Button Power Standby Indicator Main Power Button MENU Button Illuminates red in standby mode, Illuminates green when the Remote Control Sensor VOLUME ( ) Buttons Monitor is turned on Buttons Connection Options Back Connection Panel... -
Page 7: External Equipment Connections
External Equipment Connections Monitor External Equipment Connection Panel (MONO) AUDIO AUDIO ( ) L ( ) R AUDIO VIDEO COMPONENT AUDIO RGB1 OUTPUT RGB1 INPUT RGB2 INPUT RS-232C INPUT CONTROL REMOTE AUDIO EXTERNAL SPEAKER (8Ω) AC INPUT S-VIDEO EXTERNAL SPEAKER INPUT INPUT (DVD/DTV INPUT) -
Page 8: External Equipment Viewing Setups
External Equipment Viewing Setups atching VCR Setup atching VCR Setup How to Connect - When connecting the Monitor to external equipment, match the colors of connecting ports (Video - yellow, Audio (L) - white, Audio (R) -red). - Connect the VIDEO INPUT socket (yellow) with the BNC-RCA adapter to the VIDEO INPUT on the Monitor. - If you have a mono VCR, connect the audio cable from the VCR to the AUDIO (L/MONO) input on the Monitor. - Page 9 atching DTV Setup atching DTV Setup - To watch digitally broadcast programs, purchase/connect a digital SET-TOP BOX. - This monitor supports HDCP (High-baudwidth Digital Contents Protection) protocol for DVI DTV (480p,720p,1080i) mode. How to Connect • Connect DTV set-top box video output to monitor COMPONENT (DVD/DTV INPUT) or to the monitor RGB1 (PC/DTV INPUT), RGB2 (PC/DTV input) connector depending on your Set-top Box connectors.
- Page 10 Monitor Display Specifications Monitor Display Specifications RGB1 Mode Horizontal Vertical Horizontal Vertical Resolution Resolution Frequency(KHz) Frequency(Hz) Frequency(KHz) Frequency(Hz) 31.468 70.09 832x624 49.725 74.55 640x350 37.861 85.08 48.363 60.00 31.469 70.08 56.476 70.06 1024x768 720x400 37.927 85.03 60.023 75.02 31.469 59.94 68.677 84.99 35.000...
-
Page 11: Remote Control Key Functions
Remote Control Key Functions - When using the remote control, aim it at the remote control sensor on the Monitor. - Under certain conditions or if the IR code from the remote is interrupted, a particular remote function may not occur. Repeat remote key presses for functions if necessary. -
Page 12: Monitor Installation/Mounting Options
Monitor Installation Options • The Monitor can be installed in different ways such as on a wall, or on a desktop etc. • Install this monitor only in a location where adequate ventilation is available. • It is recommended that this product only be used at an altitude of less than 6561 feet (2000m) to get the best quality picture and sound. -
Page 13: Monitor Accessories
Caution • When installing the monitor vertically, you have to change the OSD display mode so that the menus will appear correctly and also to protect the monitor from overheating (Refer to P. 18). • Install this monitor only in a location where adequate ventilation is available. To Mount on a Wall To Install on a Desktop Wall mount minimum allowable clearances for... -
Page 14: Turning On The Monitor
Turning on the Monitor - When using the remote control, aim it at its sensor on the Monitor. Turning on the Monitor just after installation 1. Connect power cord correctly. 2. Press the ON/OFF button on the Monitor. At this moment, the Monitor is switched to standby mode. -
Page 15: Apc (Auto Picture Control)
Video Setups - Each adjustment doesn’t effect other input sources. As required, re-adjust Video menu options for the following input sources. RGB1 (PC)/RGB2 (PC), RGB1 (DTV)/RGB2 (DTV)/COMPONENT (480p, 720p, 1080i) VIDEO/S-VIDEO/COMPONENT (480i) APC (Auto Picture Control) APC (Auto Picture Control) - This function adjusts the Monitor to the best picture appearance 1. -
Page 16: Dasp (Digital Auto Sound Processing)
Audio Setups DASP (Digital Auto Sound Processing) DASP (Digital Auto Sound Processing) - This function lets you enjoy the best sound without any special adjustment because the Monitor automatically selects the appropriate sound option based on the program content. 1.Use the DASP button to select the appropriate sound setup. FLAT SPORTS CINEMA... -
Page 17: Time Menu Options
Time Menu Options Setting the Clock Setting the Clock - If current time setting is erased by a power failure, if TV is unplugged, or if the monitor has been turned off with the ON/OFF button on the monitor, reset the clock. 1. -
Page 18: Special Menu Options
Special Menu Options Key Lock Key Lock - The monitor can be set up so that it can only be used with the remote control. - This feature can be used to prevent unauthorized viewing. VIDEO LANGUAGE KEY LOCK AUDIO 1. -
Page 19: Screen Menu Options
Screen Menu Options Auto Adjustment Auto Adjustment - RGB1 (PC) mode only; This function doesn’t work in RGB1-Digital broadcast. - Automatically adjusts picture position and minimizes image shaking. 1. Press the MENU button and then use D / E button to select the SCREEN menu. VIDEO AUTO CONFIG. -
Page 20: Screen Position
Screen Position Screen Position - Screen Position is available in the following modes: RGB1-PC, RGB1-DTV (480p,720p,1080i), RGB2-DTV (480p,720p,1080i), COMPONENT (480p,720p,1080i). 1. Press the MENU button and then use button to select the SCREEN menu. D / E VIDEO AUTO CONFIG. AUDIO 2. -
Page 21: Pip (Picture-In-Picture) Feature
PIP (Picture-in-Picture) Feature - PIP lets you view 2 different inputs (picture sources) on your monitor screen at the same time. One source will be large, and the other source will show a smaller inset image. - When you select PC or DTV for main picture in PIP, you can watch VIDEO, S-VIDEO or COMPONENT 480i for sub picture. atching PIP atching PIP Size... -
Page 22: Main Picture Size Adjustment
Twin Picture Main Picture Size Adjustment Main Picture Size Adjustment Use the TWIN PICTURE button. • Each press of the TWIN PICTURE button cycles through the screen displays shown below. DW 1 DW 2 Sub Picture Size Sub Picture Size Adjustment Adjustment Selecting a Source for the... -
Page 23: External Control Device Setup
External Control Device Setup - Connect the RS-232C input jack to an external control device (such as a computer or an A/V control system) and control the Monitor’s functions externally. - Connect the serial port of the control device to the RS-232C jack on the Monitor back panel. - RS-232C connection cables are not supplied with the Monitor. - Page 24 OK Acknowledgement Command Reference List Command Reference List [Command2][ ][Set ID][ ][OK][Data][x] COMMAND 1 COMMAND 2 DATA • (Hexadecimal) The Monitor transmits ACK (acknowledgement) based on this format when receiving normal data. At this time, if the 01. Power 0 ~ 1 data is data read mode, it indicates present status data.
- Page 25 03. Aspect Ratio (Command:c) (Main picture format) 07. Contrast (Command:g) G To adjust screen contrast. G To adjust the screen format. You can also adjust contrast in the Video menu. You can also adjust the screen format using the ARC (Aspect Ratio Control) button on remote control or in the Transmission Special menu.
- Page 26 Acknowledgement 11. Sharpness (Command:k) [o][ ][Set ID][ ][OK][Data][x] G To adjust the screen sharpness. Data 0 : 4:3 1: 16:9 You can also adjust sharpness in the Video menu. 16. PIP Position (Command:q) Transmission G To select sub picture position for PIP. [k][k][ ][Set ID][ ][Data][Cr] You can also adjust the sub picture position using Data Min: 0 ~ Max: 64...
- Page 27 20. Color Temperature (Command:u) 25. Orbiter (Command:p) G To adjust color temperature. G To control the orbiter function on/off. You can also adjust ACC in the Video menu. Transmission Transmission [j][p][ ][Set ID][ ][Data][Cr] [k][u][ ][Set ID][ ][Data][Cr] Data 0: Orbiter off Data 0: Normal 1: Cool 2: Warm...
-
Page 28: Ir Code (Nec Format)
IR Code (NEC Format) How to Connect How to Connect G Connect your wired remote control to the Remote port on the Monitor. Set the CONTROL LOCK to ‘ON’ on the Monitor back panel to operate Monitor with wired remote control. Remote Control IR Code (NEC Format) Remote Control IR Code (NEC Format) G Output waveform... - Page 29 Code (Hexa) Function Note UP ( R/C Button DOWN ( R/C Button VOL+ ( R/C Button VOL- ( R/C Button POWER On/Off R/C Button (Power On/Off) POWER ON Discrete IR Code (Only Power On) POWER OFF Discrete IR Code (Only Power Off) MUTE R/C Button Number Key 0...
-
Page 30: Troubleshooting Checklist
Troubleshooting Checklist • Check whether the Monitor is turned on. No picture & • Power cord inserted into wall outlet? No sound • Plug another product’s power cord into the wall outlet where the Monitor’s power cord was plugged in. •... -
Page 31: Maintenance
If you leave your Monitor dormant for a long time (such as a vacation), it’s a good idea to unplug the power cord to protect against possible damage from lightning or power surges. Product Specifications MODEL P50W28A Width (inches / mm) 48.2 / 1223 Height (inches / mm) 28.9 / 734... - Page 32 P/N : 3828VA0352L (RF02KE) 206-3838...
Need help?
Do you have a question about the P50W28A and is the answer not in the manual?
Questions and answers