Table of Contents
Advertisement
Includes
and SERIES II Electronics
Included Wall Control MUST be installed prior to operation of this Garage
Door Operator
Safe-T-Beam
®
Safety Reverse System Must be installed to close door
NOTE: Your Residential Operator comes with a Boom Assembly
which is standard for up to a 7 foot 6 inch high door. An exten-
sion kit for an 8 foot high door is available.
For Answers and Assistance:
1.800.929.3667
or visit www.overheaddoor.com
SAVE THIS MANUAL FOR FUTURE REFERENCE
3511135556
Remote Control
Advertisement
Table of Contents

Related Manuals for Overhead door Signature Screw Drive


Summary of Contents for Overhead door Signature Screw Drive
-
Page 1: Remote Control
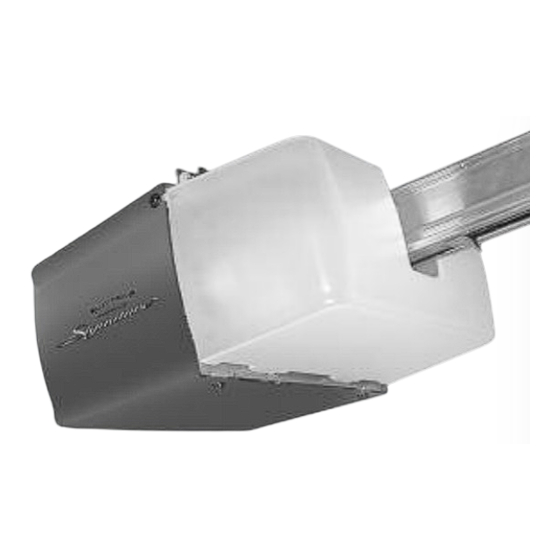
3511135556 Includes Remote Control and SERIES II Electronics Included Wall Control MUST be installed prior to operation of this Garage Door Operator Safe-T-Beam ® Safety Reverse System Must be installed to close door NOTE: Your Residential Operator comes with a Boom Assembly which is standard for up to a 7 foot 6 inch high door. - Page 2 NOTES / NAMES / NUMBERS...
- Page 3 NOTES / NAMES / NUMBERS...
-
Page 4: Pre-Installation Check List
The Overhead Door Corporation recommends that you read and fully understand all information and instructions contained herein before choosing a “ do-it-yourself ” installation. Any questions should be directed to the Overhead Door Corporation or an authorized Overhead Door Dealer. - Page 5 TYPICAL SECTIONAL DOOR INSTALLATION ADDED TYPICAL HEADER BRACKET SUPPORT MOUNTING BOARD BRACKET BRACES 36” POWER CORD 120V GROUNDED OUTLET EXTENSION SPRING TORSION SPRING SAFE-T-BEAM ® TYPICAL (TRACK GUIDED) 1-PIECE DOOR INSTALLATION 1-PIECE DOOR SECTIONAL DOOR...
-
Page 6: Table Of Contents
TABLE OF CONTENTS TOOLS RECOMMENDED SECTION PAGE PRE-INSTALLATION CHECK LIST ....4-5 TOOLS REQUIRED ......6 Carpenter’s level SAFETY FEATURES. -
Page 7: Operational Features
POWER HEAD EXPLODED VIEW FOR HELP-1.800.929.3667 OR OVERHEADDOOR.COM [ 1 ] Power Head Assembly POWER HEAD PARTS LIST Item Part Name Item Part Name Terminal Strip Power Head Assembly Cover (By Series/Model) No. 8-32 x 1/2" Hex Washer Head Screw No. - Page 8 1-PIECE BOOM HARDWARE EXPLODED VIEW FOR HELP-1.800.929.3667 OR OVERHEADDOOR.COM [ 2 ] 1-Piece Boom & Screw Assembly ® NOTE: The operator will not function properly unless the Safe-T-Beam sensors are installed and the force controls adjusted. PARTS LIST Parts Required Item Part Name Straight Door Arm Clevis Pin...
- Page 9 PARTS IDENTIFICATION FOR HELP-1.800.929.3667 OR OVERHEADDOOR.COM remotes vary by model NUSTBSENDSENS-1 NOTE: Accessories vary by model. FASTENERS - Shown full size. See Parts List for description. Cotter pin #8 x3/8" Hex flange head screw 1/4" Shoulder bolt w/flange 1/4" Flange nut #8 x 3/8"...
-
Page 10: Safety Information
SAFETY INFORMATION PRE-INSTALLATION WARNING OVERVIEW OF IMPORTANT POTENTIAL HAZARDS INSTALLATION Garage doors are large, heavy objects that move with the help of springs under high tension and electric motors. Since moving objects, springs under tension, and electric motors can cause injuries, your safety and the safety INSTRUCTIONS of others depend on you reading the information in this manual. - Page 11 SECT 1—MAIN ASSEMBLY FOR HELP-1.800.929.3667 OR OVERHEADDOOR.COM OPEN BLUE PARTS BAG coupler NOTE: 3-piece boom assembly is for doors up to and including 7 feet 6 inches high. An exten- sion for 8 feet doors is available. 1. Set power head so that front panel (with end serial no.
-
Page 12: Main Assembly
MAIN ASSEMBLY FOR HELP-1.800.929.3667 OR OVERHEADDOOR.COM NOTE: If installing an extension kit for an carriage stop 8 feet high door, refer to the instructions included with the extension kit now. 6. Flip power head/boom assembly over (upside down), so that entire length of screw USES BUMPER is visible from above. - Page 13 MAIN ASSEMBLY FOR HELP-1.800.929.3667 OR OVERHEADDOOR.COM release OPEN GREEN PARTS BAG knob Screws for attaching light cover are included in this bag. Please set aside for use later. 12. Attach emergency release knob, cord cord and tag. Fig. 1-8 • Tie an overhand knot in one end of emergency release cord [17].
- Page 14 SECT 2—INSTALLATION FOR HELP-1.800.929.3667 OR OVERHEADDOOR.COM NOTE: There are differences in installations TYPICAL TRACKLESS depending on which type of door you have. CENTERLINE These differences are explained throughout this section. Please note those steps which are applicable to your particular door. garage door REFER TO PAGES 2 &...
-
Page 15: Installation
INSTALLATION FOR HELP-1.800.929.3667 OR OVERHEADDOOR.COM 2. Finding highest point of travel. TRACK GUIDED • While raising garage door manually, watch top edge of door to see where it reaches its highest point. This is called “highest point of Highest point of travel. travel.”... - Page 16 INSTALLATION FOR HELP-1.800.929.3667 OR OVERHEADDOOR.COM NOTE: If torsion spring interferes with your wooden plate fastened to wall studs ceiling final location, mark bracket location 2-1/2" or 6" above torsion spring depending on garage header door type. wall studs 4. Check mounting location for strength. Header bracket must be attached to garage door opening framework of garage.
- Page 17 INSTALLATION FOR HELP-1.800.929.3667 OR OVERHEADDOOR.COM 7. Attaching boom to header bracket. 5/16" • Gently set power head on garage floor while FLANGE leaning boom strap against header bracket. (It is recommended that you place a piece of cardboard or similar material between power head and floor to prevent scrapes and scratches to power head.) NOTE: It may be necessary to support power...
- Page 18 INSTALLATION FOR HELP-1.800.929.3667 OR OVERHEADDOOR.COM 8. Mounting power head. • Raise power head and support it high enough that you can manually raise garage door fully open. • Line up power head and boom with center of door. Fig. 2-9. •...
- Page 19 LIGHT-WEIGHT SECTIONAL use of these attachment systems could void your warranty. Fig. 2-12B WHEREVER POSSIBLE—USE DOOR BRACKET SUPPLIED WITH YOUR OVERHEAD DOOR OPERATOR. a. Fasten door bracket using 3 self-drilling screws [47]. even with or above top roller Fig. 2-13...
- Page 20 INSTALLATION FOR HELP-1.800.929.3667 OR OVERHEADDOOR.COM OPEN YELLOW PARTS BAG SECTIONAL DOOR 10. Attach door arms [23] and [26]. • For sectional doors. must be – Connect short leg of curved arm to some angle door bracket. Fig. 2-14. off vertical. –...
- Page 21 SECT 3—SAFE-T-BEAM ® INSTALLATION FOR HELP-1.800.929.3667 WARNING There should be no electrical power to the operator while installing Safe-T-Beam System ® wires. If you have plugged in the power cord–UNPLUG IT NOW. NOTE: Operator will not close door automatically unless the Safe-T-Beam ® System is installed. 1.
-
Page 22: Safe-T-Beam
® SAFE-T-BEAM INSTALLATION FOR HELP- OVERHEADDOOR.COM CAUTION Staples which are too tight can cut or pinch wires. Cut or pinched wires can cause the STB System to stop working. When using the ≈ 1/2" insulated staples, make sure you fasten them only as tightly as needed to hold the wire snug- ≈1-1/4"... - Page 23 SECT 4—WALL CONTROL INSTALLATION FOR HELP- 1.800.929.3667 WARNING Power must be removed before attaching wires. Be sure ends do not touch each other or other terminals. CAUTION • Use of any other wall control can cause the door to operate unexpectedly and the light not to work.
-
Page 24: Wall Control
WALL CONTROL OPERATIONAL FEATURES FOR HELP- OVERHEADDOOR.COM 1. Wall console. Fig. 4-5. A. Vacation locking switch. – Lock disable all controls after door closes.. – Unlock allows all controls to work normally. NOTE: Carriage must stay in contact with “CLOSE” limit switch in order for the vacation locking switch to work. -
Page 25: Connecting Power
SECT 6—CONNECTING POWER FOR HELP-1.800.929.3667 OR OVERHEADDOOR.COM WITH GROUNDED PLUG: WARNING To reduce the risk of electrical shock, this equipment has a grounded type plug that includes a third (grounding) pin. This plug will only fit a grounded type outlet. If you do not have a grounded outlet, contact a quali- fied electrician to install one. -
Page 26: Settings
SECT 7—SETTINGS (FORCE & LIMITS) FOR HELP-1.800.929.3667 OR OVERHEADDOOR.COM CAUTION Door opens rapidly lever • Keep clear of door and its path. (actuator arm) • Keep ladder to side of power head to fully lifted SLIDE prevent being hit by moving parts. SWITCH Be sure and set force adjustments at minimum CARRIAGE... -
Page 27: Settings
SETTINGS (CONTACT REVERSE) FOR HELP-1.800.929.3667 OR OVERHEADDOOR.COM Limit switch adjustments must be completed before running contact reverse test. 1. Test contact reverse. • Open door using wall control. • Lay 2" x 4" board on floor in center of garage door opening. -
Page 28: Programming Remote Controls
SECT 9—PROGRAMMING REMOTE CONTROLS FOR HELP-OVERHEADDOOR.COM PROGRAMMING REMOTE CONTROLS Learn Button NOTE: Each remote device must be programmed separately WARNING Moving door can cause serious injury or death. Learn Indicator • Keep people clear of opening while door is moving. •... -
Page 29: Transmitter Compliance Statement
IMPORTANT TRANSMITTER SAFETY COMPLIANCE STATEMENT INSTRUCTIONS WARNING To reduce the risk of Transmitters comply with all United States and Canadian legal requirements as of the date of manufacture. No warranty is made that they comply with all legal requirements of any other severe injury or death: jurisdiction. - Page 30 SECT 10—MAINTENANCE & TROUBLESHOOTING MONTHLY MAINTENANCE MAINTENANCE CHECK-OFF Door springs and hardware. YEAR • Oil door rollers, bearings, and hinges. 3 4 5 6 7 8 9 10 11 12 13 14 15 16 17 18 19 20 – Use silicone lubricant or light oil. NOTE: Do not operate door automatically or manually if MONTH springs are broken.
-
Page 31: Maintenance & Troubleshooting
MAINTENANCE & TROUBLESHOOTING Use this guide to correct problems with your door operator. If these solutions do not work, call Customer Service. CAUTION Use only with included SERIES II wall control Use of any other wall control can cause the door to operate unexpectedly and the light not to work. -
Page 32: Wiring Diagram
SECT 11—WIRING DIAGRAM FOR HELP-1.800.929.3667 OR OVERHEADDOOR.COM CAUTION Opening cover could cause electrical shock. Remove power from operator prior to removing cover. ELECTRICAL SHOCK PRIMARY POWER CORD CLOSE SEQUENCER OPEN WHITE WHITE WHITE GREEN BLACK THERMAL PROTECTOR LIGHTS BLACK MOTOR BLUE BLUE TRANSFORMER... -
Page 33: Warranty
ODC or one of its authorized distributors within the applicable warranty period. Either the original seller may be contacted or the nearest Overhead Door Distributor may be contacted by calling 1-800-929-DOOR. (Proof of pur- chase and identification as the original purchaser may be required.) - Page 34 2-Button Remote Control with CodeDodger ® Universal Conversion Kit 3-Button Remote Control ® with CodeDodger 60 WATT Light Bulb 3-Button Mini Remote Control ® withCodeDodger Emergency Release Kit OverHead Door Corp 22790 Lake Park Blvd. Alliance, Ohio 44601 Call: 1.800.929.3667 Web: www.overheaddoor.com...
- Page 35 NOTES / NAMES / NUMBERS...
- Page 36 For Answers and Assistance: 1.800.929.3667 or visit www.overheaddoor.com SAVE THIS MANUAL FOR FUTURE REFERENCE...