Table of Contents
Advertisement
Serial Number Decal
BELT/CHAIN DRIVE GARAGE DOOR OPENER MODELS
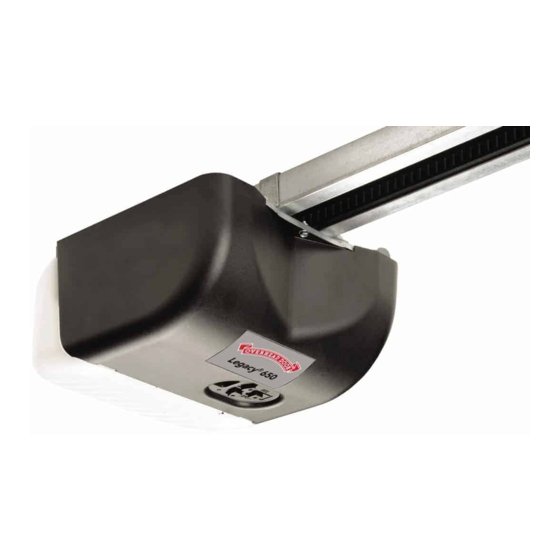
Legacy® 650, Model 1029
Legacy® 850, Model 2029
PROGRAMMING, OPERATION & MAINTENANCE MANUAL
Includes CodeDodger® Remote Control.
The Included Safe-T-Beam® system MUST be installed to close the door.
For use with residential sectional overhead garage doors ONLY.
Homelink® and Car2U® compatible
STOP
To reduce the risk of injury to persons or damage to property, use this opener only with a sectional residential door.
Por reduire le risque de blessures ou de dommages materials, utillsez cet ouvre-porte uniquement pour une porte
a section re sidentielie.
INSTALLER: LEAVE THIS MANUAL WITH HOMEOWNER
HOMEOWNER: SAVE THIS MANUAL FOR FUTURE REFERENCE
Alternate language manuals available at:
Idioma alternativo manuales disponibles en:
Autre langue manuels disponibles à:
www.OverheadDoor.com
©2017 Overhead Door Corporation, the Ribbon Logo, CodeDodger, Legacy and Safe-T-Beam®, are trademarks of Overhead Door Corporation.
All other trademarks are property of their rightful owners. Consistent with our policy of continuing product improvements, we reserve the
right to change product specifications without prior notice or obligations. HomeLink is a registered trademark of Gentex Corporation. Car2U is
a registered trademark of Lear Corporation.
Need help or have questions?
For answers and assistance,
visit www.OverheadDoor.com
or call Customer Service at: 1-800-929-3667
WARNING
!
AVERTISSEMENT
!
DO NOT use other brands or types.
38485503493
Advertisement
Table of Contents
Troubleshooting

Related Manuals for Overhead door legacy 650


Summary of Contents for Overhead door legacy 650
- Page 1 Autre langue manuels disponibles à: www.OverheadDoor.com ©2017 Overhead Door Corporation, the Ribbon Logo, CodeDodger, Legacy and Safe-T-Beam®, are trademarks of Overhead Door Corporation. All other trademarks are property of their rightful owners. Consistent with our policy of continuing product improvements, we reserve the right to change product specifications without prior notice or obligations.
-
Page 2: Table Of Contents
FCC Part 15.21 Statement: INDEX Changes or modifications not expressly approved by the party responsible for Safety Information compliance could void the user’s authority to Safety Notifications ..........4 operate the equipment. Important Safety Instructions ......5 FCC / IC Statement: Features This device complies with FCC Part 15 and Industry Canada licence-exempt RSS... - Page 3 Before setting up your new garage door opener, please locate and record the model plate on the opener. This information will be necessary should you seek technical support via our website, customer support department or local servicing Overhead Door® distributor. Model Number...
-
Page 4: Safety Notifications
SAFETY NOTIFICATIONS & INSTRUCTIONS OVERVIEW OF POTENTIAL HAZARDS READ THIS SAFETY INFORMATION Garage doors are large, heavy objects that move with the help of springs under high tension and electric motors. Since moving objects, springs under tension, and electric motors can cause injuries, your safety and the safety of others depend on you reading the information in this manual. If you have questions or do not understand the information presented, call your nearest trained door system technician or visit our website at www.OverheadDoor.com. -
Page 5: Important Installation Instructions
MORTELLES LIRE ET SUIVRE ATTENTIVEMENT TOUTES LES INSTRUCTIONS D’INSTALLATION ET DE FONCTIONNEMENT AINSI QUE TOUTES LES CONSIGNES DE SÉCURITÉ. Si vous avez des questions ou si vous ne comprenez pas une instruction, veuillez contacter directement Overhead Door. • NE PAS installer l’opérateur sur une porte mal équilibrée. Celle-ci pourrait entraîner de graves blessures. Les réparations et les réglages des câbles, ensembles de ressort ou tout autre article de quincaillerie doivent être effectués par un pro-... -
Page 6: Safety Features
SAFETY & STANDARD FEATURES Safe-T-Beam® (STB) Non-Contact Safe-T-Beam® (STB) FUNCTION Reversing System 1. The Safe-T-Beam® has no effect on the door during an opening cycle. Puts an invisible beam across the door opening. The 2. If the Safe-T-Beam® detects an obstruction when trying to close the door stops and reverses to the full open position if door, it will not allow the door to close. -
Page 7: Introduction
OPENER PROGRAMMING NOTE: Before programming the opener, check to make sure there are no objects in the garage door opening. INTRODUCTION Now that the garage door opener is installed, follow the steps in this manual to program the opener so that the door opens and closes properly and all remote devices operate correctly. - Page 8 PROGRAMMING DOWN TRAVEL LIMIT WARNING • Make sure doorway is in full view and clear of obstacles and people to avoid injury or property damage. • DO NOT operate this unit from the wall control before LIMITS are set. Severe damage to the opener could occur. •...
- Page 9 PROGRAMMING UP TRAVEL LIMIT Programming UP Limit: 1-2. Enter Programming Mode 1. Press and hold the UP arrow button. HOLD UNTIL • Long LED will light BLUE. 2. Release UP arrow button. PRGM PRGM PRGM • Round LED will flash BLUE. Lights Steady Blue –...
-
Page 10: Force Control
PROGRAMMING FORCE AND CONTACT REVERSE Force Control Contact Reverse Test NOTE: The limit and Force settings MUST BE COMPLETED The force controls are automatically set when the wall control before performing the Contact Reverse Test. is used for the first time with garage door opener. The door MUST complete one full cycle, from full open to full close 1. - Page 11 PROGRAMMING ADDITIONAL REMOTE CONTROLS 1. Activate Remote THE REMOTE CONTROLS INCLUDED WITH THIS OPENER HAVE BEEN PROGRAMMED AT THE FACTORY FOR YOUR CONVENIENCE. NOTE: The following instructions are for remote control transmitters purchased separately in addition to those provided with this opener, but can also be used if any remote(s) may require re-programming.
-
Page 12: Important Safety Instructions
IMPORTANT SAFETY INSTRUCTIONS WARNING To reduce the risk of severe injury or death, read and follow all instructions. NEVER let children operate or play with the door controls. Keep remote away from children. ALWAYS keep the moving door in sight and away from people and objects until door is completely closed. NO ONE SHOULD CROSS THE PATH OF THE MOVING DOOR. -
Page 13: Regular Maintenance
MAINTENANCE & ADJUSTMENTS WARNING AVERTISSEMENT L’utilisation d’une autre commande murale pourrait produire des résultats inattendus de la Use of any other wall control can cause unexpected operation of the door and loss of lighting feature. Locate wall console within sight of the door but porte ainsi que le dysfonctionnement de l’éclairage. -
Page 14: Light Bulb Replacement
Visit www.OverheadDoor.com for more information and recommendations for LED bulbs. * Overhead Door LED light bulbs are designed to reduce or eliminate reduced remote range issues caused by common LED bulbs. They also offer better product life by making them resistant to vibration caused by the opener, and cold or damp weather. -
Page 15: Adjustment Guides
MAINTENANCE & ADJUSTMENTS G. Adjustment Guides WARNING AVERTISSEMENT TO AVOID INJURY OR DAMAGE Pour éviter les blessures ou des dommages • NE JAMAIS régler la force pour compenser des dommages, • NEVER adjust the force settings to adjust for damage, y compris une porte mal équilibrée, un rail de porte coinçant including an unbalanced door, binding door track or ou des ressorts cassés. -
Page 16: Locating Safe-T-Beam® Pairs
MAINTENANCE & ADJUSTMENTS Multiple Garage Doors LOCATING SAFE-T-BEAM® PAIRS • NEVER position Safe-T-Beam® modules where signals will cross. Transmitter (RED LED) and Receiver (GREEN LED) • Place the Transmitter (Red LED) Safe-T-Beams on adjacent doors facing in opposite directions. NOTE: Direct sunlight creates interference with Safe-T-Beam ® Receiver (Green LED). STB modules CAN be positioned further away from the door opening if necessary to avoid sunlight but no further off the wall to maintain alignment with the Transmitter (Red LED) module. -
Page 17: Troubleshooting
TROUBLESHOOTING Need help or have questions? Call Overhead Door at 1-800-929-3667 STOP or visit: www.OverheadDoor.com PROBLEM: WHAT TO DO: Opener does NOT • Turn Sure-Lock™ OFF See page 6. • Check power source. operate when wall – Plug a lamp into outlet used for powerhead. If lamp works, power source is OK. -
Page 18: Troubleshooting
TROUBLESHOOTING POWERHEAD LEDS Powerhead LED Solution Possible Problem Round LED Long LED Normal operation. None required. Check power supply. No response from unit. Contact a trained door system professional. ON/RED/ ON/RED/ Limits NOT set properly. Re-program limits, see pages 8-9. STEADY STEADY Program error. -
Page 19: Optional Programming & Accessories
OPTIONAL PROGRAMMING & ACCESSORIES CLEARING MEMORY OF REMOTES 2. Press and Hold + & - Buttons NOTE: Clearing memory of remotes from the powerhead Flashing will clear ALL programmed remotes, wireless keypads and Blue vehicle transmitters. The opener will no longer recognize any signal from any remote device, including a missing PRGM PRGM... - Page 20 C. Release the button being held in step B and wait for the LED to stop flashing. This button is now set for Overhead Door. Repeat Step 2 for C. Press the HomeLink button a few more times until door moves.
- Page 21 WIRELESS KEYPAD PROGRAMMING Tip: Program Keypad before mounting. STEP 2B) PROGRAMMING THE KEYPAD FOR MULTIPLE OPENERS (UP TO 3) Keypad Overview: Program the keypad with a Personal Identification Number (PIN) as described in step 1. Then follow these additional steps. 1.
- Page 22 WIRELESS KEYPAD PROGRAMMING STEP 3) OPERATING THE KEYPAD WITH THE OPENER(S) REPLACING BATTERIES Single Door Operation: If the keypad back-lighting fails to operate, Batteries may 1. Ensure number pad back lighting is off. require replacement. 2. Enter PIN number. • Programming will not be lost during battery change.
- Page 23 THIS PAGE INTENTIONALLY BLANK...
-
Page 24: Part
RAIL PARTS Safe-T-Beam® Set Safe- T- Beam ® sensor Safe- T- Beam ® source 1/4" x 1-1/4" Lag screw (x4) Item Description QTY. Carriage Release Handle Head To Rail Bracket (2 for Chain, 1 for Belt) Curved Door Arm Head To Rail Bracket Belt Guard (Belt only) Installation Parts Pack (Blue Bag) Tensioner Assembly Mounting Parts Pack (Orange Bag) - Page 25 POWERHEAD Item # Description QTY. Powerhead Cover, 1029/1029H Powerhead Cover, 2029/2029H Light Lens Cover Motor Assembly Light Socket Assembly Transformer, 120V Circuit Board Assembly (1029/1029H) Circuit Board Assembly (2029/2029H) Power Cord Assembly Power Cord Assembly (1029H/2029H) Screws, M6-1x12 (3pk) Screws, # 8x5/16 (3pk) Optical Dual Encoder Assembly Replacement Kit NOTE: The following kits will include all necessary harnesses, and/or hardware required for reassembly and detailed assembly instructions.
-
Page 26: Dasma Information
DASMA INFORMATION IMPORTANT Garage Door Openers Are Not Toys INFORMATION Automatic Garage Door Opener Garage Door Safety and Maintenance Guide Do not stand or walk under a moving door! Do not let children or adults play “beat the door. ” It is dangerous and can result in serious injury or death. -
Page 27: Part.
Teach children to keep their hands and fingers clear of section joints, hinges, track, springs and other door parts. Contact with a moving door or its hardware could cause serious injury. The pushbutton wall control should These injuries can also happen be out of the reach of children (at with garage doors that don’t have least 5 feet from the floor) and away... - Page 28 Make sure the additional safety devices, such as photo eyes or edge sensors, are properly installed and adjusted (see owner’s manual). Testing and Maintaining The Garage Door Perform routine maintenance steps once a month. Review your owner’s manual for the garage door. If you don’t have a manual, look for the model number on the back of the door, or check the lock handle, hinges or other hardware for the manufacturer’s name...
- Page 29 Lubrication Regularly lubricate the moving parts of the door. However, do not lubricate plastic parts such as plastic rollers and plastic idler bearing. Consult the door owner’s manual for the manufacturer’s recommendation. Balance Position 3 to 4 Feet Door Balance Periodically test the balance of your door.
- Page 30 THIS PAGE INTENTIONALLY BLANK...
-
Page 31: Warranty
EXPIRED. Some states do not allow limitations on how long an implied warranty lasts, so the above limitation may not apply to you. IN NO EVENT SHALL OVERHEAD DOOR CORPORATION OR ITS PARENT OR AFFILIATES BE RESPONSIBLE FOR, OR LIABLE TO ANYONE FOR, SPECIAL, INDIRECT, COLLATERAL, PUNITIVE, INCIDENTAL OR CONSEQUENTIAL DAMAGES, even if Overhead Door Corporation has been advised of the possibility of such damages. - Page 32 Overhead Door Corporation 1-800-929-3667 www.OverheadDoor.com...