Sign In
Upload
Manuals
Brands
Zeiss Manuals
Medical Equipment
opmi lumera 700
Zeiss opmi lumera 700 Manuals
Manuals and User Guides for Zeiss opmi lumera 700. We have
4
Zeiss opmi lumera 700 manuals available for free PDF download: User Manual, Instructions For Use Manual, Basic Instructions
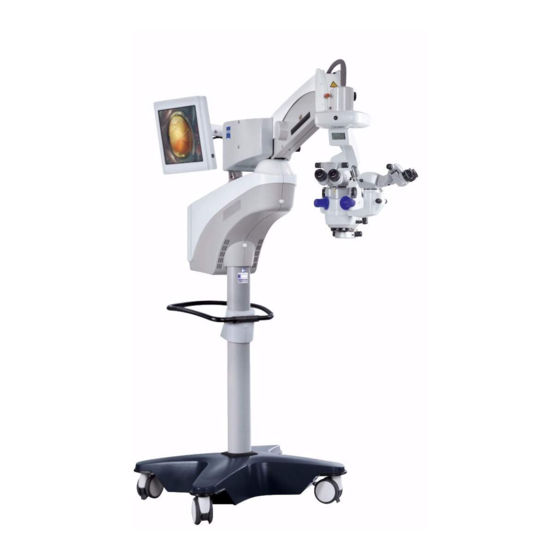
Zeiss opmi lumera 700 Instructions For Use Manual (236 pages)
Surgical Microscope, Software Release 3.1
Brand:
Zeiss
| Category:
Microscope
| Size: 10.12 MB
Table of Contents
Table of Contents
3
1 Notes on Instructions for Use
11
Device Name
11
Area of Application
11
Purpose and Storage of the Documentation
11
Questions and Comments
11
Conventions in this Document
11
Conventions in All Text Areas
11
Conventions in a Course of Action
12
Other Applicable Documents
13
2 Safety Notes
15
Target Group
15
Area of Use
15
Intended Use
15
Normal Use
15
Responsibilities and Duties of the Operator
16
Messages to Manufacturer and Authorities
17
Measures and Duties of the Operator
18
Electromagnetic Compatibility
19
Requirements for Operation
19
Before Commissioning for the First Time
19
Before Every Use
20
During Operation
22
After Every Use
23
Measures to Prevent Phototoxic Injury
24
Illumination Characteristics (Spectral Composition)
24
Illumination Intensity
24
Angle of Illumination
25
Focus of the Light Source
25
Exposure Time to Light
25
Maximum Radiation Exposure
27
Maximum Radiation Exposure Times with Red Reflex Illumination
27
Maximum Radiation Exposure Times with Surrounding Field Illumination
28
Maximum Radiation Exposure Times with Integrated Slit Illuminator
28
References
28
3 Description of the Device
31
Device Marking
31
Device Setup
35
CALLISTO Eye Panel PC
36
Support Arm for CALLISTO Eye Panel PC
36
Lamp Housing
37
Suspension Arm
39
XY Coupling
39
Overhead Display
40
Surgical Microscope
40
Assistant's Microscope
42
14-Function Foot Control Panel
43
Stand Base
43
Stand Column
44
Support Arm with Connector Panel
44
Integrated 22" Monitor
45
Support Arm for Integrated 22" Monitor
45
Instrument Tray
46
Integrated Keratoscope Ring
46
Connections on the Surgical Microscope
47
Connections on the Assistant's Microscope
47
Connector Panel
48
Connector Panel for the Integrated HD Camera
48
CALLISTO Eye Panel PC Connector Panel (Model I)
49
CALLISTO Eye Panel PC Connector Panel (Model II)
49
Control Elements and Displays
50
Superlux Eye Light Source Fault Signal
50
Halogen Light Source Fault Signal
51
LED Light Source Fault Signal
51
Manual Mode Fault Signal
52
Overhead Display
53
Surgical Microscope
54
Assistant's Microscope
55
Invertertube E
56
Widefield Eyepiece
57
Handgrips
57
14-Function Foot Control Panel
58
XY Coupling
59
Suspension Arm
60
Control Panel
61
CALLISTO Eye Panel PC (Model I)
62
CALLISTO Eye Panel PC (Model II)
63
Superlux Eye Light Source
64
Halogen Light Source
64
Software Description
65
Structure of the Operating Panel
65
Bottom Bar
65
Status Bar
66
Color Code
67
Interactive Buttons
67
Navigation Buttons
69
Control Panel Keyboard
70
Settings for Daily Operation - Main Menu, Tab 1
71
Basic Device Settings - Main Menu, Tab 2
72
Factory Settings for Handgrips and 14-Function Foot Control Panel
73
Configurable Assignments for Handgrips and the 14-Function Foot Control Panel
76
Functional Description
79
Operating Concept
79
SCI Illumination
81
Main and Auxiliary Light Source
81
Total Magnification
82
Fast Focus
82
RESIGHT Functions
83
Deepview
83
Reset Options
83
Links
84
Manual Mode
84
Assistant's Microscope
85
IDIS (Integrated Data Injection System)
85
Integrated Slit Illumination
86
Integrated HD Camera
86
Integrated HD Video and Image Recording
87
4 Installation
89
Safety During Installation
89
Preparing the Installation
90
Requirements for Connecting the Device to an IT Network
90
Connections
92
Connecting the Power Supply
92
Connecting the 14-Function Foot Control Panel
93
Setting up a Network Connection with the CALLISTO Eye Panel PC
94
Setting up a Network Connection with Integrated CALLISTO Eye Panel PC
98
Connecting IDIS Via CALLISTO Eye Panel PC
100
Connecting External Video Devices
102
Connecting the Strain Relief
104
5 Daily Startup
105
Outfitting the Surgical and Assistant's Microscopes with Accessories
105
Replacing Accessories and Components
105
Connecting the Invertertube E
108
Connecting RESIGHT 700
110
Connecting Auxiliary Illumination
110
Balancing the System
111
Adjusting the Surgical and Assistant's Microscopes
113
Adjusting the Downward Travel Limit
113
Adjusting Friction
114
Positioning the Assistant's Microscope
114
Adjusting Microscope Tilt
115
Adjusting the Tubes and Eyepieces
116
Adjusting the Working Distance and Magnification
117
Positioning the Device in the or
118
Moving the Device
118
Swiveling the Device over the Surgical Field
119
Placing the Device in the Working Position
120
Orienting the Integrated CALLISTO Eye Panel PC
121
Orienting the Integrated 22" Monitor
122
6 Before Every Use
123
Safety During Preparation
123
Switching the Device on
124
Function Test
125
Device Function Tests
125
Function Tests for Device with Fundus Viewing System
126
Preparing the System for Sterile Use
127
Attaching Sterile Accessories
127
Placing the Drape
129
7 Operation
131
Safety During Operation
131
Configuring User and Surgery Profiles
132
Creating and Activating Users
132
Changing the User Language
133
Deleting Users
133
Creating a "Cataract" Surgery Profile
133
Creating a "Retina RESIGHT" Surgery Profile
134
Creating a "Retina Contact" Surgery Profile
135
Assigning the RESIGHT Function to the Surgery Profile
136
Configuring Working Steps
137
Deleting a Surgery Profile
138
Device-Specific Software Configuration
138
Setting the Date and Time
138
Configuring Optics
139
Pairing
140
Configuring the Video Signal of the Integrated HD Camera
141
Configuring the Network Connection with CALLISTO Eye
142
Configuring Integrated HD Video and Image Recording
144
Configuring the Software for Specific Users
146
Configuring the 14-Function Foot Control Panel
147
Configuring the Handgrips
147
Configuring Image Inversion on the Invertertube E
148
Configuring the Direction of the XY Coupling
149
Configuring Speeds
149
Configuring the Speed of the RESIGHT 700 Internal Focus
149
Configuring the Overhead Display
150
Configuring Fast Focus
150
Configuring Links
151
Configuring Reset Options
152
Daily Operation
152
Setting the Illumination
153
Setting the Total Magnification
157
Setting Deepview
158
Setting the Focus Distance
159
Changing the XY Coupling Position
159
Setting the Integrated Keratoscope Ring
160
Setting the HD Digizoom
161
Setting the Integrated HD Camera
161
Recording
165
Transferring Control to CALLISTO Eye
172
Ending Control Via CALLISTO Eye
173
Typical Operating Sequence
174
Starting Work
174
Carrying out the Working Steps
175
Stopping Work
175
Switching the Device off
176
8 Cleaning and Disinfection
177
Safety During Cleaning and Disinfection
177
Cleaning
177
Cleaning Optical Surfaces
177
Cleaning Mechanical Surfaces
177
Fogging of Optical Surfaces
177
Disinfection
178
Disinfection of Surfaces
178
9 Maintenance
179
Maintenance Schedule for the Operator
179
Every Six Months
179
Maintenance Schedule for the Authorized Service
179
Every Twelve Months
179
Every Two Years
181
Every Four Years
181
Every Six Years
181
Performing Safety Inspections
181
10 Troubleshooting
183
Localizing Malfunctions
183
Response to Faults with Messages
183
Exporting Log Files
183
Faults (with Messages)
184
Faults (Without Messages)
185
Device Faults
185
Integrated HD Video and Image Recording Faults
187
14-Function Foot Control Panel Faults
188
Wired 14-Function Foot Control Panel Faults
189
Troubleshooting Work
190
Activating Manual Mode
190
Operating the Device in Manual Mode
191
Changing the Halogen Lamp
192
Swiveling the Backup Xenon Lamp into Position and Resetting the Remaining Service Hours
193
Changing the Superlux Eye Light Source Lamp Module
194
Setting the Gas Spring on the Integrated 22" Monitor
195
Increasing Mobility of the Suspension Arm on the Integrated 22" Monitor
196
Increasing Mobility of the Monitor Mount on the Integrated 22" Monitor
197
Increasing Mobility of the Monitor Mount on the Integrated CALLISTO Eye Panel PC Support Arm
197
Establishing Cable Connections for the 14-Function Foot Control Panel
198
Displaying the Firmware Versions
198
Opening the Service Menu
198
11 Technical Specifications
201
Essential Performance Features
201
Compliance
201
Electrical Data
202
Stand
202
Light Sources
202
Integrated HD Camera
203
Integrated HD Video and Image Recording
204
Integrated Keratoscope Ring
205
Integrated 22" Monitor
205
Mechanical Data
205
Integrated Slit Illumination
205
Optical Data
206
Surgical Microscope
206
Objective Lenses
206
Objective Lenses with Support Ring
206
Eyepieces
206
Dimensions and Weights
207
Dimensions and Swiveling Ranges
207
Support Arm for Integrated CALLISTO Eye Panel PC
208
Support Arm for Integrated 22" Monitor
209
Maximum Weight Capacity
210
Total Weight
210
Ambient Requirements for Operation
211
Ambient Requirements for Transport and Storage
211
Guidance and Manufacturer´s Declaration - Electromagnetic Immunity
211
EMC - Electromagnetic Compatibility IEC 60601-1-2
213
12 Accessories and Spare Parts
215
Accessories
215
Video Accessories
215
14-Function Foot Control Panel
215
Fundus Viewing Systems
215
Additional Illumination
215
Sterilizable Caps
216
Drapes
216
Spare Parts
216
Lamps and Light Guides
216
Dust Cover
216
Network Cable
216
Country-Specific Power Cable
217
Components
217
Tubes for Surgical and Assistant's Microscopes
217
Eyepieces for Surgical and Assistant's Microscopes
217
Intermediate Pieces for Surgical Microscope
217
Objective Lenses
218
Coobservation
218
Integrated Components (Factory Installed)
218
CALLISTO Eye
219
UC Kits
219
13 Decommissioning
221
Cleaning before Storage
221
Cleaning the Device and Accessories
221
14 Packaging and Transport
223
Preparing for Transport
223
Placing the Device in the Transport Position
223
15 Disposal
225
Disposal of the Device
225
Glossary
227
Keyword Index
231
Advertisement
Zeiss opmi lumera 700 User Manual (294 pages)
on floor stand
Brand:
Zeiss
| Category:
Medical Equipment
| Size: 14.15 MB
Table of Contents
Chapter Overview
3
Opmi Lumera
2
Table of Contents
3
Key to Symbols
7
Hazard Symbols
7
Information Symbols
7
Target Group
8
Field of Use
9
Intended Use
9
Normal Use
9
Notes for the Operator
10
Requirements for Operation
13
Prior to the very First Use
13
Before Every Use
13
During Use
15
After Every Use
16
Liability and Warranty
17
Measures to Prevent Phototoxic Injury
18
Illumination Characteristics (Spectral Composition)
18
Illumination Intensity
18
Angle of Illumination
19
Focus of the Light Source
19
Exposure Time to Light
20
Safety Devices
24
Symbols and Labels on the Device
30
Microscope Labels
30
System Overview
41
Components of the Surgical Microscope
44
Controls of the Main Microscope and Assistant's Microscope
52
Controls for the Tubes
54
Controls for the Widefield Eyepieces
55
Components of the XY Coupling
56
Controls of the XY Coupling
56
Components of the Floor Stand
58
Controls of the Lamp Housing
64
Controls on the Suspension Arm
66
Controls on the Control and Display Panel
67
Connector Panel on the Floor Stand
68
Connector Panel for 17" Video Monitor
74
Components of the Foot Control Panel
76
Preparations for Use
79
Configuring the Surgical Microscope
80
Replacing Components and Accessories
80
Connecting Invertertube E and RESIGHT 700 (Option) to the Main Microscope
84
Connecting Invertertube E to the Assistant's Microscope (Option)
84
Connecting the Second Light Guide to the Accessories
86
Balancing the System
87
Connecting the System and Accessories
88
Connecting the System to the Power Supply
88
Connecting the Wired Foot Control Panel (FCP) (Option)
90
Pairing with the Wireless Foot Control Panel (FCP-WL)
90
Connecting the Strain Relief Device
92
Connecting External Video Devices to an SD Video Camera (Option)
94
Connecting External Video Devices to an HD Video Camera (Option)
96
Positioning and Aligning the System
98
Relocating the System
98
Positioning the System in the or
99
Adjusting the Limit of Downward Travel
100
Positioning the Assistant's Microscope
101
Adjusting the Surgical Microscope
102
Setting the Tilt Position
104
Aligning the Video Monitor (Option)
105
Attaching Asepsis Caps
106
How to Prepare the Device for Sterile Operation
106
Attaching the Drapes
107
Operation
109
Powering the System up and down
111
Function Test before Use
112
Menu Structure
116
Controls on the 5.7" Control Panel with Touchscreen Functionality
118
Symbols and Abbreviations on the 5.7" Control Panel
119
Configuring the Optical Settings
120
System-Specific Configuration
120
Pairing with the Foot Control Panel
121
How to Configure Video Settings
123
Resetting the Service Hours of the Xenon Lamps
125
Displaying System Information
126
Activating the Service Menu
127
Configuring the Network Connection
128
Enabling the Network Connection (Option)
130
Exporting Logfiles
131
Configuring User Profiles
132
User-Specific System Configuration
132
Configuring the Light Sources and Illumination Systems
137
Configuring the Foot Control Panel
142
How to Configure the Hand Grips
146
Configuring the Surgery Mode (Image Inversion and Camera Settings)
149
Configuring the Links
153
How to Configure the Reset Option
154
How to Configure the Speed
155
Configuring the Focusing Function
156
Configuring RESIGHT
158
Configuring the Video Function
159
Daily Usage
161
Setting the User Profile
161
Zooming in and out
163
How to Set the SCI Mode and the (Optional) Keratoscope
164
Setting the XY and Focus Positions
169
Setting the Surgery Mode (Image Inversion and Video Format)
171
Setting the Integrated Video Recording Function Via USB Port (Option)
173
Control Via CALLISTO Eye (Option)
174
Configuring Movement (Zoom, Focus, XY Speeds)
177
Configuring the Light Sources
178
Configuring the RESIGHT Functions
178
Configuring the Controls
179
Configuring the Surgery Mode
180
Configuring the Camera
181
Configuring the Reset Functions
182
Configuring Links
183
Configuring the System
184
Adjusting the Light (Main and Slit Illumination)
186
Setting Additional Light
187
Setting Positions (Zoom, Focus, XY)
188
Setting the Keratoscope
188
Changing the Surgery Type
189
Typical Procedure
190
What to Do in the Event of Malfunctions
193
Failure of a Main Function (XY, Focus, Zoom, Light)
194
Failure of the Halogen Light Source
195
Failure of the Superlux Eye Light Source
196
For Your Safety
198
Malfunctions of the System
198
Troubleshooting
198
Malfunctions of the Integrated Video Recording Function Via USB Port (Option)
201
Malfunctions of the Wireless Foot Control Panel
202
Malfunctions of the Cable-Based Foot Control Panel
203
Error Messages Displayed on the 5.7" Control Panel
204
Care and Maintenance
207
System Maintenance
208
Maintenance Intervals
208
Safety Check
209
Changing the Halogen Lamp
210
Replacing the Xenon Lamp Module for Superlux Eye
212
Counterbalancing the Monitor Support Arm
214
Care of the Device
216
Cleaning
216
Disinfection
217
Sterilization
217
Environmental Protection Measures
218
Note on Disposal
218
System Data
219
Technical Data
220
EMC (Electromagnetic Compatibility)
227
Electromagnetic Radiation Disturbance
228
Electromagnetic Immunity
229
Recommended Safety Distances
233
System Combinations
234
Components for the Surgical Microscope
235
Ordering Data
235
Components for Documentation and Coobservation
236
Accessories
239
Approval Data
242
Ambient Conditions
243
Annex / Options)
245
Intended Use
246
Normal Use
246
Optional Integrated Video Recording Function Via USB Port
246
Storage Options
247
Button Functions on the 5.7" Control Panel
248
Menu Functions on the Video Monitor
252
Network Interface - Overview for Networking
258
Configuring the Device
260
Checklist
268
Managing Patient Data
274
Exporting Patient Data
279
Importing Patient Data
279
Indexes
281
Opmi Lumera
282
Zeiss opmi lumera 700 User Manual (150 pages)
Brand:
Zeiss
| Category:
Microscope
| Size: 7.72 MB
Table of Contents
Safety Measures
5
User Manual
1
Table of Contents
5
Key to Symbols
7
Hazard Symbols
7
Information Symbols
7
Target Group
8
Field of Application
8
Intended Use
8
Normal Use
8
Notes for the Operator
10
Requirements for Operation
13
Prior to the very First Use
13
Before Every Use
13
During Use
15
After Every Use
16
Liability and Warranty
17
Measures to Prevent Phototoxic Injury
18
Illumination Characteristics (Spectral Composition)
18
Illumination Intensity
18
Angle of Illumination
19
Focus of the Light Source
19
Exposure Time to Light
20
Safety Devices
24
Symbols and Labels on the Device
30
Microscope Labels
30
System Overview
47
OPMI LUMERA 700 (Floor Stand Version)
48
OPMI LUMERA 700 (Ceiling Mount Version)
50
Components of the Surgical Microscope
52
Controls of the Main Microscope and Assistant's Microscope
66
Controls for the Tubes
68
Controls for the Widefield Eyepieces
69
Components of the XY Coupling
70
Controls of the XY Coupling
70
Floor Stand and Ceiling Mount Components
72
Controls of the Lamp Housing
84
Controls on the Suspension Arm
86
Controls on the Standard Wall Panel of the Ceiling Mounts and on the Control and Display Panel of the Floor Stand
88
Connector Panel on the Floor Stand
90
Ceiling Mount Terminal Panels
96
Connector Panel on the 22" TFT
102
Components of the Foot Control Panel
104
Preparations for Use
107
Operation
108
Positioning and Connecting the Floor Mount
110
Relocating the System
110
Positioning the Device in the or
112
Connecting the System to the Power Supply
114
Pairing with the Wireless Foot Control Panel (FCP-WL)
116
Connecting the Wired Foot Control Panel (FCP) (Option)
116
Connecting the Strain Relief Device
118
Connecting External Video Equipment to Integrated SD 3CCD Camera to the Floor Stand (Optional)
120
Connecting External Video Equipment on Integrated HD 3CCD Camera to the Floor Stand (Optional)
122
OPMI LUMERA 700 with Integrated Data Injection System IDIS (Optional)
124
Network Connection OPMI LUMERA 700 (Floor Mount) with CALLISTO Eye
126
Positioning and Connecting the Floor Mount
128
Positioning the Device in the or
128
Example or Situations
134
Pairing with Wireless Foot Control Panel (FCP-WL)
136
Connecting the Wired Foot Control Panel (FCP) (Option)
136
Connecting External Video Equipment on Integrated SD 3CCD Camera to the Floor Stand (Optional)
138
Connecting External Video Equipment on Integrated HD 3CCD Camera to the Floor Stand (Optional)
140
Mounting Accessories on the Surgical Microscope
142
Replacing Components and Accessories
142
Connecting Invertertube E and RESIGHT 700 (Optional) to the Surgical Microscope
146
Connecting the Second Light Guide to the Accessories
148
Balancing the System
149
Adjusting the Surgical Microscope
150
Advertisement
Zeiss opmi lumera 700 Basic Instructions (2 pages)
Brand:
Zeiss
| Category:
Microscope
| Size: 0.51 MB
Advertisement
Related Products
Zeiss OPMI Lumera T
Zeiss OPMI Lumera i on floor stand
Zeiss OPMI Lumera i
Zeiss VICTORY 7x42 T* FL
Zeiss Dialyt 7x50 B/GA T Marine
Zeiss HUMPHREY 720i
Zeiss HUMPHREY 745i
Zeiss HUMPHREY 740i
Zeiss HUMPHREY 750i
Zeiss Axioscope 7
Zeiss Categories
Microscope
Medical Equipment
Binoculars
Laboratory Equipment
Measuring Instruments
More Zeiss Manuals
Login
Sign In
OR
Sign in with Facebook
Sign in with Google
Upload manual
Upload from disk
Upload from URL