Ricoh Priport JP5000 Manuals
Manuals and User Guides for Ricoh Priport JP5000. We have 5 Ricoh Priport JP5000 manuals available for free PDF download: Operating Instructions Manual, Service Manual
Ricoh Priport JP5000 Operating Instructions Manual (465 pages)
Ricoh Priport Operating Instructions
Brand: Ricoh
|
Category: All in One Printer
|
Size: 15.42 MB
Table of Contents
-
-
Options
26 -
-
Keys28
-
Indicators30
-
-
Operation
33 -
Originals
35 -
User Codes
41 -
Saving Master
101 -
On Line Printing
102 -
Make-Up Printing
127 -
Make-Up Samples
132 -
User Tools
155 -
User Tools Menu
157-
System157
-
Initial Setting159
-
Mode Setting161
-
Stamp166
-
-
-
Time Setting170
-
Class Enter no171
-
No. of Skip Feed173
-
No. of Q.start174
-
Type of Paper176
-
Stamp Position176
-
Position (User)178
-
Regist. (User)180
-
Position (Date)180
-
Position (Page)182
-
Check Counter184
-
Reset Counters185
-
Chg. User Code185
-
Del. User Code186
-
-
Poor Printing
207-
Dirty Background207
-
Black Line/Stain210
-
Skipped Prints210
-
-
Remarks
211 -
Operation Notes
211-
General Cautions211
-
Print Paper213
-
Originals213
-
Misfed Paper213
-
PC Controller214
-
-
-
Main Frame218
-
-
Specifications
223 -
Main Frame
223 -
Document Feeder
227 -
Consumables
228 -
Index
229
-
-
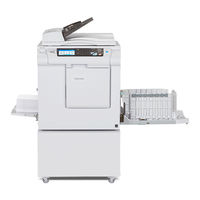
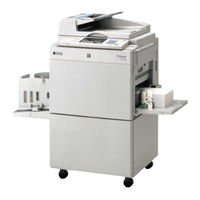
Machine Exterior253
-
Machine Interior254
-
Options256
-
Operation Panel258
-
Keys258
-
Indicators260
-
-
Panel Display261
-
Operation
263-
Print Paper263
-
Originals265
-
-
Removing Prints272
-
-
Auto Reset275
-
Tint Mode278
-
Zoom286
-
Edge Erase293
-
Economy Mode302
-
Auto Cycle303
-
All Class Mode304
-
Auto Class Mode306
-
Class Mode313
-
Programs324
-
Security Mode327
-
Job Separation329
-
On Line Printing332
-
Auto on Line333
-
-
Image Rotation334
-
Make-Up Printing346
-
Make-Up Samples349
-
Original Storage352
-
Image Overlay357
-
Storage Overlay357
-
On Line Overlay358
-
Overlay Format358
-
-
Date Stamp360
-
Page Stamp362
-
Stamp365
-
Memory Combine367
-
-
-
User Tools
391-
User Tools Menu393
-
System393
-
Initial Setting395
-
Mode Setting396
-
Stamp400
-
On Line Mode403
-
-
-
Time Setting405
-
Class Enter no406
-
No. of Skip Feed408
-
No. of Q.start409
-
Type of Paper410
-
Stamp Position411
-
Position (Date)412
-
Position (Page)413
-
Check Counter416
-
Reset Counters416
-
Chg. User Code417
-
Del. User Code418
-
Number Keys418
-
-
Troubleshooting
419-
Loading Paper422
-
M ) Lights433
-
J ) Lights434
-
K ) Lights438
-
Poor Printing441
-
Dirty Background441
-
Faint Prints444
-
-
Remarks
445 -
Specifications
451-
Main Frame451
-
Consumables457
-
Index458
-
Advertisement
Ricoh Priport JP5000 Service Manual (316 pages)
Brand: Ricoh
|
Category: All in One Printer
|
Size: 10.23 MB
Table of Contents
-
Drive Layout27
-
Main Drive28
-
Auto Shading35
-
Thermal Head40
-
Master Eject42
-
Master Feed55
-
Paper Feed79
-
Paper Delivery104
-
Service Tables138
-
Service Remarks138
-
Scanner Section138
-
Test Points141
-
Dip Switches141
-
Special Tools151
-
Access Procedure152
-
Data Logging155
-
Basic Settings161
-
Input Test Mode173
-
Output Test Mode175
-
System Test185
-
User Tools188
-
Scanner Unit201
-
Lens Cover201
-
Scanner Frame202
-
Xenon Lamp204
-
Scanner Motor206
-
Scanner Wire207
-
Printing Section265
-
Main Motor273
Ricoh Priport JP5000 Operating Instructions Manual (232 pages)
Brand: Ricoh
|
Category: All in One Printer
|
Size: 4.63 MB
Table of Contents
-
Options26
-
Keys28
-
Indicators30
-
Operation33
-
Originals35
-
User Codes41
-
Saving Master101
-
On Line Printing102
-
Originals103
-
Main Features115
-
Command Sheet120
-
Make-Up Printing127
-
Make-Up Samples132
-
User Tools155
-
User Tools Menu157
-
System157
-
Initial Setting159
-
Mode Setting161
-
Stamp166
-
Time Setting170
-
Class Enter no171
-
Of Skip Feed173
-
Of Q.start174
-
Type of Paper176
-
Stamp Position176
-
Position (User)178
-
Regist. (User)180
-
Position (Date)180
-
Position (Page)182
-
Check Counter184
-
Reset Counters185
-
Chg. User Code185
-
Del. User Code186
-
Poor Printing207
Advertisement

Ricoh Priport JP5000 Operating Instructions Manual (232 pages)
Table of Contents
-
Options26
-
Keys28
-
Indicators30
-
Operation33
-
Originals35
-
User Codes41
-
Saving Master101
-
On Line Printing102
-
Originals103
-
Main Features115
-
Command Sheet120
-
Make-Up Printing127
-
Make-Up Samples132
-
User Tools155
-
User Tools Menu157
-
System157
-
Initial Setting159
-
Mode Setting161
-
Stamp166
-
Time Setting170
-
Class Enter no171
-
Of Skip Feed173
-
Of Q. Start174
-
Type of Paper176
-
Stamp Position176
-
Position (User)178
-
Regist. (User)180
-
Position (Date)180
-
Position (Page)182
-
Check Counter184
-
Reset Counters185
-
Chg. User Code185
-
Del. User Code186
-
Poor Printing207

Ricoh Priport JP5000 Operating Instructions Manual (232 pages)
Table of Contents
-
Options24
-
-
Keys25
-
Indicators27
-
-
Operation
31-
Print Paper31
-
Originals33
-
-
-
Make-Up Printing125
-
Make-Up Samples130
-
User Tools
155-
User Tools Menu157
-
System157
-
Initial Setting160
-
Mode Setting162
-
Stamp167
-
Set User Code(S)170
-
-
-
Time Setting172
-
Class Enter no173
-
Of Skip Feed175
-
Of Q.start176
-
Type of Paper177
-
Stamp Position178
-
Position (User)179
-
Regist. (User)181
-
Position (Date)182
-
Position (Page)183
-
Check Counter185
-
Reset Counters185
-
Chg. User Code186
-
Del. User Code187
-
-
-
Loading Paper193
-
Poor Printing211
-
Dirty Background211
-
Faint Prints214
-