Table of Contents
Advertisement
Advertisement
Table of Contents

Related Manuals for N-Com B4


Summary of Contents for N-Com B4
- Page 1 USER INSTRUCTIONS AND SAFETY Firmware Version: 3.10...
- Page 2 Firmware version, visit the website www.n-com.it REFERENCE STANDARDS The products of the N-Com line are in compliance with standards as per the table below: The Bluetooth system complies with the main safety requirements and other applicable provisions of Directive 99/5/CE, Directive 2002/95/CE,...
-
Page 3: Table Of Contents
1.5.Qualified personnel ................6 1.6.Accessories and batteries..............6 1.7.Disposal ....................6 2. CONTENT OF THE PACKAGING ............7 3. INSTALLATION ................8 3.1.Removing the B4 system from the helmet ...........10 4. BASIC FUNCTIONS..............10 4.1.System menu...................10 5. N-COM WIZARD ................11 6. PAIRING UP BLUETOOTH DEVICES ...........11 6.1.Affiliation reset function..............12... -
Page 5: Warnings And Safety
1. WARNINGS AND SAFETY Read this User Manual carefully, as well as the User Manuals for other N-Com kits that you will be using with the N-Com B4 B4. Read the simple rules listed below. Failure to comply with these rules may lead to dangerous situations. -
Page 6: Qualified Personnel
1.7. Disposal Refer to this user manual and to manuals related to other parts of the N-Com system in order to disassemble the system from the helmet. Once the system has been disassembled, dispose of it according to the following instructions: •... -
Page 7: Content Of The Packaging
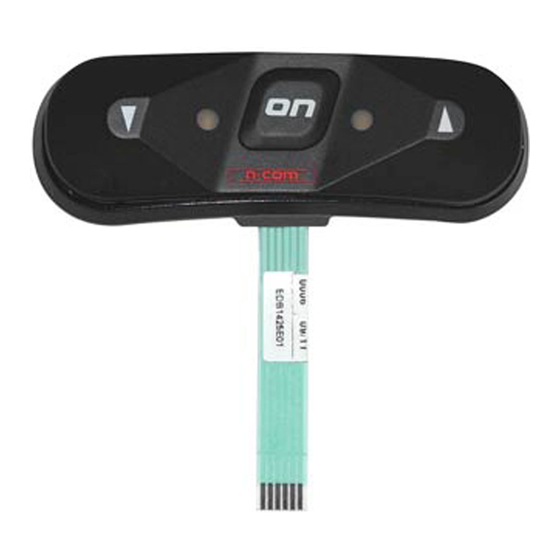
2. CONTENT OF THE PACKAGING The N-Com B4 B4 package contains: BATTERY COVER MICROPHONE BLUETOOTH CARD ANTENNA KEYPAD CONNECTORS: - IN JACK 3.5 mm - MICRO USB N-Com B4 B4 system Micro USB wire Rechargeable battery Battery charger... -
Page 8: Installation
3. INSTALLATION The B4 B4 system can be installed on Nolan helmets preset for the N-Com B4 B4 system. Visit the website www.n-com.it for a list of compatible models. • Open the small door on the e-box and place the rechargeable battery inside the system, making sure it is inserted in the right direction (Fig.1) - Page 9 • Place the system in the special housing in the back of the helmet, pushing it all the way into the groove (Fig. 4). Fig. 4 • Fold the antenna back inside the shell • Fix the cable inside the helmet and make sure the right fixing clip snaps into its housing (Fig.
-
Page 10: Removing The B4 System From The Helmet
Briefly press “ ” to decrease the volume. A double tone signals the lowest volume level. 4.1. System menu B4 features a menu with 3 functions: BASE, RADIO, BIKE TO BIKE (activated upon request). To scroll the card functions menu, press “on” for 2 seconds (with system turned on). -
Page 11: N-Com Wizard
5. Select the N-Com device. If a password is requested, enter 0000 (four zeros); 6. B4 B4 will confirm the pairing up by means of a tone in the headset, and the LEDs will stop flashing; 7. Turn off and on both the mobile phone and the B4 B4 to store the pairing up data. -
Page 12: Affiliation Reset Function
Press “ ” and “ ” at the same time for 4 seconds, and release them when you hear a beep. The N-Com will emit a special acoustic signal to confirm and will then turn itself off. This function can also be turned on through PC using the “N-Com Wizard”... -
Page 13: Stereo Fm Radio
"Conference" setting is stored for future GPS communications. 9. STEREO FM RADIO B4 is equipped with Stereo FM radio with RDS (Radio Data System) technology, which automatically selects the strongest signal available for the FM radio you want to listen to, regardless of your location. -
Page 14: Audio Devices With Cable Connection
4. After a few seconds, the helmets “recognize” each another, a beep is emitted to signal the pair up was successful and intercom communication is activated; 5. Turn off both N-Com Bluetooth systems and turn them back on to store the pair up data. 12.2. -
Page 15: Bike-To-Bike Pair Up
Bike-to-Bike pair up 1. Make sure both N-Com B4 systems are turned off; 2. Set both N-Com B4 systems in Pairing up mode by pressing “on” (for more than 4 seconds), until the LEDS start to flash quickly; 3. On Helmet 1 press the “memory” button where you wish to store Helmet 2;... -
Page 16: Battery
BATTERY Before using the N-Com device for the first time, recharge the battery completely for at least 10 hours. To obtain best performances from the battery, it is recommended to completely recharge the battery the first few times. Afterwards, you can recharge the battery for shorter periods. -
Page 17: Summary Table Of Controls
X (2s) Bike 2 pair up X (2s) Bike 3 pair up X (4s) Bike 4 pair up X (4s) Bike-to-Bike menu enabling/disabling Erase pair ups** X (4s) *Briefly press at the same time **With N-Com system in Pairing up Mode... -
Page 18: Limited Warranty
• Negligence and normal wear of internal and external parts. • Any damage caused by an accident; • Any change or modification made to the helmet or to the N-com system by the user or by third parties. • Colour changes or damages caused by exposure to harmful chemical products. -
Page 19: Validity Of This Limited Warranty
16.3. Validity of this limited warranty This warranty is valid only if the enclosed warranty form is duly and completely filled out with the following information: • Product identification code • Name and stamp of the authorized dealer. • Product purchase date. •... -
Page 20: Product Identification
16.5. Product identification The identification code is printed on the adhesive label applied to the B4 B4 system, under the rechargeable battery.