Table of Contents

Related Manuals for Lorex LW2301 Series


Summary of Contents for Lorex LW2301 Series
-
Page 1: Instruction Manual
DIGITAL WIRELESS QUAD SURVEILLANCE SYSTEM WITH BUILT-IN VIDEO RECORDER AND INDOOR/OUTDOOR MOTION CAMERA MODELS: LW2301 Series Copyright © 2009 Lorex Technology Inc. Instruction Manual English Version 1.0 www.lorexcctv.com www.lorexcctv.com... - Page 2 Thank you for purchasing the Digital Wireless Quad Video Recording System. This manual refers to the following products: • LW2301 Series Please visit us on the web for the most current Manuals, Quick Start Guides and Firmware. Additional Language Manuals may also be available at: CAUTION: TO REDUCE THE RISK OF ELECTRIC SHOCK REFER SERVICING TO QUALIFIED SERVICE PERSONNEL.
- Page 3 B E F O R E Y O U S T A R T THIS PRODUCT MAY REQUIRE PROFESSIONAL INSTALLATION LOREX IS COMMITTED TO FULFILLING YOUR SECURITY NEEDS • We have developed user friendly products and documentation. Please read the Quick Start Guide and User Manual before you install this product.
- Page 4 AVANT DE COMMENCER CE PRODUIT POURRAIT EXIGER UNE INSTALLATION PROFESSIONNELLE LOREX S’ENGAGE À SATISFAIRE VOS BESOINS SÉCURITAIRES • Veuillez lire le guide de démarrage rapide et le mode d’emploi avant d’installer ce produit. • Les guides du consommateur et les séances de tutorat vidéo sont disponibles sur l’Internet en visitant www.lorexcctv.com/support...
- Page 5 NEED HELP? DO NOT RETURN THIS PRODUCT TO THE STORE Please make sure to register your product at www.lorexcctv.com to receive product updates and information EASy WAyS TO CONTACT US: Online: Pr oduc t Suppo r t i s a v a i l a b l e 24/ 7 i n c l u di ng p r o du ct in for m a ti o n, us e r m a nu a l s , qu i c k s ta r t u p gu i de s a n d F A Q ’...
-
Page 6: Necesita Ayuda
NECESITA AYUDA COMUNÍQUESE PRIMERO CON NOSOTROS NO DEVUELVA ESTE PRODUCTO A LA TIENDA Cerciórese de por favor colocar su producto en www. lorexcctv.com/registration para recibir actualizacio- nes y la información del producto maneras sencillas de comunicarse con nosotros En línea: apoyo al producto disponible 24/7 incluyendo infor- mación del producto, manuales para el usuario, guías de inicio rápido y preguntas más frecuentes en... -
Page 7: Important Safeguards
Important Safeguards In addition to the careful attention devoted to quality standards in the manufacture process of your video product, safety is a major factor in the design of every instrument. However, safety is your responsibility too. This sheet lists important information that will help to assure your enjoyment and proper use of the video product and accessory equipment. - Page 8 Important Safeguards Service 13. Servicing - Do not attempt to service this video equipment yourself as opening or removing covers expose dangerous voltage or other hazards. Refer all servicing to qualified service personnel. 14. Conditions Requiring Service - Unplug this video product from the wall outlet and refer servicing to qualified service personnel under the following conditions.
-
Page 9: General Precautions
General Precautions 1. All warnings and instructions in this manual should be followed 2. Remove the plug from the outlet before cleaning. Do not use liquid aerosol detergents. Use a water dampened cloth for cleaning 3. Do not use this unit in humid or wet places 4. - Page 10 * Stated IR Illumination range is based on ideal conditions. Actual range and image clarity depends on installation location, viewing area and light reflection/absorption level of object The Digital Wireless signal transmission type used by the Lorex LW2301 series is also known as Frequency Hopping Spread Spectrum.
-
Page 11: Table Of Contents
Table of Contents Getting Started ... 8 Wireless Receiver ... 9 Camera... 11 Remote Control ... 12 Installing the Camera ... 13 Connecting the Wireless Receiver ... 14 LED Indicators on the Wireless Receiver ... 15 Using the System... 16 On-Screen Display... -
Page 12: Getting Started
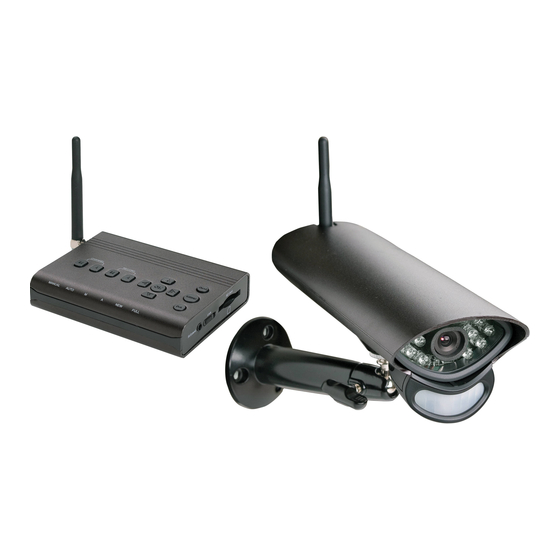
Getting Started Getting Started The system comes with the following components: 1 x COLOR OUTDOOR NIGHT VISION CAMERA* 1 x SD MEMORY CARD 2 x WALL MOUNTING KIT (FOR RECEIVER AND CAMERA) 1 X WIRELESS ANTENNA (FOR CAMERA) *Camera configuration may vary by model CHECK YOUR PACKAGE TO CONFIRM THAT YOU HAVE RECEIVED THE COMPLETE SYSTEM, INCLUDING ALL COMPONENTS SHOWN ABOVE. -
Page 13: Wireless Receiver
Wireless Receiver Top Panel 1. CHANNEL: Press M to change channels 1~4 manually; press A to enable Auto Sequence Viewing Mode. 2. RECORD: Press M to start Manual Recording; press M again to stop. Press A to start Motion Recording; press A again to stop. NOTE: The date and time must be set on the system prior to using Schedule Recording. -
Page 14: Right Panel
Wireless Receiver Left Panel 1. Antenna: Connection jack for the wireless antenna. 2. DC: Connect the included power adapter. 3. AV Out: Connect the included Audio/Video cable to display images from the receiver on your TV/monitor. 4. Alarm Vol.: Adjust the volume of the motion alarm; will also adjust volume of system “beeps” when you press buttons on the receiver and remote control. -
Page 15: Camera
Camera Camera 1. PIR Sensor: Passive IR motion sensor for more accurate motion recording. 2. Microphone: Built-in microphone underneath camera body. 3. Lens: Camera lens. 4. Night Vision IR: Night vision IR LEDs used for viewing in complete darkness. 5. Pair: Pairing button. For more details, see “Pairing” on page 38. 6. -
Page 16: Remote Control
Remote Control Remote Control ATTENTION: Before using the remote control, remove the protective clear plastic tab from the battery cover. 1. 1/ : Move menu cursor UP; play/pause playback; jump to camera 1 while in Quad Mode. 2. Enter: Confirm menu selections (same as OK on the wireless receiver). -
Page 17: Installing The Camera
Installing the Camera Before you install the camera, carefully plan where and how it will be positioned, and where you will route the cable that connects the camera to the power adapter. • Before starting permanent installation, verify its performance by observing the image on a monitor when camera is positioned in the same location/position where it will be permanently installed... -
Page 18: Connecting The Wireless Receiver
Connecting the Wireless Receiver Connecting the Wireless Receiver To set up the wireless receiver: 1. Connect the Black cable from the AV cable to AV Out port on the left panel of the receiver. Connect the Yellow video cable and White audio cable (mono) to your TV, DVR, or observation system. -
Page 19: Led Indicators On The Wireless Receiver
LED Indicators on the Wireless Receiver Use the LED indicators on the wireless receiver to observe the status of the receiver, cameras, and SD card. Figure 3.2 LED indicators on wireless receiver The blue LEDs indicate the following: • MANUAL: Channel switching set to manual •... -
Page 20: Using The System
Using the System Using the System By default, the camera included with your system is automatically paired to the wireless receiver. The camera and receiver will communicate with one another once they are powered On-Screen Display With camera 1 properly connected and powered on, the system displays a single channel full- screen live view of the camera. - Page 21 On-Screen Display (cont’d.) 1. Signal Indicator – The signal indicator shows the strength of the signal being received from the camera. The number of bars in the Signal Indicator shows the strength of the signal – One or No Bars indicates the signal is poor, and 4 bars indicate a very strong signal.
-
Page 22: Viewing Modes
Viewing Modes Viewing Modes There are three different viewing modes available on the system: single channel viewing, Auto Sequence Viewing Mode (view individual channels automatically in sequence), and Quad mode. To change viewing modes: Press the Channel—A button to enable Auto Sequence Viewing Mode and switch automatically between channels;... -
Page 23: Quad Mode
Quad Mode Use Quad mode to view up to four cameras simultaneously. To enable/disable Quad mode: • Press the QUAD button on the wireless receiver or the remote control; The Schedule Recording warning appears briefly on-screen (see figure 5.2), then the Quad display mode begins. -
Page 24: Setting The Time
Setting the Time Setting the Time It is highly recommended to set the time on the system prior to recording. You need to set the correct date and time in order to use Schedule Recording. For more details, see “Motion Recording”... -
Page 25: Recording
Recording Three recording modes are available on the system: Manual Recording, Schedule Recording, and Motion Recording. NOTE: An SD card must be inserted in the wireless receiver in order to record. You should always format the SD card prior to initial recording. For details, see “Format” on page 45. NOTE: The system can record video to an SD card NOTE: Recording overrides other actions on the receiver. -
Page 26: Manual Recording
Recording Manual Recording Manual Recording allows you to manually start/stop recording from cannot record while in Quad mode. You can also record while in Zoom mode. For details on using Zoom, see “Zoom” on page 43. NOTE: You cannot change channels or enable Auto Sequence Viewing Mode during Manual Recording. -
Page 27: Schedule Recording
Schedule Recording Use Schedule Recording to have the system automatically record continuously from a selected camera or from Auto Sequence Viewing Mode according to a start and stop time. You must set a Recording Schedule in the main menu in order to use Schedule Recording. NOTE: Please ensure you have set the date and time on the receiver prior to setting a recording schedule. -
Page 28: Stopping Schedule Recording
Recording To enable schedule recording: 1. Disable ALL RECORDING on the system: • If the system is in Manual Recording, press the Record— RECORD—M button on the wireless receiver so the blue LED receiver • If the system is in Motion Recording, press the RECORD—A/Motion button so the blue LED NOT appear on the wireless receiver ATTENTION: Manual Recording, Motion Recording, and Quad Mode will override... -
Page 29: Motion Recording
Motion Recording Use Motion Recording to have the system only record when motion is detected by one of the cameras. The camera that appears on-screen is the only camera that is recording. Figure 7.3 Recording triggered by motion during the Motion Recording To enable Motion Recording: 1. - Page 30 Recording When Should I Use Motion Recording? • Low traffic areas or non-sensitive/non-critical recording environments • Overnight recording NOTE: In the event of a power failure, the system will restart in Auto Sequence Mode + Motion Recording when power is restored. For more details, see “Appendix G: Power Failure” on page 54. Recording Tip! If you are using more than one camera...
-
Page 31: Viewing Recorded Video
Viewing Recorded Video With video recorded on the SD card, you can open the File menu to playback the video files. ATTENTION: All recording must be stopped on the system prior to playing back saved video files. You can playback recorded video on the system (when connected to a TV or monitor) or directly from the SD card –... - Page 32 Viewing Recorded Video 080512 080513 080514 Figure 8.1 File list – Date folders (oldest on top) 4. Select a folder and press the Enter/OK button. Folders are labeled by date (yymmdd): e.g. 080512 . Select [. .] and press the Enter/OK button to go up a level. 5.
-
Page 33: Controlling Playback
Controlling Playback Once the file begins playing, use the buttons on the remote control or wireless receiver to control playback. REMOTE CONTROL Figure 8.3 Playback buttons on the remote control and wireless receiver : Play/Pause playback; restart video from the beginning. : Fast forward playback 2X, 4X, 8X, 16X, 32X, and 64X. -
Page 34: Viewing Video Directly From The Sd Card
Viewing Recorded Video Viewing Video Directly From the SD Card You can view the saved video files on your computer (PC or Mac) by using an SD card reader (not included). Saved video files are in AVI format. NOTE: Some PCs and Macs may have an SD card reader built-in. Please refer to your computer’s instruction manual for more details. -
Page 35: Using The Main Menu
Using the Main Menu Use the Main Menu to configure camera and receiver settings. To open the Main Menu: • Press the MENU button on the wireless receiver or the remote control NOTE: Make sure the display is in single channel full-screen view prior to opening the Main Menu Figure 9.0 Main Menu 1. -
Page 36: Camera On/Off
Using the Main Menu Camera On/Off Use the Camera On/Off menu to show/hide camera channels on the main display screen. For example, if you disable camera 3, it will not appear in single channel full-screen, Auto Sequence Viewing Mode, or in Quad mode. NOTE: If a power failure occurs on your system, you may need to re-configure your Camera On/Off settings. -
Page 37: Record
Record Use the Record menu to change image quality, set motion recording time, set a recording schedule, and enable/disable overwrite. Figure 10.0 Record menu The Record menu contains the following sub-menus: • Quality: Set the image resolution to 320x240 (QVGA) or 640x480 (VGA) •... -
Page 38: Quality
Using the Main Menu Quality Figure 10.1 Quality menu — 320x240 (QVGA) and 640x480 (VGA) To change the image quality: 1. From the Main Menu, select Record and press the Enter/OK button. 2. From the record menu, select Quality and press the Enter/OK button. 3. -
Page 39: Trigger Record
Trigger Record Use the Trigger Record menu to set the length of the time for the system to record after motion is detected by a camera. Figure 10.2 Trigger Record menu To change the motion recording time: 1. From the Main Menu select Record and press the Enter/OK button. 2. -
Page 40: Schedule Record
Using the Main Menu Schedule Record Use the Schedule Record menu to set start and stop times for Schedule Recording. During this time block, the system will record continuously from one specific camera, or from any cameras in Auto Sequence Viewing Mode. NOTE: The time uses the 24-hour clock. -
Page 41: Overwrite
Overwrite Use the overwrite feature to have the system overwrite the oldest recorded data on the SD card once the SD card is full. Figure 10.4 Overwrite enable/disable To enable overwrite: 1. From the Main Menu select Record and press the Enter/OK button. 2. -
Page 42: Pairing
Using the Main Menu Pairing Use the Pairing menu to “pair’ (add) additional cameras to the system (up to four). By default, the camera included with your system is automatically paired to channel 1 on the wireless receiver. The camera and receiver will communicate with one another once they are powered What is Pairing? “Pairing”... - Page 43 Figure 11.1 Pairing menu To pair an additional camera: 1. Connect the camera to a power outlet. DO NOT permanently mount the camera. 2. Press MENU on the wireless receiver or remote control. 3. From the Main Menu, select Pairing and press the Enter/OK button. 4.
-
Page 44: Settings
Using the Main Menu Settings Use the Settings menu to set the system time, change display options, and format the SD card. Figure 12.0 Settings menu The Settings menu contains the following sub-menus: • Date & Time: Set the date and time on the system •... -
Page 45: Date & Time
Date & Time Use the Date & Time menu to set the time and date on the system. You time in order to use Schedule Recording. For details, see “Schedule Recording” on page 23. Figure 12.1 Clock Set To set the date and time: 1. -
Page 46: Av Out
Using the Main Menu AV Out Use the AV out menu to select the TV system for the wireless receiver. Figure 12.2 AV out menu To select the TV system: 1. From the Main Menu, select Setting and press the Enter/OK button. 2. -
Page 47: Zoom
Zoom Use the zoom menu to enable 1X and 2X digital zoom on the cameras. While zoomed in, you can scan the image and view channels in full-screen. NOTE: Zoom is intended as a temporary setting that is applied to ALL CHANNELS. When you are finished using zoom, you should return the view to 1X view. -
Page 48: Brightness
Using the Main Menu Brightness Use the Brightness menu to adjust the screen brightness level. Figure 12.4 Brightness menu To adjust brightness: 1. From the Main Menu, select Setting and press the Enter/OK button. 2. From the Settings menu, select Brightness and press the Enter/OK button. 3. -
Page 49: Format
Format Use the Format menu to format the SD card. It is highly recommended to format the SD card prior to initial recording. ATTENTION: Formatting erases all video data on the SD card. This step undone. Figure 12.5 Format menu To format the SD card: 1. -
Page 50: Default
Using the Main Menu Default Use the Default menu to restore the system to factory settings. ATTENTION: Restoring the system to the default factory settings DOES NOT delete video files on the SD card, nor does it reset the date and time on the system. Figure 12.6 Default menu To restore factory settings: 1. -
Page 51: Appendix A: System Specifications
Appendix A: System Specifications General Description Transmission Frequency Transmission Power Unobstructed Effective Range Spread Spectrum Modulation Mode Operating Temperature Operating Humidity Camera Description Image Sensor Total Picture Pixels Minimum Illumination Night Vision Distance View Angle Power Consumption (Max.) Power Supply Dimensions Weight Receiver... -
Page 52: Appendix B: About Digital Wireless Technology
Appendix B: About Digital Wireless Technology Appendix B: About Digital Wireless Technology The Digital Wireless signal transmission type used by the Lorex LW2301 series is also known as FHSS –Frequency Hopping Spread Spectrum. This type of signal is highly resistant to deliberate jamming as it generates a channel hopping sequence using an algorithm generated by the receiver system. -
Page 53: Appendix C: Adding Cameras
Appendix C: Adding Cameras The system comes with a camera that has already been paired to the wireless receiver. The Pairing Function assigns each camera to a different channel on the wireless receiver (up to four cameras), and is necessary for configuring additional cameras. By default, the camera included with the system appears on channels 1 on the wireless receiver. -
Page 54: Appendix D: Strengthening The Range Of The Wireless Signal
Appendix D: Strengthening the Range of the Wireless Signal Appendix D: Strengthening the Range of the Wireless Signal Is your wireless signal choppy? Do you want to extend the range of wireless transmission? There are several ways to boost your wireless signal as well as options to help you extend the range of the wireless signal. - Page 55 Appendix D: Strengthening the Range of the Wireless Signal 2.4 GHZ Directional Wireless Panel Antenna Use the 2.4GHz Directional Wireless Panel Antenna (model #: ACCANTD9) to focus a wireless one specific camera signal onto in order to increase range of transmission (clear line-of-sight between the camera and the antenna is required).
-
Page 56: Appendix E: Deleting Video Files On The System
Appendix E: Deleting Video Files on the System Appendix E: Deleting Video Files on the System You can delete video files on the SD card directly on the system. Deleting files if you need to clear space on the SD card (if Overwrite is disabled), or for your own file management purposes. For details, see “Overwrite”... -
Page 57: Appendix F: Estimated Recording Times On Sd Cards
Appendix F: Estimated Recording Times on SD Cards Use the table below to help you estimate the recording times on various sizes of SD cards. Times shown are in hours, minutes, and seconds. NOTE: The system is compatible with SD High Capacity (SDHC) cards, minimum Class 2. Standing Recording Time SD Card Capacity... -
Page 58: Appendix G: Power Failure
Appendix G: Power Failure Appendix G: Power Failure A power failure may interrupt recording modes on the system. After power is restored, the following will occur: The system will restart in Auto Sequence Mode + Motion Recording – this ensures that some form of recording will be immediately active on the system NOTE: If you had a different display view or recording mode set when the power failure occurred, you will need to re-apply the previous display view and recording mode. -
Page 59: Troubleshooting
Troubleshooting If you have problems with your System, there is often a quick and simple solution. Please try the following: Problem Solution • There is no picture • from a Camera. • • The picture from the • camera is choppy •... -
Page 60: Faq
Q: What is the maximum distance I can have between the camera and the receiver? A: Typically 450 feet (137 m) with a clear line of sight in open space, or approximately 150 feet (46 m) in a house. Walls, studs, furniture will interfere with the range of wireless transmission. Q: Why does my “wireless camera”... - Page 64 SEE HEAR PROTECT Enhance your security with genuine Lorex Cameras, Digital Video Recorders, Integrated Systems and Accessories. Order whatever you need at www.lorexcctv.com or call 1-888-42-LOREX (1-888-425-6739) Restaurant Warehouse Office Convenience Store CVC6998HR CVC6993R CNC1020 VQ1536HR PROTECT EVERYTHING Day Care Home Office THAT MATTERS Add wired or wireless cameras to expand the...