Table of Contents
Advertisement
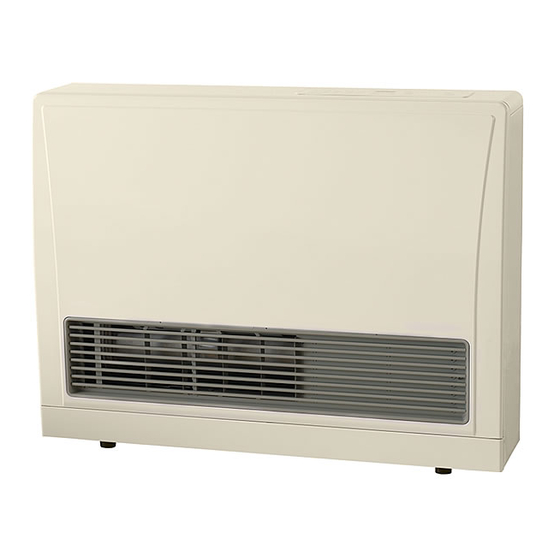
Owner's Operation and Installation Manual for the
EX17 (RHFE-433RWTA)
EX22 (RHFE-558RWTA)
Gas Direct Vent Wall Furnace
WARNING: If the information in these instructions is not
followed exactly, a fire or explosion may result causing
property damage, personal injury or loss of life.
- Do not store or use gasoline or other flammable vapors and
liquids in the vicinity of this or any other appliance.
- WHAT TO DO IF YOU SMELL GAS
Do not try to light any appliance.
•
Do not touch any electrical switch; do not use any phone in
•
your building.
Immediately call your gas supplier from a neighbor's phone.
•
Follow the gas supplier's instructions.
If you cannot reach your gas supplier, call the fire
•
department.
- Installation and service must be performed by a qualified
installer, service agency or the gas supplier.
INSTALLER: Leave this manual with the appliance.
CONSUMER: Retain this manual for future reference.
Energysaver
®
Table of Contents ........... 2
Safety Information .......... 3
Operating Instructions .... 6
Care and Maintenance ... 22
Fault Codes .................... 24
Installation Instructions ... 26
Parts List ........................ 45
Consumer Support ......... 54
Advertisement
Table of Contents

Related Manuals for Rinnai EX17


Summary of Contents for Rinnai EX17
-
Page 1: Table Of Contents
Owner’s Operation and Installation Manual for the EX17 (RHFE-433RWTA) EX22 (RHFE-558RWTA) Energysaver ® Gas Direct Vent Wall Furnace Table of Contents ... 2 Safety Information ..3 Operating Instructions ..6 Care and Maintenance ... 22 Fault Codes ....24 Installation Instructions ... -
Page 2: Table Of Contents
Function Lock ..........20 Humidifier and Air Flow Direction ....21 Care and Maintenance ........22 Before Making a Service Call ......23 Fault Codes ............ 24 Restart Function ..........25 Troubleshooting ..........25 Rinnai Corporation EX17 / EX22 Manual... -
Page 3: Safety Information
• Clothing or other flammable material should not be placed on or near the appliance. • Any safety screen or guard removed for servicing must be replaced prior to operating the appliance. Rinnai Corporation EX17 / EX22 Manual... -
Page 4: Safety Features
Propane: 81.0% EX22: Natural Gas: 80.0% Propane: 81.0% Rinnai is continually updating and improving products. Therefore, specifications are subject to change without prior notice. The efficiency rating of this appliance is a product thermal efficiency rating determined under continuous operating conditions and was determined independently of any installed system. -
Page 5: Features
• Hush! Quiet Operation • Warm Air Outlet at Floor Level (keeps your feet • Modern Design Minimizes Floor Space warm) Requirements • Function Lock • Fault Code Message Display • Room Temperature Setting Memory Rinnai Corporation EX17 / EX22 Manual... -
Page 6: Operating Instructions
HOLD BOTH SIDES MODEL NUMBER, AND PULL TOWARD SERIAL NUMBER, GAS TYPE, ETC. THERMISTOR AIR FILTER GAS CONNECTIONS EXHAUST PIPE 1/2" NPT VENT TERMINAL POWER CORD COMBUSTION/ EXHAUST PLUG 120V AC COMBUSTION AIR INTAKE HOSE Rinnai Corporation EX17 / EX22 Manual... -
Page 7: Control Panel
Rinnai Corporation EX17 / EX22 Manual... -
Page 8: Setting The Clock
Holding button down will change the time rapidly, first in minutes, then in hours. CONFIRM SETTINGS Press the “Select”or “Clock” Programming button once to lock in and Clock Select Timers complete setting the time. Select indicators will go out. Clock Rinnai Corporation EX17 / EX22 Manual... -
Page 9: Operating The Heater Manually
To turn the heater OFF: Frost Press the “ON/OFF” button. Override Auto ON/OFF DO NOT turn heater off by unplugging the power cord. The convection fan will continue to run until the appliance cools. Rinnai Corporation EX17 / EX22 Manual... -
Page 10: Programmable Weekly Timer
Period 3 heats the room from 4:00 pm to 11:00 pm at 72° F. 11:00pm • Period 4 has a temperature setting of LOW and runs the appliance at this setting during the night. 4:00pm Rinnai Corporation EX17 / EX22 Manual... -
Page 11: Programming The Weekly Timers
Select choice. Select Repeat steps → for periods 1 through to 4 until you are satisfied with all the settings. Press the “Timers“ button again to confirm your program and lock in all settings. Rinnai Corporation EX17 / EX22 Manual... -
Page 12: Programming The Weekly Timers (Example)
Press the “Select” button again. The clock Programming indicator will become stable, the pre-set Timers Clock Select Tu We Th Fr Select Program temperature will flash and “Select Program Temp Temp” will be shown. Rinnai Corporation EX17 / EX22 Manual... -
Page 13: Programming The Weekly Timers (Example
To review all of the programed settings go to “WEEKLY TIMER REVIEW FUNCTION”. For a description of how to operate the heater with these programed settings, go to “OPERATING THE TIMERS”. Rinnai Corporation EX17 / EX22 Manual... -
Page 14: Weekly Timer Review Function
“Mo”(Monday) then “Tu” etc. Press the “ ” button to go backwards through the program. To exit the Weekly Timer Review mode: Press the “Timers” button. Programming Clock Select Timers Rinnai Corporation EX17 / EX22 Manual... -
Page 15: Your Weekly Timer Program
If the Weekly Timer program settings are erased, Start Time Temp or OFF the heater will revert to this program. 7:00 am 72 F 12:00 pm 70 F 5:00 pm 74 F 11:30 pm 64 F Rinnai Corporation EX17 / EX22 Manual... -
Page 16: Operating The Timers
Returning to Manual Mode Press the “Auto” button. The “Auto” Room Frost indicator will go out and be replaced by the “Man”(Manual) indicator. Override Auto ON/OFF The heater will now heat depending on your manual settings. Rinnai Corporation EX17 / EX22 Manual... -
Page 17: Override Function
Override function turned off manually (see step below). To turn off the Override function: Press the “Override” button. Then the heater will return to the operation of the current timer period. Rinnai Corporation EX17 / EX22 Manual... -
Page 18: Frost Protection
When the “Frost” indicator is displayed the Frost Protection is operating, and will always prevent the room temperature from falling below the pre-set Frost Protection temperature. To turn off the Frost Protection: Press the “Frost” button. The Frost “Frost” indicator will go out. Override Auto ON/OFF Rinnai Corporation EX17 / EX22 Manual... -
Page 19: Energy Saving Mode
30 min 30 min 30 minutes it reduces the temperature by a further 2 F, effectively saving energy. The Economy Mode will not operate if the heater is under capacity for the room size. Rinnai Corporation EX17 / EX22 Manual... -
Page 20: Function Lock
If activated while the heater is OFF, then all controls will be locked. If the heater is turned off while the Function Lock is activated, it cannot be turned on again until the lock is deactivated. Deactivating the lock releases the controls. Rinnai Corporation EX17 / EX22 Manual... -
Page 21: Humidifier And Air Flow Direction
The horizontal louver (which determines the vertical air During operation a small amount of condensation is flow direction) is fixed and cannot be adjusted. produced in the flue system and drains into the humidifier tray. Rinnai Corporation EX17 / EX22 Manual... -
Page 22: Care And Maintenance
Dirty filters reduce the air flow and the appliance’s qualified service technician, preferably one who has ability to produce heat. The filters should be cleaned attended Rinnai service training classes on the Direct frequently during the heating season. If the filters Vent products. -
Page 23: Before Making A Service Call
Unit cuts off without apparent reason. Check whether filters are blocked. Dirty filters will cause the heater to overheat. Power Failure. Switch OFF, then ON again when power is restored to re-set controls. Rinnai Corporation EX17 / EX22 Manual... -
Page 24: Fault Codes
If the fault code remains in diagnosing the problem. The fault code will flash in or returns on the next operation, contact Rinnai or your the display on the control panel. When making a nearest service agent and arrange for a service call. -
Page 25: Restart Function
Flue manifold not connected Service Call Louver obstructed Clear obstruction Air filter blocked Clean filter Gas Escape Service Call Function Lock Set Cancel Function Lock Gas turned off at meter, tank, Turn gas on or valve. Rinnai Corporation EX17 / EX22 Manual... -
Page 26: Installation Instructions
Gas and Propane Installation Code, CSA B149.1. • Rinnai suggests that a dedicated electrical circuit • A manufactured home (USA only) or mobile home with a 120VAC, 60 hz, 10 amp power source be OEM installation must conform with the used. -
Page 27: Gas Connection
Also refer to the Safety Behaviors and Practices section. The clearance 2" to combustibles from the top is zero. 2" 40" Attach Back Covers (Sides Only) Attach back covers as shown. Engage Lugs Secure With Screws Rinnai Corporation EX17 / EX22 Manual... -
Page 28: Flue Terminal Clearances
Flue Terminal Clearances Rinnai Corporation EX17 / EX22 Manual... -
Page 29: Flue Terminal Clearances
Flue Terminal Clearances Rinnai Corporation EX17 / EX22 Manual... -
Page 30: Dimensions
Dimensions 11 " (280mm) 3 7/16" (88mm) 3 3/8" (85mm) 6 1/2" (165mm) 8 9/16" 9 5/8" Exhaust at rear of unit Power supply cable (217mm) (245mm) 29 1/2" (750mm) Rinnai Corporation EX17 / EX22 Manual... -
Page 31: Installation Parts
9 1/2 - 15 3/4 in (240 - 400mm) C Vent Kit FOT-153 15 3/4 - 23 5/8 in (400 - 600 mm) D Vent Kit FOT-154 23 5/8 - 31 1/2 in (600 - 800 mm) Rinnai Corporation EX17 / EX22 Manual... -
Page 32: Drilling Flue Hole
For weatherboard walls, drill through the center of the weatherboard from the outside first and then through the plasterboard. A template is provided. NOTICE Do not cut the intake hose. Cutting the intake hose may result in noise. Rinnai Corporation EX17 / EX22 Manual... -
Page 33: Flue Manifold Installation
• This appliance can only be used with one of the not exhaust into other rooms. five types of Rinnai flue kits. The flue kits and their dimensions are listed on the previous page. • The flue manifold is not designed to be positioned under floors or below the heater. - Page 34 Push the assembly into the terminal tube, ensuring that the seal is in place on the inner tube. Attach the inside connection with 3 screws. The inner connection can still be turned to install the screws. 3 screws Rinnai Corporation EX17 / EX22 Manual...
-
Page 35: Extension Kit Installation
All 3 views are from behind the appliance. For your configuration, position the air intake hose as shown. Horizontal extension on left side Plastic tie c i t right side c i t left side Plastic tie Rinnai Corporation EX17 / EX22 Manual... - Page 36 10 feet. Therefore, pipes exceeding these lengths should be made to drain to the outside by giving their horizontal portions 3˚ or more downward and outward slope. Rinnai Corporation EX17 / EX22 Manual...
- Page 37 Join air intake hoses by screwing the hose joint half of its length into the air intake hose and then screwing Hose joint another air intake hose into the hose joint. air intake hoses Rinnai Corporation EX17 / EX22 Manual...
-
Page 38: Extension Kit Installation
50 Air Intake Hose - 90.6 in (2.3 m) Bent Elbow Long Bent Elbow 50 Hose Joint Pipe Stopper A Pipe Stopper B Pipe Clamp B 3 sets 4 sets 5 sets 1 set Wall Fixture Screw A Screw B Rinnai Corporation EX17 / EX22 Manual... -
Page 39: Connecting The Appliance
2 Spacer bracket Spacer screws. Wall bracket Up to 10 mm Adjustable Leg If necessary, the unit can be leveled using the adjustable legs under the front right and left hand side legs. Rinnai Corporation EX17 / EX22 Manual... -
Page 40: Operating Instructions
Keep burner and control compartment clean. See installation and 3. Locate the manual gas valve on the side of the heater. Turn the manual valve operating instructions. clockwise to the full OFF position. Rinnai Corporation EX17 / EX22 Manual... -
Page 41: Cut-Away Diagram
Cut-Away Diagram Rinnai Corporation EX17 / EX22 Manual... -
Page 42: Wiring Diagram
If any of the original wire as supplied with the appliance must be replaced, it must be replaced with Label all wires prior to disconnection when type 18 AWG wire or its equivalent. servicing controls. Wiring errors can cause improper and dangerous operation. Rinnai Corporation EX17 / EX22 Manual... -
Page 43: Ladder Diagram
Ladder Diagram Rinnai Corporation EX17 / EX22 Manual... -
Page 44: Flow Diagram
Flow Diagram THERMISTOR Rinnai Corporation EX17 / EX22 Manual... -
Page 45: Parts List
Parts List For replacement parts call Rinnai at 1-800-621-9419. Rinnai Corporation EX17 / EX22 Manual... - Page 46 Parts List Rinnai Corporation EX17 / EX22 Manual...
- Page 47 Parts List For replacement parts call Rinnai at 1-800-621-9419. Rinnai Corporation EX17 / EX22 Manual...
- Page 48 Parts List Rinnai Corporation EX17 / EX22 Manual...
- Page 49 Parts List For replacement parts call Rinnai at 1-800-621-9419. Rinnai Corporation EX17 / EX22 Manual...
- Page 50 AU131-236-B CORD PACKING A AU131-236-A HEAT INSULATOR A 556F-477 HEAT INSULATOR B 556F-478 REAR PANEL PACKING 556F-325 UNDER COVER TOTAL ASS'Y 556F-479-2 UNDER COVER TOTAL ASS'Y 556F-479-4 ON-OFF VALVE ASS'Y BRR37-244 INLET CAP 3022-0363 Rinnai Corporation EX17 / EX22 Manual...
- Page 51 CONNECTING TUBE FIXER 556F-408 COMBUSTION FAN CASING ASS'Y 556F-414-3 SCREW FOR MOTOR CP-30310 CUSHION RUBBER 308F-8273 FLUE SLIDING TUBE ASS'Y R558F-1019 O RING E RHF300-200-E O RING D FOT-001-016-3 SLIDING TUBE RHF250-148-2 COVER 302F-1103 Rinnai Corporation EX17 / EX22 Manual...
- Page 52 EI-161 SLEEVE 3022-0344 TF COVER 556F-524 FR LEAD 431F-1430 OVERHEAT SWITCH ES-01174 OHS3 HARNESS ASS'Y R558F-1030 OHS3 HARNESS R558F-1031 PRESSURE SENSOR 1004F-2051 SENSOR LEAD ASS'Y 1004F-2053 SCREW ZAA0420SZ SCREW ZEAB0408UK SCREW ZEAB0408SZ SCREW ZEDB0412SZ Rinnai Corporation EX17 / EX22 Manual...
-
Page 53: Parts List
EXHAUST CAUTION LABEL 1001F-1654 OWNER'S MANUAL R558F-1050 CONVERSION MANUAL R558F-1051 TEMPLATE 556F-2086 CONVERSION KIT 556F-2085-1 LP to NG CONVERSION KIT 556F-2085-2 NG to LP CONVERSION KIT 556F-2085-3 LP to NG CONVERSION KIT 556F-2085-4 NG to LP Rinnai Corporation EX17 / EX22 Manual... -
Page 54: Consumer Support
What will Rinnai do? Rinnai will repair or replace the covered product or any part or component that is defective in materials or workmanship as set forth. Rinnai will pay reasonable labor charges associated with the repair or replacement of any such part or component. All repair parts must be genuine Rinnai parts. - Page 55 Rinnai shall not be liable for indirect, incidental, special, consequential or other similar damages that may arise, including lost profits, damage to person or property, loss of use, inconvenience, or liability arising from improper installation, service or use.
- Page 56 • Up to 83% AFUE Energy Efficiency • Zero-Clearance Installation • Available in Four Options of Fronts • Remotes and Fan Included • Gas Conversion Kit Available Hydronic Air Handler Designed for Use with Rinnai Systems • Domestic Hot Water Priority • Optional Programmable Thermostat •...