Table of Contents
Advertisement
Quick Links
Advertisement
Table of Contents

Related Manuals for Magellan Roadmate Commercial RC9496T-LMB


Summary of Contents for Magellan Roadmate Commercial RC9496T-LMB
- Page 1 Magellan RoadMate Commercial RC9496T-LMB Android Fleet Navigator ™ User Manual...
-
Page 2: Important Safety Warnings
It is your responsibility to comply with all traffic laws and to use the Magellan RoadMate and mounting options in such a manner that the user is in compliance with applicable laws. - Page 3 Only use the car charger approved for/supplied with your Magellan RoadMate receiver. Use of another type of car charger may result in fire or electric shock. For safety reasons, the battery in your Magellan RoadMate receiver will stop charging when the ambient temperature is less than 32°F (0°C) or more than 113°F (45°C).
- Page 4 This transmitter must not be co-located or operated in conjunction with any other antenna or transmitter. Lifetime Traffic is for the lifetime of the GPS Device or until Magellan no longer receives relevant traffic data whichever is shorter. Lifetime Traffic may not be transferred to another Magellan device and may not be available in certain areas.
- Page 5 © 2015 MiTAC International Corporation. The Magellan logo, Magellan, RoadMate and Quickspell are registered trademarks of MiTAC International Corporation. SmartDetour and OneTouch are trademarks of MiTAC International Corporation and are used under license by MiTAC International Corporation. All rights reserved.
-
Page 6: Table Of Contents
Magellan RoadMate Content . . . . . . . . . . . . . . . . . . . - Page 7 This user manual will give you the necessary information on how to use the various features of the Magellan RoadMate Commercial receiver. Visit us at magellanGPS .com/support Connect with us @MagellanGPS MiTAC Digital Corporation 471 El Camino Real, Santa Clara, CA 95050 USA...
-
Page 8: Fundamentals
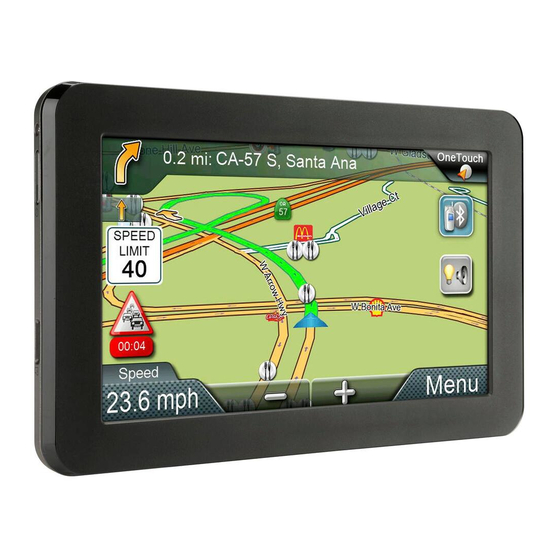
Chapter Fundamentals The Map Screen will be the most commonly used screen for driving and navigating to a destination. The following will familiarize you with the icons and buttons on the device. Time Wi-Fi Bluetooth Cancel route Traffic Signal Vehicle Battery Next Maneuver Square Tiles... -
Page 9: Elements Of The Map Screen
Wi-Fi is turned off in Settings. Bluetooth Displays the current pairing status of the Bluetooth connection. When paired to a phone, the Magellan RoadMate receiver can be used as a remote interface for your phone. Bluetooth is paired to a phone. - Page 10 Speaker On. Volume set by slider bar. Speaker Muted. Current Displays the current location of the Magellan RoadMate receiver in Location relation to the displayed map. Indicator Tap on the Current Location Indicator to get information on your current location.
- Page 11 Alert Icons There are two standard alerts that can be displayed on the screen when they are present in your area, Red Light Cameras and Fixed Speed Cameras. Location of a red light camera. Location of a fixed speed camera. Map Screen Content Tiles There are eight different content tiles available on the device.
-
Page 12: Install Cradle
Power On, Suspend, Power Off Turning the Magellan RoadMate Receiver On Press and hold the Power button for 2-3 seconds. The Magellan logo may not appear until a few seconds after you release the button. Turning the Magellan RoadMate Receiver Off (Suspend Mode) If you suspend operation, the route and all information is held so you can quickly resume use. -
Page 13: Adjustments
Tap Cancel to continue operation, otherwise the unit will suspend operation. To resume, press and release the power button. Turning the Magellan RoadMate Receiver Off (Shutdown) Press and hold the Power button for 2-3 seconds and release when the Shutting Down message is displayed. - Page 14 Changing Zoom Levels Button Method to zoom in or to zoom out of the map display. Pinch / Spread Method Use two fingers to “Pinch” the map area to zoom out. Use two fingers to “Spread” the map area to zoom in. Changing the Map Style The map can be changed to be viewed in 3-dimensional, 2-dimensional - North up or 2-dimensional - heading up style.
- Page 15 Viewing Current Location Details Tap on the current location icon The Current Location screen is displayed. Saving Current Location Tap on the current location icon The Current Location screen is displayed. Tap on the Save icon Select where to save the location (Wish List, My Places or OneTouch).
-
Page 16: My Places
Chapter My Places My Places My Places can be best described as the place where all of the saved destinations and routes are stored. There are four separate sections to My Places, each one with its own distinct purpose. Address The Address Book stores contacts, places and trips that you have saved. - Page 17 Accessing the Address Book From the Map screen, tap the Address Book icon Three tabs are available, as below: Places tab Contacts Tab Trips Tab Adding a Place to the Address Book From the Map screen, tap Go To . . . You can select a POI or search an address, as appropriate.
- Page 18 Adding a Contact to the Address Book From the Map screen, tap the Address Book icon Tap the Contacts tab icon Tap the Edit icon Tap the “item add” icon Enter the address to be added. When the address has been entered, tap Add. Enter a contact name, or edit/accept the suggested name.
- Page 19 Editing Contact information You can add, rename, or delete any phone number or place belonging to a contact. In addition, you can edit any phone number for a contact. To do any of these operations, you start by selecting the contact: Selecting a contact to edit it From the Map screen, tap the Address Book icon.
- Page 20 At the bottom header, the buttons + Address and + Phone are displayed. Tap the + Address button. The full keyboard with POIs is displayed. Locate the place to add. The full address/POI search is available. Tap Done and the keyboard is displayed so you can edit the display name. Tap Save to save changes and return to the Contact Edit page.
-
Page 21: Wish List
Editing the Trip’s Name in the Address Book Only the descriptive name for a contact can be edited. From the Map screen, tap the Address Book icon. Tap the Trip tab icon Tap the Edit icon. Tap on the appropriate Edit icon Use the keyboard to modify the name of the trip. -
Page 22: Recent
Recent Recent destinations can’t be added or edited, but you can delete one or all of them. Deleting Recent Destinations From the Map screen, tap the Address Book icon. Tap Recent. Tap the Edit icon. Tap the delete icon for the recent destination to be deleted or tap Clear All to delete all the recent destinations in the list. - Page 23 Editing the Name of a OneTouch Button From the Map screen, tap the OneTouch button Tap the Edit icon. Edit the OneTouch button name. Tap Save. Tap Done. Rearranging the OneTouch Buttons From the Map screen, tap the OneTouch button Press and hold the OneTouch button to be moved.
-
Page 24: Vehicle Profile
Chapter Vehicle Profile Set your vehicle profile so that when routes are being calculated you will not be routed over roads that your vehicle cannot travel on. Note: Vehicle Mode must be set to Fleet for routing to consider Vehicle Profile. Accessing Vehicle Profile From the Map screen tap Settings. -
Page 25: Fleet Manager
Fleet Manager Note The following information is only for the device Administrator. Please follow these steps to register and manage your devices on Fleet Manager. Register a Magellan Fleet Manager account Go to FleetManager.MagellanGPS.com and click Request one here to create a new account. -
Page 26: Update Software & Maps
Registered Devices will be displayed in the Before confirming the registration, it is ‘Update’ tab. Please contact your Magellan possible to assign devices to groups. Click sales representative to get information on how on the dropdown menu, and select +New to to subscribe to Map Updates. -
Page 27: Hours Of Service (Hos)
Chapter Hours of Service (HOS) Driver Log Book The hours of service (HOS) are regulations issued by the Federal Motor Carrier Safety Administration (FMCSA) governing the working HOS Button HOS Tiles hours of anyone operating a commercial motor vehicle (CMV) in the United States. Driver Status squares Driver Log... - Page 28 Multiple Drivers (Team Driving) Adverse Driving A co-driver can be logged as Driver, while the During adverse weather conditions, tap the other is in Sleeper Berth mode, or logged as Adverse Driving icon (exclamation mark) in On Duty (Not Driving). Once a driver is selected, the HOS footer.
- Page 29 Daily Log Daily Log Info To open, tap ‘Daily Log’ from the Driver A list displays all information associated with Log screen. The buttons (Chart, Remarks, that days trip, including co-driver, vehicle Info) in the footer can switch the view from number, odometer reading, carrier, addresses, the log chart to list of remarks and a list of etc.
-
Page 30: International Fuel Tax Agreement (Ifta)
Chapter International Fuel Tax Agreement (IFTA) The International Fuel Tax Agreement (or In the Search by Date Range page, tap the IFTA) is an agreement between the lower 48 ‘From‘ field to expand the calendar. Enter states of the United States and the Canadian dates in the ‘From‘... -
Page 31: Keyboard
Since there are some differences from a typical smartphone, and for those who have not used a smartphone keyboard, the basics of the Magellan RoadMate keyboard will be explained here. The key in the lower right is used for Search, Done, Save, and Enter. Its label changes according to the operation in progress, and will dim when it is not available to be used. - Page 32 Tapping on one of the category buttons will add that category to the search input. You can select a sub- category (if available) and add it. With a category selected, you can search, or add information to limit the search. Tap Search to display results on the Search Results page.
-
Page 33: Magellan Roadmate Content
Chapter Magellan RoadMate Content Types of Content There are various types of content available on the Magellan RoadMate Commercial. Some items are optional or subscription-based. Preloaded POIs There are over 9 million POIs preloaded into the Magellan (Points of Interest) RoadMate Commercial. - Page 34 When you register your device, a SmartGPS Eco account is created where your content is stored. SmartGPS Eco continuously pulls information from the Internet that will be used for content. The Magellan RoadMate Commercial is able to give you the latest weather forecasts and current gas prices.
- Page 35 Once you have successfully connected, the information for connecting to the network is stored in the Magellan RoadMate Commercial and it automatically connects to the network when the Wi-Fi signal is in range. From the Map screen press Tap on the Wi-Fi button.
- Page 36 With the name and security set, tap on Join. Forgetting a Network Connection After connecting to a network, the password for the network is stored in the Magellan RoadMate Commercial until you “forget” the password. After forgetting, you will need to re- enter the password to connect.
- Page 37 User-Entered Content On the device, content can be saved when you create a route to a destination or by entering it directly into your address book. The procedures are mostly the same, just accessed from different areas. Adding Places or Contacts From the Map screen, tap the Address Book icon.
- Page 38 Tap Content. Tap PhantomALERT. Tap on the alert to be modified. a) Set visibility on map on or off. b) Set audible Alert on or off. to return to previous screens. Weather Weather can be customized to display the temperature in Fahrenheit (°F) or Celsius (°C). You can also set which five cities will have weather information available on the device.
-
Page 39: Routing
Next to the icon is the distance to and name of the street where the maneuver will be performed. Note: The Magellan RoadMate will provide audible alerts while you are routing. If you missed an alert or just want to hear it again, tap the header with the street name for the maneuver and the message will repeat. - Page 40 You can compare routing methods and view them on the map. You can see the distance to the destination and the estimated time of arrival for the selected routing method. The routing methods include Fastest, Shortest or Least Freeways. As you select the routing method, the highlighted route in the map area reflects the choice made.
-
Page 41: Creating And Revising Routes
Detour Tap Detour and select the distance (3, 5, or 9 miles) to detour. The Magellan RoadMate will recalculate the route with the detour included. Turn List The Turn List will display all of the maneuvers involved in the route. - Page 42 Creating a Route from Recent Places From the Map screen tap Tap Recent. Tap the desired destination from the list of recent destinations. Choose how you want the route computed; Fastest, Shortest, or Least Freeways. Tap GO. Creating a Route from the OneTouch Menu From the Map screen tap Tap the OneTouch button with the desired destination.
- Page 43 Creating a Route to an Intersection From the Map screen tap Go To . . . Using the instructions found in “Keyboard Basics” on page 24 , enter the name of the first street. Tap Search. A list of streets and cities is displayed.
- Page 44 Creating a Route to a POI (Point of Interest) From the Map screen tap Go To . . . Select the POI category from the horizontal list displayed. Choose how you want the route computed; Fastest, Shortest, or Least Freeways. Tap GO.
- Page 45 Shortcut: Tap the Maneuver icon on the Map screen to go directly to the Turn List. on the maneuver to detour around. Confirm by tapping GO. Note: Not all maneuvers can be detoured, but the Magellan RoadMate will try to recalculate the route, avoiding the maneuver. RC9496T-LMB User Manual...
-
Page 46: Bluetooth
The Magellan RoadMate RC9496T-LMB provides hands-free capabilities for making and receiving phone calls, utilizing Bluetooth on your smartphone. Before you can use your smartphone with the Magellan RoadMate you need to pair the phone to the Magellan RoadMate. Pairing Your Phone... - Page 47 Instructions Answering a Call When a call is received the following is displayed along the bottom of the screen. Tap Answer to accept the call. The Bluetooth screen is displayed and you can begin speaking. Note: Press the Home button to return to the Map screen without interrupting the call. The Dial pad from the Map screen will return you to the Bluetooth screen.
- Page 48 Tap the Edit icon. Tap on the Edit icon for any open item in the list (indicated by the words “Speed Dial”). Tap “Dial Pad” and enter the number followed by name to be used. Deleting a Number from the Speed Dial list From the Map screen, tap Tap the speed dial tab Tap the Edit icon.
- Page 49 Managing the Contacts Phone Book The Contacts Phone Book can not be edited within the Magellan RoadMate but can be imported from your paired smartphone. Make the changes to your Address Book on your smartphone and then follow these instructions.
- Page 50 From the Map screen, tap the Settings button. Tap on Bluetooth. Tap on the Sync to SmartGPS Eco via Phone checkbox. When the box is checked, the Magellan RoadMate will obtain and sync content through your paired smartphone. RC9496T-LMB User Manual...
-
Page 51: Settings
Settings Settings Menu The Settings Menu is the starting point for accessing the tools needed to customize and set the necessary parameters for the Magellan RoadMate. General Access tools to set the language, units of measure, auto power off, screen... -
Page 52: General Settings
View currently registered SmartGPS Eco ID or register a new or existing ID. End-User License Agreement Legal statement describing the contract between Magellan and the end-user as to how the software can and cannot be used as well as any restrictions imposed by Magellan. -
Page 53: Navigation And Maps
When checked, all computed routes will avoid toll roads whenever possible. Avoid Unpaved Roads When checked, the Magellan RoadMate will avoid creating a route that uses unpaved roads as possible. Note: When a route is created that requires the use of an unpaved road, a warning will be displayed indicating that an unpaved road is being used in the route. - Page 54 Then your searches will start from that set location. When the Magellan RoadMate is turned off, (full shutdown) it will start up with current location in GPS mode. If it is merely suspended, it will ‘wake up’ with its ‘current location’ mode unchanged.
- Page 55 Wi-Fi. Wi-Fi Networks Wi-Fi Networks displays a list of Wi-Fi networks in range of the Magellan SmartRV. Tap Add Network to include a known network that does not broadcast its SSID. Tap Refresh to scan for additional networks.
- Page 56 Bluetooth call. Sync to SmartGPS Eco via Phone When the Sync to SmartGPS Eco via Phone box is checked, the Magellan RoadMate will obtain and sync content through your paired smartphone. Paired Phones Displays a list of any smartphones that are currently paired with the Magellan RoadMate via Bluetooth.
- Page 57 Points of Interest Visibility Tap to access a list of POI (Points of Interest) types. When a POI type is checked, it will appear on the map. Browser Browser settings let you customize the way you browse the web, and control the privacy settings.
- Page 58 471 El Camino Real, Santa Clara, CA 95050 USA www .magellanGPS .com © 2015 MiTAC International Corporation. The Magellan logo and Magellan are registered trademarks of MiTAC International Corporation, and OneTouch is a trademark of MiTAC International Corporation and are used under license by MiTAC Digital Corporation.