Pioneer DJM-850 Operation Manual
Audio & video mixing dj software
Hide thumbs
Also See for DJM-850:
- Operating instructions manual (32 pages) ,
- Firmware update manual (7 pages) ,
- Quick start manual (6 pages)
Table of Contents
Advertisement
Quick Links
Advertisement
Table of Contents

Related Manuals for Pioneer DJM-850


Summary of Contents for Pioneer DJM-850
- Page 1 VirtualDJ 8 – Pioneer DJM-850...
-
Page 2: Table Of Contents
E. Microphone ........................9 F. Input Selects ........................9 G. Master ..........................10 H. Effects ..........................11 I. Rear Panel ......................... 11 Advanced Setup ........................13 Timecode (DVS) ........................13 Recording ..........................15 Mixer Order........................... 17 VirtualDJ 8 – Pioneer DJM-850... -
Page 3: Installation
Set the SOURCE selector at the top panel for DECKs 1 to 4 to USB Connect the Pioneer DJM-850 with AC power using the provided cable and power on the unit Note: Usage of turntables or CD players (for DVS) is not necessary. The mixer may be used as a pure MIDI mixer. -
Page 4: Drivers
850#firmware-update http://www.pioneerdj.com/en/support/software/djm- 850#drivers If the drivers are properly installed, the DJM-850 Setting Utility will appear each time you connect your DJM-850 with your computer via the USB port. Advanced Setup for further details. -
Page 5: Advanced Setup
Alternative setups can be applied in the same window. Timecode (DVS)* configuration is not pre-configured (see DVS Support for more details). requires Pro Infinity or Timecode License http://www.virtualdj.com/buy/index.html For further software settings please refer to the User Guides of VirtualDJ 8. http://www.virtualdj.com/wiki/PDFManuals.html VirtualDJ 8 – Pioneer DJM-850... - Page 6 VirtualDJ 8 – Pioneer DJM-850...
-
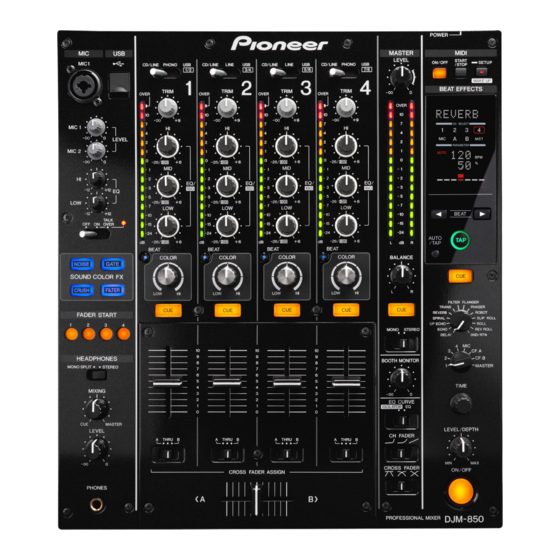
Page 7: Controls
U. USB Use a USB cable to connect the DJM-850 with a USB port of your computer and allow DJM-850 to send and receive audio and Midi signals MIDI. Press this button to enable the MIDI Operation of the DJM-850. Once... -
Page 8: Equalizer
VirtualDJ GUI, the internal High-Low Pass Filter of VirtualDJ is still not used (only provide a visual indicator) 12. COLOR BEAT. Then enabled, the Sound Color Effects will follow the Beat pattern from the FX section. VirtualDJ 8 – Pioneer DJM-850... -
Page 9: Headphones
Set to USB position to route a VirtualDJ deck output to a mixer channel. On PHONO/CD/LINE position the audio signal from the Inputs (1, 2, 3 and 4 at the rear panel) will be routed directly to the Output of this Mixer Channel. In this case the sound VirtualDJ 8 – Pioneer DJM-850... -
Page 10: Master
27. EQ CURVE. Choose between Normal and Isolator (Cut) Equalizer modes. 28. CH FADER CURVE. Select the Curve that the Channel Volume faders will follow. 29. CROSSFADER CURVE. Select which curve the Crossfader will follow (Cut, Full, Smooth) VirtualDJ 8 – Pioneer DJM-850... -
Page 11: Effects
H. Effects The Beat Effects section of the Pioneer DJM-850 is offering a variety of high-quality hardware beat-based effects that can be applied to any of the 4 available decks, Master, Crossfader assigned sides and both Microphone Inputs. The Effects that come with VirtualDJ can be applied to any of the 4 decks as well, using the corresponding Effect buttons from the GUI or an additional MIDI device and will be applied before the hardware effects. - Page 12 47. DIGITAL. S/PDIF Output. Used to digitally link mixers without converting to analog. 48. CONTROL. 3.5mm mini phone jack type connections. If you connect a Pioneer CDJ Player with the supplied Control cables, you will be able to start/stop playback with the Volume faders of the DJM-850.
-
Page 13: Advanced Setup
CDs) can be accepted in all 4 available Channels. Connect your Timecode devices at the rear panel of the Pioneer DJM-850 to the Inputs 1 to 4 and make sure the Input switchers at the top panel are set to USB position. - Page 14 VirtualDJ will auto-create 2 Timecode Inputs. Add 2 more Timecode Input lines and select the appropriate Input Channels as per the image below Pioneer DJM-850 – Audio Setup with 4 Timecode Inputs Click to APPLY. Press PLAY on your timecode CD and/or Vinyl device and VirtualDJ will automatically detect your Timecode type and make the appropriate adjustments for best performance.
-
Page 15: Recording
See Recording. Pioneer DJM-850 - Audio Setup with 2 Timecode Inputs Recording Any of the 4 available USB Output Channels of the Pioneer DJM-850 can be used to record your Main Mix along with Microphone Inputs. VirtualDJ 8 – Pioneer DJM-850... - Page 16 Open the AUDIO tab of VirtualDJ Settings and manually add a “record” line to your current audio configuration. Select the PIONEER DJM-850 sound card and the same Input Channels from the Setting Utility (in this case IN 7&8), as per the following image.
-
Page 17: Mixer Order
Choose one of the available mixer orders 1-2-3-4, 3-1-2-4 (default) or 1-3-4-2 If the sound card of the Pioneer DJM-850 is used in the Audio setup, confirm the change of the audio routing in the following window and VirtualDJ will automatically make the necessary changes to the audio configuration. - Page 18 Pioneer DJM-850 product page: http://www.pioneerdj.com/en/product/mixer/djm- 850/black/overview Pioneer DJM-850 manual: http://www.pioneerdj.com/en/support/documents/djm-850#manual Hardware Integration Department 2015 - ATOMIX PRODUCTIONS Reproduction of this manual in full or in part without written permission from Atomix Productions is prohibited. VirtualDJ 8 – Pioneer DJM-850...