Table of Contents
Advertisement
Quick Links
Advertisement
Table of Contents

Related Manuals for Baumatic BMMI170SS


Summary of Contents for Baumatic BMMI170SS
- Page 1 BMMI170SS 17 Litre, Built-in Microwave Oven...
- Page 2 MODEL: BMMI170SS M i c r o w a v e O v e n O w n e r ' s M a n u a l 1. READ these instructions carefully before installing and operating the oven. Keep them for further reference.
-
Page 3: Table Of Contents
Do not attempt to operate this oven with the door open since open door operation can result in harmful exposure to microwave energy. It is important not to modify or tamper with the safety interlocks. Do not place any object between the oven front face and the door or allow food residue or cleaner residue to accumulate on sealing surfaces. -
Page 4: Specifications
Power Consumption: 230-240V~50Hz, 1200W (Microwave) Microwave Power Output: 700W Operation Frequency: 2450MHz Outside Dimensions: 304mm(H)×452mm(W)×318mm(D) Oven Cavity Dimensions: 198mm(H)×315mm(W)×294mm(D) Oven Capacity: 17Litres Cooking Uniformity: Turntable System Net Weight: Approx. 10.5 kg If the oven fails to operate: Check to ensure that the control panel is programmed correctly and the timer is set. -
Page 5: Grounding Instructions
This appliance must be grounded. This oven Note is equipped with a cord with a grounding wire, If you have any questions about the with a grounding plug. It must be plugged grounding electrical instructions, into a wall receptacle that is properly consult Customer Services installed and grounded. -
Page 6: Microwave Cooking Principles
Warning: When the appliance is operated in temperature should be checked before the combination mode, children should only serving in order to avoid burns. use the oven under adult supervision due to Cooking utensils may become hot because the temperatures generated. of heat transferred from the heated food. -
Page 7: Utensils Guide
The ideal material for a microwave utensil is and/or fires. transparent to microwave, it allows energy to Round /oval dishes rather than square/oblong pass through the container and heat the food. ones are recommend, as food in corners tends Microwaves can not penetrate metal, so metal to overcook. -
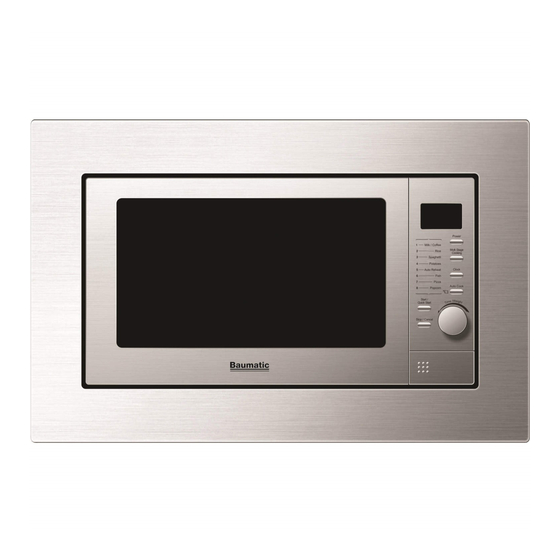
Page 8: Part Names
Door Safety Lock System Oven Window Roller Ring Door Release Button Control Panel Wave Guide (Please do not remove the mica plate covering the wave guide) Glass tray / Turn table... - Page 9 LED DISPLAY SCREEN Cooking time, power, action indicators, and clock time are displayed. POWER Touch this button repeatedly to set desired microwave cooking power level. MULTI STAGE COOKING Touch to set a multi stage cooking program. CLOCK Use to set clock time. AUTO COOK Press for instant settings to cook popular food.
-
Page 10: How To Set The Oven Controls
ETTING THE CLOCK In standby mode, touch CLOCK pad once or twice to select 12-hour or 24-hour clock. Turn TIME/WEIGHT dial to enter the hour digital. Touch CLOCK pad to confirm. Turn TIME/WEIGHT dial to enter the minute digital. Touch CLOCK pad to confirm. NOTE: You can check the clock time while cooking is in progress by touching the CLOCK pad. - Page 11 ULTI STAGE COOKING Your oven can be programmed for up to 2 automatic cooking sequences. Suppose you want to set the following cooking program. Microwave Cooking ↓ Microwave Cooking (with lower cooking power) Input Microwave Cooking program. Press MULTI STAGE COOKING button once. Input another stage of Microwave Cooking program (with lower cooking power).
-
Page 12: Cleaning And Care
HILD Use to prevent unsupervised operation of the oven by children. The CHILD LOCK indicator will show up on display screen, and the oven can not be operated while the CHILD LOCK is set. To set the CHILD LOCK: Press and hold the STOP/CANCEL button for 3 seconds, a beep sounds and the lock indicator lights. - Page 13 Built-in installation instructions: Cabinet Frame fastener (x2) Heat channel Microwave oven Frame kit Screw 4x10 (x4) Screw 4x8 (x4) Screw 4x16 (x4)
- Page 14 Make a cut out in the cabinet as per the below dimensions. Make sure you include the cut outs for ventilation. Turn the oven over and place on a cushioned surface. Then attach the feet.
- Page 15 Fasten the heat channel to the top of the microwave using the 4 screws (4x8). Fasten the frame kit to the front of the microwave using the screws provided (4x10):...
- Page 16 Attach the 2 frame fasteners to the cabinet using the screws provided (4 x 4x16) Install the microwave into the aperture, ensuring the clips on the frame kit secure to the frame fasteners. You can adjust the feet on the oven to aid alignment.
- Page 17 Ensure that the oven is central Installation complete.
- Page 18 IMPORTANT: If your appliance appears not to be operating correctly, then you should disconnect it from your mains supply and then contact the Customer Care Department. DO NOT ATTEMPT TO REPAIR THE APPLIANCE YOURSELF. Please note that if an engineer is asked to attend whilst the product is under guarantee and finds that the problem is not the result of an appliance fault, then you may be liable for the cost of the call out charge.
- Page 19 United Kingdom Czech Republic Baumatic Ltd., Baumatic CR spol s.r.o. Baumatic Buildings, Lípovà 665 6 Bennet Road, 460 01 Liberec 4 Reading, Berkshire Czech Republic RG2 0QX United Kingdom +420 483 577 200 www.baumatic.cz Sales Telephone (0118) 933 6900 Slovakia Sales Fax Baumatic Slovakia, s.r.o.