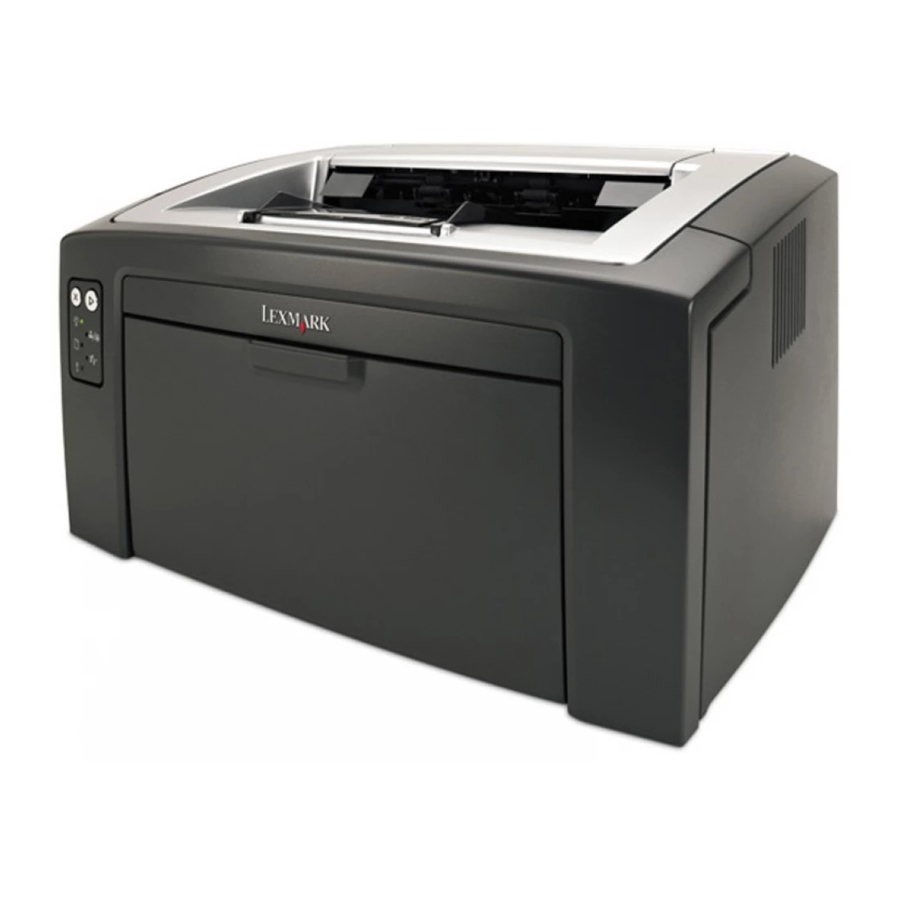
Lexmark E120 User Manual
Lexmark printer user's guide
Hide thumbs
Also See for E120:
- Service manual (115 pages) ,
- User manual (87 pages) ,
- Quick reference manual (12 pages)
Table of Contents
Advertisement
E120, E120n
User's Guide
July 2005
www.lexmark.com
Lexmark and Lexmark with diamond design are trademarks of Lexmark International, Inc.,
registered in the United States and/or other countries.
© 2005 Lexmark International, Inc. All rights reserved.
740 West New Circle Road
Lexington, Kentucky 40550
Advertisement
Table of Contents

Related Manuals for Lexmark E120


Summary of Contents for Lexmark E120
- Page 1 E120, E120n User’s Guide July 2005 www.lexmark.com Lexmark and Lexmark with diamond design are trademarks of Lexmark International, Inc., registered in the United States and/or other countries. © 2005 Lexmark International, Inc. All rights reserved. 740 West New Circle Road...
-
Page 2: Safety Information
Eire, send to Lexmark International Ltd., Marketing and Services Department, Westhorpe House, Westhorpe, Marlow Bucks SL7 3RQ. Lexmark may use or distribute any of the information you supply in any way it believes appropriate without incurring any obligation to you. You can purchase additional copies of publications related to this product by calling 1-800-553-9727. -
Page 3: Table Of Contents
Chapter 1: Overview ... 5 Chapter 2: Using the operator panels ... 8 Overview of the Lexmark E120 operator panel ... 9 Understanding the Lexmark E120 operator panel lights ... 10 Operator panel codes for the Lexmark E120 ... 12 Overview of the Lexmark E120n operator panel ... - Page 4 Electronic emission notices ... 82 Noise emission levels ... 83 ENERGY STAR ... 83 Waste from Electrical and Electronic Equipment (WEEE) directive ... 83 Laser notice ... 84 Statement of Limited Warranty for Lexmark E120 and Lexmark E120n ... 84 Index ... 86...
-
Page 5: Chapter 1: Overview
Overview The printer is available in two models: Lexmark E120 (base model) with 600 dpi (dots per inch) to 1200 IQ (image quality) resolution, 8 MB of standard memory, and a USB port; and Lexmark E120n network model) with 600 dpi to 1200 IQ resolution,16 MB of standard memory, a USB port, and an integrated Ethernet adapter. - Page 6 The power button and the power cord port are located at the rear of the printer, on the left. The USB port and a cable lock access point can also be found at the rear of the printer, on the right. The network model (Lexmark E120n) has an Ethernet port located just below the USB port.
- Page 7 The network model (Lexmark E120n) has six lights and two buttons. Note: The Continue button also functions as a light on the E120n model. Cancel Ready / Data Load / Remove Paper Error • Press and release Continue • Press the Continue button from the Ready state to print menu and network setup pages.
-
Page 8: Chapter 2: Using The Operator Panels
Using the operator panels Section Overview of the Lexmark E120 operator panel Understanding the Lexmark E120 operator panel lights Operator panel codes for the Lexmark E120 Overview of the Lexmark E120n operator panel Understanding the Lexmark E120n operator panel lights... -
Page 9: Overview Of The Lexmark E120 Operator Panel
When the printer is turned on, both lights cycle as a self test is performed. Also, when the printer is reset, or when a printer setting is changed in the menus, both lights cycle. -
Page 10: Understanding The Lexmark E120 Operator Panel Lights
Understanding the Lexmark E120 operator panel lights Operator panel lights mean different things, depending on the sequence. Lights that are off, on, and/or blinking indicate printer conditions such as printer status, intervention, or service. Use the light sequence table to find the message being indicated, then click the message for more information. - Page 11 Memory full (Ready / Data light blinks three times) Host interface disabled (Ready / Data light blinks five times) Jam in the printer paper path (Ready / Data light blinks ten times) Jam in Tray 1 / priority feeder (Ready / Data light blinks four times)
-
Page 12: Operator Panel Codes For The Lexmark E120
Printer is ready to receive and process data. • Printer is in Power Saver mode. Printer is functioning properly. Note: To change the Power Saver setting, use the Local Printer Setup Utility (see Software and Documentation CD). Overview of the Lexmark E120 operator panel... - Page 13 Press and release – Press and hold Waiting Light sequence: Error—Blinking Message: Printer is waiting until a print timeout occurs, or until additional data is received. Solution: • Press to print contents of the print buffer. • Press and release •...
-
Page 14: Invalid Engine Code
Current job is canceled. • Printer is resetting to the user default settings. All active print jobs are canceled. A user default setting remains in effect until the user changes it or until the user restores the factory default settings. -
Page 15: Not Ready
New code is being programmed into the engine or firmware. Solution: Wait for message to clear. When printer has finished programming the code, it returns to ready. Note: No button is active while this message is displayed. Overview of the Lexmark E120 operator panel to cancel job. -
Page 16: Restoring Factory Defaults
Remove the toner cartridge, and install a new toner cartridge that is programmed for the same region as your printer. See the back of the printer for a label with your printer region location. See Ordering supplies on page 66 for a list of correct supplies and part numbers. - Page 17 Press twice quickly to see the secondary light sequence. Ready / Data—Blinks once Message: Door is open. Solution: Close the open door. Overview of the Lexmark E120 operator panel Primary light sequence Primary light sequence Secondary light sequence Secondary light...
-
Page 18: Complex Page
To avoid this error in the future: • Reduce complexity of the page by reducing the amount of text or graphics. • Set Page Protect to On in the Local Printer Setup Utility (see Software and Documentation CD). ENA connection lost Light sequence: Error—On... -
Page 19: Insufficient Collation Area
To avoid this error in the future: • Reduce complexity of the page by reducing the amount of text or graphics. • Set Page Protect to On in the Local Printer Setup Utility (see Software and Documentation CD). Load media Light sequence: Error—Blinking... -
Page 20: Memory Full
Ready / Data—Blinks three times Message: Printer is processing data, but the memory used to store pages is full. Solution: • Press to clear message and continue printing job (may not print correctly). -
Page 21: Host Interface Disabled
Printer discards all jobs previously sent. • Enable the USB port by selecting a value other than Disabled for the USB Buffer item in the Local Printer Setup Utility (see Software and Documentation CD). Jam in the printer paper path Note: All jams show the same primary code. - Page 22 Ready / Data—Blinks four times • Error—On Message: A jam has occurred in Tray 1 / priority feeder. Solution: See Clearing jams on page 53 for more information. Overview of the Lexmark E120 operator panel Primary light sequence Secondary light sequence...
-
Page 23: Short Paper
Solution: • Make sure the loaded print media is large enough and paper size is set correctly in the Local Printer Setup Utility paper size menu (see Software and Documentation CD). • Press to clear message and continue the job. -
Page 24: Service Error
Printer has a service error, and printing has stopped. Solution: Turn printer off and back on. If lights are still blinking, contact customer support. See the Lexmark web site at www.lexmark.com for the phone number in your area. Overview of the Lexmark E120 operator panel... -
Page 25: Overview Of The Lexmark E120N Operator Panel
Buttons are used to continue or cancel the current print job. When the printer is turned on, all lights cycle as a self test is performed. Also, when the printer is reset, or when a printer setting is changed in the menus, all lights cycle. -
Page 26: Understanding The Lexmark E120N Operator Panel Lights
Understanding the Lexmark E120n operator panel lights The operator panel lights mean different things, depending on their sequence. Lights that are off, on, and/or blinking indicate printer conditions such as printer status, intervention, or service. Use the light sequence table to find the message being indicated, then click the message for more information. - Page 27 Jam between the input and exit sensors Jam at printer exit sensor Jam in Tray 1 / priority feeder Resource save off Short paper Toner low Long-life photoconductor kit life warning Replace long-life photoconductor kit Overview of the Lexmark E120n operator panel...
-
Page 28: Operator Panel Codes For The Lexmark E120N
Printer is ready to receive and process data. • Printer is in Power Saver mode. Printer is functioning properly. Note: To change the Power Saver setting, use the Local Printer Setup Utility (see Software and Documentation CD). Overview of the Lexmark E120n operator panel Secondary light sequence... - Page 29 Ready / Data—Blinking • Error—Blinking Message: Printer is processing data or printing pages, but the resolution of a page in current job is reduced from 600 dots per inch (dpi) to 300 dpi to prevent a memory full error. Solution: •...
- Page 30 Current job is canceled. • Printer is resetting to the user default settings. All active print jobs are canceled. A user default setting remains in effect until the user changes it or until the user restores the factory default settings.
- Page 31 Light sequence: • Continue—On • Ready / Data—On • Error—On Message: Printer is not ready to receive or process data, or the printer port is offline. Solution: • Press to return to Ready or Busy state. • Press and release •...
- Page 32 Remove the toner cartridge, and install a new toner cartridge that is programmed for the same region as your printer. See the back of the printer for a label with your printer region location. See Ordering supplies on page 66 for a list of correct supplies and part numbers.
- Page 33 Change cartridge Light sequence: • Toner Low/Replace PC Kit—On • Error—Blinking Message: Printer has detected a refilled Return Program toner cartridge has been installed. Solution: Remove current toner cartridge, and install a new toner cartridge. Open door Light sequence: Error—On Message: Door is open.
- Page 34 – Reduce complexity of the page by reducing the amount of text or graphics. – Set Page Protect to On in the Local Printer Setup Utility (see Software and Documentation CD). Missing cartridge / Defective cartridge detected Light sequence: •...
- Page 35 • Continue—On • Paper Jam—Blinking • Error—On Message: During power-on cycle, the printer detected the connection to the external network adapter was lost. Note: This error is only detected during power-on cycle. Solution: • Press to clear message. • Re-establish connection with the external network adapter.
- Page 36 • Toner Low/Replace PC Kit—On • Error—On Message: Printer memory does not have the free space necessary to collate print job. May occur due to one of the errors listed below: • Printer memory is full. • A page is too complex to print.
- Page 37 Ready / Data—On • Toner Low/Replace PC Kit—On • Error—On Message: Printer is processing data, but the memory used to store pages is full. Solution: • Press to clear message and continue printing job (may not print correctly). • Press and release •...
-
Page 38: Network Interface Errors
• Enable the network port by selecting a value other than Disabled for the Network Buffer item in the Local Printer Setup Utility (see Software and Documentation CD). Overview of the Lexmark E120n operator panel Primary light sequence Primary light... - Page 39 • Paper Jam—On Message: A jam has occurred at the input sensor; it can be after the paper leaves the tray and enters the printer or in the priority feeder. Solution: See Clearing jams on page 53 for more information.
- Page 40 • Paper Jam—On Message: A jam has occurred in Tray 1 / priority feeder. Solution: See Clearing jams on page 53 for more information. Overview of the Lexmark E120n operator panel Primary light sequence Primary light sequence Secondary light sequence...
- Page 41 Load / Remove Paper—On • Error—On Message: Paper length is too short to print the formatted data. This occurs when the printer does not know the loaded media size or when there is a problem feeding the media. Solution: •...
- Page 42 Light sequence: • Continue—On • Toner Low/Replace PC Kit—On Message: The printer is ready to receive and process data. In addition, the toner in the toner cartridge is getting low. Solution: • Press to clear message and continue processing job.
-
Page 43: Using The Printer Resident Web Page
The printer has a service error, and printing has stopped. Solution: Turn the printer off and back on. If the lights are still blinking, contact customer support. See the Lexmark web site at www.lexmark.com for a phone number in your area. -
Page 44: Printing The Menu Settings And Network Setup Page
Using the operator panels The Lexmark E120n (network model), has a resident Web page, which can be accessed from the browser. To access the resident Web page, type the printer’s IP address in the URL address field of the browser (for example, http:// 192.168.236.24). -
Page 45: Chapter 3: Print Media Tasks And Tips
Print media tasks and tips Section Types of print media Choosing appropriate print media Storing print media Loading print media into Tray 1 Loading print media into the priority feeder Preventing jams Clearing jams Print media tasks and tips Page... -
Page 46: Types Of Print Media
To reduce printing problems and receive the best print quality, try a sample of the media you are considering before buying large quantities. Refer to the Card Stock & Label Guide available on our Lexmark Web site at www.lexmark.com for more information about which print media provides optimum results. -
Page 47: Preprinted Forms And Letterhead
Use transparencies designed specifically for laser printers. Transparencies must be able to withstand temperatures of 185°C (365°F) without melting, discoloring, offsetting, or releasing hazardous emissions. We recommend Lexmark laser printer transparencies: part number 70X7240 for letter size transparencies; part number 12A5010 for A4 size transparencies. -
Page 48: Card Stock
Loading print media into Tray 1 The printer has two print media sources: Tray 1 and a multi-sheet priority feeder. Media in the priority feeder will be picked first. After the supply of media has been used up, media will be picked from Tray 1... - Page 49 The attached backstop can be adjusted in and out to fit the length of the multiple sizes of print media the printer supports. Note: Tray 1 width can be adjusted by pushing in on the left guide. To increase the width, squeeze the tab attached to the right guide and slide to the right until the selected media width is matched.
- Page 50 Prepare a stack of print media for loading by flexing or fanning it back and forth. Straighten the edges on a level surface. Place the prepared stack of print media into the tray and push the attached backstop lightly against the end of the loaded stack.
-
Page 51: Loading Print Media Into The Priority Feeder
Loading print media into the priority feeder The priority feeder is located at the front of the printer, just above Tray 1. Use the priority feeder to make quick runs of print media types or sizes that are not currently loaded in Tray 1. -
Page 52: Preventing Jams
Have exposed adhesive when the flap is in the sealed position – Are self-sealing • Use only recommended print media. See the Card Stock & Label Guide available on our Lexmark Web site at www.lexmark.com for more information about which print media provides optimum results for your printing environment. •... -
Page 53: Clearing Jams
(see Operator panel codes for the Lexmark E120 on page 12 or Operator panel codes for the Lexmark E120n on page 28). Prepare the printer for jam removal by opening the paper support out and removing all printed pages from the output bin. - Page 54 Open the top door, and remove any lodged print media from the paper path. CAUTION: The fuser may be hot. To avoid personal injury, use caution when opening the top door to remove a jam from the fuser area. Open the front door by sliding the release button to the left. Clearing jams...
- Page 55 Pull the front door up until it clicks into an open position, and remove any lodged print media. To remove print media behind the toner cartridge, it may be necessary to remove the toner cartridge by grasping the plastic handle and pulling straight out. Clearing jams...
- Page 56 Place the toner cartridge on a flat, clean surface. Replace the toner cartridge by placing it into the guides and pushing it into the printer. Clearing jams...
- Page 57 Print media tasks and tips Close front door by pressing firmly in the center of the front door with your thumb until the door clicks shut. Make sure all other doors are closed securely and press Continue to resume printing. Note: The page which caused the jam will reprint.
-
Page 58: Chapter 4: Printing Tasks
Printing tasks Section Printing from the priority feeder Printing on both sides of the paper (manual duplex) Printing multiple page images on one page (N-up printing) Printing on letterhead Canceling a print job Printing tasks Page... -
Page 59: Printing From The Priority Feeder
Types of print media on page 46. If both the priority feeder and Tray 1 are loaded with print media, the printer will pick from the priority feeder until the print media is empty, then continue printing from Tray 1. -
Page 60: From A Macintosh Computer
Hold both sides of the print media close to the priority feeder and push into the printer until the media stops. Note: Do not force the print media into feeder. Forcing media causes jams. Press the flashing Continue From a Macintosh computer Click File Page Setup. -
Page 61: Printing On Both Sides Of The Paper (Manual Duplex)
Printing on both sides of the paper (manual duplex) Printing on both sides of the paper reduces total printing costs and is environmentally friendly. Macintosh does not support manual duplex printing. Follow the directions below to print on both sides of the paper (manual duplex) from Windows. -
Page 62: Printing Multiple Page Images On One Page (N-Up Printing)
Click OK on the Print window. The printer prints every other page of the document first. Once the first side of a job prints, the Load Paper and Continue lights blink (see Print side two of a duplex job on page 20 or 37). -
Page 63: From A Macintosh Computer
From a Windows computer Click File Print. Click Preferences (or Options, Printer, or Setup, depending on the application) to view printer driver settings. Click the Paper tab. Select Letterhead from the Paper type drop-down list. Select the appropriate paper size and tray. -
Page 64: Canceling A Print Job
A print job can be canceled from the operator panel or from the computer. The Cancel job light sequence appears on the operator panel when a job is canceled (see Cancel job / Reset printer on page 14 or 30). -
Page 65: Chapter 5: Supplies Information
Supplies information Section Supply items needed Ordering supplies Storing supplies Conserving supplies Assessing supply needs Checking toner cartridge and long-life photoconductor kit levels Changing the toner cartridge Changing the long-life photoconductor kit Lexmark Return Program Recycling Lexmark products Supplies information Page... -
Page 66: Supply Items Needed
Ordering supplies Within the United States or Canada, order Lexmark supplies from an authorized Lexmark dealer. To locate a nearby dealer, call 1-800-539-6275. In other countries or regions, visit the Lexmark online store at www.lexmark.com or contact the place where the printer was purchased. -
Page 67: Assessing Supply Needs
The Toner low light sequence appears when the toner cartridge is nearing empty (see Toner low on page 23 for the Lexmark E120, or see Toner low on page 42 for the Lexmark E120n). Printing is still possible for a short time while the sequence is displayed, however print quality continues to degrade as the toner level decreases. -
Page 68: Changing The Toner Cartridge
Changing the toner cartridge Remove all printed pages from the output bin. Open the front cover by sliding the release button to the left and lifting the door until it clicks into an open position. Remove the toner cartridge by grasping the handle and pulling out. Changing the toner cartridge... - Page 69 Unpack the new toner cartridge. Note: Packing material from the new cartridge may be used to ship the old cartridge back to Lexmark for recycling. See Lexmark Return Program on page 74 for more information. Remove the red, plastic packing from the cartridge by grasping near the cartridge handle and pulling away from the cartridge.
- Page 70 Install the new toner cartridge by aligning the sides of the toner cartridge with the guides in the printer and pushing the toner cartridge in as far as it will go. The cartridge stops when correctly installed. Close the front cover, and press Continue to resume printing.
-
Page 71: Changing The Long-Life Photoconductor Kit
Changing the long-life photoconductor kit Warning: When replacing the long-life photoconductor kit, do not touch the blue drum. Touching the drum will contaminate the long-life photoconductor kit and affect print quality. Open the rear cover by sliding the release button to the right. Remove the long-life photoconductor kit by pulling out on the extended tabs. - Page 72 Handle the long-life photoconductor kit by the tabs only. Warning: Touching the blue drum will cause contamination and affect print quality. Note: For information about recycling the old long-life photoconductor kit, see Recycling Lexmark products on page 74 Carefully i nstall the long-life photoconductor kit by inserting it into the guides marked with green arrows.
- Page 73 Push the tabs firmly with your thumbs until the long-life photoconductor kit clicks into place. Close the rear door. Warning: Do not leave the rear door open longer than necessary. Extended light exposure can damage the blue photoconductor drum and cause print quality problems. Open the front cover and hold the Cancel photoconductor kit counter and warning.
-
Page 74: Lexmark Return Program
Lexmark Return Program The Lexmark Return Program is an environmental program in which Lexmark sells new toner cartridges at a special price with the agreement that the cartridge will be returned, at no cost, only to Lexmark for recycling. Regular toner cartridges without this agreement are also available. -
Page 75: Chapter 6: Troubleshooting
Troubleshooting Section General problems Print quality problems Troubleshooting Page... -
Page 76: General Problems
General problems Problem Solution / Answer Lights begin blinking. See Understanding the Lexmark E120 operator panel lights on page 10. Characters missing when Check printer driver settings to make sure Envelope has been selected from the Paper Type printing to envelopes menu. - Page 77 1 Turn the loaded paper stack over. output bin 2 Extend paper support on the output bin. 3 If using legal size print media, contact technical support. Log onto www.lexmark.com for a technical support phone number in your area. General problems...
-
Page 78: Print Quality Problems
ABCDE To replace the fuser, call a service technician. † This setting can be changed using the Local Printer Setup Utility (Windows), or through Printer Settings (Macintosh). See Software and Documentation CD for additional information. Cause Either the toner cartridge or the fuser is defective. - Page 79 ABCDE To replace the fuser, call a service technician. † This setting can be changed using the Local Printer Setup Utility (Windows), or through Printer Settings (Macintosh). See Software and Documentation CD for additional information. Cause • The Toner Darkness setting is too light.
- Page 80 To replace the fuser, call a service technician. † This setting can be changed using the Local Printer Setup Utility (Windows), or through Printer Settings (Macintosh). See Software and Documentation CD for additional information. Cause The toner cartridge is defective.
- Page 81 Paper curls badly as it exits the bin To replace the fuser, call a service technician. † This setting can be changed using the Local Printer Setup Utility (Windows), or through Printer Settings (Macintosh). See Software and Documentation CD for additional information. Cause The long-life photoconductor kit is exhausted.
-
Page 82: Notices
These licenses do not provide you any rights to the Lexmark copyrighted software in this printer. Since the third-party licensed software the Lexmark modifications are based on is supplied explicitly without warranty, use of the Lexmark modified version is similarly provided without warranty. -
Page 83: Noise Emission Levels
Companies participating in this program introduce products that power down when they are not being used. This feature will cut the energy used by up to 50 percent. Lexmark is proud to be a participant in this program. As an ENERGY STAR Partner, Lexmark International, Inc. has determined that this product meets the ENERGY STAR guidelines for energy efficiency. -
Page 84: Laser Notice
This limited warranty applies to this product only if it was originally purchased for your use, and not for resale, from Lexmark or a Lexmark Remarketer, referred to in this statement as “Remarketer.” Limited warranty Lexmark warrants that this product: •... - Page 85 CONSEQUENTIAL DAMAGES. This is true even if you advise Lexmark or a Remarketer of the possibility of such damages. Lexmark is not liable for any claim by you based on a third party claim. This limitation of remedies also applies to claims against any Suppliers and Remarketers of Lexmark.
-
Page 86: Index
21 in Tray 1 / priority feeder 22 jams clearing 53 preventing 52 labels 47 letterhead 47, 63 Lexmark Cartridge Collection Program 74 Lexmark Return Program 74 lights 10, 26 loading letterhead 63 priority feeder 51 long-life photoconductor kit... - Page 87 46 choosing 46 loading 51 Paper jam at printer exit sensor 40 at the input sensor 39 between printer input and exit sensor 39 power button 6 preprinted forms 47 print media 5 choosing 46 loading 46 sizes 46...