Table of Contents

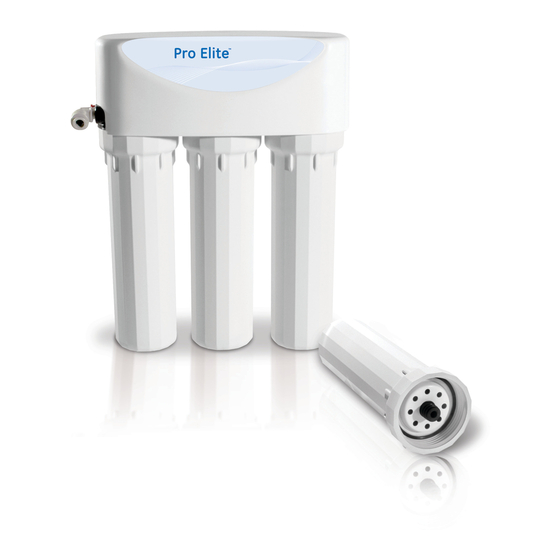
Summary of Contents for GE Pro Elite RO-450
- Page 1 DRINKING WATER SYSTEM WITH WATER QUALITY MONITOR MODEL RO-450 INSTALLATION, OPERATION & SERVICE MANUAL Tested and certified by NSF International against NSF/ANSI Standard 58 for the reduction of the claims specified on the Performance Data Sheet.
-
Page 2: Table Of Contents
TABLE OF CONTENTS Page SECTION I. INTRODUCTION ...................3 SECTION II. SPECIFICATIONS ................4 SECTION III. PREPARATION ..................5 A. Major System Components .............5 B. Tools Recommended for Installation ..........7 C. Site Selection For Major System Components .......7 SECTION IV. INSTALLATION STEPS ................8 A. -
Page 3: Introduction
SECTION I. INTRODUCTION to fouling by particulate matter, turbidity and Your new Reverse Osmosis (R.O.) Drinking Water colloidal materials. System uses a combination of filtration technologies IN–LINE ACTIVATED CARBON POST FILTER– to reduce unwanted contaminants in a water supply. The In–Line Activated Carbon Post Filter is The following steps combine to give you the best in located after the Holding Tank and has been clear sparkling drinking water:... -
Page 4: Specifications
SECTION II. SPECIFICATIONS TABLE A – qUALIFIED SySTEM PERFORMANCE Because the performance of an R.O. Membrane is highly dependent upon pressure, temperature and TDS, the following should be used for comparison purposes only. U.S. Metric Membrane Production 41-53 gpd 155–201 lpd Membrane TDS Reduction 96% minimum 96% minimum... -
Page 5: Section Iii. Preparation
SECTION III. PREPARATION A. Major System Components • A Reverse Osmosis Membrane sealed in a plastic bag. The following components comprise the R.O. Drinking Water System. (Refer to Fig. 1, below • A Sediment Module, shrink wrapped. for general system layout.) • An Activated Carbon Module, shrink •... - Page 6 OPTIONAL RO-450 BASEMENT INSTALLATION DIAGRAM Dispensing Faucet water qualitY mOnitOr Faucet Base nOte: FOr reFrigeratOr water Dispenser Or prODuct ice maKer hOOKup, tee (3/8” Blue) intO 3/8" Blue tuBing tO Dispensing Faucet. water qualitY mOnitOr caBle hOlDing tanK shutOFF ValVe 25 Ft.
-
Page 7: Tools Recommended For Installation
B. Tools Recommended for Installation 1. Dispensing Faucet–The faucet should be placed near the sink where drinking water The following tools will cover most of the is normally obtained. Convenience of use installation sites encountered: (filling of water pitchers and glasses), and " variable speed electric drill. an open area beneath the faucet under the sink for attaching product and drain tubing 2. -
Page 8: Section Iv. Installation Steps
SECTION IV. INSTALLATION STEPS 2c. Drilling a counter top: All plumbing should be done in accordance with NOTE: The counter top must be less than state and local plumbing codes. 1¼" thick. Treat ceramic tile as porcelain until NOTE: Some codes may require installation by a the tile is penetrated, then use the carbide licensed plumber;... - Page 9 5. Place the Toggles of the Monitor Housing Assembly through the mounting hole on the sink or counter top. Drop the handle of the Wrench through the Monitor Housing opening. This will separate and orient the 7. Determine which direction the handle should Toggle Wings.
-
Page 10: Feed Water Saddle Valve Installation
FEED WATER SADDLE VALVE 2b. To install on (hard) Steel or Brass Tubing supply line. Cold Water Line • The supply line should now be drained. Use a battery powered or properly grounded drill Saddle Reversible to avoid shock hazard. Back Plate •... -
Page 11: Manifold Assembly Installation
NOTE: When cutting the polytubing make 4. Locate the ¼" yellow tubing with the tee clean, square cuts, failing to do so could attached to one end. Remove the yellow plug result in poor connections and possible from the fitting labelled "Out" on the manifold leaks. -
Page 12: Start Up
F. Start Up When the Faucet is first opened, expect air and carbon fines (very fine black powder) 1. Installing the modules and membrane and from the In–Line and Activated Carbon Post sanitizing the holding tank. Filters to be rinsed out. This is normal for •Open the Dispensing Faucet and close the the first tank of water or after the Activated Holding Tank Shut–Off Valve (the handle... -
Page 13: Changing Modules
B. Changing Modules NOTE: Now is the convenient time to change the In–Line Activated Carbon Post THIS R.O. SYSTEM CONTAINS MODULES Filter, see Sec. V, C.1–6. WHICH MUST BE REPLACED AT REGULAR INTERVALS TO MAINTAIN PROPER •Slowly open the Feed Water Saddle Valve. PERFORMANCE. - Page 14 NOTES:...
- Page 15 NOTES:...
-
Page 16: Section Vi. Trouble Shooting Guide
SECTION VI. TROUBLE SHOOTING GUIDE Problem Possible Cause Solution Low quantity of Product Water Feed Water Saddle Valve is plugged or Open Valve or unclog. from Holding Tank closed. Clogged Sediment Module or Activated Replace Modules. Carbon Module. Low water pressure. Feed Water pressure must be above 40 psig. - Page 17 Problem Possible Cause Solution High Total Dissolved Solids (TDS) The Product Water and Drain Water Correct plumbing. in the Product Water lines are reversed. (continued) No drain flow, Drain Restrictor is Clear or replace Drain Restrictor. clogged. No drain flow, the drain orifice in Clear or replace Dispensing Faucet. the Dispensing Faucet is plugged.
-
Page 18: Exploded View And Parts List
EXPLODED VIEW & PARTS LIST 19..Nitrate/Nitrite Test Kit... - Page 19 DRAWING NO. PART NO. DESCRIPTION 1 ....S2009 ......Self Tapping Screw 2 ....S2005 ......ASO Cap 3 ....S2013 ......ASO Cap O–Ring 4 ....S2011 ......ASO Diaphragm – Large 5 ....S2007 ......ASO Piston 6 ....S2006 ......ASO Piston Ring 7 ....
- Page 20 DRInKInG WateR sYsteM FiVe/One Year limiteD warrantY What Does This Warranty Cover? This warranty covers any defects in materials and workmanship of the Drinking Water System when installed and operated within recommended parameters, with the exceptions stated below. How Long Does The Coverage Last? The LeverEdge will warrant its Drinking Water System (except for the reverse osmosis membrane), for a period of five years from the date of purchase.


