Table of Contents
Advertisement
Available languages
Available languages
Installation Instructions
This Heavy-Duty Water Filtration System must be properly installed and located in accordance with the Installation
Instructions before it is used.
Check with your local public works department for plumbing
codes. You must follow their guides as you install the Heavy-
Duty Water Filtration System.
Use the Heavy-Duty Water Filtration System on a potable, safe-
to-drink, home COLD water supply only. The filter cartridge will
not purify water or make unsafe water safe to drink.
Protect the Heavy-Duty Water Filtration System and piping
from freezing. Water freezing in the housing will damage it.
Your Heavy-Duty Water Filtration System is rated up to 100 psi
water pressure. If your house water supply pressure is higher
than 80 psi during the day (it may reach higher levels at night),
install a pressure-reducing valve before the housing is installed.
REQUIRED TOOLS AND ACCESSORIES FOR
INSTALLATION
2 Adjustable wrenches
Pipe cutter
Ruler or tape measure
Cordless drill
File
Emery paper
Screwdriver
Additional installation parts may be required:
threads on
SAFETY PRECAUTIONS
WARNING:
PROPER INSTALLATION
WARNING
Optional accessories are available (Visa, MasterCard or Discover cards
accepted) by visiting our Website at GEAppliances.com or from Parts
and Accessories, call 800.626.2002 (U.S.) or 800.663.6060 (Canada).
CONTENTS INCLUDED WITH PRODUCT
Product literature
GEAppliances.com
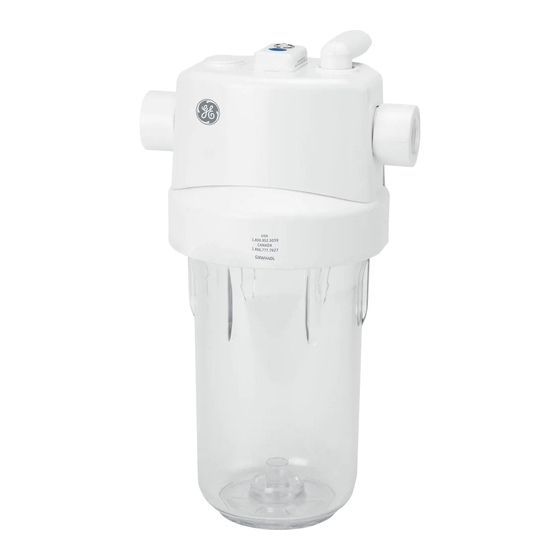
Heavy-Duty Water Filtration System
GXWH40L
and head
(filters not included)
Advertisement
Table of Contents

Related Manuals for GE GXWH40L


Summary of Contents for GE GXWH40L
- Page 1 Installation Instructions Heavy-Duty Water Filtration System GXWH40L (filters not included) SAFETY PRECAUTIONS WARNING: PROPER INSTALLATION This Heavy-Duty Water Filtration System must be properly installed and located in accordance with the Installation Instructions before it is used. Check with your local public works department for plumbing codes.
-
Page 2: Cartridge Specifications
CARTRIDGE SPECIFICATIONS FXHTC Cartridge Performance Data Influent Challenge Reduction Average Substance Concentration Requirements Reduction Standard 42 months Filter Cartridge Replacement Valve Operations Do not use harsh Remote timer 4 Inspect the Control handle release button Head Filter wrench remove 6 Reinstall the to remove Control Handle FILTER... -
Page 3: Select Location
STEP-BY-STEP INSTALLATION INSTRUCTIONS (cont.) Select Location It is recommended that a shut-off valve be placed on both sides of the filter. It is recommended that a mounting bracket be used. It is recommended to install an expansion tank in the cold water line between the water heater and the filter. -
Page 4: Parts List
Final Check Timer Installation and Reset Instructions Blue reset button Timer battery installation and change Installation of timer Insert coin or screwdriver in the slot between timer cap 2 AAA batteries Timer reset and application Head PARTS LIST Ref. No. Part No. -
Page 5: Instructions D'installation
INSTRUCTIONS D’INSTALLATION Système de filtration d’eau pour service rigoureux GXWH40L (filtres non inclus) MESURES DE SÉCURITÉ AVERTISSEMENT: Consulter le service local des travaux publics au sujet des codes de plomberie et de raccordement aux égouts. L’installation du système de filtration d’eau pour service rigoureux doit être conforme aux installé... -
Page 6: Étapes De L'installation
SPÉCIFICATIONS DE CARTOUCHE Cartouche FXHTC Caractéristiques complètes Concentration d’agents polluants Spécifications Réduction réduction des substances répertoriées à droite. La concentration Substance dans l’arrivée d’eau de réduction moyenne été réduite à une concentration inférieure ou égale à la limite admissible pour l’eau sortant de le système, comme 10 % Conditions de l’épreuve Spécifications de fonctionnement... -
Page 7: Installation Du Filtre
Si le fil est isolé, il faut le dénuder sur une NOTE: émeri. IMPORTANT: Cette mise à la masse vous protège contre les chocs électriques et cette liaison à la terre peut voir été neutralisée par le logement du filtre d’eau. Pour rétablir la Fil de mise à la terre... -
Page 8: Inspection Finale
Inspection finale S’il y a une fuite des joints, fermer l’arrivée d’eau et resserrer les raccords ou nouveau pendant 10 minutes (151 l [40 gal]) avant de boire l’eau. Instructions d’installation et de réglage de la minuterie Installation et remplacement de la pile de la minuterie Installation de la minuterie Bouton bleu de réinitialisation de la... -
Page 9: Instrucciones De Instalacion
Es posible que se necesite partes adicionales para completar la instalación: arandela hembras NPTF de 2,5 cm (1”) en el alojamiento del filtro tierra de cobre calibre 6 la NSF International contra el Estándar Tanque de expansión (12-12 GE) GEAppliances.com... -
Page 10: Instrucciones De Instalacion Paso A Paso
ESPECIFICACIONES DEL CARTUCHO Cartucho FXHTC Datos de Rendimiento Concentración de Requisitos de Reducción Substancia reto entrante reducción promedio La concentración de las sustancias indicadas en el agua que entra Estándar 42 en el sistema fue reducida a una concentración menor o igual al Condiciones de prueba Requisitos de operación Ritmo de flujo: 4 gpm (15,1 Lpm) -
Page 11: Instalación De La Unidad
INSTRUCCIONES DE INSTALACION PASO A PASO (cont.) Seleccione la ubicación Se recomienda instalar una válvula de cierre en ambos lados del filtro. Seleccione una ubicación para el filtro que esté: Sugerimos que se utilice una ménsula de instalación. Se recomienda instalar un tanque de expansión en la línea de agua fría entre el calentador de agua y el filtro. -
Page 12: Lista De Partes
Revisión final , espere una hora, luego antes de Instalación del cronómetro e instrucciones de reinicio Instalación y cambio de las baterías del cronómetro Instalación del cronómetro Inserte una moneda o un destornillador en la ranura entre Tapa del cronómetro Reinicio y aplicación del cronómetro Base del cronómetro...