Table of Contents
Advertisement
Quick Links
Advertisement
Table of Contents

Summary of Contents for Zotac ZBOX pico
- Page 2 ZOTAC. Products and corporate names mentioned in this manual may be registered trademarks or copyrights of their respective companies, and are used for identification purposes only.
-
Page 3: Table Of Contents
Package contents -------------------------------------------------------------------------------------- 5 Port Layout -------------------------------------------------------------------------------------------------- 6 How to disable the ring LED indicator ------------------------------------------------------------- 8 Mounting the ZOTAC ZBOX pico to an LCD monitor---------------------------------------- 10 Getting started with Windows 8.1 with Bing --------------------------------------------------- 12 Using your ZOTAC ZBOX pico ---------------------------------------------------------------------- 16... -
Page 4: Product Specifications
• 2GB DDR3L-1333 memory USB ports • Three USB 2.0 ports Storage • 32GB/64GB eMMC • Expandable via micro SD/SDHC/SDXC Networking • 10/100Mbps Ethernet Wireless networking • 802.11n Wi-Fi • Bluetooth 4.0 Operating System • Windows 8.1 with Bing, 32-bit ZOTAC ZBOX pico... -
Page 5: Safety Information
Safety information Your ZOTAC ZBOX pico is designed and tested to meet the latest standards of safety for information technology equipment. However, to ensure your safety, it is important that you read the following safety instructions. Setting up your system Read and follow all instructions in the documentation before you operate your system. -
Page 6: Welcome
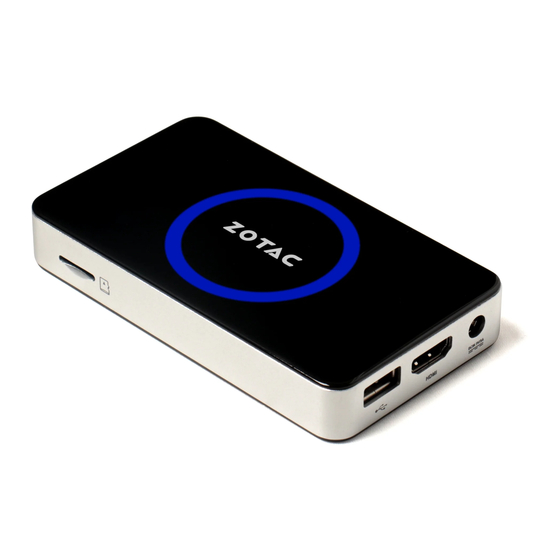
Welcome Congratulations on your purchase of the ZOTAC ZBOX pico. The following illustration displays the package contents of your new ZOTAC ZBOX pico. Please contact your retailer If any of the below items are damaged or missed. Package contents • 1 x ZOTAC ZBOX pico •... -
Page 7: Port Layout
Port Layout Power button ZOTAC ZBOX pico... - Page 8 4. MicroSD memory card slot The built-in memory card reader supports Micro SD/SDHC/SDXC cards to expand the storage capabilities of the ZOTAC ZBOX pico. 5. HDMI output The HDMI (High Definition Multimedia Interface) output supports a Full HD 1080p displays such as an HDTV or monitor.
-
Page 9: How To Disable The Ring Led Indicator
How to disable the ring LED indicator Turn on the ZBOX pico mini-PC, then press <Delete> to enter the BIOS SETUP UTILITY. Use the arrow keys to navigate to the Power menu and select Logo Indicator. ZOTAC ZBOX pico... - Page 10 Press <Enter> and select Disabled. Press F10 to save the configuration and exit. The PC will reboot. ZOTAC ZBOX pico...
-
Page 11: Mounting The Zotac Zbox Pico To An Lcd Monitor
Mounting the ZOTAC ZBOX pico to an LCD monitor You can attach the ZOTAC ZBOX pico to the back of a VESA75/100 compliant display. Secure the mounting bracket to the LCD monitor using 2 screws. Disclaimer: ZOTAC is not liable for damages resulting from an improper installation. - Page 12 Connect the ZOTAC ZBOX pico to the LCD monitor with an HDMI cable. Note: You can also mount the ZOTAC ZBOX pico vertically as shown in the picture below. ZOTAC ZBOX pico...
-
Page 13: Getting Started With Windows 8.1 With Bing
Please follow the steps below to begin using your ZBOX with Windows 8.1 with Bing. 1. Power on the system. 2. Connect to the Internet via Ethernet or Wi-Fi. 3. Select the Region and language. 4. Read and agree to the license terms. ZOTAC ZBOX pico... - Page 14 5. Pick a color you like and give the PC a name. 6. We recommend using the express settings. ZOTAC ZBOX pico...
- Page 15 7. Create a Microsoft new account if you don’t have one or select “Sign in without a Microsoft account” and click “next”. ZOTAC ZBOX pico...
- Page 16 8. Setup your account. 9. Wait for the initial system setup to complete . ZOTAC ZBOX pico...
-
Page 17: Using Your Zotac Zbox Pico
Using your ZOTAC ZBOX pico Configuring a wireless connection Please follow the instructions below to connect to a wireless network: Double-click the wireless network icon (pic) in the notification area. Select the wireless network you want to connect to from the list and click Connect. -
Page 18: Using A Dynamic Ip (Pppoe Connection)
Password. Click “Next”. 10. Click “Finish” to finish the configuration. 11. Enter your user name and password. Click “Connect” to connect to the internet. Note: Contact your internet Service Provider (ISP) if you have problems connecting to the network. ZOTAC ZBOX pico... -
Page 19: Configuring Audio Output Via An Hdmi Device
Configuring audio output via an HDMI device Follow the steps below to enable audio output via HDMI when connecting the ZOTAC ZBOX pico to a TV or receiver via HDMI. Access the Sound settings via the system Control Panel. Under Playback devices, click the display... -
Page 20: Configuring Windows 8.1 Micro Sd/Sdhc/Sdxc Support
2. Select “Change PC settings” > “PC and devices” > “Devices”, you will see a group named “Default Save Locations”. 3. Click “Set Up,” now you can configure Windows to use the micro-SD card for music, photos, and videos. ZOTAC ZBOX pico... - Page 21 4. The Music, Pictures, and Videos folders on the SD card are associated to individual user accounts. ZOTAC ZBOX pico...
-
Page 22: Recovering Windows 8.1 (From Internal System Image)
Recovering Windows 8.1 (from internal system image) 1. Select “PC settings” > “Update and recovery” > “Recovery” > “Restart now”. ZOTAC ZBOX pico... -
Page 23: Recovering Windows 8.1 (From External Recovery Dvd)
2. Choose “Troubleshoot” > “Reset your PC” > “Reset”. Recovering Windows 8.1 (from external recovery DVD) 1. Please back up your personal files before attempting recovery. 2. Boot from recovery DVD. 3. Follow the on-screen instructions to finish the recovery. ZOTAC ZBOX pico... - Page 24 ZOTAC ZBOX pico...
- Page 25 ZOTAC ZBOX pico 291-MB253-02...
- Page 26 2 9 1 - MB 2 5 3 - 0 2 K 1 F...


