
Related Manuals for KitchenAid KBFC42FS


Summary of Contents for KitchenAid KBFC42FS
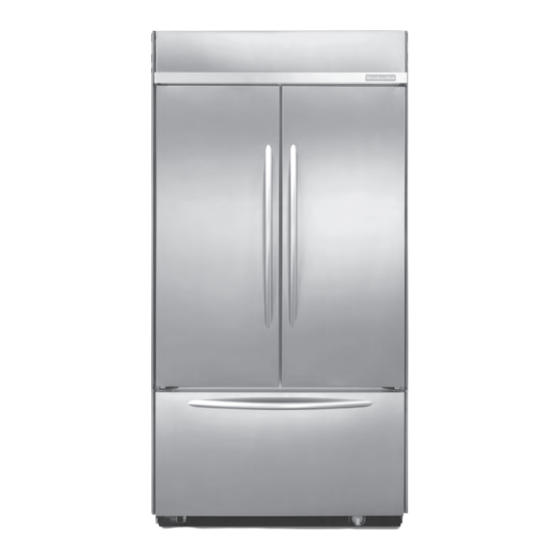
- Page 1 KAR-17 TECHNICAL EDUCATION BUILT-IN FRENCH DOOR BOTTOM-MOUNT REFRIGERATOR MODELS: KBFC42FS & KBFO42FS JOB AID 4317402...
- Page 2 FORWARD This KitchenAid Job Aid, “Built-In French Door Bottom-Mount Refrigerator” (Part No.4317402), provides the In-Home Service Professional with information on the installation, operation, and service of the Built-In French Door Bottom-Mount Refrigerator. For specific information on the model being serviced, refer to the “Use and Care Guide,” or “Tech Sheet” provided with the re- frigerator.
-
Page 3: Table Of Contents
TABLE OF CONTENTS Page GENERAL ............. . 1-1 Refrigerator Safety . - Page 4 COMPONENT TESTING ........... 5-1 Thermistor .
-
Page 5: General
GENERAL REFRIGERATOR SAFETY Your safety and the safety of others are very important. We have provided many important safety messages in this manual and on your appliance. Always read and obey all safety messages. This is the safety alert symbol. This symbol alerts you to potential hazards that can kill or hurt you and others. -
Page 6: Model & Serial Number Designations
MODEL & SERIAL NUMBER DESIGNATIONS MODEL NUMBER MODEL NUMBER K BF C 42 S 00 PRODUCT GROUP K = KitchenAid PRODUCT IDENTIFICATION BF = BTM Freezer, French Door MERCHANDISING SCHEME / SERIES C = Wrap Around Stainless Steel O = Overlay Model WIDTH 42 = 42˝... -
Page 7: Model & Serial Number Label And Tech Sheet Locations
MODEL & SERIAL NUMBER LABEL AND TECH SHEET LOCATIONS The Model/Serial Number label and Tech Sheet locations are shown below. Model & Serial Number Label Location (On Upper Left Side Of Refrigerator Liner) Tech Sheet Location... - Page 8 — NOTES —...
-
Page 9: Installation Information
INSTALLATION INFORMATION WATER SUPPLY REQUIREMENTS If the water pressure to the reverse osmosis system is less than 40 to 60 psi (276-414 kPa): Water Pressure • Check to see whether the sediment filter A cold water supply with water pressure be- in the reverse osmosis system is blocked. - Page 10 — NOTES —...
-
Page 11: Product Operation
OVERVIEW The main electronic control board monitors the water valve for total elapsed time and gallons The KitchenAid Built-In French Door Bottom- of water used. The number displayed on the Mount Refrigerator Constant Flow Temperature Water Filter Indicator (WFI) is the percentage Management System uses two thermistors of filter usage remaining. -
Page 12: Temperature Control
TEMPERATURE CONTROL Freezer Temperature Control — Temperature Decreasing The main electronic control board checks the When the freezer temperature begins to de- resistance of the thermistors, and compares it crease, the process will reverse. The com- to both the customer temperature settings and pressor speed decreases, followed by the the last thermistor reading taken. -
Page 13: Compressor Protection
COMPRESSOR COMPRESSOR PROTECTION The main control board supplies a 5 vdc, peak- To protect the compressor and maintain ef- to-peak square wave, at 54 to 150 Hz, to the ficiency, minimum compressor off time is pro- inverter board. A standard VOM will read ap- grammed into the main control board. -
Page 14: Adaptive Defrost
AIR DOOR When entering a defrost cycle, if the bimetal is open, the time to defrost is reset to 8 hours, The air door is driven by a reversible DC stepper and the control will time through the entire motor. The motor operates on a 12 vdc, peak- 37-minute defrost period. -
Page 15: Holiday Mode
MAX COOL MODE Freezer Thermistor If the main electronic control board senses an Max Cool changes the refrigerator tempera- open or a shorted thermistor, the compressor ture setting to 34°F (1°C) and the freezer to and the evaporator fan motor will begin to op- –5°F (–21°C) for 24 hours. -
Page 16: Over Temperature Alarm
MASTER ALARM RESET In the Holiday Mode the following occurs: • Temperature selections remain at the current Pressing the Over Temperature Reset will turn setting, but are not displayed. off the audio alarm, but does not affect the indi- cator light the first time the Over Temperature •... -
Page 17: Control Board
LOW VOLTAGE PHOENIX Ingredient Care Center Temperature Control CONTROL BOARD The control monitors the temperature of each A low voltage transformer, located on the left ingredient care center pan by means of a side of the unit compartment, supplies 24 volts thermistor located in the top of each pan. -
Page 18: Air Circulation
AIR CIRCULATION It is important not to block any of the vents with food items. If the vents are blocked, airflow will In order to ensure proper temperatures, you be restricted, and the temperature management need to permit airflow between the refrigerator system will not function properly. -
Page 19: Refrigerator Use
REFRIGERATOR USE ™ MAX COOL ENERGY SAVER FEATURE (42˝ BOTTOM MOUNT ONLY) The Max Cool feature assists with periods of heavy ice usage, full grocery loads, or tempo- The Energy Saver feature controls the heaters rarily warm room temperatures. located inside the hinged seal between the re- frigerator doors. -
Page 20: Ice Maker
Over Temperature To manually turn off the ice maker, slide the ice maker ON/OFF control to the OFF IMPORTANT: If the Over Temperature Alarm (down) position as shown. activates, your food may spoil (see “Power Interruptions” in the Use and Care Guide for additional information). - Page 21 Meat Storage Guide Quick Chill Setting Store most meat in original wrapping as long Each deli pan has a Quick Chill setting. Activat- as it is airtight and moisture-proof. Rewrap if ing this selection lowers the temperature of the necessary. When storing meat longer than the pan for a period of one hour.
- Page 22 — NOTES — 3-12...
-
Page 23: Component Access
COMPONENT ACCESS This section instructs you on how to service components inside the Built-In French Door Bottom- Mount Refrigerator. The components and their locations are shown below. COMPONENT LOCATIONS WARNING Electrical Shock Hazard Disconnect power before servicing. Replace all parts and panels before operating. Failure to do so can result in death or electrical shock. - Page 24 Refrigerator Compartment Components Refrigerator Refrigerator User Interface & Refrigerator Refrigerator Door Switch Door Switch Refrigerator Lighting Motorized Air Door Thermistor (Behind Top Grille) (Behind Top Grille) Refrigerator Temp-Controlled Drawer Covers Heated Flipper Mullion Temp-Controlled Motorized Air Doors Freezer Compartment Components & Water Valve / Filter Housing Ice Maker Optics Emitter Board Ice Maker &...
-
Page 25: Removing A Refrigerator Light Socket
REMOVING A REFRIGERATOR LIGHT SOCKET Using a small flat-blade screwdriver, push WARNING in on the light socket retainer, and pull the socket out of its opening in the refrigerator liner. Light Socket Retainer Electrical Shock Hazard Disconnect power before servicing. Replace all parts and panels before operating. -
Page 26: Removing The User Interface Assembly
REMOVING THE USER INTERFACE ASSEMBLY Remove the six hex-head screws from WARNING the user interface frame and remove the frame. Electrical Shock Hazard Disconnect power before servicing. User Interface Frame Replace all parts and panels before Screws (3 of 6) operating. -
Page 27: Removing The Refrigerator Thermistor
REMOVING THE REFRIGERATOR THERMISTOR Remove the hex-head screw from the re- WARNING frigerator thermistor and pull the thermis- tor away from the liner. Refrigerator Thermistor Screw Electrical Shock Hazard Disconnect power before servicing. Replace all parts and panels before operating. Failure to do so can result in death or electrical shock. -
Page 28: Removing The Refrigerator Motorized Air Door
REMOVING THE REFRIGERATOR MOTORIZED AIR DOOR Unlock and disconnect the motorized air WARNING door connector from the wiring harness and remove the air door and cover. Motorized Air Door Connector Electrical Shock Hazard Disconnect power before servicing. Replace all parts and panels before operating. -
Page 29: Removing A Refrigerator Temp-Controlled Motorized Air Door
REMOVING A REFRIGERATOR TEMP-CONTROLLED MOTORIZED AIR DOOR Disconnect the motorized air door wire WARNING connector from the wire harness, and re- move the air door. Motorized Air Door Connector Electrical Shock Hazard Disconnect power before servicing. Replace all parts and panels before operating. -
Page 30: Removing A Temp-Controlled Drawer Cover
REMOVING A TEMP-CONTROLLED DRAWER COVER WARNING Electrical Shock Hazard Center Divider Cover Screws (2 of 4) Disconnect power before servicing. Replace all parts and panels before operating. Failure to do so can result in death or electrical shock. Unplug refrigerator or disconnect power. Rotate the front of the center divider cov- Remove the temp-controlled drawer for er up, pull out, and remove the cover. - Page 31 Disconnect the wire connector on the Remove the two screws from the temp- temp-controlled drawer cover from the controlled drawer cover and remove the wiring harness. cover. TC Drawer Cover Screws Left Cover Connector Right Cover Connector (8-Pin) (6-Pin)
-
Page 32: Removing The Heated Flipper Mullion And An Actuator/Electrical Contact
REMOVING THE HEATED FLIPPER MULLION AND AN ACTUATOR / ELECTRICAL CONTACT b) While lifting the flipper mullion, insert WARNING a small flat-blade screwdriver behind each of the three mullion retainer clips, pry the pins out of the door liner holes, and remove the flipper mullion. - Page 33 To remove the top or bottom heated d) Remove the two hex-head screws from flipper mullion actuator/electrical con- the actuator/electrical contact. tact: a) Open the refrigerator doors. Actuator / Electrical Contact Screws Top Mullion Actuator/ Electrical Contact e) Disconnect the spade connector from the actuator/electrical contact terminal.
-
Page 34: Removing The Unit Compartment Components
REMOVING THE UNIT COMPARTMENT COMPONENTS Condenser WARNING Inverter Compressor Fan Motor Main & LV Boards Electrical Shock Hazard 24V Transformer Power Switch Disconnect power before servicing. To remove the power switch: Replace all parts and panels before a) Push the bottom of the switch forward operating. - Page 35 To remove the 24 volt transformer: b) Disconnect the six wire connectors from the control board. a) Disconnect the two wire connectors from the wire harness. c) Press in on the locking tab and lift the control board off each of the five b) Remove the two hex-head screws and standoffs.
- Page 36 To remove the low voltage control board: a) Disconnect the three wire connectors from the control board. Inverter b) Press in on the locking tab and lift the control board off each of the four standoffs. 2 Connectors Standoff Locking Tab 2 Screws c) Insert a screwdriver into the side open- ing of the compressor terminal cover,...
- Page 37 d) Disconnect the 3-pin connector from the compressor pins. Condenser Fan Motor e) Disconnect the ground wire from the compressor terminal. Ground Wire 3-Pin Connector Bracket Screws b) Press down on the locking tabs and pull the wire connector off the fan motor. f) Remove the screw from the chassis c) Remove the speed nut from the blade ground wire and remove the inverter.
- Page 38 10. To remove the compressor: a) Remove the front and rear screws Ground from the unit compartment cover and Wire lift the cover off the unit compartment. 3-Pin Terminal Compressor Connector Cover e) IMPORTANT: Refrigerant must be handled by a licensed, EPA-certified Filter-Drier refrigerant technician in accordance with established procedures.
-
Page 39: Removing A Refrigerator Door Switch
REMOVING A REFRIGERATOR DOOR SWITCH Disconnect the two wires from the door WARNING switch terminals. Electrical Shock Hazard Disconnect power before servicing. Replace all parts and panels before operating. Failure to do so can result in death or electrical shock. Door Switch Wires Unplug refrigerator or disconnect power. -
Page 40: Removing A Refrigerator Door Skin And Handle
REMOVING A REFRIGERATOR DOOR SKIN AND HANDLE Unplug refrigerator or disconnect power. d) Fully close the door, then pull the skin straight out and off the door. To remove a door skin: a) Pull the freezer drawer out. b) Remove the three Phillips screws from the bottom of the door skin. -
Page 41: Removing A Refrigerator Door
REMOVING A REFRIGERATOR DOOR WARNING Ends Of Door Spring Electrical Shock Hazard Disconnect power before servicing. Replace all parts and panels before operating. Failure to do so can result in death or electrical shock. Screw Unplug refrigerator or disconnect power. Pull the freezer drawer open and remove the T-15 stop screw from the bottom hinge pin. -
Page 42: Removing The Freezer Drawer Slides
REMOVING THE FREEZER DRAWER SLIDES Unplug refrigerator or disconnect power. Fully extend the slide you wish to remove. Pull the freezer drawer out and remove Remove the two screws from the slide the food and the liner from the freezer and remove the slide from the freezer. -
Page 43: Removing The Freezer Drawer Switch
REMOVING THE FREEZER DRAWER SWITCH Disconnect the two wires from the freezer WARNING drawer switch terminals. Locating Tab Electrical Shock Hazard Disconnect power before servicing. Replace all parts and panels before operating. Failure to do so can result in death or electrical shock. -
Page 44: Removing The Ice Maker & Fill Tube Heater
REMOVING THE ICE MAKER & FILL TUBE HEATER WARNING Electrical Shock Hazard Ice Maker Screws (3) Disconnect power before servicing. Replace all parts and panels before operating. Failure to do so can result in death or electrical shock. b) Disconnect the two ice maker connec- tors from the wire harness and remove Unplug refrigerator or disconnect power. - Page 45 To remove the fill tube heater: d) Disconnect the two wire connectors from the heater terminals. a) Remove the ice maker (see step 4). b) Unlatch and disconnect the heater connector from the main harness. Heater Connectors c) Remove the two hex-head screws from the heater and slide the heater off the fill tube.
-
Page 46: Removing The Ice Maker Optics
REMOVING THE ICE MAKER OPTICS WARNING Ice Bin Slide Screws Electrical Shock Hazard Disconnect power before servicing. Replace all parts and panels before Emitter Housing Screws operating. c) Disconnect the wire connector from Failure to do so can result in death or the emitter board pins. - Page 47 To remove the optics receiver board: b) Disconnect the wire connector from the receiver board wire connector. a) Remove the five hex-head screws from the right divider mounting plate, and remove the plate and slide. Right Divider Mounting Plate Screws Receiver Board Wire Connector c) Disconnect the wire connector from...
-
Page 48: Removing The Evaporator Fan Motor
REMOVING THE EVAPORATOR FAN MOTOR Unlock and disconnect the evaporator WARNING fan motor connector from the wire har- ness. NOTE: Do not allow the wire har- ness to fall behind the evaporator cover, otherwise you will have to remove the cover to retrieve it. -
Page 49: Removing The Bimetal, Defrost Heater, And Evaporator
REMOVING THE BIMETAL, DEFROST HEATER, AND EVAPORATOR Remove the two front left and right side WARNING hex-head screws from the center divider. Loosen the two rear hex-head slotted screws, then pull the divider forward and remove the keyhole slots from the screws. Remove the divider from the liner. - Page 50 Remove the eight hex-head screws from the evaporator cover and remove the cover. Bimetal Connectors Evaporator Cover Screws Unclip Bimetal To remove the defrost heater: a) Disconnect the two heater connectors from the wiring harness. b) Bend the tabs up on the three bottom brackets, pull the heater out of the slots, and remove the heater.
- Page 51 10. To remove the evaporator: a) Remove the bimetal (see step 8). b) Remove the defrost heater (see step 9). c) Remove the foam air block from the left side of the evaporator. Unbraze Tubing d) Remove the two hex-head screws from the bottom of the evaporator.
-
Page 52: Removing The Water Valve
REMOVING THE WATER VALVE WARNING Filter Housing Water Valve Inlet Line Electrical Shock Hazard Screws Quick-Disconnect Ring Disconnect power before servicing. Disconnect the wire connector from the Replace all parts and panels before water valve terminals. operating. Push in on the quick-disconnect ring and Failure to do so can result in death or pull the water line off the water valve out- electrical shock. -
Page 53: Removing The Water Filter Housing
REMOVING THE WATER FILTER HOUSING Remove the water valve (see page 4-30 WARNING for the procedure). Remove the two hex-head screws from the front of the water filter mounting bracket. Water Filter Mounting Bracket Electrical Shock Hazard Disconnect power before servicing. Replace all parts and panels before operating. - Page 54 — NOTES — 4-32...
-
Page 55: Component Testing
COMPONENT TESTING Before testing any of the components, per- • Check all connections before replacing form the following checks: components, looking for broken or loose wires, failed terminals, or wires not pressed • Control failure can be the result of corro- into connectors far enough. -
Page 56: Heated Flipper Mullion
WARNING Electrical Shock Hazard Disconnect power before servicing. Replace all parts and panels before operating. Failure to do so can result in death or electrical shock. HEATED FLIPPER MULLION MOTORIZED AIR DOOR Contact Refer to page 4-10 for the procedure for ac- cessing the heated flipper mullion. -
Page 57: Power Switch
WARNING Electrical Shock Hazard Disconnect power before servicing. Replace all parts and panels before operating. Failure to do so can result in death or electrical shock. POWER SWITCH 24 V TRANSFORMER Primary (1) Unused (4) Unused (2) WH (5) BK (3) Line (Ribbed) (6) Line (Smooth) Secondary... -
Page 58: Condenser Fan Motor
WARNING Electrical Shock Hazard Disconnect power before servicing. Replace all parts and panels before operating. Failure to do so can result in death or electrical shock. CONDENSER FAN MOTOR EVAPORATOR FAN MOTOR Refer to page 4-12 for the procedure for ac- cessing the condenser fan motor. -
Page 59: Compressor & Inverter
WARNING Electrical Shock Hazard Disconnect power before servicing. Replace all parts and panels before operating. Failure to do so can result in death or electrical shock. COMPRESSOR & INVERTER Refer to page 4-12 for the procedure for ac- for 3 to 6 volts DC. If the voltage is not cessing the compressor and inverter. -
Page 60: Door/Drawer Switch
WARNING Electrical Shock Hazard Disconnect power before servicing. Replace all parts and panels before operating. Failure to do so can result in death or electrical shock. DOOR/DRAWER SWITCH FILL TUBE HEATER Refer to pages 4-17 & 4-21 for the proce- Refer to page 4-22 for the procedure for ac- dures for accessing a refrigerator or freezer cessing the fill tube heater. -
Page 61: Defrost Heater & Bimetal
WARNING Electrical Shock Hazard Disconnect power before servicing. Replace all parts and panels before operating. Failure to do so can result in death or electrical shock. DEFROST HEATER & BIMETAL WATER VALVE Bimetal Defrost Heater Refer to page 4-27 for the procedures for ac- Refer to page 4-30 for the procedure for ac- cessing the defrost heater &... -
Page 62: Main Control Board
WARNING Electrical Shock Hazard Disconnect power before servicing. Replace all parts and panels before operating. Failure to do so can result in death or electrical shock. MAIN CONTROL BOARD Refer to page 4-12 for the procedure for accessing the main control board. NOTE: See the chart for the main control board test specifications. -
Page 63: Diagnostics & Troubleshooting
DIAGNOSTICS & TROUBLESHOOTING WARNING Electrical Shock Hazard Disconnect power before servicing. Replace all parts and panels before operating. Failure to do so can result in death or electrical shock. ELECTRONIC CONTROL FEATURES • Pulsed Defrost Heat - During the defrost cycle, the heater is energized continuously The electronic control in the refrigerator for the first 2 minutes. -
Page 64: Service Diagnostics Mode
SERVICE DIAGNOSTICS MODE Temp UP key, or the Up arrow key. The routine will end automatically after all the steps are As a requirement to run the Service Diagnostics completed, or after 20 minutes have elapsed, routine, the appliance must be turned ON. whichever occurs first. -
Page 65: Service Information
SERVICE INFORMATION NOTE: Watt and pressure readings will vary, and are influenced by the existing condition of • The compressor suction and process stubs the appliance, such as an iced-up evaporator, can not be interchanged. the condition of the condenser, the defrost •... - Page 66 — NOTES —...
-
Page 67: Wiring Diagrams
WIRING DIAGRAMS NOTE: IM Solenoid valve and evap cover grounded through mounting. - Page 68 UNIT COMPARTMENT To Freezer Section To Refrigerator Section...
- Page 69 REFRIGERATOR SECTION...
- Page 70 FREEZER SECTION...
- Page 71 REFRIGERANT...
- Page 72 — NOTES —...
-
Page 73: Tech Tips
TECH TIPS ADJUSTING A REFRIGERATOR DOOR 5. Using a 1/2˝ open-end wrench, turn the 1. Unplug refrigerator or disconnect power. adjustable hinge pin 180° to adjust the 2. Pull the freezer drawer out. door up or down. NOTE: Make sure that 3. -
Page 74: Adjusting The Freezer Door
ADJUSTING THE FREEZER DOOR 1. Unplug refrigerator or disconnect power. 2. Pull the freezer drawer out. NOTE: This adjustment allows you to level 3. Remove the food from the drawer. the freezer door with the cabinet surface to 4. Lift the liner out of the freezer drawer. prevent leakage and frost from occurring. -
Page 75: Product Specifications
WARRANTY INFORMATION SOURCES IN THE UNITED STATES: FOR PRODUCT SPECIFICATIONS AND WARANTY INFORMATION CALL: FOR WHIRLPOOL PRODUCTS: 1-800-253-1301 FOR KITCHENAID PRODUCTS: 1-800-422-1230 FOR ROPER PRODUCTS: 1-800-447-6737 FOR TECHNICAL ASSISTANCE WHILE AT THE CUSTOMER’S HOME CALL: THE TECHNICAL ASSISTANCE LINE: 1-800-832-7174...