Table of Contents
Advertisement
1.
Instructions For Use ......................................................................... 56
2.
Safety Precautions ............................................................................ 58
3.
Environmental Care............................................................................ 60
4.
Get To Know Your Appliance ........................................................... 61
5.
Available Accessories ....................................................................... 64
6.
Using The Cooking Hob....................................................................... 70
7.
USING THE OVEN ...................................................................................... 72
8.
Oven Functions ..................................................................................... 78
9.
Cleaning And Maintenance ............................................................... 86
10. EXTRAORDINARY MAINTENANCE ........................................................... 93
11. INSTALLING THE APPLIANCE ................................................................... 95
12. ADAPTATION TO DIFFERENT TYPES OF GAS....................................... 104
INSTRUCTIONS FOR THE USER: these contain user advice, the description
of the controls and the correct procedures for cleaning and maintenance of
the appliance.
INSTRUCTIONS FOR THE INSTALLER: these are intended for the qualified
technician who must install the appliance, set it functioning and carry out
an inspection test.
@
Further information about the products can be found at www.smeg.com
Contents
55
Advertisement
Table of Contents

Related Manuals for Smeg A5-8


Summary of Contents for Smeg A5-8
- Page 1 INSTRUCTIONS FOR THE INSTALLER: these are intended for the qualified technician who must install the appliance, set it functioning and carry out an inspection test. Further information about the products can be found at www.smeg.com...
-
Page 2: General Instructions
General instructions 1. INSTRUCTIONS FOR USE This manual is an integral part of the appliance. It must be kept in its entirety and in an accessible place for the whole working life of the appliance. We recommend reading this manual and all information it contains carefully before using the appliance. Installation must be carried out by qualified personnel in accordance with the standards in force. - Page 3 General instructions Do not use sealed tins or containers in the appliance. Overpressure may occur inside the containers during cooking, creating a danger of explosion. Do not cover the bottom of the oven with aluminium or tin foil sheets during cooking and do not place pans or trays on it to avoid damage to the enamelled surface.
-
Page 4: Safety Precautions
General instructions 2. SAFETY PRECAUTIONS Consult the installation instructions for safety standards on electrical or gas appliances and for ventilation functions. In your interests and for your safety the law requires that the installation and servicing of all electrical and gas appliances be carried out by qualified personnel in accordance with the standards in force. - Page 5 General instructions The appliance is intended for use by adults. Do not allow children to go near it or play with it. This appliance may be used by children from the age of 8 and by people of reduced physical and mental ability or lacking in experience and knowledge, provided they are supervised or instructed on the safe use of the appliance and if they understand the associated risks.
-
Page 6: Environmental Care
Instructions for disposal 3. ENVIRONMENTAL CARE Our environmental care Pursuant to Directives 2002/95/EC, 2002/96/EC and 2003/108/EC relating to the reduction of the use of hazardous substances in electrical and electronic appliances, as well as to the disposal of refuse, the crossed out bin symbol on the appliance indicates that at the end of the useful life of the product, it must be collected separately from other refuse. -
Page 7: Instructions For The User
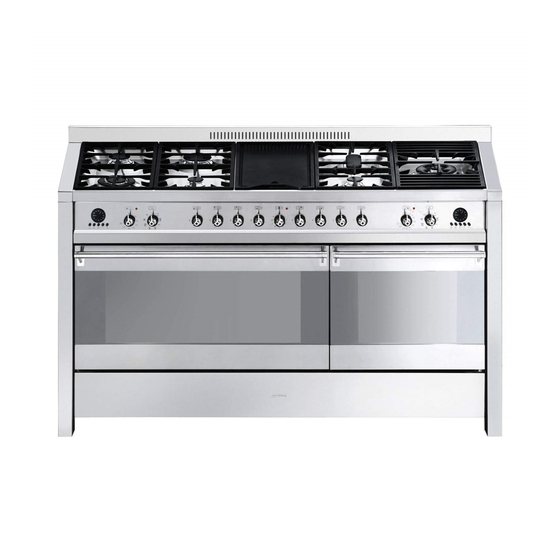
Instructions for the user 4. GET TO KNOW YOUR APPLIANCE Cooking hob Control panel Door Oven seal Storage compartment Pizza plate or cover recess (on some Oven light models only) Rack/tray support frames/guides Bottom plate (on some models only) - Page 8 Instructions for the user Description of the controls on the front panel 4.1.1 Programming clock The programming clock allows to display the current time or to set a timer or a programmed cooking operation. 4.1.2 Temperature selection knob (left oven) The cooking temperature is selected by turning the knob clockwise to the required setting, between the maximum and the minimum settings.
- Page 9 Instructions for the user 4.1.5 Barbeque resistance power regulation knob This knob allows to adjust the power of the barbeque grill on the hob. Place the knob to any position from “1” to “9” to activate the heating element. The indicator light comes on to indicate that the heating element is operating.
-
Page 10: Available Accessories
Instructions for the user 5. AVAILABLE ACCESSORIES NOTE: Some models are not provided with all accessories. WOK reduction: useful when using a wok. Left oven rack: useful for holding cooking containers. Left oven tray rack: to be placed over the top of the left oven tray;... - Page 11 Instructions for the user Right oven rack: useful for holding cooking containers. Right oven tray rack: to be placed over the top of the oven tray; for cooking foods which may drip. Right oven tray: useful for collecting fat from foods placed on the rack above.
- Page 12 Instructions for the user Using the WOK reduction pan stand The WOK pan stand should be placed on top of the hob pan stands as shown in the adjacent figure. Make sure they are stable. The WOK pan stand should only be used when cooking with a wok.
- Page 13 Instructions for the user Using the rotisserie rod Keep the oven door closed during cooking. Use the clip forks provided to prepare the rotisserie rod with the food. The clip forks can be tightened using the fastening screws. Place the rotisserie supports into the inserts at the corners of the tray.
- Page 14 Instructions for the user Having prepared the rotisserie rod, place the tray on the first runner (see 7.2 Oven runners). Rocking the rotisserie supports, insert the tip of the rotisserie rod into the hole of the rotisserie motor on the side of the oven. At the end of cooking, screw on the handle provided so that you can move the rod with the food on it readily.
- Page 15 Instructions for the user Using the pizza plate (on some models only) With the oven cold, remove the circular cover from the bottom (as shown in the figure) and insert the pizza plate. Make sure that the plate is inserted correctly in the recess provided.
-
Page 16: Using The Cooking Hob
Instructions for the user 6. USING THE COOKING HOB General warnings and advice Before lighting the hob burners, make sure that the flame-spreader crowns are correctly positioned in their housings with their respective burner caps. Lighting the hob burners All the appliance's control and monitoring devices are located together on the front panel. - Page 17 Instructions for the user Cookware diameters Burner Ø min. (cm) Ø max. (cm) Auxiliary Semi-rapid Rapid Ultra-rapid Fish burner Suitable oval containers Ultra-rapid Cleaning the barbeque plate The plate is coated with a non-stick material (Teflon). This kind of film is very fragile and can be damaged when using metal utensils.
-
Page 18: Using The Oven
Instructions for the user 7. USING THE OVEN Before using the appliance • Remove any labels (apart from the technical data plate) from trays, dripping pans and the cooking compartment. • Remove any protective film from the outside or inside of the appliance, including from accessories such as trays, dripping pans, the pizza plate or the base cover. - Page 19 Instructions for the user Internal oven lights The oven lights switch on by selecting any function. General warnings and advice for use All cooking operations must be carried out with the door closed. The dissipation of heat may cause hazards. During cooking, do not cover the bottom of the oven with aluminium or tin foil and do not place pans or oven trays on it as this may damage the enamel coating.
- Page 20 Instructions for the user Programming clock (left / right oven) FUNCTION KEY LIST TIMER KEY END OF COOKING KEY TIME SETTING AND RESET VALUE DECREASE KEY VALUE INCREASE KEY The appliance is equipped with two electronic programmers connected via serial communication allowing them to synchronize every 60 seconds.
- Page 21 Instructions for the user Analogue clock operation 7.8.1 Setting the time When the oven is used for the first time, or after an interruption in the electricity supply, the display flashes at regular intervals. Press the key to stop the display flashing. Press key again for 2 seconds;...
- Page 22 Instructions for the user 7.8.3 Programming Cooking duration: the 2 can be pressed to set the cooking duration. Before it can be set, the thermostat knob must be turned to the required cooking temperature and the function selector knob to any setting. To set the cooking duration, proceed as follows: •...
- Page 23 Instructions for the user Cooking start: as well as setting a cooking duration, the cooking start time can also be set (with a maximum delay of 12 hours in relation to the current time). To set the cooking start/end time, proceed as follows: •...
-
Page 24: Oven Functions
Instructions for the user 8. OVEN FUNCTIONS STATIC: As the heat comes from above and below at the same time, this system is particularly suitable for certain types of food. Traditional cooking, also known as static or thermal radiation cooking, is suitable for cooking just one dish at a time. Perfect for all types of roasts, bread and cakes and in any case particularly suitable for fatty meats such as goose and duck. - Page 25 Instructions for the user CIRCULAR: The combination of the fan and the circular element (incorporated in the rear of the oven) enables different foods to be cooked on several levels, as long as they need the same temperature and same type of cooking operation. Hot air circulation ensures instant and uniform distribution of heat.
- Page 26 Instructions for the user Cooking advice and instructions 8.1.1 General advice We recommend preheating the oven before putting food in. • For cooking on several levels, we recommend using a fan-assisted function to achieve uniform cooking at all heights. • In general, it is not possible to shorten cooking times by increasing the temperature (the food could be well-cooked on the outside and undercooked on the inside).
- Page 27 Instructions for the user 8.1.4 Advice for defrosting and proving • We recommend positioning frozen foods in a lidless container on the first shelf of the oven. • The food must be defrosted without its wrapping. • Lay out the foodstuffs to be defrosted evenly, not overlapping. •...
- Page 28 Instructions for the user 8.3 Cooking table (left oven) TYPES OF FOOD WEIGHT FUNCTION FIRST COURSES LASAGNE 3-4 kg Static OVEN-BAKED PASTA 2 kg Static MEAT ROAST VEAL 1.2 kg Fan-assisted static PORK LOIN 1.2 kg Fan-assisted static PORK SHOULDER 1.2 kg Turbo ROAST RABBIT...
- Page 29 Instructions for the user RUNNER POSITION TEMPERATURE TIME IN MINUTES FROM BOTTOM °C 220 - 230 50 - 60 220 - 230 180 - 190 70 - 80 180 - 190 70 - 80 180 - 190 90 - 100 180 - 190 70 - 80 180 - 190...
- Page 30 Instructions for the user TYPES OF FOOD WEIGHT FUNCTION PIZZA 1 kg Pizza BREAD 1 kg Circular FOCACCIA 1 kg Turbo DESSERTS RING CAKE 1 kg Fan-assisted static FRUIT TART 1 kg Fan-assisted static SHORT PASTRY 0.5 kg Fan-assisted bottom JAM TARTS 1.2 kg Turbo...
- Page 31 I n s t r u c t i o n s f o r t h e u s e r RUNNER POSITION TEMPERATURE TIME IN MINUTES FROM BOTTOM °C 250 - 280 6 -10 190 - 200 25 -30 180 - 190 15 -20 50 - 60...
-
Page 32: Cleaning And Maintenance
Instructions for the user 9. CLEANING AND MAINTENANCE Do not use steam jets to clean the appliance. The steam could reach the electronics, damaging them and causing short-circuits. WARNING: For your safety, you are advised to wear protective gloves while performing any cleaning or extraordinary maintenance. Do not use cleaning products containing chlorine, ammonia or bleach on steel parts or parts with metallic finishes on the surface (e.g. - Page 33 Instructions for the user Cleaning the cooking hob parts 9.4.1 Pan stands Remove the pan stands and clean them with lukewarm water and non-abrasive detergent, making sure to remove any encrustations. Dry them thoroughly and return them to the hob. Continuous contact between the pan stands and the flame can cause modifications to the enamel over time in those parts exposed to heat.
- Page 34 Instructions for the user 9.4.4 Barbeque plate Remove the plate only when it has cooled off. Danger of burns! 1 Lift the plate from the shaped part on the front. Take care not to spill residues that might be in the side drainage holes. 2 Clean it using standard washing up liquid and a soft sponge.
- Page 35 Instructions for the user Cleaning the oven For the best oven upkeep, clean it regularly after having allowed it to cool. Take out all removable parts. • Clean the oven racks with warm water and non-abrasive detergent. Rinse and dry. •...
- Page 36 Instructions for the user 9.5.1 Removing the guide frames (left oven) Removing the guide frames enables the sides to be cleaned more easily. To remove the guide frames: 1 Pull the frame towards the top of the oven to unhook it from its housing A, then slide it out of the seats B at the back.
- Page 37 Instructions for the user Removing the door seal (not on pyrolitic models) To permit thorough cleaning of the oven, the door seal may be removed. There are fasteners on all four sides to attach it to the edge of the oven. Pull the edges of the seal outwards to detach the fasteners.
- Page 38 Instructions for the user 9.10 Cleaning the pizza plate (on some models only) The pizza plate should be washed separately according to the following instructions: leave the pizza stone inside and activate the pyrolysis function, then at the end, when the stone has cooled down to lukewarm, wipe it with a damp microfibre cloth to remove any residues.
-
Page 39: Extraordinary Maintenance
Instructions for the user 10.EXTRAORDINARY MAINTENANCE The oven requires periodic minor maintenance or replacement of parts subject to wear, such as gaskets, light bulbs, etc. Specific instructions for each operation of this kind are given below. Before any intervention that requires access to live parts, disconnect the appliance from the power supply. - Page 40 Instructions for the user 10.3 Removing the door Open the door completely. Insert two pins into the holes on the hinges towards the back of them until they engage. Grasp the door on both sides with both hands, lift it forming an angle of around 30° and remove it.
-
Page 41: Instructions For The Installer
Instructions for the installer 11.INSTALLING THE APPLIANCE 11.1 Installing in kitchen units Veneers, adhesives or plastic coatings on adjacent furniture should be temperature-resistant (no less than 90°C). If they are not sufficiently temperature-resistant, they may warp over time. The appliance must be installed by a qualified technician and according to the regulations in force. - Page 42 Instructions for the installer 11.2 Room ventilation and combustion extraction The room containing the appliance should have a permanent air supply in accordance with the standards in force. The room where the appliance is installed must have enough air flow for the regular combustion of gas and for the air exchange needed in the room itself.
- Page 43 Instructions for the installer 11.3 Gas connection At the end of the installation, check for any leaks with a soapy solution, never with a flame. The tightening torque between connections that incorporate a gasket must be between 10 and 15 Nm. After carrying out any operation on the appliance, check that the gas connections are properly tightened.
- Page 44 Instructions for the installer 11.3.1 Connection with a rubber hose WARNING: The following instructions are valid solely for Class 1 installations. See fig. C in chapter “11.1 Installing in kitchen units”. Connection using a rubber hose complying with current standards is only permitted if the hose can be inspected along its entire length.
- Page 45 Instructions for the installer 11.3.2 Connection with a flexible steel hose WARNING: The following instructions are valid for all types of installation, see fig. A, B, C in chapter “11.1 Installing in kitchen units”. Only use standards-compliant continuous wall steel hoses no longer than 2 metres.
- Page 46 Instructions for the installer 11.4 Electrical connection Make sure the voltage and the cross-section of the power supply line match the specifications indicated on the identification plate positioned on the appliance. Do not remove this plate for any reason. A copy of the plate is attached to the instructions.
- Page 47 Instructions for the installer POSSIBLE CABLE TYPE CONNECTION TYPES (if not present) 415 V 5-pole 5 x 2.5 mm² H05V2V2-F 415 V 4-pole 4 x 4 mm² H05V2V2-F 240 V 3-pole 3 x 6 mm² H05V2V2-F • Use H05V2V2-F cables withstanding temperatures of 90°C or higher. •...
- Page 48 Instructions for the installer 11.5 Positioning the skirt WARNING: The skirt provided is an integral part of the product; it must be fastened to the appliance prior to installation. • Position the skirt above the top, taking care to align holes A with holes B. •...
- Page 49 Instructions for the installer 11.7 Wall mounting instructions (some markets only) 1 Fasten a hook bolt (not supplied) into the wall at a height (h) of 800 mm from the floor. The installer must provide the hook bolt when installing the appliance. 2 Attach the snap hook to the chain.
-
Page 50: Adaptation To Different Types Of Gas
Instructions for the installer 12.ADAPTATION TO DIFFERENT TYPES OF GAS BEFORE PERFORMING ANY OPERATIONS, SWITCH OFF THE POWER SUPPLY TO THE APPLIANCE. Appliance set for gas: NATURAL GAS G20 (2H) 20 mbar pressure (see label on product) In case of operation with other types of gas, the burner nozzles must be changed and the minimum flame adjusted on the gas taps. - Page 51 Instructions for the installer 12.2 Burner and nozzle characteristics table For burner arrangement, see “Instructions for the user - 6.4 Cookware diameters”. Rated heating Burner Natural gas – G20 20 mbar capacity (kW) Nozzle diameter Reduced capacity 1/100 mm Auxiliary 1.05 72 (X) Semi-rapid...
- Page 52 Instructions for the installer 12.3 Final operations After replacing the nozzles, reposition the flame-spreader crowns, the burner caps and the pan stands. Following adjustment to a gas other than the one originally set in the factory, replace the gas setting label fixed to the appliance with the one corresponding to the new gas.