Table of Contents
Advertisement
1.
PRECAUTIONS FOR SAFETY AND USE _____________________ 43
2.
INSTALLING THE APPLIANCE _____________________________ 45
3.
ADAPTING TO DIFFERENT TYPES OF GAS __________________ 48
4.
FINAL OPERATIONS _____________________________________ 50
5.
DESCRIPTION OF CONTROLS ____________________________ 52
6.
USING THE HOB ________________________________________ 59
7.
USING THE OVENS______________________________________ 61
8.
ACCESSORIES AVAILABLE _______________________________ 63
9.
COOKING ADVICE ______________________________________ 64
10.
CLEANING AND MAINTENANCE ___________________________ 72
11.
EXTRAORDINARY MAINTENANCE _________________________ 78
THESE INSTRUCTIONS ONLY APPLY TO THE COUNTRIES OF DESTINATION WHOSE
IDENTIFICATION SYMBOLS ARE LISTED ON THE COVER OF THIS MANUAL.
INSTRUCTIONS FOR THE INSTALLER: these are intended for the
qualified engineer who is to check the gas supply system and install,
commission and test the appliance.
INSTRUCTIONS FOR THE USER: these provide recommendations for
use, a description of the controls and the correct procedures for
cleaning and maintaining the appliance.
42
Table of Contents
Advertisement
Table of Contents

Related Manuals for Smeg A2PY-6


Summary of Contents for Smeg A2PY-6
-
Page 1: Table Of Contents
PRECAUTIONS FOR SAFETY AND USE _____________________ 43 INSTALLING THE APPLIANCE _____________________________ 45 ADAPTING TO DIFFERENT TYPES OF GAS __________________ 48 FINAL OPERATIONS _____________________________________ 50 DESCRIPTION OF CONTROLS ____________________________ 52 USING THE HOB ________________________________________ 59 USING THE OVENS______________________________________ 61 ACCESSORIES AVAILABLE _______________________________ 63 COOKING ADVICE ______________________________________ 64 CLEANING AND MAINTENANCE ___________________________ 72 EXTRAORDINARY MAINTENANCE _________________________ 78... -
Page 2: Precautions For Safety And Use
Presentation 1. PRECAUTIONS FOR SAFETY AND USE THIS MANUAL IS AN INTEGRAL PART OF THE APPLIANCE. TAKE GOOD CARE OF IT AND KEEP IT TO HAND THROUGHOUT THE COOKER'S LIFE CYCLE. USERS ARE ADVISED TO READ THIS MANUAL AND ALL THE INSTRUCTIONS IT CONTAINS BEFORE USING THE COOKER. - Page 3 Presentation THE NAMEPLATE WITH THE TECHNICAL DATA, SERIAL NUMBER AND MARK IS IN A VISIBLE POSITION IN THE STORAGE COMPARTMENT. THE NAMEPLATE MUST NEVER BE REMOVED. THIS APPLIANCE MUST NEVER BE INSTALLED ON A STAND. THE APPLIANCE BECOMES VERY HOT DURING USE. TAKE CARE NOT TO TOUCH THE HEATING ELEMENTS INSIDE THE OVEN.
-
Page 4: Installing The Appliance
Instructions for the Installer 2. INSTALLING THE APPLIANCE It is the law that all gas appliances are installed by competent persons. Corgi gas installers are approved to work to safe and satisfactory standards. All gas installation, servicing and repair work must be in accordance with the gas safety regulations 1984 (installation and use) as amended 1990. - Page 5 Instructions for the Installer Operation at 380-415V 3N H05RR-F five-wire cable (cable of 5 x 1.5 Operation at 380-415V 2N H05RR-F four-wire cable (cable of 4 x 1.5 Operation at 220-240V H05RR-F three-wire cable (cable of 3 x 2.5 The earth wire (yellow-green) must be at least 20 mm longer than the other wires at the end for connection to the appliance.
- Page 6 Instructions for the Installer 2.3 Connecting to natural and LPG gas (Please see connection diagram) This type of connection is possible on both built-in and free-standing appliances. Make the connection to the appliance using flexible bayonet style hose in accordance to B.S. 669. The hose connection at the rear of the appliance has a ½”...
-
Page 7: Adapting To Different Types Of Gas
Instructions for the Installer 3. ADAPTING TO DIFFERENT TYPES OF GAS Before carrying out the operations described below, disconnect the appliance from the electricity supply. The appliance is tested with G20 (2H) natural gas at the pressure of 20 mbar. If it is to be used with other types of gas, the burner nozzles have to be changed and the gas tap adjusted to set the minimum flame. -
Page 8: Burner And Nozzle Data Tables
Instructions for the Installer Burner and Nozzle Data Tables Nominal Burner heat capacity (kW) Auxiliary 1.05 Semi rapid Rapid Ultra rapid Nominal Burner heat capacity (kW) Auxiliary 1.05 Semi rapid Rapid Ultra rapid Hob burner layout Bottled gas – G30/G31 30/37 mbar Nozzle By-pass Reduced... -
Page 9: Final Operations
Instructions for the Installer 4. FINAL OPERATIONS After changing the nozzles, put the pan stands, the burner caps and flame diffuser rings back in place. After adjusting for use of a gas other than the gas used for testing the appliance, replace the gas setting label inside the storage compartment with the label for the new gas. - Page 10 Instructions for the Installer 4.4 Fitting the rear splash-back • Place the splash-back on the hob, aligning the holes A with the holes • Fix the splash-back to the hob by tightening the screws C.
-
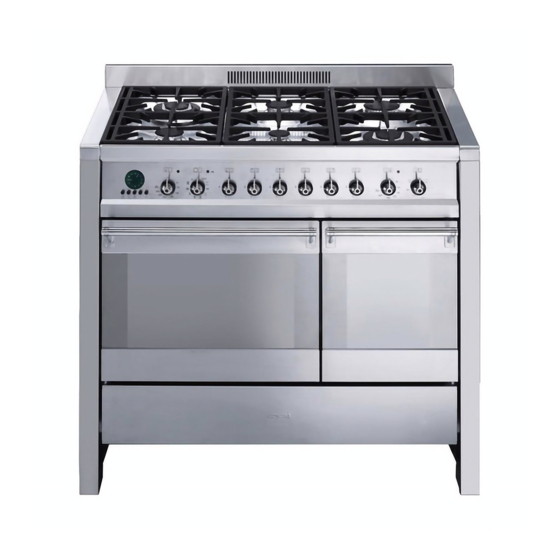
Page 11: Description Of Controls
Instructions for the User 5. DESCRIPTION OF CONTROLS The front panel All the cooker's control and monitoring devices are placed together on the front panel. At first use after a power blackout, press the middle knob seconds to enable oven cooking operations. KEY TO SYMBOLS LEFT REAR BURNER... - Page 12 Instructions for the User THERMOSTAT KNOB (MAIN OVEN) The cooking temperature is selected by turning the knob clockwise to the required setting, between 50° and 280°C. The light comes on to indicate that the oven is heating up. When the light remains on without flashing, the temperature inside the oven is being kept constantly at the set level.
- Page 13 Instructions for the User FUNCTION SELECTOR KNOB (OVENS) Turn the knob to select one of the following functions: MAIN OVEN NO FUNCTION SET GRILL ELEMENT ON IN ALTERNATION WITH BOTTOM HEATING ELEMENT + TOP AND BOTTOM HEATING ELEMENTS TOP HEATING ELEMENT + GRILL GRILL ELEMENT + ROTISSERIE TOP AND BOTTOM HEATING ELEMENTS + FAN...
- Page 14 Instructions for the User Electronic Analogue Clock (on some models only) LIST OF FUNCTIONS MINUTE-MINDER BUTTON END OF COOKING BUTTON CLOCK TIME ADJUSTMENT AND RESET VALUE DECREASE BUTTON VALUE INCREASE BUTTON 5.2.1 Setting the time When the oven is used for the first time, or after an interruption in the electricity supply, the display flashes at regular intervals.
- Page 15 Instructions for the User 5.2.2 Minute-Minder This function does not stop cooking; it simply activates the buzzer. Press the display will light up as shown in figure 1. Keep the Each time a key is pressed, 1 outside segment, representing 1 minute of cooking time, will light up or go out.
- Page 16 Instructions for the User 5.2.3 Programming Cooking duration: the cooking duration can be set. Before it can be set, the thermostat must be turned to the cooking temperature required and the function selector knob to any setting. To set the cooking duration, proceed as follows: Press the key and the display will light up as...
- Page 17 Instructions for the User Starting cooking: as well as setting a cooking duration, the cooking start time can also be set (with a maximum delay of 12 hours from the current time). To set the cooking start/end time, proceed as follows: Set the cooking duration as described in the previous point.
-
Page 18: Using The Hob
Instructions for the User 6. USING THE HOB Lighting the hob burners Before lighting the hob burners check that the flame diffuser rings are correctly in place with their respective burner caps, making sure that the holes A in the flame diffusers are aligned with the plugs and thermocouples. The special pan stand B is for use with woks. - Page 19 Instructions for the User Practical hints for using the hob burners For better burner efficiency and to minimise gas consumption, use pans with lids of suitable size for the burner, so that flames do not reach up the sides of the pan (see point "6.3 Pan Diameters"). Once the contents come to the boil, turn down the flame far enough to prevent the liquid from boiling over.
-
Page 20: Using The Ovens
Instructions for the User 7. USING THE OVENS Precautions and General Advice When the oven is used for the first time, it should be heated to the maximum temperature for long enough to burn off any oily residues left by the manufacturing process, which might contaminate foods with unpleasant smells. - Page 21 Instructions for the User Storage compartment The storage compartment is in the bottom of the cooker, underneath the ovens. To open it, pull on the top of the door. Never use it to store flammable materials such as rags, paper, etc.; it is intended to take the appliance's metal accessories only.
-
Page 22: Accessories Available
Instructions for the User 8. ACCESSORIES AVAILABLE The oven is fitted with 4 runners for placing trays and shelves at different heights. Main Oven Auxiliary Oven Oven shelf: for cooking food on plates, small cakes or roasts or foods requiring light grilling. -
Page 23: Cooking Advice
Instructions for the User 9. COOKING ADVICE The oven should always be preheated in fan mode to 30/40°C above the cooking temperature. This considerably shortens cooking times and reduces electricity consumption, as well as giving better results. The oven door must be closed during cooking operations. Conventional cooking (main and auxiliary ovens) FUNCTION SELECTOR THERMOSTAT SET AT 50 - 250-280°C... - Page 24 Instructions for the User Hot air cooking (main oven) FUNCTION SELECTOR THERMOSTAT SET AT 50 - 280°C This system is suitable for cooking on several shelves, even with foods of different kinds (fish, meat, etc.) without cross-contamination of flavours or smells. The air circulation inside the oven ensures uniform heat distribution.
- Page 25 Instructions for the User Hot-air grilling (main oven) FUNCTION SELECTOR THERMOSTAT FROM 50° C TO 200°C Allows uniform heat distribution with better penetration to the core of foods. Foods are lightly browned on the outside but still soft on the inside.
- Page 26 Instructions for the User Defrosting (main oven) FUNCTION SELECTOR THERMOSTAT SET ON 0 The air movement provided by the fan alone thaws foods more quickly. The air circulating inside the oven is at room temperature. Defrosting at room temperature has the advantage that the food's flavour and appearance are retained intact.
- Page 27 Instructions for the User Rotisserie cooking (main oven) FUNCTION SELECTOR THERMOSTAT SET AT 50 - 200°C Recommended for small pieces of meat. Prepare the rotisserie rod with the food, tightening the screws A of the prongs. Fit the shelf B onto the third runners from the bottom. Remove the handle D and position the rotisserie rod so that the pulley E is still in the guides on the shelf B.
- Page 28 Instructions for the User Rotisserie cooking (auxiliary oven) FUNCTION SELECTOR THERMOSTAT AT MAXIMUM SETTING This cooking mode is available for the auxiliary oven only. Recommended for small pieces of meat. Prepare the rotisserie rod with the food, tightening the screws A of the prongs.
- Page 29 Instructions for the User Recommended cooking tables Cooking times, for meat in particular, vary depending on the food's thickness and quality and personal preference. PASTA LASAGNE PASTA BAKES MEAT ROAST VEAL ROAST BEEF ROAST PORK CHICKEN DUCK GOOSE-TURKEY RABBIT LEG OF LAMB ROAST FISH PIZZA CONFECTIONERY...
- Page 30 Instructions for the User PASTA LASAGNE PASTA BAKES CREOLE RICE MEAT ROAST VEAL ROAST PORK ROAST BEEF FILLET STEAK ROAST LAMB RARE ROAST BEEF ROAST CHICKEN ROAST DUCK ROAST TURKEY ROAST RABBIT ROAST HARE ROAST PIGEON FISH PIZZA SWEETS (CONFECTIONERY) SPONGE CAKE FRUIT CAKE LIGHT SPONGE CAKE...
-
Page 31: Cleaning And Maintenance
Instructions for the User 10. CLEANING AND MAINTENANCE 10.1 Cleaning stainless steel Before carrying out any operation involving access to live parts, disconnect the appliance from the electricity supply. To keep stainless steel in good condition, it must be cleaned regularly, after each use, first allowing it to cool. - Page 32 Instructions for the User 10.2.2 The burner caps, flame diffuser rings and burners The burner caps, flame diffuser rings and burners can be removed for easier cleaning. Remove the pan stands and wash them in warm water with a non-abrasive detergent, taking care to remove all deposits, and wait until they are completely dry.
- Page 33 Instructions for the User The auxiliary oven is fitted with enamelled liners that are continuously self-cleaning. These liners simplify cleaning of the oven and ensure it continues to perform well over time. 10.3.2 Using the self-cleaning liners To keep the inside of the oven clean and free from food residues and unpleasant smells, it should periodically be operated empty at a temperature of at least 200°...
- Page 34 Instructions for the User For easier cleaning, the storage drawer underneath the oven can be completely removed. Pull it fully out and raise it at the front (just like an ordinary drawer). 10.4 Door glazing The glass in the door should always be kept thoroughly clean. Use absorbent kitchen roll;...
- Page 35 Instructions for the User 10.5 Pyrolysis: automatic oven cleaning (for the main oven only) To keep stainless steel in good condition, it must be cleaned regularly, after each use, first allowing it to cool. Before starting the automatic cleaning cycle, make sure that the oven does not contain any foods or large spills from previous cooking operations inside.
- Page 36 Instructions for the User 10.5.2 Setting the cleaning cycle with electronic analogue clock FUNCTION SELECTOR KNOB ELECTRONIC ANALOGUE CLOCK Position the function selector knob to the symbol at the same time as pressing the symbol The display will appear as shown in figure 1 with the number 1 flashing and the segments up to 6 illuminated to show the minimum duration of pyrolysis (an hour and a half).
-
Page 37: Extraordinary Maintenance
Instructions for the User 11. EXTRAORDINARY MAINTENANCE Occasionally, the ovens will require minor servicing procedures or the replacement of parts subject to wear and tear, such as gaskets, light bulbs, etc. The specific operations for each procedure of this kind are provided below. - Page 38 Instructions for the User 11.2 Removing the door Open the door completely and insert the pins (supplied) into the holes from the inside. Close the door to an angle of about 45° and lift it off. To reassemble, fit the hinges into their grooves, then lower the door into place and extract the pins.