
Related Manuals for KitchenAid COMMERCIAL MIXER


Summary of Contents for KitchenAid COMMERCIAL MIXER
- Page 1 COMMERCIAL MIXER INSTRUCTIONS 1-800-541-6390 Details Inside ® FOR THE WAY IT’S MADE. ™...
-
Page 2: Hassle-Free Replacement Warranty
KitchenAid that, if your Stand Mixer should fail within the first year of ownership, KitchenAid will arrange to deliver an identical or comparable replacement to your door free of charge and arrange to have your “failed” Stand Mixer returned to us. -
Page 3: Table Of Contents
Ordering Accessories and Replacement Parts ...4 Electrical Requirements ...5 Troubleshooting Problems ...5 Stand Mixer Features ...6 Assembling Your Stand Mixer ...7 Using Your KitchenAid ® Mixing Time ...8 Mixer Use ...8 Speed Control Guide - 10 Speed Mixers ...9 Beater To Bowl Clearance...10 Mixing Tips...11... -
Page 4: Important Safeguards
Call the KitchenAid Customer Satisfaction Center at 1-800-541-6390 for more information. 7. The use of attachments not recommended or sold by KitchenAid may cause fire, electrical shock or injury. 8. Do not use the Stand Mixer outdoors. -
Page 5: Warranty
Warranty: One Year Full Warranty from date of purchase. KITCHENAID DOES NOT ASSUME ANY RESPONSIBILITY FOR INCIDENTAL OR CONSEQUENTIAL DAMAGES. Some states do not allow the exclusion or limitation of incidental or consequential damages, so this exclusion may not apply to you. This warranty gives you specific legal rights and you may also have other rights which vary from state to state. -
Page 6: For Puerto Rico
Failure to do so can result in death or electrical shock. Arranging for Service Outside the 50 United States and Puerto Rico Consult your local KitchenAid dealer or the store where you purchased the Ordering Accessories and Replacement Parts To order accessories or replacement... -
Page 7: Electrical Requirements
30 minutes before turning it back on. If the problem cannot be corrected with the above steps, see the KitchenAid Warranty on page 3. Do not return the Stand Mixer to the retailer – they do not provide service. -
Page 8: Stand Mixer Features
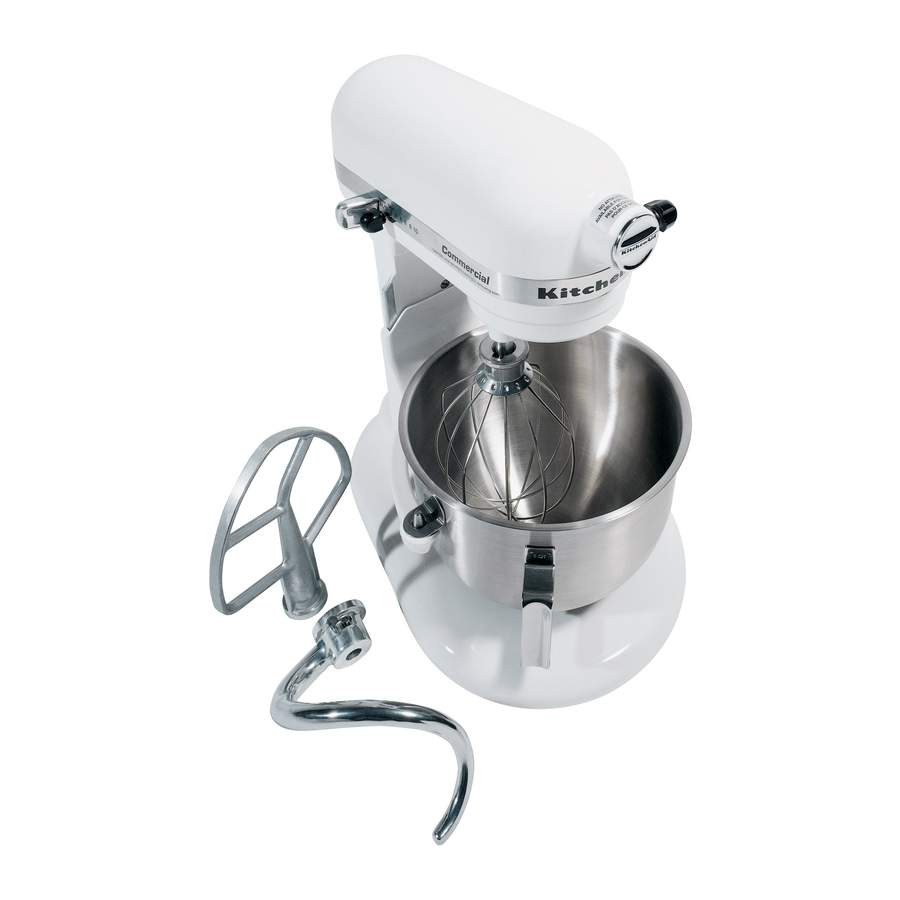
Lever Beater Height Adjustment Screw (partly shown) Spring Latch and Bowl Pin (not shown) Flat Beater Bowl Support Mixer Features Motor Head Locating Pins 5 Quart Stainless Steel Bowl Spiral Dough Hook Bowl Lift Handle (not shown) Beater Shaft Stainless... -
Page 9: Assembling Your Stand Mixer
3. Press beater upward as far as possible and turn left. 4. Pull beater from beater shaft. 5. Plug into a grounded 3 prong outlet. Commercial mixer SPEED Control and Lever Guard RAISE The Soft Start™ feature minimizes splash-out by starting the mixer slowly before increasing to the selected speed. -
Page 10: Using Your Kitchenaid Attachments
Using Your KitchenAid Flat Beater for normal to heavy mixtures: cakes creamed frostings candies cookies pie pastry Wire Whip for mixtures that need air incorporated: eggs egg whites heavy cream boiled frostings Dough Hook for mixing and kneading yeast doughs:... -
Page 11: Speed Control Guide - 10 Speed Mixers
Speed Control Guide – 10 Speed Mixers All speeds feature Soft Start™ operation, which minimizes splash-out and flour- puff. The mixer will start slowly before increasing to the selected speed. Speed Stir STIRRING SLOW MIXING MIXING, BEATING BEATING, CREAMING FAST BEATING,... -
Page 12: Beater To Bowl Clearance
Beater To Bowl Clearance Your Stand Mixer is adjusted at the factory so the flat beater just clears the bottom of the bowl. If, for any reason, the flat beater hits the bottom of the bowl or is too far away from the bowl, you can correct the clearance easily. -
Page 13: Mixing Tips
(creamed) before other ingredients are added. For all cakes, mixing times may change because your KitchenAid mixer works more quickly than other mixers. In general, mixing a cake with the KitchenAid ®... -
Page 14: Basic White Bread
Cool to lukewarm. Dissolve yeast in warm water in warmed mixer bowl. Add lukewarm milk mixture and 4 flour. Attach bowl and dough hook to mixer. Turn to Speed 2 and mix about 1 minute. Continuing on Speed 2, add remaining flour, at a time, and mix about 2 minutes, or until dough clings to hook and cleans sides of bowl. -
Page 15: Care And Cleaning
• The bowl is dishwasher-safe. It can also be hand-washed in hot sudsy water, rinsed thoroughly, and dried. • Wipe the stand mixer with a clean damp cloth. Do not use abrasive cleansers or scouring pads and do not immerse the stand mixer in water. - Page 16 5. Slide the bowl support down so that the tabs on the back of the bowl support line up with the slots in the column. Remove the bowl support by passing the tabs through the slots. 6. Clean the bowl support and column with the mild detergent and a wash cloth.
-
Page 17: Accessories
Accessories Pouring Shield Model KPS2CL (for 5 quart models) Minimizes splash-out when adding ingredients. Mixer Covers Model K5CR To protect mixers when not in use. Made of cotton and polyester, they are machine washable. - Page 20 ® FOR THE WAY IT’S MADE. ™ ® Registered trademark/™ Trademark/ the shape of the mixer is a trademark of KitchenAid, U.S.A. 9707796 © 2003. All rights reserved. Printed in USA (dZw1203)