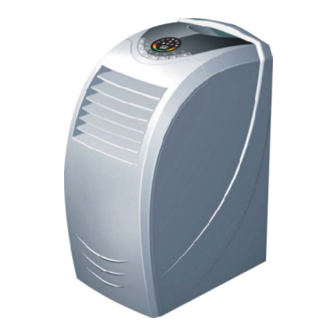
Summary of Contents for Dimplex DAC15006R
- Page 1 PORTABLE AIR-CONDITIONER Model DAC15006R ☆ Please read and retain this manual for future reference...
- Page 2 Important Safeguards. • Read all instructions. • Disconnect the power plug before dismantling, assembling or before cleaning. • Avoid touching mobile parts of the appliance. • Never insert fingers, pencils or any other objects though the guards whenever the power plug is connected, especially while running.
- Page 3 Part Names: 1. Control Panel 2. Horizontal Louver 3. Vertical Louver 4. Air Inlet Grille 5. Castors 6. Exhaust Duct 7. Handle 8. Air Outlet Grille 9. Power Cord and Plug 10. Water Injection Draw 11. Cord Storage hooks. 12. Water Level Indicator 13.
- Page 4 Up/down: Press up or down button to set temperature or adjust the time in Timer mode. Press both buttons to change form from Celsius to Fahrenheit. Mode: Press this button to select cool, dehumidify or fan mode. Econ: Press this button to set to energy saving mode (only cool mode). The temperature is preset at 27 and low fan speed is selected.
- Page 5 Remote control Power Press this button to turn/off the unit. Timer Press this button to set the timer. Swing Press this button to make the vertical louver swing automatically Vary from Celsius degree to Fahrenheit degree. Cool Press this button to choose Cool mode. Press this button to choose Dry mode.
- Page 6 2. Changing the set time. When Timer is on, you can check remnant time by pressing Timer button. It will flash 5 times. Press Up or Down button to adjust set time. The set time can also be cancelled if you press the Timer button once again during the flashing time.
- Page 7 Installation 1.Selection of Installation Place Install the unit on a flat and dry place. Leave at least 50cm space around the Unit (when the hose is not connected). (Fig.5) 2. AIR Exhaust Duct Mounting Method 1) Fix the square end of the exhaust dust to the exhaust terminal of the unit.
- Page 8 4. Mounting Illustrations a) Mounting in the wall b) Correct Bending c) Incorrect bending...
- Page 9 Adding Water. An added feature of this model. Humidity absorbed from the air condenses at the Evaporator, turns into water and is collected in the internal tank. When enough water is collected it is pumped up and over the condenser, assisting the cooling of the refrigerated gas, increasing the COOLING CAPACITY.
- Page 10 During the operation of this portable unit, the system (or water sensor) checks the water level every hour, if there is inadequate water the Water Indicator will flash requesting water filling. There is a time lag between the system detecting low water and the Water Injection Indicator flashing to indicate adding water.
- Page 11 2. Clean the air filter If the air filter is blocked with a lot of dust, the efficiency will be reduced. You should clean the filter every two weeks. 1) Pull out the air filter as Fig.14. 2) Wash the air filter by immersing it gently in warm (under 40°C or 104°F) water with neutral detergent.
- Page 12 It is the inner liquid (refrigerant) It is normal. flowing inside. noisy vibration Is it inclined? Place it on a flat surface. Is the voltage normal? Turn off the unit if the voltage is abnormal. Set the exhaust tube correctly. The unit starts and exhaust tube...
- Page 13 Control Panel CAUTION: If the unit is turned off in cool dry mode and restarted immediately the unit will wait at least 3 minutes before running again. 1. Buttons. Timer: Press this button to set the timer. Swing: Press this button to make the vertical louver swing automatically. Press once again, the swing will stop.
- Page 14 Indicates the time and temperature. Display EX (X=2,3,5) when there is something wrong (refer to Self diagnosis function). Display E4 when coil is defrosted. Celsius degree and Fahrenheit degree indicator. Remote control Power Press this button to turn/off the unit. Timer Press this button to set the timer.
- Page 15 NOTE: To vary from Celsius to Fahrenheit by control panel, press both Up and Down button at least 2 seconds. Operation Methods. Timer Set 1.Set timer-off Press the Timer button when the unit is on. The LED will flash “_ _” five times. During this period press Up or Down button to adjust set time from 0.5h to 24h.
- Page 16 LED displays ambient room temperature. Fan speed and temperature cannot be adjusted. When the water tank is full, the Water Full Indicator will illuminate and the compressor will shut off automatically, the fan will stay on circulating the air. At this time, you must empty the water tank as described in the Drainage section.


