Table of Contents
Advertisement
Available languages
Available languages
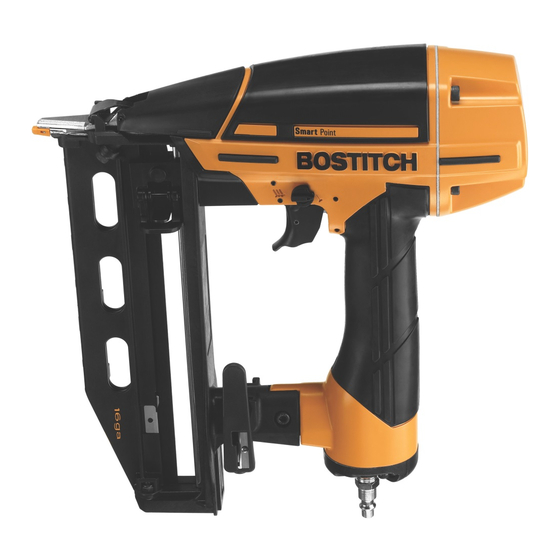
BTFP71917
SMART POINT
16 GA FINISH NAILER
TM
CLAvAdORA dE ACABAdO SMART POINT
dE CALIBRE 16
TM
CLOuEuSE dE FINITION SMART POINT
dE CALIBRE 16
MC
OPERATION and MAINTENANCE MANUAL
MANUAL DE OPERACIÓN Y DE MANTENIMIENTO
MANUEL D'INSTRUCTIONS ET D'ENTRETIEN
BEFORE OPERATING THIS TOOL, ALL OPERATORS SHOULD STUDY THIS MANUAL TO
UNDERSTAND AND FOLLOW THE SAFETY WARNINGS AND INSTRUCTIONS. KEEP THESE
INSTRUCTIONS WITH THE TOOL FOR FUTURE REFERENCE. IF YOU HAVE ANY QUESTIONS,
CONTACT YOUR BOSTITCH REPRESENTATIVE OR DISTRIBUTOR.
ANTES DE OPERAR ESTA HERRAMIENTA, TODOS LOS OPERADORES DEBERÁN ESTUDIAR
ESTE MANUAL PARA PODER COMPRENDER Y SEGUIR LAS ADVERTENCIAS SOBRE
SEGURIDAD Y LAS INSTRUCCIONES. MANTENGA ESTAS INSTRUCCIONES CON LA
HERRAMIENTA PARA FUTURA REFERENCIA, SI TIENE ALGUNA DUDA, COMUNÍQUESE CON
SU REPRESENTANTE DE BOSTITCH O CON SU DISTRIBUIDOR.
LIRE ATTENTIVEMENT LE PRÉSENT MANUEL AVANT D'UTILISER L'APPAREIL. PRÉTER
UNE ATTENTION TOUTE PARTICULIÈRE AUX CONSIGNES DE SÉCURITÉ ET AUX
AVERTISSEMENTS. GARDER CE MANUEL AVEC L'OUTIL POUR FUTUR RÉFÉRENCE. SI VOUS
AVEZ DES QUESTIONS, CONTACTEZ VOTRE REPRÉSENTANT OU VOTRE CONCESSIONNAIRE
BOSTITCH.
9R205625RA 12/13
Advertisement
Chapters
Table of Contents

Related Manuals for Bostitch BTFP71917


Summary of Contents for Bostitch BTFP71917
- Page 1 SEGURIDAD Y LAS INSTRUCCIONES. MANTENGA ESTAS INSTRUCCIONES CON LA HERRAMIENTA PARA FUTURA REFERENCIA, SI TIENE ALGUNA DUDA, COMUNÍQUESE CON SU REPRESENTANTE DE BOSTITCH O CON SU DISTRIBUIDOR. LIRE ATTENTIVEMENT LE PRÉSENT MANUEL AVANT D’UTILISER L’APPAREIL. PRÉTER UNE ATTENTION TOUTE PARTICULIÈRE AUX CONSIGNES DE SÉCURITÉ ET AUX AVERTISSEMENTS.
-
Page 2: Table Of Contents
To obtain warranty service in the U.S. return the product, together with proof of purchase, to the U.S. BOSTITCH National or Regional Independent Authorized Warranty Service Center. In the U.S. you may call us at 1-800-556- 6696 or visit www.BOSTITCH.com for the location most convenient for you. -
Page 3: Safety Instructions
save these instructions DeFinitions - saFetY GuiDeLines This manual contains information that is important for you to know and understand. This information relates to protecting YOUR SAFETY and PREVENTING EQUPMENT PROBLEMS. To help you recognize this information, we use the symbols below. Please read the manual and pay attention to these symbols. - Page 4 “depressed” or “up” position. On all other BOSTITCH tools and most other tools, the trip is normally in the “down” position. This tool has a selectable trigger mode which determines if the tool drives fasteners in sequential or contact mode.
-
Page 5: Tool Components
TOOL COMPONENTS Over-Molded Frame Cap Comfort Grip Rear Exhaust Frame Protector Frame Trigger Lockout Trigger Actuation Mode Selector Switch Dial-A-Depth ® Control Latch Pencil Sharpener Nose Door Contact Trip Belt Hook Trigger Lockout No-Mar Tip Spare No Mar Tip Storage... -
Page 6: Tool Specifications
DO NOT EXCEED THIS RECOMMENDED OPERATING PRESSURE. Air Consumption: The BTFP71917 requires 2.0 cubic feet per minute or C.F.M. (56.6 liters per minute or LT/MIN) of free air at 80PSI (5.6 kg/cm ) to operate at a rate of 60 fasteners per minute. To determine the appropriately sized air compressor, take the actual rate at which the tool will be run and compare the required C.F.M. -
Page 7: Air Supply And Connections
AIR SuPPLY ANd CONNECTIONS Do not use oxygen, combustible gases, or bottled gases as a power source for this tool as tool may explode, possibly causing injury. FITTINGS: Install a male plug on the tool which is free flowing and which will release air pressure from the tool when disconnected from the supply source. -
Page 8: Loading The Tool
TRIP OPERATION MOdE Always disconnect air supply before making adjustments as accidental actuation may occur, possibly causing injury. The BTFP71917 feature a selectable trigger system that allows the user to choose between the following modes of operation: 1. Contact Trip Operation... -
Page 9: Dial-A-Depth
1. CONTACT TRIP: The common operation procedure on “Contact Trip” tools is for the operator to contact the work surface to actuate the trip mechanism while keeping the trigger pulled, thus driving a fastener each time the work surface is contacted. This will allow rapid fastener placement on many jobs. All pneumatic tools are subject to recoil when driving fasteners. -
Page 10: Installing The Belt Hook
• Never clamp or tape the trigger or contact trip in an actuated position. • Never leave a tool unattended with the air hose attached. • Do not operate this tool if it does not contain a legible WARNING LABEL. • Do not continue to use a tool that leaks air or does not function properly. Notify your nearest BOSTITCH representative if your tool continues to experience functional problems. INSTALLING THE BELT HOOK Always disconnect tool from air supply before making adjustments or before attempting any part assembly or disassembly. Always remove the belt hook from the tool when selecting Contact Trip Mode. -
Page 11: Tool Operation
“depressed” or “up” position. On all other BOSTITCH tools and most other tools, the trip is normally in the “down” position. This tool has a selectable trigger mode which determines if the tool drives fasteners in sequential or contact mode. -
Page 12: Jam Clearing Procedure
On occasion nails can jam in the nose of a pneumatic nailer. This can be caused by striking a metal plate in the wall, drywall screw, or some other hard object. The BTFP71917 features open drive channel architecture for jam clearing. To clear a jam follow this procedure: 1. -
Page 13: Maintaining The Pneumatic Tool
When working on air tools, note the warnings in this manual and use extra care evaluating problem tools. REPLACEMENT PARTS: Use only genuine BOSTITCH replacement parts. Do not use modified parts. ASSEMBLY PROCEDURE FOR SEALS: When repairing a tool, make sure the internal parts are clean and lubricated. Use Parker “O”-LUBE, Magnalube, or equivalent on all “O”-rings. - Page 14 MAINTENANCE CHECKLIST Maintenance Benefit Procedure Service Interval Inspect trigger performance Ensure trigger system is in Refer to Tool Operation Daily proper working order Check section in this manual Drain condensation from air Prevents accumlation of Open drain cock on tanks Daily compressor tanks and air moisture that can impede tool...
-
Page 15: Troubleshooting
Dry/dirty magazine . . . . . . . . . . . . . . . . . . . -
Page 16: Available Accessories
AvAILABLE ACCESSORIES SB16 SERIES FN1664-RK 16 GAUGE STRAIGHT FINISH REBUILD KIT - BTFP71917 NAILS TVA17 TRIGGER VALVE KIT - BTFP71917 -16-... - Page 17 BOSTITCH Fastening Systems (“BOSTITCH”) garantiza al comprador del comerciante original que el producto comprado está exento de defectos en material y fabricación, y se compromete a reparar o reemplazar, a opción de BOSTITCH, cualquier engrapadora o clavadora neumática defectuosa de marca BOSTITCH por un período de siete (7) años desde la fecha de compra (un (1) año de la fecha de compra en el caso de compresores y herramientas utilizadas en aplicaciones de...
-
Page 18: Instrucciones De Seguridad
conserve estas instrucciones Pautas De seGuriDaD / DeFiniciones Este manual contiene información importante para que conozca y comprenda. Esta información está relacionada con la protección de SU SEGURIDAD y con EVITAR PROBLEMAS EN EL EQUIPO. Para ayudarlo a reconocer esta información, utilizaremos los símbolos siguientes. Lea el manual y preste atención a estos símbolos. - Page 19 “sin presionar” o hacia “arriba”. En todas las demás herramientas de BOSTITCH y en la mayoría de las otras herramientas, el disparador normalmente está en la posición hacia “abajo”. Esta herramienta cuenta con un modo de activación seleccionable que determina si la herramienta coloca las fijaciones en modo secuencial o de contacto.
-
Page 20: Componentes De La Herramienta
COMPONENTES dE LA HERRAMIENTA Tapa del Agarre cómodo armazón sobremoldeado Escape Protector posterior del armazón Armazón Bloqueo del gatillo Gatillo Modo de activación Interruptor Dial-A-Depth ® selector Control Pestillo Sacapuntas Puerta de la punta Interruptor de contacto Gancho para el cinturón Bloqueo del gatillo Almacenamiento del repuesto... -
Page 21: Especificaciones De La Herramienta
Consumo de aire: El modelo BTFP71917 requiere 2,0 pies cúbicos por minuto o C.F.M. (56,6 litros por minuto o LT/MIN) de aire libre a 80 PSI (5,6 kg/cm2) para operar a una velocidad de 60 sujetadores por minuto. Para determinar el tamaño adecuado del compresor de aire, tome la velocidad real en la cual se utilizará... -
Page 22: Suministro De Aire Y Conexiones
SuMINISTRO dE AIRE Y CONEXIONES No use oxígeno, gases combustibles ni gases envasados en cilindros para operar esta herramienta porque puede explotar, causando posibles lesiones. CONECTORES: Instale un enchufe macho en la herramienta que está fluyendo libremente y que liberará presión de aire de la herramienta al desconectarse de la fuente de alimentación. -
Page 23: Carga De La Herramienta
CONTROL dE BLOQuEO dEL GATILLO La función de control de bloqueo del gatillo en las herramientas neumáticas de BOSTITCH proporciona una característica que bloquea el gatillo para dar mayor control de seguridad. Pulse el botón de control de bloqueo hacia dentro o afuera para activar o bloquear el gatillo de la herramienta. - Page 24 Siempre desconecte el suministro de aire antes de hacer ajustes porque puede activarse la unidad casualmente, causando posibles lesiones. Los modelos BTFP71917 tienen un sistema de gatillo seleccionable que permite al usuario elegir entre los siguientes modos de funcionamiento: 1. Funcionamiento con disparo de contacto 2.
-
Page 25: Instalación Del Gancho Para El Cinturón
• Nunca deje una herramienta sin supervisión con la manguera de aire conectada. • No opere esta herramienta si no cuenta con una ETIQUETA DE ADVERTENCIA legible. • D eje de usar la herramienta si tiene fugas de aire o no funciona bien. Notifique al representante más cercano de BOSTITCH si la herramienta continúa experimentando problemas funcionales. INSTALACIÓN dEL GANCHO PARA EL CINTuRÓN Desconecte siempre la herramienta del suministro de aire antes de hacer ajustes o de intentar armar o desarmar piezas. -
Page 26: Funcionamiento De La Herramienta
“sin presionar” o hacia “arriba”. En todas las demás herramientas de BOSTITCH y en la mayoría de las otras herramientas, el disparador normalmente está en la posición hacia “abajo”. -
Page 27: Procedimiento Para Despejar Atascos
Ocasionalmente pueden atascarse clavos en la punta de una clavadora neumática. Esto puede producirse al golpear una placa de metal en la pared, un tornillo o algún otro objeto duro. El modelo BTFP71917 cuenta con arquitectura de canal abierto para solucionar los atascamientos. Para despejar un atasco siga este procedimiento: 1. -
Page 28: Mantenimiento De La Herramienta Neumática
PIEZAS DE REPUESTO: Al cambiar piezas, solamente use repuestos genuinos BOSTITCH. No use piezas modificadas. PROCEDIMIENTO DE ENSAMBLAJE PARA LOS SELLOS: Al reparar una herramienta, fíjese en que las piezas internas estén limpias y lubricadas. Use Parker “O”-LUBE, Magnalube u otro lubricante equivalente en todas las juntas tóricas. - Page 29 LISTA dE vERIFICACIÓN dE MANTENIMIENTO Mantenimiento Beneficio Procedimiento Intervalo de servicio Inspeccione el funcionamiento Confirme que el sistema de Consulte la sección Revisión Diariamente del gatillo o disparador disparo funcione bien funcional de la herramienta en este manual Drene la condensación de los Previene la acumulación de Abra la llave de drenaje en Diariamente...
-
Page 30: Solución De Problemas
El depósito está seco o sucio . . . . . . . . . . . . . . . . . -
Page 31: Accesorios Disponibles
ACCESORIOS dISPONIBLES FN1664-RK SB16 SERIES PAQUETE DE CLAVOS NEUMÁTICOS RECTOS RECONSTRUCCIÓN - BTFP71917 PARA CALIBRE 16 TVA17 JUEGO DE VÁLVULA DE IMPULSIÓN -BTFP71917 -31-... - Page 32 INTROduCTION Le modèle BOSTITCH BTFP71917 est un outil de précision conçu pour la pose d’attaches à haute vitesse et à haut volume. Cet outil vous donnera un rendement efficace et fiable lorsqu’utilisé correctement et avec soin. Comme pour tout bon outil électrique, il est important de suivre les instructions du fabricant pour une performance optimale. Veuillez étudier ce manuel avant d’utiliser l’outil et comprendre les avertissements et les mises en garde de sécurité.
- Page 33 conservez ces Directives Mesures De sÉcuritÉ - DÉFinitions Ce manuel contient des renseignements importants que vous devez connaître et comprendre. Ces renseignements concernent la protection de VOTRE SÉCURITÉ et la PRÉVENTION DE PROBLÈMES LIÉS À L’ÉQUIPEMENT. Afin de vous aider à repérer ces renseignements, nous avons utilisé les pictogrammes qui se trouvent ci-dessous.
- Page 34 « appuyée » ou « relevée ». Sur tous les autres outils BOSTITCH ainsi que sur la plupart des autres outils, le déclencheur est habituellement en position « abaissée ».
- Page 35 COMPOSANTS dE L’OuTIL C h a p e a u Poignée moulée de couple confortable Échappement Protecteur de bâti arrière Bâti Blocage de Gâchette gâchette Mode de fonctionnement Commande Sélecteur ® Dial-A-Depth Taille-crayon O u v e r t u r e du nez de Déclenchement pose...
- Page 36 Consommation d’air : Le modèle BTFP71917 exige 2,0 pi³/min ou 56,6 l/min de rendement d’air libre à une pression absolue de 80 lb/po (5,6 kg/cm2) pour fonctionner au taux de 60 attaches par minute. Pour déterminer le compresseur approprié, utilisez le taux auquel l’outil fonctionnera puis comparez le débit requis (l/min ou pi³/min) au rendement d’air libre (l/min ou pi³/...
- Page 37 ALIMENTATION d’AIR ET CONNEXIONS N’utilisez pas d’oxygène, de gaz combustibles ou de gaz en bouteille comme source d’alimentation pour cet outil puisque cela peut causer l’explosion de l’outil et causer des blessures. RACCORDS : Installez une prise mâle sur l’outil laquelle est mobile et libérera la pression d’air de l’outil lorsque déconnecté de la source d’alimentation.
- Page 38 3. Assurez-vous que le poussoir est derrière le dernier clou. COMMANdE dE BLOCAGE dE GÂCHETTE La commande de blocage de gâchette des outils pneumatiques BOSTITCH permet le blocage de la gâchette pour une plus grande sécurité. Enfoncez ou relâchez le bouton de commande de blocage afin d’activer ou de bloquer la gâchette de l’outil.
- Page 39 Déconnectez toujours l’alimentation d’air avant d’effectuer des ajustements puisque l’outil pourrait être actionné accidentellement et causer des blessures La BTFP71917 offrent un système de gâchette sélectionnable qui permet à l’utilisateur de choisir entre les modes de fonctionnement suivants : 1. Fonctionnement par déclenchement sur contact 2.
- Page 40 • Ne laissez jamais un outil sans surveillance avec le conduit d’air attaché. • Ne faites pas fonctionner l’outil s’il ne comporte pas une ÉTIQUETTE D’AVERTISSEMENT lisible. • C essez d’utiliser l’outil en cas de fuite d’air ou s’il ne fonctionne pas correctement. Avisez votre représentant BOSTITCH le plus proche si votre outil continue de mal fonctionner. INSTALLATION du CROCHET dE CEINTuRE Déconnectez toujours l’outil de l’alimentation d’air avant de faire des ajustements ou de tenter d’assembler ou de désassembler une pièce.
- Page 41 POuR uTILISER LE TAILLE-CRAYON INTÉGRÉ Un taille-crayon standard est intégré dans le crochet de ceinture pour faciliter le travail de l’opérateur. Pour tailler un crayon, insérez un crayon standard dans le trou et faites-le tourner vers la droite (sens horaire). FONCTIONNEMENT dE L’OuTIL DES LUNETTES DE SÉCURITÉ...
- Page 42 « appuyée » ou « relevée ». Sur tous les autres outils BOSTITCH ainsi que sur la plupart des autres outils, le déclencheur est habituellement en position « abaissée ».
- Page 43 évaluez les outils à problèmes. PIÈCES DE RECHANGE : N’utilisez que de pièces de rechange d’origine BOSTITCH. N’utilisez pas de pièces modifiées. PROCÉDURE D’ASSEMBLAGE DES JOINTS : Lorsque vous réparez un outil, assurez-vous que les pièces internes sont propres et lubrifiées. Utilisez du Parker “O”-LUBE, Magnalube ou l’équivalent sur tous les joints toriques.
- Page 44 LISTE dE vÉRIFICATION POuR L’ENTRETIEN Entretien Bienfait Procédure Intervalle de service Inspectez la performance de Assurez-vous que le système Reportez-vous à la section Chaque jour la gâchette de gâchette est en bon état Vérification du fonctionnement de de marche l’outil du présent manuel Drainez le condensat des Prévient l’accumulation de Ouvrez les robinets de purge...
- Page 45 Le mandrin est cassé ou détérioré . . . . . . . . . . . . . Remplacez le mandrin (vérifiez le segment de piston) Le magasin est sale ou trop peu lubrifié . . . . . . . . Nettoyez et lubrifiez et utilisez le lubrifiant pour outil pneumatique BOSTITCH Le magasin est trop usé...
- Page 46 ACCESSOIRES dISPONIBLES SB16 SERIES FN1664-RK CLOUS DE FINITION DROITS DE ENSEMBLE DE RÉASSEMBLAGE CALIBRE 16 POUR BTFP71917 TVA17 TROUSSE POUR SOUPAPE DE DÉCLENCHEMENT - BTFP71917 -46-...