
Related Manuals for Char-Broil Classic C-46G3 463211514


Summary of Contents for Char-Broil Classic C-46G3 463211514
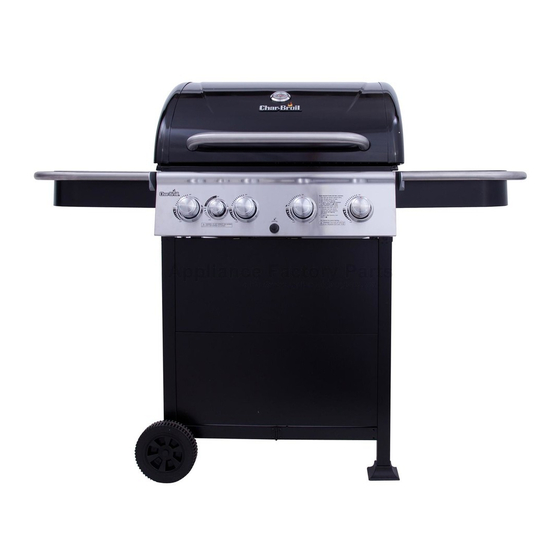
- Page 1 Classic C-46G3 463211514 during assembly, please call 1-800-241-7548. durante el Ensamblado, llámenos Al 1-800-241-7548 08/16/13 • G560-001-120801...
-
Page 2: Table Of Contents
THIS GRILL IS FOR OUTDOOR TABLE OF CONTENTS CAUTION USE ONLY. For Your Safety....... . 2 Grease Fires Grilling Guide. -
Page 3: Grilling Guide
Pre-Heating Your Grill Rotisserie Cooking GRILLING GUIDE – Getting Started Just like your home oven, your grill should be pre-heated Rotisserie cooking is best for 'round' meat, such as large to provide optimum performance. Pre-heat the grill on high roasts, whole poultry, and pork. It generally requires an for 10-15 minutes –... - Page 4 This is great advice when it comes to keeping your grill clean. Routine Care The Char-Broil® grill is equipped with Gear Trax™, Periodic cleaning of this grill is necessary, as grill fires can Wood Chips which allow for the easy mounting of our unique line of...
-
Page 5: Use And Care
LP Cylinder Filling USE AND CARE •Use only licensed and experienced dealers. •LP dealer must purge new cylinder before filling. OPD Hand Wheel LP Cylinder Removal, Transport and Storage •Dealer should NEVER fill LP cylinder more than 80% of Type 1 outlet with LP cylinder volume. - Page 6 Ignitor Lighting • If you notice grease or other hot material dripping from grill onto valve, hose or regulator, turn off gas supply WARNING • Do not lean over grill while lighting. at once. Determine the cause, correct it, then clean and inspect valve, hose and regulator before 1.
-
Page 7: Spider Alert
Cleaning the Burner Assembly NOTE: Your grill may NOT be equipped with a CAUTION Sideburner! Follow these instructions to clean and/or replace parts of burner assembly or if you have trouble igniting grill. Sideburner Ignitor Lighting 1. Turn gas OFF at control knobs and LP cylinder. •... -
Page 8: Limited Warranty
LIMITED WARRANTY This warranty only applies to units purchased from an authorized retailer. Manufacturer warrants to the original consumer-purchaser only that this product shall be free from defects in workmanship and materials after correct assembly and under normal and reasonable home use for the periods indicated below beginning on the date of purchase*. - Page 9 ÍNDICE DE MATERIAS ESTA PARRILLA SOLO SE PELIGRO ADVERTENCIA PUEDE USAR EN EXTERIORES. Por su propia seguridad......9 Fuego de Grasa ADVERTENCIA •...
- Page 10 Cómo calentar la parrilla Para cocinar en asador INTERROGA TORIO DE GUÍA – Ser Comenzado Como lo hace con el horno de la cocina de su casa, debe La mejor manera de cocinar carnes en piezas calentar su parrilla antes de usarla, para que funcione 'redondas', como asados grandes, aves enteras y Cuando la use por primera vez óptimamente.
- Page 11 Haga esto después de que la parrilla se haya enfriado. Esta parrilla no ha sido Parrilla de Char-Broil® está equipado con Gear Trax™, diseñada para "quemar" los residuos cerrando la tapa y que permite el montaje fácil de nuestra exclusiva línea de...
- Page 12 2.Gire todas las perillas de control a la posición Carga de los tanques de gas propano APAGADO (OFF). USO Y MANTENIMIENTO •Recurra solamente a vendedores autorizados y con 3.CIERRE el tanque de gas, girando la manilla de la Remoción, transporte y almacenamiento experiencia.
- Page 13 • Limpie la parrilla con frecuencia; de preferencia cada Cómo usar el encendedor ADVERTENCIA vez después de usarla. Si utiliza un cepillo de cerdas para limpiar las superficies para cocinar, antes de usar • No se incline sobre la parrilla cuando la esté •...
- Page 14 Nota: Es posible que su parrilla NO venga equipada Cómo limpiar la unidad del quemador PELIGRO ADVERTENCIA con un quemador lateral. Siga estas instrucciones para limpiar o cambiar piezas Encendido con el encendedor del quemador de la unidad del quemador, o si tiene problemas para encender la parrilla.
- Page 15 GARANTÍA LIMITADA Esta garantía es válida únicamente para las unidades adquiridas de los distribuidores autorizados. El fabricante le garantiza únicamente al consumidor-comprador original, que este producto no presentará defectos de mano de obra ni de materiales por el período indicado a continuación, contado desde la fecha de compra*, si se arma correctamente y se usa en el hogar, en condiciones normales y razonables.
-
Page 16: Parts List
PARTS LIST Qty Description Qty Description FIREBOX CART, RIGHT SIDE TUBE BURNER, F/ ELECTRODE SHIELD, F/ TANK TUBE BURNER GREASE TRAY ELECTRODE, MAIN BURNER AXLE ROD CARRY OVER TUBE WHEEL HEAT TENT GREASE CUP COOKING GRATE CLIP, F/ GREASE CUP WARMING GRID LEG EXTENDER GRILL LID... - Page 17 LISTA DE PARTES Clave Cant. Descripción Clave Cant. Descripción CÁMARA DE COMBUSTIÓN BARRA POSTERIOR CARRITO LADO DERECHO QUEMADORES DE TUBO, ELECTRODO QUEMADORES DE TUBO PROTECTOR CONTRA EL CALOR, TANQUE ELECTRODO, QUEMADOR PRINCIPAL BANDEJA PARA LA GRASA TUBO DE ARRASTRE DEL QUEMADOR VARILLA DE EJE CUBIERTA CONTRA EL CALOR RUEDA...
-
Page 18: Parts Diagram
PARTS DIAGRAM/ SCHÉMA DES PIÈCES #13 #13 #20 #20 #20 #20... -
Page 19: Assembly
ASSEMBLY/ ARMADO NOTE: DO NOT over tighten screws and washers that come into contact with porcelain coated surfaces. Over tightening may cause the porcelain coating to crack and break, resulting in exposed metal that will be prone to rust. Nota: NO apriete demasiado los tornillos y arandelas que entren en contacto con las superficies revestidas de porcelana. Si los aprieta demasiado, se puede quebrar y romper el revestimiento de porcelana lo que dejará... - Page 20 Tighten the screws Apriete los tornillos Tighten the screws Apriete los tornillos...
- Page 21 Tighten the screws Apriete los tornillos Axle Spacer Qty: 2 Separador del eje Cant. 2 Axle Washer Hitch Pin Qty: 1 Qty: 1 Arandela para el eje Pasador de acoplamiento Cant. 1 Cant. 1...
- Page 22 Tighten the screws Apriete los tornillos...
- Page 23 Tighten the screws Apriete los tornillos Tighten the screws Apriete los tornillos...
- Page 24 Tighten the screws Apriete los tornillos Tighten the screws Apriete los tornillos...
- Page 27 AAA Battery Batería AAA...
- Page 28 LP Cylinder (not included) Tanque de gas propano (no viene incluido) CAUTION Cylinder valve must face to front of cart once tank is attached. Failure to install cylinder correctly may allow gas hose to be damaged in operation, resulting in the risk of fire.
-
Page 29: Troubleshooting
EMERGENCIES: If a gas leak cannot be stopped, or a fire occurs due to gas leakage, call the fire department. Emergencies Possible Cause Prevention/Solution Gas leaking from • Damaged hose. •Turn off gas at LP cylinder or at source on natural gas systems. Discontinue use of cracked/cut/burned hose. - Page 30 Troubleshooting (continued) Problem Possible Cause Prevention/Solution Sudden drop in gas flow or • Check for gas in LP cylinder. • Out of gas. low flame. • Excess flow valve tripped. • Turn off knobs, wait 30 seconds and light grill. If flames are still low, turn off knobs and LP cylinder valve.
- Page 31 CASOS DE EMERGENCIA: Si no se puede detener una fuga de gas, o si ocurre un incendio debido a una fuga de gas, llame a los bomberos. Emergencias Causas probables Medidas de prevención / solución Fugas de gas de mangueras •...
- Page 32 Resolución de problemas (continuación) Causas probables Problema Medidas de prevención / solución Caída repentina del flujo de • Se acabó el gas. • Verifique que el tanque de gas esté cargado. gas o llama reducida. • Cierre las perillas, espere 30 segundos y encienda la parrilla. Si las llamas •...
- Page 33 NOTES/ NOTAS...
- Page 34 NOTES/ NOTAS...