
Related Manuals for Kenwood KGC-9044


Summary of Contents for Kenwood KGC-9044
-
Page 1: Instruction Manual
KGC-9044 11 BAND GRAPHIC EQUALIZER INSTRUCTION MANUAL © B64-1423-00 (E) (MC) 00/2 1 99/12 11 10 9 8 7 6 5 4 3 2 1... -
Page 2: Table Of Contents
Contents Before use Safety precautions ...3 Buttons and Display ...4 Equalizer operations KBS (Kenwood Built-in Sound) ...4 Equalizer Adjustment ...5 Equalizer Curve Memory ...5 Other operations Menu System...6 Spectrum Analyzer Display Selection ...7 Automatic Dimmer Function ...7 Demonstration Function...7 Input Sensitivity Adjustment ...7 Theft Deterrent Faceplate ...8... -
Page 3: Safety Precautions
• If you experience problems during installation, consult your Kenwood dealer. • If the unit does not seem to be working right, try pressing the reset button first. If that does not solve the problem, consult your Kenwood dealer. GRAPHIC EQUALIZER KGC-9044... -
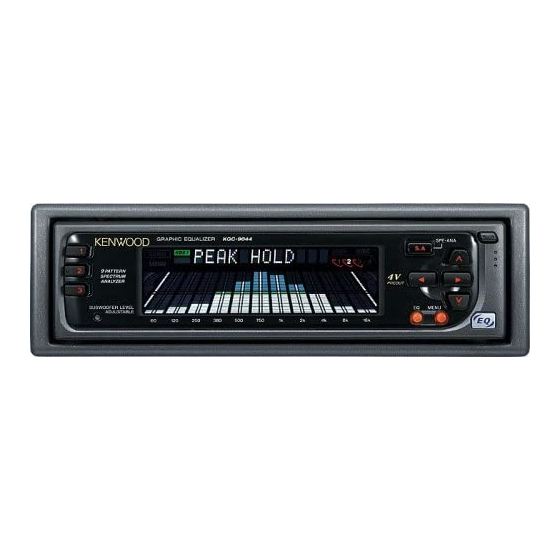
Page 4: Buttons And Display
DEMO indicator KBS indicator Equalizer curve /Spectrum analyzer display Equalizer operations KBS (Kenwood Built-in Sound) Four types of loudness levels and equalizer curves for rock, Release button pops, vocal, and flat music genre have been preset. You can call up an equalizer curve for each genre at the touch of a button. -
Page 5: Equalizer Adjustment
Equalizer Adjustment You can adjust the sound level to suit your preference among 11 frequencies: 60 Hz, 120 Hz, 250 Hz, 380 Hz, 500 Hz, 750 Hz, 1 kHz, 2 kHz, 4 kHz, 8 kHz, and 16 kHz. Selecting Band for Adjustment: Each time you press the 2 button, the band shifts to the left (lower frequencies), while each time you press the 3 button, the band shifts to the right (higher frequencies). -
Page 6: Other Operations Menu System
Other operations Menu System To accommodate a greater number of functions, a function set system has been employed for making settings. Press the MENU button to enter the function set mode and then display the function to make the setting. Press the MENU button to enter the function set mode,and the MENU indicator lights. -
Page 7: Spectrum Analyzer Display Selection
Spectrum Analyzer Display Selection You can select the display to enjoy sounds with eyes. Switching the Spectrum Analyzer Display: Each time you press the S.A button, the spectrum analyzer display switches as follows; 1 "SCAN MODE ON":Displays 2 to 9 are automatically shown in succession for about five seconds each. -
Page 8: Theft Deterrent Faceplate
Removing Faceplate: Press the release button and drop open the faceplate. In its dropped condition, whilst drawing the faceplate to one side, pull it to the front and remove it. Release button GRAPHIC EQUALIZER KGC-9044 SPE-ANA PATTERN SPECTRUM ANALYZER PREOUT... -
Page 9: Accessories
Accessories External view External view ... Number of items ...1 ...2 ...1 2CAUTION The use of any accessories except for those provided might result in damage to the unit. Make sure only to use the accessories shipped with the unit, as shown above. Installation Procedure 1. -
Page 10: Connections
Connections Fuse(3A) REAR FRONT Left channel Right channel Power amplifier Power amplifier Power amplifier To the car light control switch ILLUMI Automatic illumination control cable (Orange) Battery cable (Yellow) BATT Ground cable (Black) - (To car chassis) Power control cable (Blue/White) P.CONT Installation Installation... - Page 11 Removing the hard rubber frame Engage the catch pins on the removal tool and remove the two locks on the lower level. Lower the frame and pull it forward as shown in the figure. Lock Accessory2 Removal tool When the lower level is removed, remove the upper two locations.
-
Page 12: Troubleshooting Guide
Troubleshooting Guide What might appear to be a malfunction in your unit may just be the result of slight misoperation or miswiring. Before calling service, first check the following table for possible problems. PROBLEM The power is not turned on. The fuse has blown. -
Page 13: Specifications
Specifications Specifications subject to change without notice. Equalizer section Equalizer centre frequencies ...60 Hz, 120 Hz, 250 Hz, 380 Hz, 500 Hz, 750 Hz, 1 kHz, 2 kHz, 4 kHz, 8 kHz, 16 kHz Equalizer range ...-10 ~ +10 dB Subwoofer Cut-off Frequency ...50Hz,80Hz,120Hz Subwoofer Output Gain ...-80 ~ +10 dB Subwoofer Cut-off Slope ...12 dB / oct.