
Related Manuals for Kenmore Elite 721.88512


Summary of Contents for Kenmore Elite 721.88512
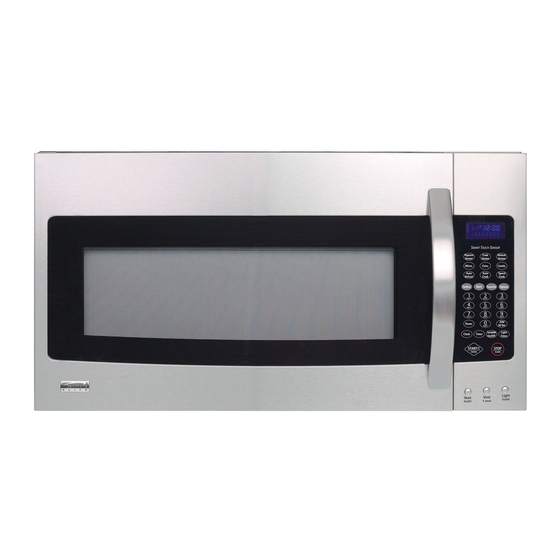
- Page 1 Microwave Hood Combination Use & Care Guide Combinacibn Microondas Guia de uso y cuidado Models/Modelos 721.88512, MFL57601502 Sears, Roebuck and Co., Hoffman Estates, IL 60179 Campana 721.88513, 721.88519 www.sears.com...
-
Page 2: Table Of Contents
Five-Year Limited Warranty on the Magnetron For five years from the date of purchase, if the magnetron in this microwave oven fails due to a defect in material or workmanship, Sears will replace the magnetron. Safety regulations require the magnetron to be installed by Sears. After the first year, the customer assumes any labor costs associated replacement. -
Page 3: Safety
• As with any appliance, close supervision is necessary when used by children. • Do not operate the microwave oven if it has a damaged cord or plug, if it is not working properly, or if it has been damaged or dropped. - Page 4 • Do not cover or block any openings on the microwave oven. • Do not store this microwave oven outdoors. Do not use the microwave oven near water, for example, near a kitchen sink, in a wet basement, near a swimming pool or similar location.
-
Page 5: Overview
This section discusses the concepts behind microwave cooking. It also shows you the basics you need to know to operate your microwave oven. Please read this information before you use your oven. HOW YOUR MICROWAVE HOOD COMBINATION Microwave energy is not hot. It causes food to make its own heat, and it's this heat that cooks the food. -
Page 6: Testing Your Dinnerware Or Cookware
• Do not dry flowers, fruit, herbs, wood, paper, gourds, or clothes in the oven. • Do not start a microwave oven when it is empty. Product life may be shortened. If you practice programming the oven, put a container of water in the oven. -
Page 7: Microwave Oven Features
MICROWAVE OVEN FEATURES Your microwave oven is designed to make your cooking experience as enjoyable and productive as possible. To get you up and running quickly, the following is a list of the oven's basic features: A. Metal Shielded Window. The shield prevents microwaves from escaping. -
Page 8: Control Panel Features
PANEL FEATURES Your microwave oven control panel lets you select the desired cooking function quickly and easily. If Micro, Conv, Combi pad is not selected, it automatically default to micro. All you have to do is touch the necessary Command Pad. The following is a list of all the Command and Number Pads located on the control panel. - Page 9 B. POPCORN SENSOR. Touch this pad when popping popcorn in your microwave oven. The oven's sensor will tell the oven how long to cook depending on the amount of humidity it detects from the popcorn.
-
Page 10: How To Use
• Four tones signal the end of a cooking cycle. CLOCK When your microwave oven is first plugged in or after a power failure, the Display will show " PLEASE SET TIME OF DAY ". If a time of day is not set, " : "will show on the Display until you touch "Clock"... -
Page 11: Exhaust Fan
EXHAUST The bottom of the control panel controls the 5-speed exhaust fan. Example: To set Level 4. Touch" Display Shows: This shows the last level until speed level. VENT ON/OFF LeVeL V J L-J IO Touch this pad until VENT LEVEL 4 appears in the display. -
Page 12: Add 30 Sec
ADD 30 SEC A time-saving pad, this simplified control lets you quickly set and start microwave cooking at 100% power without the need to touch START/ENTER. Example: To cook for 1 minutes. Touch" Display 1. _T_0 P_ Time of day /,_"_"-_,,_ Time counting down and 2. -
Page 13: Microwave Power Bevels
MICROWAVE POWER LEVELS For best results, some recipes call for different cook powers. The lower the cook power, the slower the cooking. Each number from 10 to 0 stands for a different percentage of full cook power. The following chart gives the percentage of cook power each number pad stands for, and the cook power name usually used. -
Page 14: Turntable On/Off
TURNTABLE ON/OFF For best cooking results, leave the turntable on. It can be turned off for large dishes. Touch" Display Shows: L,,, ,,, l'_'_';LC Ill,,I 2. _,+QdO_/ Press TURNTABLE ON/OFF to turn the turntable on or off. NOTE: • This option is not available in cook sensor and defrost modes. -
Page 15: Melt / Soften
MELT The oven uses low power to melt foods (butter or margarine, chocolate, marshmallows, or processed cheese food). See the following table. Example for 8 oz. Chocolate: Display Shows: Time of day -L-/ '_lcLcL LI_L'LL'LI:_' _. I/1/-/ll T/ Y/ I/-!._/ I I/-I/-//-/3 T/Y/ Time counting down. -
Page 16: Auto Defrost
AUTO DEFROST Three defrost sequences are preset in the oven. The auto defrost feature provides you with the best defrosting method for frozen foods. The Auto Defrost Table will show you which defrost sequence is recommended for the food you are defrosting. For added convenience, the Auto Defrost includes a built-in beep mechanism that reminds you to check, turn over, separate, or rearrange to get best defrost results. - Page 17 AUTO DEFROST TABLE Meat setting FOOD SETTING BEEF MEAT Ground Beef, Remove thawed portions with fork. Bulk Turn over. Return remainder to oven. MEAT Ground Beef, Separate and rearrange. Patties Round Steak MEAT Turn over. Cover warm areas with aluminum foil. Tenderloin MEAT Turn over.
- Page 18 AUTO DEFROST TABLE (CONT.) Poultry setting FOOD SETTING CHICKEN POULTRY Turn over (finish defrosting breast- Whole side down). Cover warm areas with aluminum foil. (up to 6 Ibs) Cut-up Separate pieces and rearrange. Turn over. Cover warm areas with aluminum foil. CORNISH Turn over.
- Page 19 Bread setting FOOD SETTING Bagel BREAD Turn over and rearrange. Dinner Roll Muffin Hamburger Hot Dog Slices of Bread Loaf of Bread DEFROSTING TIPS • When using Auto Defrost, the weight to be entered is the net weight in pounds and tenths of pounds (the weight of the food minus the container).
-
Page 20: Sensor Operating Instructions
Fill containers at least half full for best results. 4. Be sure the outside of the cooking container and the inside of the microwave oven are dry before placing food in the oven. Beads of moisture turning into steam can mislead the sensor. -
Page 21: Cook Sensor Table / Reheat Sensor Table
COOK SENSOR TABLE TOUCH PAD CATEGORY NUMBER Baked Pierce each potato with a fork and place the oven tray around Potato the edge, at least one inch apart. After cooking, allow to stand for 5 minutes. Frozen Remove from package, rinse off frost under running water. Place in an appropriately sized microwave container. -
Page 22: Auto Cook / Auto Cook Table
AUTO COOK Auto Cook provides 6 preset categories for cooking, Example: To cook bacon 2 slices. Touch: Display Shows: '-'_C/.-CL 8/.TL-nl. "rnl , -u "_"rn ,_- 5 __._c 5 Time counting down and cook. 8RL-'-" AUTO COOK TABLE TOUCH PAD NUMBER CATEGORY Bacon... -
Page 23: Tips For Convection Cooking
TIPS FOR CONVECTION COOKING This section gives you cooking instructions and procedures for operating each convection function. Please read these instructions carefully. Convection cooking circulates hot air through the oven cavity with a fan. The constantly moving air surrounds the food to heat the outer portion quickly, creating even browning and sealed-in flavor by the constant motion of hot air over the food surfaces. -
Page 24: Convection
CONVECTION During convection cooking, a heating element is used to raise the temperature of the air inside the oven. Convection cooking temperature ranges from 100°F to 450°F. It is best to preheat the oven when convection cooking. Note: Lower oven temperature by 25°F from package recommended temperature, instructions. -
Page 25: Convection Baking Guidelines
CONVECTION BAKING GUIDELINES 1. Always use the metal rack when convection baking. Place food directly on rack or place in metal tray and then place tray on rack. (See page 15.) 2. Aluminum pans conduct heat quickly. For most convection baking, light, shiny finishes give best results because they prevent overbrowning cook the center areas. - Page 26 CONVECTION BAKING GUIDELINES Food Frozen Pie Pies, Pastries Meringue-Topped Two-Crust Quiche Pastry Shell Casseroles Meat, Chicken, Seafood Combinations Pasta Potatoes, scalloped Vegetable Convenience Frozen Bread Dough Foods Frozen Entree Frozen Pizza Rising Crust Frozen Pizza French Fries Crinkle Cut Frozen Waffle Frozen Cheese Sticks Frozen Turnovers Main Dishes...
-
Page 27: Meat Roasting Guidelines For Convection Cooking
MEAT ROASTING GUIDELINES Food Beef Ribs (2 to 4 Ibs.) Rare Medium Well Boneless Ribs, Top Sirloin Rare Medium Well Beef Tenderloin Rare Medium Pot Roast (21/2 to 3 Ibs.) Chuck, Rump Meat Loaf (2 Ibs.) Canned (3-lb. fully cooked) Butt (5-lb. -
Page 28: Tips For Combination Cooking
TIPS FOR COMBINATION COOKING This section gives you instructions to operate each combination cooking function. Please read these instructions carefully. Sometimes combination microwave-convection cooking is suggested to get the best cooking results since it shortens the cooking time for foods that normally need a long time to cook. This cooking process also leaves meats juicy on the inside and crispy on the outside. -
Page 29: Speed Cook / Speed Cook Chart
SPEED COOK This oven can cook food without entering cooking time or power level on combination mode. SPEED COOK has 4 food categories. See the SPEED COOK CHART on this page for the settings available. For best results, place food on the rack. When cooking meats, use the metal tray/drip pan to catch drippings. -
Page 30: Combination Roast Cooking Guide
COMBINATION ROAST COOKING Food Beef Turn over after half of cooking time. Ribs (2 to 4 Ibs.) Rare Medium Well Boneless Ribs, Top Sirloin Rare Medium Well Beef Tenderloin Rare Medium Chuck, Rump or Pot Roast (21/2 to 3 Ibs.) (Use cooking bag for best results.) Turn over after half of cooking Canned (3-lb. -
Page 31: Combination Bake Cooking Guide
COMBINATION BAKE COOKING Food Quiche Pies, Pastries Convenience Frozen Entree Foods Frozen Pizza Rolls, Egg Rolls Pizza Baked Potatoes Vegetables GUIDE Oven Temp. Time, Min. 425°F 15 to 17 Let stand 5 minutes before cutting. 375°F 39 to 43 Follow package directions for preparation. 450°F 4to 6 Follow package directions for preparation. -
Page 32: Heating / Reheating Guide
GUIDE To heat or reheat successfully in a microwave oven, it is important to follow several guidelines. Measure the amount of food in order to determine the time needed to reheat. Arrange the food in a circular pattern for best results. Room temperature food will heat faster than refrigerated food. -
Page 33: Fresh Vegetable Guide
FRESH VEGETABLE GUIDE VEGETABLE AMOUNT Artichokes 2 medium (8 oz.each) 4 medium Asparagus, 1 lb. Fresh, Spears Beans, Green 1 lb. &Wax Beets,Fresh 1 lb. Broccoli,Fresh,S 1 lb. pears Cabbage, 1 lb. Fresh, Chopped Carrots, Fresh, 2 cups Sliced Cauliflower, 1 lb. -
Page 34: Care And Cleaning
Tomake sureyourmicrowave ovenlooks good andworks well f ora long time,youshould maintain i tproperly. Forproper c are, p lease follow these instructions carefully. For interior surfaces: Wash often with warm, sudsy water and a sponge or soft cloth. Use only mild, nonabrasive soaps or a mild detergent. -
Page 35: Caring For The Filters
Push filter upward and push to the other side to lock into place. 5. Plug in microwave oven or reconnect power. is installed to recirculate air, the chacoal filter (Part No.5230W1A003A) ®. The charcoal filter cannot be cleaned and should be replaced every 6 to 12 months. -
Page 36: Replacing The Cooktop And Oven Lights
2. Remove the bulb cover mounting screws. 3. Replace bulb. 4. Reinstall bulb cover with mounting screws. 5. Plug in microwave oven or reconnect The oven light 1. Unplug microwave oven or disconnect 2. Remove the vent grille mounting screws. - Page 37 Amount of food • If you increase or decrease the amount of food you prepare, the time it takes to cook that food will also change. For example, if you double a recipe, add a little more than half the original cooking for doneness and, if necessary, add more time in small...
- Page 38 Using aluminum foil (cont.) • Place the container in a glass bowl and add some water so that it covers the bottom of the container, than 1/4-in. (.64-cm) high. This ensures even heating of the container bottom. • Always remove the lid to avoid damage to the oven.
- Page 39 COOKING COMPARISON GUIDE Cooking with your new oven offers a wide variety of food preparation options: microwave cooking, convection cooking, and combination cooking. Microwave cooking uses very short, high-frequency waves. The movement of the microwaves through the food generates heat and cooks most foods faster than regular methods, while retaining their natural texture and moisture.
- Page 40 However, to test cookware before using, follow these steps: 1. Place the empty cookware in the microwave oven. 2. Measure 1 cup of water in a glass measuring cup and place it in the oven beside the cookware.
- Page 41 HOW TO USE ACCESSORIES Glass Turntable Metal Tray Notes : • Do not operate the oven when it is empty except preheating. Metal Rack MICROWAVE CONVECTION © © © © : Possible to use : Recommended method :Donotuse COMBINATION © ©...
-
Page 42: Questions And Answers
What does "standing time" mean? Why does steam come out of the air exhaust vent? Can I pop popcorn in my microwave oven? How do I get the best results? ANSWERS No. If you remove or move the glass tray, you will get poor cooking glass or guide tray. -
Page 43: Cooking Tips
If you still need help, call Sears Service at 1-800-4-MY-HOME MICROWAVE OVEN DOES NOT WORK PROBLEM Nothing works. The microwave oven will not run. COOKING TIMES PROBLEM Food is not cooked enough. - Page 44 GLASS TRAY PROBLEM The glass tray will not move. TONES PROBLEM You do not hear the programming or end-of-cycle tone. The audible tone has been disabled. DISPLAY MESSAGES PROBLEM The display is flashing" : ". If none of these items is causing your problem, call Sears Service at 1-800-4-MY-HOME CAUSE •...
-
Page 45: Protection Agreements
Protection Agreements Congratulations on making a smart purchase, Your new Kenmore ® product is designed and manufactured dependable operation. But like all products, it may require preventive maintenance or repair from time to time. That's when having a Master Protection Agreement can save you money and aggravation. -
Page 46: Service
For expert troubleshooting and home solutions advice: For repair - in your home - of all major brand appliances, lawn and garden equipment, no matter who made it, no matter who sold it! For the replacement owner's manuals that you need to do-it-yourself. For Sears professional and items like garage door openers and water heaters.